
Related Manuals for Velleman HQ-Power HQLE10061


Summary of Contents for Velleman HQ-Power HQLE10061
-
Page 1: Table Of Contents
HQLE10061 USER MANUAL HANDLEIDING MODE D'EMPLOI MANUAL DEL USUARIO BEDIENUNGSANLEITUNG INSTRUKCJA OBSŁUGI MANUAL DO UTILIZADOR... - Page 2 8 sound programme 1 sound programme 2 sound programme 3 sound programme 4 sound programme 5 sound programme 6 sound programme 7 sound programme 8 auto + sound programme speed (0-100 %) V. 01 – 07/12/2020 ©Velleman nv...
- Page 3 DERBY motor speed (slow-fast) no function green red + green LASER effect group no function clockwise rotation (slow-fast) anticlockwise rotation (slow-fast) BAR stroboscope (rate 0-100 %) no function BAR LED on different case different case running (slow-fast) V. 01 – 07/12/2020 ©Velleman nv...
- Page 4 8 sound programme 1 sound programme 2 sound programme 3 sound programme 4 sound programme 5 sound programme 6 sound programme 7 sound programme 8 auto + sound programme speed (0-100 %) V. 01 – 07/12/2020 ©Velleman nv...
-
Page 5: User Manual
(servicing) instructions in the literature accompanying the appliance. Do not stare at light source. Minimum distance from lighted objects (metres). This luminaire is not suitable for direct mounting on normally flammable surfaces (suitable only for mounting on non-combustible surfaces). V. 01 – 07/12/2020 ©Velleman nv... - Page 6 Allow about 15 cm between this device and a wall. • Do not use the luminaire with a cracked or broken protective shield. Disconnect immediately from the mains. The protective shield is not replaceable. V. 01 – 07/12/2020 ©Velleman nv...
- Page 7 • Nor Velleman nv nor its dealers can be held responsible for any damage (extraordinary, incidental or indirect) – of any nature (financial, physical…) arising from the possession, use or failure of this product.
- Page 8 The installation has to be approved by an expert before the device is taken into service. Operation The device can be used in the following modes: • stand-alone mode • master/slave • with a DMX-512 controller. V. 01 – 07/12/2020 ©Velleman nv...
- Page 9 This digital start address is the channel number from which the device starts to “listen” to the DMX controller. The same starting address can be used for a whole group of devices or an individual address can be set for every device. V. 01 – 07/12/2020 ©Velleman nv...
- Page 10 Manual 1. Press <MANUAL>. 2. Press <R>, <G> <B> or <W> to select your colour. 3. Press <+> or <-> to select the static colours. Press <1> to <9> to adjust the colour intensity. V. 01 – 07/12/2020 ©Velleman nv...
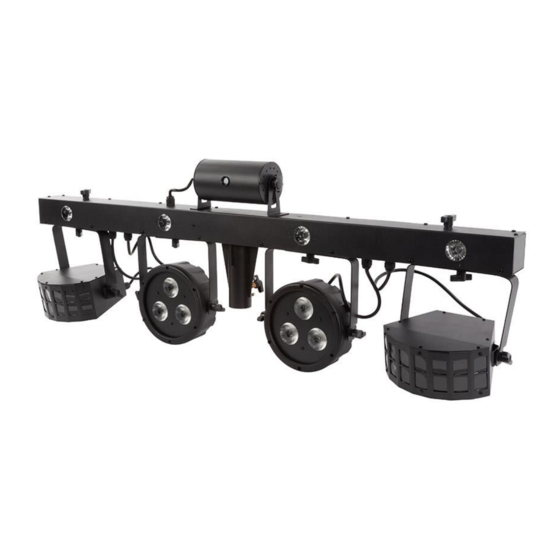
- Page 11 ....................72 W fuse ........................F1A/250V max. link-out current ....................10 A LEDs in device par ......................6x 4 W RGBW derby ..................... 8x 3 W RGBW bar ......................4x 1 W white V. 01 – 07/12/2020 ©Velleman nv...
- Page 12 © COPYRIGHT NOTICE The copyright to this manual is owned by Velleman nv. All worldwide rights reserved. No part of this manual may be copied, reproduced, translated or reduced to any electronic medium or otherwise without the prior written consent of the copyright holder.
-
Page 13: Handleiding
Kijk niet rechtstreeks in een lichtbron. Minimumafstand tot de belichte voorwerpen (meter). Dit verlichtingstoestel is niet geschikt voor rechtstreekse montage op ontvlambare oppervlakken (alleen geschikt voor montage op onontvlambare oppervlakken). V. 01 – 07/12/2020 ©Velleman nv... - Page 14 • Gebruik nooit een beschadigd toestel. Gebruik dit toestel niet indien de voedingskabel beschadigd is. • Monteer dit toestel steeds op een veilige en stabiele manier. Monteer dit toestel in een ruimte waar voldoende ventilatie V. 01 – 07/12/2020 ©Velleman nv...
- Page 15 • Noch Velleman nv noch zijn verdelers kunnen aansprakelijk gesteld worden voor schade (buitengewoon, incidenteel of onrechtstreeks) – van welke aard dan ook (financieel, fysisch…) voortvloeiend uit het bezit, gebruik of falen van dit product.
- Page 16 Sluit het toestel nooit aan op een dimmer of reostaat. • De installatie moet voor het eerste gebruik gekeurd worden door een expert. Gebruik Het toestel kan gebruikt worden als volgt: • autonome modus (standalone) • master/slave-modus • met een DMX-512-controller. V. 01 – 07/12/2020 ©Velleman nv...
- Page 17 Dit digitale startadres is het kanaalnummer van waarop het toestel luistert naar het signaal van de DMX controller. U kunt één enkel startadres gebruiken voor een groep toestellen of u kunt per toestel een nieuw startadres ingeven. V. 01 – 07/12/2020 ©Velleman nv...
- Page 18 2. Druk op <R>, <G>, <B> of <W> om de kleur te selecteren. 3. Druk op <+> of <-> om de statische kleuren te selecteren. Druk op <1> tot <9> om te kleurintensiteit in te stellen. V. 01 – 07/12/2020 ©Velleman nv...
- Page 19 ..............1 x CR2025 (meegelev.) verbruik ........................72 W zekering ......................F1A/250V max. uitgangsstroom (linkout) ..................10 A leds par ......................6x 4 W RGBW derby ..................... 8x 3 W RGBW bar ......................4x 1 W wit V. 01 – 07/12/2020 ©Velleman nv...
- Page 20 Omgevingstemperatuur Temperatuur in stationaire toestand Gebruik dit toestel enkel met originele accessoires. Velleman nv is niet aansprakelijk voor schade of kwetsuren bij (verkeerd) gebruik van dit toestel. Voor meer informatie over dit product en de laatste versie van deze handleiding, zie www.velleman.eu.
-
Page 21: Mode D'emploi
Ne pas regarder directement dans la source de lumière. Distance minimale des objets illuminés (mètres). Ce luminaire ne convient pas à un montage direct sur des surfaces normalement inflammables (appropriés uniquement à un montage sur des surfaces ininflammables). V. 01 – 07/12/2020 ©Velleman nv... - Page 22 • Toujours monter l'appareil de manière sûre et stable. Monter l'appareil dans un endroit offrant une ventilation appropriée. Laisser une distance d'environ 15 cm entre l'appareil et le mur. V. 01 – 07/12/2020 ©Velleman nv...
- Page 23 • Ni Velleman SA ni ses distributeurs ne peuvent être tenus responsables des dommages exceptionnels, imprévus ou indirects, quelles que soient la nature (financière, corporelle, etc.), causés par la possession, l’utilisation ou le dysfonctionnement de ce produit.
- Page 24 • Un expert doit approuver l’installation avant qu’elle puisse être mise en service. Fonctionnement Il y a plusieurs modes de fonctionnement : • mode autonome • maître/esclave • avec un contrôleur DMX 512. V. 01 – 07/12/2020 ©Velleman nv...
- Page 25 “écoute” le contrôleur DMX. Il est possible de choisir entre une seule adresse de départ pour toute une série d’appareils ou une adresse de départ par appareil. V. 01 – 07/12/2020 ©Velleman nv...
- Page 26 1. Appuyer sur <MANUAL>. 2. Appuyer sur <R>, <G>, <B> ou <W> pour sélectionner la couleur. 3. Appuyer sur <+> ou <-> pour sélectionner les couleurs statiques. Appuyer sur <1> à <9> pour ajuster l'intensité des couleurs. V. 01 – 07/12/2020 ©Velleman nv...
- Page 27 ......................72 W fusible ....................... F1A/250V courant d'alimentation de sortie max. (linkout) ............. 10 A par ......................6x 4 W RGBW derby ..................... 8x 3 W RGBW bar ......................4x 1 W blanc V. 01 – 07/12/2020 ©Velleman nv...
- Page 28 être modifiés sans notification préalable. © DROITS D’AUTEUR Velleman SA est l’ayant droit des droits d’auteur de ce mode d'emploi. Tous droits mondiaux réservés. Toute reproduction, traduction, copie ou diffusion, intégrale ou partielle, du contenu de ce mode d'emploi par quelque procédé ou sur tout support électronique que ce soit est interdite sans l’accord préalable écrit de l’ayant droit.
-
Page 29: Manual Del Usuario
No mire directamente a la fuente de luz. Distancia mínima de los objetos iluminados (metros). La luminaria no es apta para ser montada en superficies inflamables. Solo es apta para el montaje en superficies incombustibles. V. 01 – 07/12/2020 ©Velleman nv... - Page 30 • Instale siempre el aparato en un lugar seguro y estable. Instale siempre el aparato en un lugar con suficiente ventilación. Deje un espacio de 15 cm entre el aparato y la pared. V. 01 – 07/12/2020 ©Velleman nv...
- Page 31 • Ni Velleman nv ni sus distribuidores serán responsables de los daños extraordinarios, ocasionales o indirectos, sea cual sea la índole (financiera, física, etc.), causados por la posesión, el uso o el fallo de este producto.
- Page 32 Nunca conecte el aparato a un dimmer o un reóstato. • Un experto debe probar la instalación antes de la puesta en marcha. Funcionamiento Hay varios modos de funcionamiento: • modo autónomo (stand-alone) • modo maestro/esclavo • con un controlador DMX-512. V. 01 – 07/12/2020 ©Velleman nv...
- Page 33 DMX del controlador DMX. Es posible elegir entre una sola dirección inicial para toda una serie de aparatos o una dirección inicial por aparato. V. 01 – 07/12/2020 ©Velleman nv...
- Page 34 1. Pulse <MANUAL>. 2. Pulse <R>, <G>, <B> o <W> para seleccionar el color. 3. Pulse <+> o <-> para seleccionar los colores estáticos. Pulse <1> a <9> para ajustar la intensidad del color. V. 01 – 07/12/2020 ©Velleman nv...
- Page 35 ....................10 A LEDs par ..................... 6 x LED RGBW de 4 W derby ..................8 x LED RGBW de 3 W espada ..................4 x LED blanco de 1 W V. 01 – 07/12/2020 ©Velleman nv...
- Page 36 © DERECHOS DE AUTOR Velleman NV dispone de los derechos de autor para este manual del usuario. Todos los derechos mundiales reservados. Está estrictamente prohibido reproducir, traducir, copiar, editar y guardar este manual del usuario o partes de ello sin el consentimiento previo por escrito del propietario del copyright.
-
Page 37: Bedienungsanleitung
Hinweise zur Pflege bzw. Reparatur zu finden sind. Blicken Sie niemals direkt in die Lichtquelle. Mindestabstand zu beleuchteten Gegenständen (Meter). Die Lampe eignet sich nicht für direkte Montage auf normal entflammbaren Flächen (nur geeignet für Montage auf nicht entflammbaren Flächen). V. 01 – 07/12/2020 ©Velleman nv... - Page 38 Gerät, wenn das Netzkabel beschädigt ist. • Installieren Sie das Gerät immer an einem sicheren, stabilen Ort. Stellen Sie das Gerät immer an einem gut belüfteten Ort auf. Lassen Sie 15 cm Abstand zwischen dem Gerät und der Wand. V. 01 – 07/12/2020 ©Velleman nv...
- Page 39 Garantieanspruch. Für daraus resultierende Folgeschäden übernimmt der Hersteller keine Haftung. • Weder Velleman nv noch die Händler können für außergewöhnliche, zufällige oder indirekte Schäden irgendwelcher Art (finanziell, physisch, usw.), die durch Besitz, Gebrauch oder Defekt verursacht werden, haftbar gemacht werden.
- Page 40 Verbinden Sie das Gerät niemals mit einem Dimmerpack oder Rheostat. • Die Installation muss vor Inbetriebnahme von einem Experten genehmigt werden. Betrieb Nachfolgende Betriebsmodi können ausgewählt werden: • Autonomer Modus (Stand-Alone) • Master/Slave-Modus • mit einem DMX-512-Controller. V. 01 – 07/12/2020 ©Velleman nv...
- Page 41 Signale reagieren kann. Diese digitale Startadresse ist die Kanalnummer, von der das Gerät die Befehle der DMX-Steuerung empfängt und ausführt. Sie können dieselbe Startadresse für eine ganze Gruppe von Geräten verwenden oder eine separate Startadresse für jedes Gerät eingeben. V. 01 – 07/12/2020 ©Velleman nv...
- Page 42 2. Drücken Sie auf <R>, <G>, <B> oder <W>, um die Farbe zu wählen. 3. Drücken Sie auf <+> oder <->, um die statische Farben auszuwählen. Drücken Sie <1> bis <9>, um die Farbintensität einzustellen. V. 01 – 07/12/2020 ©Velleman nv...
- Page 43 Fernbedienung ........... 1x CR2025 (im Lieferumfang enthalten) Stromverbrauch ....................... 72 W Sicherung ......................F1A/250V max. Link-out-Strom ....................10 A LEDs Par ....................6 x 4-W-RGBW-LED Derby .................... 8 x 3-W-RGBW-LED Bar ....................4 x weiße LED (1 W) V. 01 – 07/12/2020 ©Velleman nv...
- Page 44 ........................... 43 °C Umgebungstemperatur Steady-State-Temperatur Verwenden Sie dieses Gerät nur mit originellen Zubehörteilen. Velleman NV übernimmt keine Haftung für Schaden oder Verletzungen bei (falscher) Anwendung dieses Gerätes. Mehr Informationen zu diesem Produkt und die neueste Version dieser Bedienungsanleitung finden Sie hier: www.velleman.eu. Alle Änderungen ohne vorherige Ankündigung vorbehalten.
-
Page 45: Instrukcja Obsługi
(serwisowania) znajdujące się w dokumentacji towarzyszącej urządzeniu. Nie wpatrywać się w źródło światła. Minimalna odległość od oświetlonych obiektów (w metrach). Oprawa nie nadaje się do bezpośredniego montażu na powierzchniach normalnie palnych (jest odpowiednia tylko do montażu na powierzchniach niepalnych). V. 01 – 07/12/2020 ©Velleman nv... - Page 46 (np. wzmacniacze), które wytwarzają ciepło. • Pod żadnym pozorem nie zdejmować pokrywy. W urządzeniu nie ma części, które mogą być serwisowane przez użytkownika. Nie używać urządzenia, gdy pokrywa jest usunięta. V. 01 – 07/12/2020 ©Velleman nv...
- Page 47 • Niniejsze urządzenie nie jest przeznaczone do stałej eksploatacji: regularne przerwy w eksploatacji wydłużą żywotność urządzenia. Informacje ogólne • Proszę zapoznać się z informacjami w części Usługi i gwarancja jakości Velleman ® na końcu niniejszej instrukcji. •...
- Page 48 Nie próbować samodzielnie montować urządzenia w przypadku braku powyższych kwalifikacji, gdyż nieprawidłowy montaż może spowodować obrażenia ciała. • Przy montażu na kratownicy należy stosować odpowiednie zaciski (brak w zestawie) i zamocować śrubę M10 do środka (zagiętego) wspornika. V. 01 – 07/12/2020 ©Velleman nv...
- Page 49 SLAV Slave tryb slave aktywowany/dezaktywowany odbiór sygnału InFr on/oFF pilota IR Tryb Stand-Alone Po podłączeniu do sieci urządzenie zaczyna pracować w trybie Stand-Alone. Tryb ten pozwala na użytkowanie urządzenia bez sterownika. V. 01 – 07/12/2020 ©Velleman nv...
- Page 50 2. Nacisnąć <+> lub <->, aby wybierać różne programy. 3. Nacisnąć <STROBE>, aby wyłączyć. prędkość 1. Nacisnąć <SPEED>. 2. Nacisnąć <+> lub <->, aby wyregulować prędkość programu. Sensitivity 1. Nacisnąć <SENSITIVITY>. 2. Nacisnąć <+> lub <->, aby wyregulować czułość mikrofonu. V. 01 – 07/12/2020 ©Velleman nv...
- Page 51 1. Odłączyć przewód zasilający urządzenia od gniazdka. 2. Pozostawić urządzenie do schłodzenia. 3. Otworzyć oprawę bezpiecznika. 4. Wymienić na taki sam bezpiecznik. 5. Umieścić oprawę bezpiecznika z powrotem na miejscu, zamontować tylną obudowę i ponownie podłączyć zasilanie. V. 01 – 07/12/2020 ©Velleman nv...
- Page 52 ........................... 43 °C Temperatura otoczenia Stała temperatura obudowy Należy używać wyłącznie oryginalnych akcesoriów. Firma Velleman nv nie ponosi odpowiedzialności za uszkodzenia lub urazy wynikające z (niewłaściwego) korzystania z niniejszego urządzenia. Aby uzyskać więcej informacji dotyczących produktu oraz najnowszą wersję niniejszej instrukcji, należy odwiedzić naszą stronę...
-
Page 53: Manual Do Utilizador
Não olhe diretamente para a fonte de luz. Distância mínima em relação aos objetos iluminados (metros). Esta luminária não é adequada para montagem direta em superfícies normalmente inflamáveis (adequada apenas para montagem em superfícies não combustíveis). V. 01 – 07/12/2020 ©Velleman nv... - Page 54 • Não utilize um aparelho que esteja visivelmente danificado. Não tente colocar este dispositivo a funcionar se o cabo de alimentação estiver danificado. V. 01 – 07/12/2020 ©Velleman nv...
- Page 55 • Nem Velleman NV nem os seus distribuidores podem ser responsabilizados por quaisquer danos (extraordinário, incidental ou indireto) - de qualquer natureza decorrentes (financeira, física ...) a partir da posse, uso ou falha do produto.
- Page 56 Não tente instalar o aparelho sozinho caso não tenha as qualificações necessárias pois isso poderá causar acidentes graves. • Para a montagem da treliça, usar um grampo adequado (não incl.) e coloque um parafuso M10 através do centro do suporte (dobrado). V. 01 – 07/12/2020 ©Velleman nv...
- Page 57 IR InFr on/oFF ativada/desativada Modo Autónomo O aparelho começa a funcionar no modo autónomo assim que à ligado à corrente. Este modo permite ao utilizador usar o aparelho sem controlador. V. 01 – 07/12/2020 ©Velleman nv...
- Page 58 3. Pressione <STROBE> para desativar. Velocidade 1. Pressione <SPEED>. 2. Pressione <+> ou <-> para regular a velocidade do programa. Sensibilidade 1. Pressione <SENSITIVITY>. 2. Pressione <+> ou <-> para regular a sensibilidade do microfone. V. 01 – 07/12/2020 ©Velleman nv...
- Page 59 2. Deixe o aparelho arrefecer. 3. Abra o porta-fusível. 4. Substitua-o por outro do mesmo tipo. 5. Volte a colocar o porta-fusível no lugar, coloque a tampa traseira e volte a ligar o aparelho à corrente elétrica. V. 01 – 07/12/2020 ©Velleman nv...
- Page 60 © DIREITOS DE AUTOR A Velleman NV detém os direitos de autor deste manual do utilizador. Todos os direitos mundiais reservados. É estritamente proibido reproduzir, traduzir, copiar, editar e gravar este manual do utilizador ou partes deste sem prévia autorização escrita por parte da...
- Page 61 Velleman®; worden. - se calcula gastos de transporte de y a Velleman® si el aparato ya no está • Bij reparaties buiten de waarborgperiode zullen transportkosten aangerekend cubierto por la garantía.
- Page 62 Velleman® Service- und Qualitätsgarantie wymienione wyżej warunki są bez uszczerbku dla wszystkich komercyjnych gwarancji. Seit der Gründung in 1972 hat Velleman® sehr viel Erfahrung als Verteiler in der Powyższe postanowienia mogą podlegać modyfikacji w zależności od Elektronikwelt in über 85 Ländern aufgebaut.
Need help?
Do you have a question about the HQ-Power HQLE10061 and is the answer not in the manual?
Questions and answers