Table of Contents
Advertisement
Quick Links
Advertisement
Table of Contents

Summary of Contents for Busch-Jaeger 1091 U
- Page 1 2CKA001473B8822 │ 25.10.2016 Operating Instructions -sensor 1091 U...
-
Page 2: Table Of Contents
Table of contents Table of contents Notes on the instruction manual ..........................4 Safety ..................................5 Information and symbols used ........................5 Intended use ..............................6 Improper use ..............................6 Target group / Qualifications of personnel ...................... 7 2.4.1 Operation ............................... 7 2.4.2 Installation, commissioning and maintenance .................... - Page 3 Table of contents Maintenance ................................37 Cleaning ............................... 37 Information about planning and application ......................38 10.1 Menu tree ..............................38 Index ..................................39 Operating Instructions 2CKA001473B8822 │3...
-
Page 4: Notes On The Instruction Manual
If you pass the device on, also pass on this manual along with it. Busch-Jaeger accepts no liability for any failure to observe the instructions in this manual. If you require additional information or have questions about the device, please contact Busch- Jaeger or visit our Internet site at: www.BUSCH-JAEGER.de... -
Page 5: Safety
However, residual hazards remain. Read and adhere to the safety instructions to prevent hazards of this kind. Busch-Jaeger accepts no liability for any failure to observe the safety instructions. Information and symbols used The following Instructions point to particular hazards involved in the use of the device or provide... -
Page 6: Intended Use
Each use not listed in Chapter 2.2 “Intended use“ on page 6 is deemed improper use and can lead to personal injury and damage to property. Busch-Jaeger is not liable for damages caused by use deemed contrary to the intended use of the device. The associated risk is borne exclusively by the user/operator. -
Page 7: Target Group / Qualifications Of Personnel
Safety Target group / Qualifications of personnel 2.4.1 Operation No special qualifications are needed to operate the device. 2.4.2 Installation, commissioning and maintenance Installation, commissioning and maintenance of the device must only be carried out by trained and properly qualified electrical installers. The electrical installer must have read and understood the manual and follow the instructions provided. -
Page 8: Safety Instructions
Safety Safety instructions Danger - Electric voltage! Electric voltage! Risk of death and fire due to electric voltage of 230 V. Dangerous currents flow through the body when coming into direct or indirect contact with live components. This can result in electric shock, burns or even death. -
Page 9: Information On Protection Of The Environment
Information on protection of the environment Information on protection of the environment Environment Consider the protection of the environment! Used electric and electronic devices must not be disposed of with domestic waste. – The device contains valuable raw materials which can be recycled. Therefore, dispose of the device at the appropriate collecting depot. -
Page 10: Setup And Function
Setup and function Setup and function Functions The device is a functional measuring device and is installed flush-mounted in the wall. Next to monitoring of the air quality it also offers the option of controlling a room ventilation via a fan or a a window. -
Page 11: Possible Combinations
Setup and function Possible combinations 1091 U 6435-xxx Table 1: Possible combinations Operating Instructions 2CKA001473B8822 │11... -
Page 12: Technical Data
Technical data Technical data Technical data Designation Value Nominal voltage: 230 V AC, ±10%, 50 Hz Temperature range: 0°C - +35°C Storage temperature: -10°C - +60°C Protection type: IP 20 Display size: 3.8 cm (1.5") 44 x 44 x 32 mm Dimensions of power adapter: (for BS flush-mounted box without claws) 2 floating relays with a common connection for the... -
Page 13: Factory Settings
Technical data Factory settings Factory settings Value threshold value 800 ppm rF (RH = relative humidity) threshold value 60 % Switch-off delay 3 minutes Control Display illumination Automatic mode Temperature offset (temperature correcting value) 0°C offset (CO correcting value) 0 ppm Load current 1 ampere Manual operation... -
Page 14: Connection, Installation / Mounting
Connection, installation / mounting Connection, installation / mounting Danger - Electric voltage! Risk of death due to electrical voltage of 230 V during short-circuit in the low- voltage conduit. – Low-voltage and 230 V conduits must not be installed together in a flush- mounted box! Requirements for the electrician Danger - Electric voltage! -
Page 15: Mounting
Connection, installation / mounting Mounting Caution! The device can sustain damage when coming into contact with hard objects! The plastic parts of the device are sensitive. – Pull the attachment off only with your hands. – Do not lever parts off with screwdrivers or similar hard objects. The flush-mounted insert must only be installed in flush-mounted wall boxes according to DIN 49073-1, Part 1, or suitable surface-mounted housings. - Page 16 Connection, installation / mounting 1. Connect the cables to the flush- mounted insert. – For the connection assignment, see chapter 6.3 “Electrical connection“ on page 17. Fig. 3: Connecting the cables 2. Mount the flush-mounted insert. Fig. 4: Mounting the flush-mounted insert 3.
-
Page 17: Electrical Connection
Connection, installation / mounting Electrical connection Window control: [1] Open [2] Close Fan control: [1] Level 1 [2] Level 2 Fig. 6: Control for 230 V Window control: [1] Open [2] Close Fan control: [1] Level 1 [2] Level 2 Fig. -
Page 18: Commissioning
Commissioning Commissioning The setup is carried out automatically during initial commissioning or when resetting the settings (RESET). All settings, except for the language, can be made in the settings menu at a later point in time. If certain functions are not relevant for you, confirm the preset values with the "OK" button to switch to the next menu item. - Page 19 Commissioning Control, see chapter 8.3.5 “Menu "Fan control / window control"“ on page 29 Select between fan control and ■ window control. Fig. 9: Setup menu "Control" threshold value, see chapter 8.3.4 “Menu "Threshold values / switch-off delay" for the ventilation control “ on page 27 Fig.
-
Page 20: Operation
Operation Operation Operating modes The device has three operating modes. Standard operation, see chapter 8.2 “Normal operation“ on page 21 All functions run automatically. ■ Manual operation is not required. Fig. 13: Standard operation Settings, see chapter 8.3 “Extended operation“ on page 26 E.g. -
Page 21: Normal Operation
Operation Normal operation 8.2.1 Display [1] Air pressure in hPa [2] CO value in ppm [3] Room temperature in °C [4] Relative humidity in rF (RH) Fig. 15: Display overview [1] Fan control [2] Window control [3] Calibration Fig. 16: Overview of display icons 8.2.2 Messages... - Page 22 Operation For a set window control: – The entered CO limit value has been exceeded. – The window opens automatically. Fig. 18: Window control: CO threshold value exceeded – The entered limit value for the relative humidity (RH) has been exceeded.
- Page 23 Operation For a set fan control: – The entered CO limit value has been exceeded. – The fan switches on automatically. Fig. 20: Fan control: CO threshold value exceeded – The entered limit value for the relative humidity (RH) has been exceeded.
-
Page 24: Button Lock
Operation 8.2.3 Button lock To prevent unintentional operation, a button lock can be set up. The activated button lock is not shown on the display. ■ The display illumination is independent of the button lock. ■ The button lock is switched on and off in the same manner. To prevent the button lock from being triggered unintentionally, the cover plate (operating plate) of the control element must be removed for the setup. - Page 25 Operation Press the buttons at the bottom left and top right simultaneously for at least 5 seconds. – This requires a small object. E.g. a ballpoint pen. The buttons cannot be pressed in far enough with the fingers. – Do not use sharp, pointed objects which could damage Fig.
-
Page 26: Extended Operation
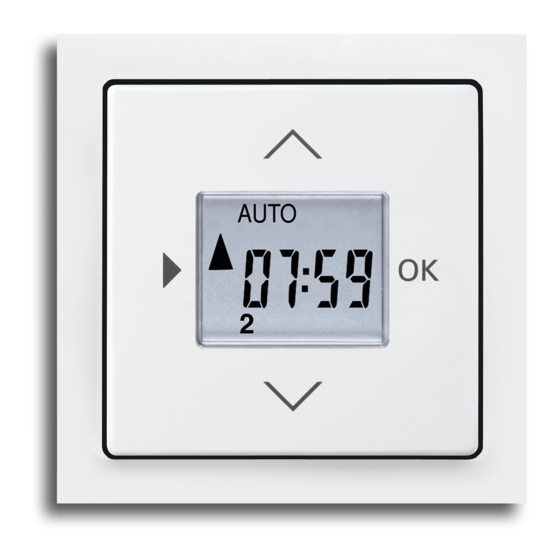
Operation Extended operation 8.3.1 Change into extended operation Use the following steps to change into extended operation: 1. Press the "CHANGE" button for at least 5 seconds. – The device changes into extended operation. 8.3.2 Display Fig. 27: Display overview of extended operation [1] Selected menu item [2] Menu / menu level [3] Menu number... -
Page 27: Menu "Threshold Values / Switch-Off Delay" For The Ventilation Control
Operation 8.3.4 Menu "Threshold values / switch-off delay" for the ventilation control relative humidity Main menu threshold value threshold value 800 ppm 60 % threshold values Off delay time 03:00 Minutes Fig. 29: Entering threshold values / switch-off delay The ventilation is controlled via threshold values. An action is triggered when one of these threshold values is exceeded or drops below the set value. - Page 28 Operation Switch-off delay This is the period the fan keeps on running after the threshold value has dropped below its set value. With entry of a switch-off delay the threshold values clearly drop below their set value and it takes longer until they are exceeded again. This prevents the fan from being constantly switched on and off at short intervals.
-
Page 29: Menu "Fan Control / Window Control
Operation 8.3.5 Menu "Fan control / window control" Fig. 30: Switchover of fan control / window control Aside from the display of air-quality values, the device also gives you the option of a ventilation control via a fan or via opening / closing of windows. Select from the following setting options: Menu function Description... -
Page 30: Menu "Display Lighting
Operation 8.3.6 Menu "Display lighting" Fig. 31: Menu item "Illumination" In this menu the desired display illumination is set. Select from the following setting options: Menu function Description The display is permanently illuminated. Automatic After the press of a button the display activates itself for one minute. Table 6: Display illumination Setting the display illumination 1. -
Page 31: Menu "Temperature Correcting Value
Operation 8.3.7 Menu "Temperature correcting value" Fig. 32: Menu "Temperature correcting value" A correcting value for the measured temperature is entered in this menu. Correcting value Information Temperature If the measure temperature value is permanently influenced by external factors, a correcting value can be entered. The displayed temperature is then adjusted by the correcting value. -
Page 32: Menu "Co 2 Correcting Value
Operation 8.3.8 Menu "CO correcting value" Fig. 33: correcting value A correcting value for the measured CO is entered in this menu. Correcting value Information If the measured CO value is permanently influenced by external factors, a correcting value can be entered. The displayed CO value is then adjusted by the correcting value. -
Page 33: Menu "Load Current
Operation 8.3.9 Menu "Load current" Fig. 34: Load current In this menu the current for the load to be switched is entered. Value Information Load current If high electric loads are controlled with the device, the high current heats up the device and the displayed temperatures and the RH value are no longer correct. -
Page 34: Menu "Manual Operation
Operation 8.3.10 Menu "Manual operation" Fig. 35: Manual operation In this menu an additional operation of the window or the ventilation is made possibly by hand. Value Information Manual operation ON Window control: The window can be opened or closed by the device in addition to the automatic control. -
Page 35: Reset (Resetting The Device)
Operation 8.3.11 RESET (resetting the device) If you wish to delete all the settings you have made and to re-enter them, the device must first be fully reset to its state at the point of delivery. 1. Press all four buttons on the device simultaneously for at least 5 seconds. -
Page 36: Operation Manual Mode
Operation Operation manual mode Fig. 37: Manual mode The set ventilation can also be controlled by hand via the "UP / DOWN" buttons of the device. This function is only available if it has been set up in the special functions, see chapter 8.3.10 “Menu "Manual operation"“... -
Page 37: Maintenance
Maintenance Maintenance Cleaning Caution! - Risk of damaging the device! When spraying on cleaning agents, these can enter the device through ■ crevices. – Do not spray cleaning agents directly onto the device. Aggressive cleaning agents can damage the surface of the device. ■... -
Page 38: Information About Planning And Application
Information about planning and application Information about planning and application 10.1 Menu tree Threshold values threshold value Threshold value of relative Switch-off delay Special function Control Window Display illumination Temperature offset offset Load current Manual operation Operating Instructions 2CKA001473B8822 │38... -
Page 39: Index
Index Index Menu "Display lighting" ............30 Menu tree ................38 Button assignment ............... 26 Messages ................21 Button lock ................24 Mounting ................15 Calibration ................21 Nachlaufzeit ..............19, 27 Change into extended operation ......... 26 National language ..............18 Cleaning ................37 Normal operation ............20, 21 CO2 correcting value ............. - Page 40 A member of the ABB Group Notice We reserve the right to make Busch-Jaeger Elektro GmbH technical changes at all times as PO box well as changes to the contents of 58505 Lüdenscheid this document without prior notice. The detailed specifications agreed Freisenbergstraße 2...
Need help?
Do you have a question about the 1091 U and is the answer not in the manual?
Questions and answers