Table of Contents
Advertisement
Quick Links
Advertisement
Table of Contents

Subscribe to Our Youtube Channel
Related Manuals for Electrolux EB6GL7KCN


Summary of Contents for Electrolux EB6GL7KCN
- Page 1 EB6GL7KCN EB6GL7KSP Steam oven User Manual...
-
Page 2: Table Of Contents
15. GUARANTEE ....................52 WE’RE THINKING OF YOU Thank you for purchasing an Electrolux appliance. You’ve chosen a product that brings with it decades of professional experience and innovation. Ingenious and stylish, it has been designed with you in mind. So whenever you use it, you can be safe in the knowledge that you’ll get great results every time. -
Page 3: Safety Information
ENGLISH SAFETY INFORMATION Before the installation and use of the appliance, carefully read the supplied instructions. The manufacturer is not responsible for any injuries or damages that are the result of incorrect installation or usage. Always keep the instructions in a safe and accessible location for future reference. -
Page 4: Safety Instructions
Always use oven gloves to remove or put in • accessories or ovenware. Before carrying out any maintenance, disconnect the • appliance from the power supply. Ensure that the appliance is switched off before • replacing the lamp to avoid the possibility of electric shock. - Page 5 ENGLISH 2.2 Electrical connection 2.3 Use WARNING! WARNING! Risk of fire and electric Risk of injury, burns and shock. electric shock or explosion. • All electrical connections should be • This appliance is for household use made by a qualified electrician. only.
- Page 6 • Discoloration of the enamel or Contact the Authorised Service stainless steel has no effect on the Centre. performance of the appliance. • Be careful when you remove the door • Use a deep pan for moist cakes. Fruit from the appliance.
-
Page 7: Product Description
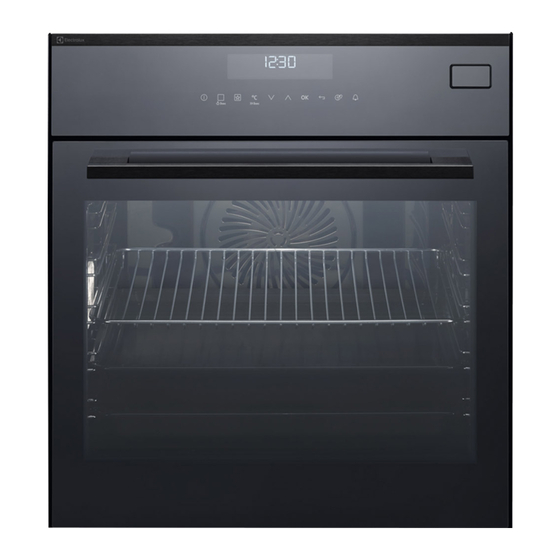
ENGLISH 3. PRODUCT DESCRIPTION 3.1 General overview Control panel Display Water drawer Socket for the core temperature sensor Heating element Lamp Descaling pipe outlet Shelf support, removable Shelf positions 3.2 Accessories Grill- / Roasting pan Wire shelf To bake and roast or as a pan to collect fat. -
Page 8: Control Panel
Glass dish with 1 grill insert 4. CONTROL PANEL 4.1 Electronic programmer Use the sensor fields to operate the appliance. Sensor Function Comment field Display Shows the current settings of the appliance. ON / OFF To activate and deactivate the appliance. - Page 9 ENGLISH Sensor Function Comment field Down key To move down in the menu. Up key To move up in the menu. To confirm the selection or setting. Back key To go back one level in the menu. To show the main menu, touch the field for 3 seconds.
-
Page 10: Before First Use
Symbol Function Time Indication The display shows how long the heating function operates. Press at the same time to reset the time. Calculation The appliance calculates the time for cooking. Heat-up Indicator The display shows the temperature in the appliance. -
Page 11: Daily Use
ENGLISH Water hardness Calcium deposit Calcium deposit Water clas‐ (mmol/l) (mg/l) sification Class 7 - 14 1.3 - 2.5 50 - 100 Moderately hard 14 - 21 2.5 - 3.8 100 - 150 Hard over 21 over 3.8 over 150 Very hard When the water hardness exceeds the 5. - Page 12 Symbol / Menu Application Symbol / Menu Description item item Contains a list of Activates and deacti‐ cleaning pro‐ vates the time exten‐ Cleaning Time Extension grammes. sion function. Used to set the appli‐ Adjusts the display ance configuration.
- Page 13 ENGLISH 6.3 Submenu for: Cleaning Symbol Menu item Description Tank Emptying Procedure for removing the residual wa‐ ter from the water drawer after use of the steam functions. Steam Cleaning Plus Procedure for cleaning stubborn dirt with the support of an oven cleaner. Steam Cleaning Procedure for cleaning the appliance when it is slightly soiled and not burned...
- Page 14 The lamp may automatically Heating func‐ Application deactivate at a temperature tion below 60 °C during some oven functions. This function is de‐ signed to save ener‐ 6.5 Specials gy during cooking. Moist Fan Bak‐ For more information refer to "Hints and Heating func‐...
- Page 15 ENGLISH 6.6 Submenu for: Assisted Cooking Heating func‐ Application tion Food Category: Fish/Seafood Food reheating with Dish steam prevents sur‐ face drying. Heat is Steam Regen‐ Fish Fish, baked distributed in a gentle erating and even way, which Fish Fingers allows to recover Fish fillet, thin taste and aroma of...
- Page 16 Dish Dish Chicken Wings, Chipolatas fresh Spare Ribs Chicken Wings, Pork Knuckle, pre- frozen cooked Chicken Legs, Pork Joint fresh Loin of Pork Chicken Chicken Legs, fro‐ Loin of Pork Chicken Breast, Pork Loin of Pork, poached smoked Chicken, 2 half...
- Page 17 ENGLISH Dish Dish Hare Swiss Tarte, sa‐ • Leg of Hare voury • Saddle of Hare Quiche Lorraine • Saddle of Hare Savory Flan Venison Food Category: Cake/Pastry • Haunch of Ven‐ Game Dish ison • Saddle of Veni‐ Ring Cake Apple Cake, cov‐...
- Page 18 Food Category: Vegetables Dish Dish Brownies Broccoli, Florets Swiss Roll Broccoli, whole Yeast Cake Cauliflower, Flor‐ Crumble Cake Cauliflower, whole Sugar Cake Carrots Short Pastry Flan Base Courgette Slices Flan Base Sponge Mixture Asparagus, green Flan Base Asparagus, white...
- Page 19 ENGLISH 6.7 Setting a heating function Dish 1. Turn on the oven. Terrine 2. Press to confirm. 3. Set the temperature. Eggs, soft boiled 4. Press to confirm. Eggs, medium boiled 6.8 Steam cooking Eggs Eggs, hard boiled The water drawer cover is in the control panel.
-
Page 20: Clock Functions
Refer to the cleaning function: Tank When temperature is reached the buzzer Emptying. sounds 3 times and the bar flashes and then disappears. CAUTION! The appliance is hot. 6.10 Fast Heat Up Indicator There is a risk of burns. -
Page 21: Automatic Programmes
ENGLISH 2. Select the heating function. 2. Press again and again until the 3. Set the temperature above 80 °C. display shows the necessary clock function and the related symbol. 4. Press again and again until the display shows: Heat + Hold. 3. - Page 22 • Food sensor cannot be used for liquid The display shows the food sensor dishes. symbol. • During cooking the food sensor must 4. Press in less than 5 remain in the dish and the plug in the seconds to set the food core socket.
- Page 23 ENGLISH 4. Cover the food sensor with the remaining ingredients. 5. Put the plug of the food sensor into the socket located in the front frame of the appliance. Baking tray/ Deep pan: Push the baking tray / deep pan between the guide bars of the shelf support.
-
Page 24: Additional Functions
10. ADDITIONAL FUNCTIONS 10.1 Favourites 1. Press to turn on the display. 2. Press at the same time You can save your favourite settings, until the display shows a message. such as duration, temperature or heating To turns off the Child Lock function function. -
Page 25: Hints And Tips
ENGLISH 10.6 Brightness of the display • Function Lock is on when There are two modes of display the heating function brightness: works. • Night brightness - when the oven is • The menu: Basic Settings turned off, the brightness of the lets you turn the function: display is lower between 10 PM and 6 Set + Go on and off. - Page 26 Remove the food packaging and put the food on a plate. Do not cover the food, Food Time (min) as it can extend the defrosting time. Use Asparagus, green 15 - 25 the first shelf position. Aubergines 15 - 25 11.3 Full Steam...
- Page 27 ENGLISH Food Time (min) Food Time (min) Beetroot 70 - 90 Bread dumpling 35 - 45 1) Preheat the oven for 5 minutes. Potato dumplings 35 - 45 Side dishes / accompaniments Rice (water / rice ratio 35 - 45 Food Time 1:1)
- Page 28 Food Temperature (°C) Time (min) Bavarian veal sausage (white saus‐ 20 - 30 age) Vienna sausage 20 - 30 Chicken breast, poached 25 - 35 Cooked ham 1 kg 55 - 65 Chicken, poached 1 - 1.2 kg 60 - 70...
- Page 29 ENGLISH Food Turbo Grilling (first step: cook Full Steam (second step: add meat) vegetables) Tempera‐ Time Shelf po‐ Tempera‐ Time Shelf po‐ ture (°C) (min) sition ture (°C) (min) sition Roast veal 50 - 60 meat: 1 30 - 40 meat: 1 1 kg, vegeta‐...
- Page 30 Food Temperature (°C) Time (min) Shelf position Pasta bake 170 - 190 40 - 50 Lasagne 170 - 180 45 - 55 Misc. types of 180 - 190 45 - 60 bread 500 - 1000 g Bread rolls 180 - 210...
- Page 31 ENGLISH Baking results Possible cause Remedy The cake sinks and The oven temperature is The next time you bake, set a becomes soggy, lumpy too high. slightly lower oven temperature. or streaky. The baking time is too Set a longer baking time. You short.
- Page 32 Cakes / pastries / breads on baking trays Food Function Temperature Time (min) Shelf position (°C) Plaited bread / Conventional 170 - 190 30 - 40 Bread crown Cooking Christmas stol‐ Conventional 50 - 70 160 - 180 Cooking...
- Page 33 ENGLISH Food Function Temperature Time (min) Shelf position (°C) Puff pastries True Fan Cook‐ 20 - 30 170 - 180 Rolls Conventional 10 - 25 190 - 210 Cooking 1) Preheat the oven. 11.11 Bakes and gratins Food Function Temperature Time (min) Shelf position (°C)
- Page 34 Food Temperature Time (min) Shelf posi‐ (°C) tion Apple cake, made with 160 - 170 70 - 80 sponge mixture (round cake tin) White bread 190 - 200 55 - 70 11.13 Multilevel Baking Use the function: True Fan Cooking.
- Page 35 ENGLISH 2. Put the core temperature sensor into The signal sounds when the oven is the meat. at the set temperature. 3. Select the function: Slow Cooking . 4. After 10 minutes, oven automatically You can set an oven temperature sets a lower temperature.
- Page 36 Food Temperature (°C) Time (min) Shelf position Apple cake, cov‐ 150 - 170 50 - 60 ered Vegetable pie 160 - 180 50 - 60 Unleavened bread 10 - 20 210 - 230 Puff pastry flan 45 - 55...
- Page 37 ENGLISH Pork Food Quantity (kg) Function Temperature Time (min) (°C) Shoulder / Neck / 1 - 1.5 Turbo Grilling 150 - 170 90 - 120 Ham joint Chop / Spare rib 1 - 1.5 Turbo Grilling 170 - 190 30 - 60 Meatloaf 0.75 - 1 Turbo Grilling...
- Page 38 Food Quantity (kg) Function Temperature Time (min) (°C) Duck 1.5 - 2 Turbo Grilling 180 - 200 80 - 100 Goose 3.5 - 5 Turbo Grilling 160 - 180 120 - 180 Turkey 2.5 - 3.5 Turbo Grilling 160 - 180...
- Page 39 ENGLISH 11.19 Frozen Foods Food Temperature (°C) Time (min) Shelf position Pizza, frozen 200 - 220 15 - 25 Pizza American, 190 - 210 20 - 25 frozen Pizza, chilled 210 - 230 13 - 25 Pizza Snacks, fro‐ 180 - 200 15 - 30 French Fries, thin 190 - 210...
- Page 40 Put no more than six one-litre preserve When the liquid in the jars starts to jars on the baking tray. simmer (after approximately 35 - 60 minutes with one-litre jars), stop the oven Fill the jars equally and close with a or decrease the temperature to 100 °C...
- Page 41 ENGLISH Food Temperature Time (h) Shelf position (°C) 1 position 2 positions Peppers 60 - 70 5 - 6 1 / 4 Vegetables for 60 - 70 5 - 6 1 / 4 sour Mushrooms 50 - 60 6 - 8 1 / 4 Herbs 40 - 50...
- Page 42 Beef Food core temperature (°C) Less Medium More Meat loaf Pork Food core temperature (°C) Less Medium More Ham, Roast Chop (saddle), Smoked pork loin, Smoked loin poached Veal Food core temperature (°C) Less Medium More Roast veal Knuckle of veal Mutton / lamb Food core temperature (°C)
- Page 43 ENGLISH Fish (salmon, trout, zander) Food core temperature (°C) Less Medium More Fish (whole / large / steamed), Fish (whole / large / roasted) Casseroles - Precooked vege‐ Food core temperature (°C) tables Less Medium More Zucchini Casserole, Broccoli Casserole, Fennel Casserole Casseroles - Savoury Food core temperature (°C)
- Page 44 Grill Preheat the empty oven for 5 minutes. Food Function Temperature Time (min) Shelf posi‐ (°C) tion Toast Grill 1 - 3 Beef Steak Grill 24 - 30 1) Turn halfway through. Fast Grilling Preheat the empty oven for 3 minutes.
-
Page 45: Care And Cleaning
85 °C. 1) Preheat the oven for 5 minutes. 12. CARE AND CLEANING You can buy our products at WARNING! www.electrolux.com/shop and at the best Refer to Safety chapters. retailer shops. 12.1 Notes on cleaning 12.3 Removing the shelf supports... - Page 46 12.5 Cleaning Reminder The steam cleaning functions support the steam cavity cleaning of the oven. When reminder is displayed cleaning is Before you start a cleaning procedure, necessary. Perform the function Steam make sure that the oven is cool.
- Page 47 ENGLISH sounds or the display shows the 3. Fill the water drawer with fresh water message. to the maximum level until the acoustic signal sounds or the display 11. Press shows the message. This activates the second part of the procedure: Descaling.
-
Page 48: Troubleshooting
2. Remove the metal ring and clean the 45° glass cover. 3. Replace the lamp with a halogen, 230 V, 40 W, 300 °C heat resistant lamp. 4. Attach the metal ring to the glass 4. Hold the door with one hand on each cover. - Page 49 ENGLISH 13.1 What to do if... Problem Possible cause Remedy You cannot activate or op‐ The oven is not connected Check if the oven is cor‐ erate the oven. to an electrical supply or it rectly connected to the is connected incorrectly. electrical supply (refer to the connection diagram if available).
- Page 50 Problem Possible cause Remedy The appliance is activated The demo mode is activa‐ Refer to "Basic Settings" in and does not heat up. The ted. "Daily use" chapter. fan does not operate. The display shows "Demo". The descaling procedure is There was a power cut.
-
Page 51: Energy Efficiency
......... Serial number (S.N.) ......... 14. ENERGY EFFICIENCY 14.1 Product Fiche and information according to EU 65-66/2014 Supplier's name Electrolux EB6GL7KCN Model identification EB6GL7KSP Energy Efficiency Index 81.0 Energy efficiency class Energy consumption with a standard load, con‐ 1.09 kWh/cycle... -
Page 52: Guarantee
When possible, do not preheat the oven the heating elements automatically before you put the food inside. deactivate earlier in some oven functions. When the cooking duration is longer than 30 minutes, reduce the oven temperature The fan and lamp continue to operate. - Page 53 ENGLISH third parties or the use of non-genuine components. 16. ENVIRONMENTAL CONCERNS Recycle materials with the symbol For Switzerland: Put the packaging in relevant containers Where should you take your to recycle it. Help protect the old equipment? environment and human health by Anywhere that sells new recycling waste of electrical and equipment or hand it in to...
- Page 54 www.electrolux.com...
- Page 55 ENGLISH...
- Page 56 www.electrolux.com/shop...
Need help?
Do you have a question about the EB6GL7KCN and is the answer not in the manual?
Questions and answers