Table of Contents
Advertisement
Available languages
Available languages
Quick Links
Advertisement
Chapters
Table of Contents

Subscribe to Our Youtube Channel
Related Manuals for Electrolux EB6L50DCN


Summary of Contents for Electrolux EB6L50DCN
- Page 1 EB6L50DSP EB6L5DSP Backofen Benutzerinformation Nutzen Sie alle Vorteile Ihres Geräts Registrieren Sie jetzt Ihr Produkt einfach per Foto für einen schnellen Zugriff auf Handbücher, Anleitungen, Serviceunterstützung und vieles Mehr unter electrolux.com/register...
-
Page 2: Table Of Contents
13. ENERGIEEFFIZIENZ..................34 14. GARANTIE..................... 35 WIR DENKEN AN SIE Vielen Dank, dass Sie sich für ein Gerät von Electrolux entschieden haben. Sie haben ein Produkt gewählt, hinter dem jahrzehntelange professionelle Erfahrung und Innovation stehen. Bei der Entwicklung dieses grossartigen und eleganten Geräts haben wir an Sie gedacht. -
Page 3: Sicherheitshinweise
DEUTSCH SICHERHEITSHINWEISE Lesen Sie vor der Installation und Verwendung des Gerätes die mitgelieferte Anleitung sorgfältig durch. Der Hersteller ist nicht verantwortlich für Verletzungen oder Schäden, die durch unsachgemässe Installation oder Verwendung entstehen. Bewahren Sie die Anweisungen immer an einem sicheren und zugänglichen Ort auf, um sie später wiederverwenden zu können. - Page 4 1.2 Allgemeine Sicherheit Die Installation des Geräts und der Austausch des • Kabels muss von einer Fachkraft vorgenommen werden. ACHTUNG: Das Gerät und die zugänglichen • Geräteteile werden während des Betriebs heiss. Achten Sie darauf, die Heizelemente nicht zu berühren.
-
Page 5: Sicherheitsanweisungen
DEUTSCH 2. SICHERHEITSANWEISUNGEN 2.1 Installation Breite der Rückseite 560 mm WARNUNG! des Geräts Das Gerät darf nur von einer Tiefe des Gerätes 567 mm Fachkraft installiert werden. Einbautiefe des Ge‐ 546 mm • Entfernen Sie die gesamte rätes Verpackung. • Montieren oder verwenden Sie ein Tiefe bei geöffneter 1027 mm beschädigtes Gerät nicht. - Page 6 Werkzeug entfernt werden wenn es mit Wasser in Kontakt können. gekommen ist. • Stecken Sie den Netzstecker erst am • Üben Sie keinen Druck auf die Ende der Installation in die geöffnete Gerätetür aus. Steckdose. Stellen Sie sicher, dass •...
- Page 7 DEUTSCH • Ist das Gerät hinter einer Möbelfront • Falls Sie ein Ofenspray verwenden, (z. B. einer Tür) installiert, achten Sie befolgen Sie die darauf, dass die Tür während des Sicherheitsanweisungen auf seiner Gerätebetriebs nicht geschlossen Verpackung. wird. Wärme und Feuchtigkeit können 2.5 Innenbeleuchtung sich hinter einer geschlossenen Möbelplatte bilden und dadurch das...
-
Page 8: Gerätebeschreibung
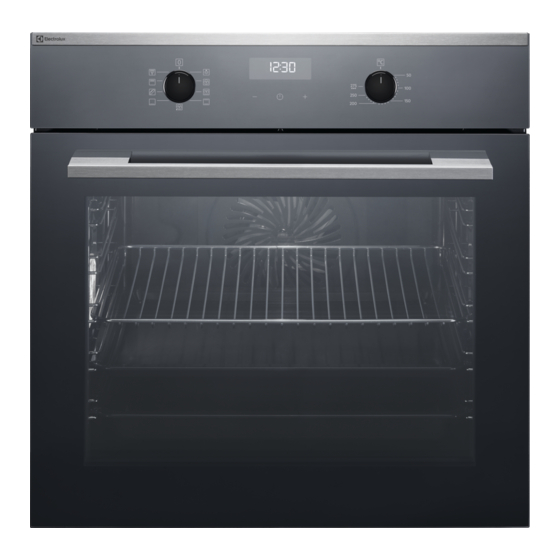
3. GERÄTEBESCHREIBUNG 3.1 Allgemeine Übersicht Bedienfeld Ofen-Einstellknopf Betriebsanzeige/-symbol Display Einstellknopf (für die Temperatur) Temperaturanzeige/-symbol Heizelement Lampe Ventilator Einhängegitter, herausnehmbar Garraumvertiefung Einschubebenen 3.2 Zubehörteile Für Kuchen und Plätzchen. Kuchenblech hochrandig Gitterrost Zum Backen und Braten oder zum Für Kochgeschirr, Kuchenformen, Auffangen von austretendem Fett. -
Page 9: Vor Dem Ersten Gebrauch
DEUTSCH 4.2 Sensorfelder/Tasten Zum Einstellen der Zeit. Zum Einstellen einer Uhrfunktion. Zum Einstellen der Zeit. 4.3 Display A. Uhrfunktionen B. Timer 5. VOR DEM ERSTEN GEBRAUCH WARNUNG! Siehe Kapitel „Sicherheitshinweise“. 5.1 Vor dem ersten Gebrauch Beim Vorheizen kann das Gerät Geruch und Rauch verströmen. Achten Sie darauf, dass der Raum gut belüftet ist. -
Page 10: Täglicher Gebrauch
6. TÄGLICHER GEBRAUCH WARNUNG! Schritt 2 Drehen Sie den Einstell‐ Siehe Kapitel knopf auf die gewünschte „Sicherheitshinweise“. Temperatur. 6.1 Einstellen: Ofenfunktion Schritt 3 Drehen Sie die Knöpfe in die Position Aus, um den Ofen nach Abschluss des Schritt 1 Drehen Sie den Backofen- Garvorgangs auszuschal‐... - Page 11 DEUTSCH 6.3 Ofenfunktionen Ofenfunktion Anwendung Ofenfunktion Anwendung Zum Anreichern der Luft mit Feuchtigkeit Der Ofen ist ausge‐ während des Garvor‐ schaltet. BakingPlus gangs. Für die richtige Stellung Farbe und eine knuspri‐ „Aus“ ge Kruste beim Backen. Für saftigere Speisen Zum Ein- und Ausschal‐ beim Aufwärmen.
-
Page 12: Uhrfunktionen
7. UHRFUNKTIONEN 7.1 Uhrfunktionen Uhrfunktion Anwendung Einstellen, Ändern oder Prüfen der Uhrzeit. Uhrzeit Einstellen der Einschaltdauer für den Ofen. Dauer Zum Einstellen eines Countdowns. Diese Funktion hat keine Auswirkung auf den Ofenbetrieb. Sie können die‐ Kurzzeit-Wecker se Funktion jederzeit einstellen, auch wenn der Ofen ausgeschaltet ist. -
Page 13: Verwenden Des Zubehörs
DEUTSCH Einstellen: Kurzzeit-Wecker Schritt 1 – wiederholt drücken. – beginnt zu blinken. Schritt 2 – drücken, um die Uhrzeit einzustellen. Die Funktion startet automatisch nach 5 Sekunden. Nach Ablauf der eingestellten Zeit ertönt der Signalton. Schritt 3 Drücken Sie eine beliebige Taste, um den Signalton abzustellen. Schritt 4 Drehen Sie die Knöpfe in die Aus-Position. -
Page 14: Zusatzfunktionen
Kuchenblech /Tiefes Kuchenblech: Schieben Sie das Blech zwischen die Führungsstäbe der Einhängegitter. Gitterrost, Kuchenblech /Tiefes Ku‐ chenblech: Schieben Sie das Blech zwischen die Führungsstäbe der Einhängegitter und den Gitterrost zwischen die Füh‐ rungsstäbe darüber. 9. ZUSATZFUNKTIONEN 9.1 Kühlgebläse dem Abschalten des Ofens läuft das Kühlgebläse weiter, bis der Ofen... - Page 15 DEUTSCH Verwenden Sie ein Kuchenblech. KUCHEN/KLEINGEBÄCK/BROT (ml) (° C) (min) Cookies / Scones / Croissants 150 - 180 10 - 20 Focaccia 200 - 210 10 - 20 Pizza 10 - 20 Brot/Brötchen 20 - 25 Brot 35 - 40 Pflaumenkuchen / Apfelkuchen / Zimtschnecken, 100 - 150 160 - 180 30 - 60...
- Page 16 10.4 Backtipps Backergebnis Mögliche Ursache Abhilfe Die Unterseite des Ku‐ Die Einschubebene ist Den Kuchen auf eine tiefere chens ist nicht ausrei‐ nicht richtig. Einschubebene stellen. chend gebacken. Der Kuchen fällt zu‐ Die Ofentemperatur ist zu Stellen Sie beim nächsten Mal sammen und wird hoch.
- Page 17 DEUTSCH BA‐ CKEN IN (° C) (min) FORMEN Käsekuchen Ober-/Unterhitze 170–190 60–90 Nutzen Sie die dritte Einschubebene. Verwenden Sie die Funktion: Heissluft. Verwenden Sie ein Kuchenblech. KUCHEN/KLEINGEBÄCK/ BROT (° C) (min) Streuselkuchen 150–160 20–40 Obstkuchen (aus Hefeteig/Rührteigmi‐ 35–55 schung), verwenden Sie ein tiefes Ku‐ chenblech Obstkuchen mit Mürbeteig 160–170...
- Page 18 KUCHEN/ KLEINGEBÄCK/ (° C) (min) BROT Hefekuchen mit 160–180 40–80 empfindlichen Belä‐ gen (z. B. Quark, Rahm, Pudding) Christstollen 160–180 50–70 Nutzen Sie die dritte Einschubebene. PLÄTZCHEN (° C) (min) Mürbeteig-Plätzchen Heissluft 150–160 10–20 Brötchen, Heizen Sie Heissluft 10–25 den leeren Backofen Rührteigplätzchen...
- Page 19 DEUTSCH (° C) (min) Lasagne, frisch Ober-/Unterhitze 180–200 25–40 Fischaufläufe Ober-/Unterhitze 180–200 30–60 Gefülltes Gemüse Heissluft 160–170 30–60 Süsse Aufläufe Ober-/Unterhitze 180–200 40–60 Nudelauflauf Ober-/Unterhitze 180–200 45–60 10.7 Backen auf mehreren Verwenden Sie die Kuchenbleche. Ebenen Verwenden Sie die Funktion: Heissluft. KUCHEN/ KLEINGEBÄCK (°...
- Page 20 PLÄTZCHEN/ (° C) (min) 2 Ebenen 3 Ebenen TÖRTCHEN/ GEBÄCK/ BRÖTCHEN Eiweissplät‐ 80–100 130–170 1 / 4 zen / Meringu‐ 10.8 Tipps zum Rösten Wenden Sie den Baten nach 1/2–2/3 der Garzeit. Verwenden Sie feuerfestes Ofengeschirr. Braten Sie grosse Fleisch- und Braten Sie magere Fleischstücke...
- Page 21 DEUTSCH SCHWEINEFLEISCH Verwenden Sie die Funktion: Heissluftgrillen. (kg) (°C) (min) Schulter / Hals / Schin‐ 1–1,5 160–180 90–120 kenstück Koteletts / Brustspitz 1–1,5 170–180 60–90 Hackbraten 0,75–1 160–170 50–60 Schweinshaxe, vorge‐ 0,75–1 150–170 90–120 gart KALB Verwenden Sie die Funktion: Heissluftgrillen. (kg) (°C) (min)
- Page 22 WILD Verwenden Sie die Funktion: Ober-/Unterhitze. (kg) (°C) (min) Rücken / Hasen‐ bis zu 1 30–40 keule, Heizen Sie den leeren Back‐ ofen vor Reh-/Hirschrücken 1,5–2 210–220 35–40 Reh-/Hirschkeule 1,5–2 180–200 60–90 GEFLÜGEL Verwenden Sie die Funktion: Heissluftgrillen. (kg) (°C)
- Page 23 DEUTSCH 10.10 Knusprig backen mit:Pizzastufe PIZZA PIZZA Heizen Sie den leeren Backofen vor dem Garen vor. Verwenden Sie die erste Ein‐ schubebene Verwenden Sie die zweite Ein‐ schubebene. (°C) (min) (°C) (min) Tarten 180–200 40–55 Blätterteig‐ 160–180 45–55 Spinatqui‐ 160–180 45–60 quiche Flammku‐...
- Page 24 GRILLSTUFE 2 GRILLSTUFE 2 Falls nicht anderweitig angege‐ Falls nicht anderweitig angege‐ ben, verwenden Sie die vierte Ein‐ ben, verwenden Sie die vierte Ein‐ schubebene. schubebene. Verwenden Sie die Funktion: Verwenden Sie die Funktion: Grillstufe 2 Grillstufe 2 Mit der Höchsttemperaturein‐...
- Page 25 DEUTSCH AUFTAUEN Verwenden Sie die Funktion: Heissluft. (°C) (min) Rösti 210–230 20–30 Lasagne, frisch / Cannel‐ 170–190 35–45 loni, frisch Lasagne, frisch / Cannel‐ 160–180 40–60 loni, gefroren Gebackener Käse 170–190 20–30 Pouletflügeli 190–210 20–30 10.13 Einkochen Verwenden Sie die Funktion Unterhitze. BEEREN‐...
- Page 26 GE‐ GEMÜSE MÜSE (min) (min) (° C) Einkochen Weiterko‐ Peperoni 60–70 5–6 bis Perlbe‐ chen bei ginn 100 °C Suppengemüse 60–70 5–6 Karotten 50–60 5–10 Pilze 50–60 6–8 Gurken 50–60 Kräuter 40–50 2–3 Mixed Pick‐ 50–60 5–10 Stellen Sie die Temperatur auf 60–70 °C.
- Page 27 DEUTSCH 10.16 Feuchte Heissluft Für beste Ergebnisse befolgen Sie die in der Tabelle unten aufgeführten Empfehlungen. (°C) (Min.) Grissini, insgesamt 0,5 kg) 190 - 200 50 - 60 Jakobsmuscheln, in der Schale ge‐ 180 - 200 30 - 40 backen Fisch, ganz in Salzkruste, 0,3 - 0,5 190 - 200 45 - 50...
- Page 28 BACKEN AUF EINER EINSCHUBEBENE. Plätzchen Nutzen Sie die dritte Einschubebene. (°C) (min) Buttergebäck / Feinge‐ Heissluft 25–40 bäck Buttergebäck / Feinge‐ Ober-/Unterhitze 20–30 bäck, Heizen Sie den leeren Backofen vor Törtchen, 20 pro Blech, Heissluft 20–35 Heizen Sie den leeren Backofen vor Törtchen, 20 pro Blech,...
-
Page 29: Reinigung Und Pflege
DEUTSCH GRILLSTUFE 2 Heizen Sie den leeren Ofen 3 Minuten lang vor. Grillen Sie bei Höchsttemperatureinstellung. Nutzen Sie die vierte Einschubebene. (min) Erste Seite Zweite Seite Frikadellen 8–10 6–8 Toast 1–3 1–3 11. REINIGUNG UND PFLEGE WARNUNG! Siehe Kapitel „Sicherheitshinweise“. 11.1 Anmerkungen zur Reinigung Reinigen Sie die Vorderseite des Ofens mit einem weichen Tuch, warmem Wasser und einem milden Reinigungsmittel. - Page 30 11.2 Reinigung: Garraumvertiefung Reinigen Sie die Garraumvertiefung, um Kalkreste nach dem Dampfgaren zu entfernen. Schritt 1 Schritt 2 Schritt 3 Giessen Sie: 250 ml weis‐ Lassen Sie den Essig bei Reinigen Sie die Garraum‐ sen Essig in die Garraum‐...
- Page 31 DEUTSCH Schritt 1 Schalten Sie den Ofen aus und lassen Sie ihn völlig ab‐ kühlen, bevor Sie ihn reinigen. Entfernen Sie die Einhänge‐ gitter. Schritt 2 Fassen Sie die Ecken des Grills. Ziehen Sie ihn gegen die Federkraft nach vorne und aus beiden Halterungen he‐...
- Page 32 Schritt 4 Fassen Sie die Türabde‐ ckung (B) an der Ober‐ kante der Tür an beiden Seiten an. Drücken Sie sie nach innen, um den Klipp‐ verschluss zu lösen. Schritt 5 Ziehen Sie die Türabde‐ ckung nach vorne, um sie abzunehmen.
-
Page 33: Fehlerdiagnose
DEUTSCH Obere Lampe Schritt 1 Drehen Sie die Glasabdeckung und nehmen Sie sie ab. Schritt 2 Reinigen Sie die Glasabdeckung. Schritt 3 Ersetzen Sie die Lampe durch eine bis 300 °C hitzebeständige Halogen‐ lampe mit 230 V und 40 W. Schritt 4 Bringen Sie die Glasabdeckung wieder an. -
Page 34: Energieeffizienz
12.2 Servicedaten zu finden. Das Typenschild befindet sich auf der vorderen Rahmen des Wenn Sie selbst keine Lösung für das Backofengarraums. Das Typenschild darf Problem finden, kontaktieren Sie Ihren nicht vom Backofengarraum entfernt Händler odereinen autorisierten werden. Kundendienst. Die erforderlichen Daten für den... -
Page 35: Garantie
DEUTSCH EN 60350-1 – Elektrische Kochgeräte für den Hausgebrauch – Teil 1: Herde, Back‐ öfen, Dampfgarer und Grillgeräte – Verfahren zur Messung der Gebrauchseigen‐ schaften. 13.2 Energie sparen Restwärme Wenn die Garzeit länger als 30 min ist, Der Ofen verfügt über reduzieren Sie die Ofentemperatur vor Funktionen, mit deren Hilfe Ende des Garvorgangs auf mindestens... - Page 36 Garantie Für jedes Produkt gewähren Nichtbeachtung der wir ab Verkauf bzw. Lieferdatum an den Gebrauchsanweisung und Endverbraucher eine Garantie von 2 Betriebsvorschriften, unsachgerechter Jahren. (Ausweis durch Garantieschein, Installation, sowie bei Beschädigung Faktura oder Verkaufsbeleg). Die durch äussere Einflüsse, höhere Gewalt, Garantieleistung umfasst die Kosten für...
- Page 40 www.electrolux.com/shop...
- Page 41 EB6L50DCN EB6L50DSP EB6L5DCN EB6L5DSP Oven User Manual...
- Page 42 13. GUARANTEE ....................30 WE’RE THINKING OF YOU Thank you for purchasing an Electrolux appliance. You’ve chosen a product that brings with it decades of professional experience and innovation. Ingenious and stylish, it has been designed with you in mind. So whenever you use it, you can be safe in the knowledge that you’ll get great results every time.
-
Page 43: Safety Information
ENGLISH SAFETY INFORMATION Before the installation and use of the appliance, carefully read the supplied instructions. The manufacturer is not responsible for any injuries or damages that are the result of incorrect installation or usage. Always keep the instructions in a safe and accessible location for future reference. -
Page 44: Safety Instructions
Always use oven gloves to remove or put in • accessories or ovenware. Before carrying out any maintenance, disconnect the • appliance from the power supply. Ensure that the appliance is switched off before • replacing the lamp to avoid the possibility of electric shock. - Page 45 ENGLISH • Make sure that the parameters on the • Do not let the appliance stay rating plate are compatible with the unattended during operation. electrical ratings of the mains power • Deactivate the appliance after each supply. use. • Always use a correctly installed •...
- Page 46 Heat • Do not clean the catalytic enamel (if and moisture can build up behind a applicable) with any kind of detergent. closed furniture panel and cause 2.5 Internal lighting subsequent damage to the appliance, the housing unit or the floor.
-
Page 47: Product Description
ENGLISH 3. PRODUCT DESCRIPTION 3.1 General overview Control panel Knob for the heating functions Power lamp / symbol Display Knob for the temperature Temperature indicator / symbol Heating element Lamp Shelf support, removable Cavity embossment Shelf positions 3.2 Accessories For cakes and biscuits. Grill- / Roasting pan Wire shelf To bake and roast or as a pan to collect... -
Page 48: Daily Use
Clean the oven and the accessories Put the accessories and the removable before first use. shelf supports back to their initial position. 5. DAILY USE WARNING! Oven func‐ Application Refer to Safety chapters. tion 5.1 Retractable knobs To bake food on one... - Page 49 ENGLISH Oven func‐ Application Oven func‐ Application tion tion This function is de‐ To roast larger meat signed to save energy joints or poultry with during cooking. For bones on one shelf po‐ Moist Fan Turbo Grilling more information refer sition.
-
Page 50: Clock Functions
WARNING! Make sure that the oven is cold before you remove the remaining water from the cavity embossment. 5.5 Display A. Function indicators B. Time display C. Function indicator 5.6 Buttons Sensor field / Button Function Description MINUS To set the time. -
Page 51: Using The Accessories
ENGLISH Press the to set the correct 2. Press again and again until time. starts to flash. After approximately five seconds, the 3. Press to set the time for flashing stops and the display shows the DURATION. time of day you set. 4. -
Page 52: Additional Functions
Push the shelf between the guide bars of Wire shelf and baking tray / deep pan the shelf support and make sure that the together: feet point down. Push the baking tray / deep pan between the guide bars of the shelf support and the wire shelf on the guide bars above. - Page 53 ENGLISH Use the baking tray. Use the second shelf position. Food Water in the cavity Temperature (°C) Time (min) embossment (ml) Cookies, scones, 150 - 180 10 - 20 croissants Focaccia 200 - 210 10 - 20 Pizza 10 - 20 Bread rolls 20 - 25 Bread...
- Page 54 • You can extend baking times by 10 – 15 minutes if you bake cakes on more Food Tem‐ than one shelf position. pera‐ • Cakes and pastries at different ture (min heights do not always brown equally. (°C)
- Page 55 ENGLISH 9.5 Baking on one level: Baking in tins Food Function Temperature Time (min) Shelf position (°C) Ring cake / True Fan 150 - 160 50 - 70 Brioche Cooking Madeira cake / True Fan 140 - 160 70 - 90 Fruit cakes Cooking Flan base -...
- Page 56 Food Function Tempera‐ Time Shelf po‐ ture (°C) (min) sition Fruit flans made with short True Fan Cooking 160 - 170 40 - 80 pastry Yeast cakes with delicate Top / Bottom 40 - 80 160 - 180 toppings (e.g. quark, cream,...
- Page 57 ENGLISH Food Function Temperature Time (min) Shelf position (°C) Vegetables au Turbo Grilling 160 - 170 15 - 30 gratin Baguettes top‐ True Fan Cook‐ 160 - 170 15 - 30 ped with mel‐ ted cheese Sweet bakes Top / Bottom 180 - 200 40 - 60 Heat...
- Page 58 Cakes / pastries / breads on baking trays Food Temperature Time (min) Shelf position (°C) 2 positions 3 positions Cream puffs / 25 - 45 1 / 4 160 - 180 Eclairs Dry streusel 150 - 160 30 - 45...
- Page 59 ENGLISH Food Temperature (°C) Time (min) Shelf position Apple cake, cov‐ 150 - 170 50 - 60 ered Vegetable pie 160 - 180 50 - 60 Unleavened bread 10 - 20 230 - 250 Puff pastry flan 45 - 55 160 - 180 Flammekuchen 12 - 20...
- Page 60 Pork Food Quantity Function Tempera‐ Time (min) Shelf posi‐ (kg) ture (°C) tion Shoulder / 1 - 1.5 Turbo Grill‐ 160 - 180 90 - 120 Neck / Ham joint Chop / Spare 1 - 1.5 Turbo Grill‐ 170 - 180...
- Page 61 ENGLISH Poultry Food Quantity Function Tempera‐ Time (min) Shelf posi‐ (kg) ture (°C) tion Poultry por‐ 0.2 - 0.25 Turbo Grill‐ 200 - 220 30 - 50 tions each Half chicken 0.4 - 0.5 Turbo Grill‐ 190 - 210 35 - 50 each Chicken, 1 - 1.5...
- Page 62 9.13 Frozen Foods Use the function True Fan Cooking. Food Temperature (°C) Time (min) Shelf position Pizza, frozen 200 - 220 15 - 25 Pizza American, 190 - 210 20 - 25 frozen Pizza, chilled 210 - 230 13 - 25 Pizza Snacks, fro‐...
- Page 63 ENGLISH Stone fruit Food Temperature (°C) Cooking time until Continue to cook simmering (min) at 100 °C (min) Pears / Quinces / 160 - 170 35 - 45 10 - 15 Plums Vegetables Food Temperature (°C) Cooking time until Continue to cook simmering (min) at 100 °C (min) 160 - 170...
- Page 64 9.16 Information for test institutes Tests according to EN 60350-1:2013 and IEC 60350-1:2011. Baking on one level. Baking in tins Food Function Temperature Time Shelf posi‐ (°C) (min) tion Fatless sponge cake True Fan Cooking 140 - 150 35 - 50...
-
Page 65: Care And Cleaning
ENGLISH Food Function Temperature Time (min) Shelf posi‐ (°C) tion Toast Grilling 1 - 3 Beef Steak Grilling 24 - 30 1) Turn halfway through. Fast Grilling Preheat the empty oven for 3 minutes. Grill with the maximum temperature setting. Food Time (min) Shelf position... - Page 66 1. Pull the front of the shelf support away from the side wall. 2. Pull the rear end of the shelf support away from the side wall and remove The heating element folds down. 3. Clean the oven ceiling.
-
Page 67: Troubleshooting
ENGLISH 6. Hold the door trim (B) on the top 1. Turn off the oven. edge of the door at the two sides and Wait until the oven is cooled down. push inwards to release the clip seal. 2. Disconnect the oven from the mains. 3. - Page 68 11.1 What to do if... Problem Possible cause Remedy You cannot activate or op‐ The oven is incorrectly Check if the oven is cor‐ erate the oven. The display connected to an electrical rectly connected to the shows “400” and an acous‐...
-
Page 69: Energy Efficiency
Product number (PNC) ......... Serial number (S.N.) ......... 12. ENERGY EFFICIENCY 12.1 Product Fiche and information according to EU 65-66/2014 Supplier's name Electrolux EB6L50DCN EB6L50DSP Model identification EB6L5DCN EB6L5DSP Energy Efficiency Index 81.2 Energy efficiency class Energy consumption with a standard load, con‐... -
Page 70: Guarantee
12.2 Energy saving the duration of the cooking. The residual heat inside the oven will continue to The oven contains features cook. which help you save energy Use the residual heat to warm up other during everyday cooking. dishes. - Page 71 ENGLISH 14. ENVIRONMENTAL CONCERNS Recycle materials with the symbol For Switzerland: Put the packaging in relevant containers Where should you take your to recycle it. Help protect the old equipment? environment and human health by Anywhere that sells new recycling waste of electrical and equipment or hand it in to electronic appliances.
- Page 72 www.electrolux.com/shop...
- Page 73 EB6L50DSP EB6L5DSP Four Notice d'utilisation Profiter pleinement de vos appareils électroménagers Pour un accès rapide aux modes d’emploi en ligne, guides pratiques, aide et plus encore, enregistrez vos produits via photo en visitant electrolux.com/register...
- Page 74 14. GARANTIE..................... 34 NOUS PENSONS À VOUS Merci d'avoir acheté un appareil Electrolux. Vous avez choisi un produit qui bénéficie de décennies d'expérience professionnelle et d'innovation. Ingénieux et élégant, cet appareil a été conçu pour vous. C'est la raison pour laquelle vous pouvez avoir la certitude d'obtenir d'excellents résultats à...
-
Page 75: Information Sur La Sécurité
FRANÇAIS INFORMATION SUR LA SÉCURITÉ Avant d'installer et d'utiliser cet appareil, lisez soigneusement les instructions fournies. Le fabricant ne pourra être tenu pour responsable des blessures et dégâts résultant d'une mauvaise installation ou utilisation. Conservez toujours les instructions dans un lieu sûr et accessible pour vous y référer ultérieurement. -
Page 76: Consignes De Sécurité
AVERTISSEMENT : L'appareil et ses parties • accessibles deviennent chauds pendant son fonctionnement. Veillez à ne pas toucher les éléments chauffants. Utilisez toujours des gants de cuisine pour retirer ou • enfourner des accessoires ou des plats allant au four. - Page 77 FRANÇAIS 2.2 Raccordement électrique • Installez l'appareil dans un lieu sûr et adapté répondant aux exigences d'installation. AVERTISSEMENT! • Respectez l'espacement minimal Risque d'incendie ou requis par rapport aux autres d'électrocution. appareils et éléments. • Tous les raccordements électriques • Avant de monter l’appareil, vérifiez si doivent être effectués par un la porte du four s’ouvre sans retenue.
- Page 78 3 mm – ne posez pas de plats allant au minimum. four ni aucun autre objet • Cet appareil est livré sans fiche ni directement sur le fond de câble d'alimentation. l'appareil. – ne placez jamais de feuilles 2.3 Utilisation...
-
Page 79: Description De L'appareil
FRANÇAIS • Remplacez immédiatement les vitres Ne l'utilisez pas pour éclairer votre de la porte si elles sont logement. endommagées. Contactez le service • Avant de changer l'ampoule, après-vente agréé. débranchez l'appareil de la prise • Soyez prudent lorsque vous retirez la secteur. -
Page 80: Bandeau De Commande
3.2 Accessoires Pour gâteaux et biscuits. Plat à rôtir Grille métallique Pour cuire et griller ou à utiliser comme Pour les plats à rôti, à gratin et les plat pour recueillir la graisse. moules à gâteau/pâtisserie. Plateau de cuisson 4. -
Page 81: Avant La Première Utilisation
FRANÇAIS 5. AVANT LA PREMIÈRE UTILISATION AVERTISSEMENT! Reportez-vous aux chapitres concernant la sécurité. 5.1 Avant la première utilisation Le four peut produire une odeur et de la fumée lors du préchauffage. Assurez-vous que la pièce est ventilée. Étape 1 Étape 2 Étape 3 Réglez l'horloge Nettoyez le four... - Page 82 Étape 2 Remplissez le bac de la cavité avec de l'eau du robinet. Le bac de la cavité a une contenance maximale de 250 ml. Ne remplissez pas le bac de la cavité en cours de cuisson, ou lorsque le four est chaud.
-
Page 83: Fonctions De L'horloge
FRANÇAIS Durant certaines fonctions, Mode de Application l'éclairage s'éteint cuisson automatiquement lorsque le four atteint une température Pour cuire des gâteaux inférieure à 60 °C. à fond croustillant et pour stériliser des ali‐ Cuisson de 6.4 Remarques sur : Chaleur ments. - Page 84 Comment modifier : Heure Dans le cas d'une coupure de courant durant 1 h maximum, l'heure est affichée et le voyant clignote. Assurez-vous que l'heure est correcte puis appuyez sur la touche pour faire cesser le clignotement. Étape 1 - appuyez à...
-
Page 85: Utilisation Des Accessoires
FRANÇAIS 8. UTILISATION DES ACCESSOIRES indentations sont également des AVERTISSEMENT! dispositifs anti-bascule. Le rebord élevé Reportez-vous aux chapitres de la grille empêche les ustensiles de concernant la sécurité. cuisine de glisser. 8.1 Insertion des accessoires Une petite indentation sur le dessus apporte plus de sécurité. -
Page 86: Fonctions Supplémentaires
9. FONCTIONS SUPPLÉMENTAIRES 9.1 Ventilateur de refroidir les surfaces du four. Si vous éteignez le four, le ventilateur de refroidissement refroidissement continue à fonctionner jusqu'à ce que le four refroidisse. Lorsque le four fonctionne, le ventilateur de refroidissement se met automatiquement en marche pour 10. - Page 87 FRANÇAIS Utilisez 200 ml d'eau. Utilisez un plat de cuisson en verre. PLATS PRÉPA‐ RÉS SURGELÉS (°C) (min) RÔTIR Pizza 200 - 10 - (°C) (min) Rôti de bœuf 200 50 - 60 Croissants 170 - 15 - Poulet 60 - 80 Lasagne, utilisez 200 ml 180 - 35 - Rôti de porc...
- Page 88 Résultats de cuisson Cause possible Solution Le gâteau est trop sec. Température de cuisson La prochaine fois, réglez une trop basse. température du four plus éle‐ vée. Durée de cuisson trop lon‐ La prochaine fois, réduisez le gue. temps de cuisson.
- Page 89 FRANÇAIS GÂTEAUX / PÂTISSERIES / PAINS (°C) (min) Gâteau avec garniture à base de crum‐ 150 - 160 20 - 40 Flans aux fruits (à base de pâte levée/ 35 - 55 mélange de génoise), utilisez un plat à rôtir Flans aux fruits à...
- Page 90 BISCUITS (°C) (min) Biscuits à pâte brisée Chaleur tournante 150 - 160 10 - 20 Petits pains, préchauf‐ Chaleur tournante 160 10 - 25 fer le four à vide Biscuits à base de mé‐ Chaleur tournante 150 - 160 15 - 20 lange de génoise...
- Page 91 FRANÇAIS GÂ‐ TEAUX / PÂTISSE‐ (°C) (min) 2 positions RIES Choux à la crème / 160 - 180 25 - 45 1 / 4 Éclairs, préchauffer le four à vide Gâteau Streusel 150 - 160 30 - 45 1 / 4 BIS‐...
- Page 92 10.9 Rôtissage Utilisez le premier niveau de la grille. BŒUF (°C) (min) Braisé 1 - 1,5 kg Chauffage 120 - 150 Haut/ Bas Rôti ou filet de par cm Turbo gril 190 - 200 5 - 6 bœuf, saignant, d'épaisseur...
- Page 93 FRANÇAIS VEAU Utilisez la fonction : Turbo gril. (kg) (°C) (min) Rôti de veau 160 - 180 90 - 120 Jarret de veau 1.5 - 2 160 - 180 120 - 150 AGNEAU Utilisez la fonction : Turbo gril. (kg) (°C) (min) Gigot d’agneau /...
- Page 94 VOLAILLE Utilisez la fonction : Turbo gril. (kg) (°C) (min) Volaille, portions 0,2 - 0,25 chacun 200 - 220 30 - 50 Poulet, demi 0,4 - 0,5 chacun 190 - 210 35 - 50 Poulet, poularde 1 - 1.5...
- Page 95 FRANÇAIS 10.11 Gril Avant la cuisson, faites préchauffer votre PIZZA four vide. Ne faites griller que des morceaux plats de viande ou de poisson. Utilisez le premier niveau de la Placez un plat au premier niveau pour grille. récupérer les graisses. (°C) (min) GRIL FORT...
- Page 96 10.12 Plats surgelés DÉCONGÉLATION Utilisez la fonction : Chaleur tournante. (°C) (min) Pizza, surgelée 200 - 220 15 - 25 Pizza épaisse, surgelée 190 - 210 20 - 25 Pizza, fraîche 210 - 230 13 - 25 Bouchées de pizza, sur‐...
- Page 97 FRANÇAIS Pour obtenir un meilleur résultat, arrêtez le four à la moitié de la durée de déshydratation, ouvrez la porte et laissez BAIES refroidir pendant une nuit pour terminer (min) le séchage. Cuisson jusqu'à Pour une plaque, utilisez le troisième ce que la prépa‐...
- Page 98 Ramequins Moule pour fond Plaque à pizza Plat de cuisson de tarte Céramique Foncé, non réfléchis‐ Foncé, non réfléchis‐ Foncé, non réflé‐ 8 cm de dia‐ sant sant chissant mètre, 5 cm Diamètre : 28 cm Diamètre : 26 cm Diamètre : 28 cm...
- Page 99 FRANÇAIS CUISSON SUR UN SEUL NIVEAU. Cuisson dans des moules (°C) (min) Génoise allégée Chaleur tournante 140 - 150 35 - 50 Génoise allégée Chauffage Haut/ 35 - 50 Tourte aux pommes, Chaleur tournante 60 - 90 2 moules Ø20 cm Tourte aux pommes, Chauffage Haut/ 70 - 90...
-
Page 100: Entretien Et Nettoyage
CUISSON SUR PLUSIEURS NIVEAUX. Biscuits/Gâteaux secs (°C) (min) Petits gâteaux, 20 par Chaleur tournante 23 - 40 1 / 4 plateau, préchauffer le four à vide Génoise allégée Chaleur tournante 35 - 50 1 / 4 GRIL FORT Préchauffez toujours le four à vide pendant 3 minutes. - Page 101 FRANÇAIS Nettoyez la cavité après chaque utilisation. L’accumulation de graisse ou d’autres résidus peut provoquer un incendie. Ne conservez pas les aliments dans le four pendant plus de 20 minu‐ Utilisation tes. Sécher la cavité avec un chiffon doux après chaque utilisation. quotidienne Après chaque utilisation, lavez tous les accessoires et séchez-les.
- Page 102 Étape 3 Écartez l'arrière du support de grille de la paroi latérale et retirez le support. Étape 4 Réinstallez les supports de grille en répétant cette pro‐ cédure dans l'ordre inverse. 11.4 Comment enlever : Gril AVERTISSEMENT! Risque de brûlure ! Étape 1...
- Page 103 FRANÇAIS Étape 1 Ouvrez entièrement la porte. Étape 2 Appuyez complètement sur les leviers de bloca‐ ge (A) sur les deux char‐ nières de la porte. Étape 3 Fermez la porte du four à la première position (angle d'environ 70°). Te‐ nez la porte des deux côtés et retirez-la du four en la soulevant.
-
Page 104: Dépannage
Avant de remplacer l'éclairage : Étape 1 Étape 2 Étape 3 Éteignez le four. Attendez Débranchez le four de l'ali‐ Placez un chiffon au fond que le four ait refroidi. mentation secteur. de la cavité. Lampe supérieure Étape 1 Tournez le diffuseur en verre pour le retirer. -
Page 105: Rendement Énergétique
Référence du produit (PNC) ......... Numéro de série (S.N.) ......... 13. RENDEMENT ÉNERGÉTIQUE 13.1 Informations produit et Fiche d’informations produit* Nom du fournisseur Electrolux EB6L50DSP 944271515 Identification du modèle EB6L5DSP 944271513 Index d'efficacité énergétique 81.2 Classe d’efficacité énergétique Consommation d'énergie avec charge standard et 1.09 kWh/cycle... -
Page 106: Garantie
EN 60350-1 - Appareils de cuisson domestiques électriques - Partie 1 : Plages, fours, fours à vapeur et grils - Méthodes de mesure des performances. 13.2 Économie d'énergie Chaleur résiduelle Si la cuisson doit durer plus de Ce four est doté de 30 minutes, réduisez la température du... - Page 107 FRANÇAIS Garantie Nous octroyons sur chaque de garantie ne sont pas valables en cas produit 2 ans de garantie à partir de la d’intervention d’un tiers non autorisé, de date de livraison ou de la mise en l’emploi de pièces de rechange non service au consommateur (documenté...
- Page 108 www.electrolux.com/shop...
- Page 109 EB6L50DSP EB6L5DSP Forno Istruzioni per l’uso Ottieni il massimo dal tuo elettrodomestico Registra il tuo prodotto per accedere al manuale digitale e a tanti altri contenuti esclusivi. Scopri di più su electrolux.com/register...
- Page 110 13. EFFICIENZA ENERGETICA................34 14. GARANZIA..................... 35 PENSATI PER VOI Grazie per aver acquistato un'apparecchiatura Electrolux. Avete scelto un prodotto che ha alle spalle decenni di esperienza professionale e innovazione. Ingegnoso ed elegante, è stato progettato pensando a voi. Quindi, in qualsiasi momento desiderate utilizzarlo, potete esser certi di ottenere sempre i migliori risultati.
-
Page 111: Informazioni Di Sicurezza
ITALIANO INFORMAZIONI DI SICUREZZA Leggere attentamente le istruzioni fornite prima di installare e utilizzare l'apparecchiatura. I produttori non sono responsabili di eventuali lesioni o danni derivanti da un'installazione o un uso scorretti. Conservare sempre le istruzioni in un luogo sicuro e accessibile per poterle consultare in futuro. -
Page 112: Istruzioni Di Sicurezza
AVVERTENZA: L'apparecchiatura e le parti accessibili • si riscaldano molto durante l'uso. Abbiate cura di non toccare gli elementi riscaldanti. Servirsi sempre degli appositi guanti da forno per • estrarre o inserire accessori o pentole resistenti al calore. Prima di qualsiasi intervento di manutenzione, •... - Page 113 ITALIANO • Non tirare l’apparecchiatura per la maniglia. Dimensioni minime 560 x 20 mm • Installare l'apparecchiatura in un dell'apertura di ven‐ luogo sicuro e idoneo che soddisfi i tilazione. Apertura requisiti di installazione. collocata sul lato • È necessario rispettare la distanza posteriore inferiore minima dalle altre apparecchiature.
- Page 114 • Servirsi unicamente di dispositivi di all'apparecchiatura quando si apre la isolamento adeguati: interruttori porta. automatici, fusibili (quelli a tappo • Non appoggiare o tenere liquidi o devono essere rimossi dal materiali infiammabili, né oggetti portafusibile), sganciatori per correnti facilmente incendiabili di guasto a terra e relè.
-
Page 115: Descrizione Del Prodotto
ITALIANO 2.5 Illuminazione interna completamente raffreddata dopo l'uso. AVVERTENZA! 2.4 Pulizia e cura Pericolo di scosse elettriche. AVVERTENZA! • Le lampadine utilizzate in questa Vi è il rischio di lesioni, apparecchiatura sono lampade incendio o danni speciali per elettrodomestici. Non all'apparecchiatura. -
Page 116: Pannello Dei Comandi
Supporto ripiano, smontabile Posizioni dei ripiani Incavo cavità 3.2 Accessori Per la cottura di torte e biscotti. leccarda Griglia Per cuocere al forno, arrostire o come Per pentole, stampi per dolci, arrosti. recipiente per raccogliere i grassi. Lamiera dolci 4. -
Page 117: Prima Di Utilizzare L'elettrodomestico
ITALIANO 5. PRIMA DI UTILIZZARE L'ELETTRODOMESTICO AVVERTENZA! Fare riferimento ai capitoli sulla sicurezza. 5.1 Prima di utilizzare l'elettrodomestico Il forno può produrre un odore sgradevole e fumo in fase di pre-riscaldamento. Accertarsi che la stanza sia ventilata. Fase 1 Fase 2 Fase 3 Impostare l'ora Pulire il forno... - Page 118 Fase 2 Riempire l'incavo della cavità con acqua di rubinetto. La capacità massima del‐ l'incavo della cavità è 250 ml. Non riempire l'incavo della ca‐ vità con acqua durante la cot‐ tura o quando il forno è caldo. Fase 3 Mettere gli alimenti in forno.
-
Page 119: Funzioni Del Timer
ITALIANO 6.4 Note su: Cottura ventilata umida Funzione Applicazione cottura Questa funzione è stata usata per Per cuocere torte dal attenersi alla classe energetica e ai fondo croccante e con‐ requisiti di ecodesign conformemente servare gli alimenti. alla normativa EU 65/2014 e EU Resistenza 66/2014. - Page 120 7.2 Come impostare: Funzioni dell’orologio Come sostituire: Imposta ora - lampeggia quando si collega il forno all'alimentazione elettrica, quando c'è stato un blackout o quando il timer non è impostato. In caso di black-out fino a un tempo massimo di 1 ora, viene visualizzata l'ora del giorno e lampeggia.
-
Page 121: Utilizzo Degli Accessori
ITALIANO Come annullare: Funzioni dell’orologio Fase 2 Premere e tenere premuto: La funzione orologio si disattiva dopo pochi secondi. 8. UTILIZZO DEGLI ACCESSORI fungono anche da dispositivi AVVERTENZA! antiribaltamento. Il bordo alto intorno al Fare riferimento ai capitoli ripiano evita che le pentole scivolino dal sulla sicurezza. -
Page 122: Funzioni Aggiuntive
9. FUNZIONI AGGIUNTIVE 9.1 Ventola di raffreddamento superfici del forno. Dopo aver spento il forno, la ventola di raffreddamento Quando il forno è in funzione, la ventola continua a funzionare fino a che il forno di raffreddamento si accende in modo non si è... - Page 123 ITALIANO PIETANZE RIGENERA‐ PRONTE SURGELATE (°C) (min) ZIONE DELLE PIE‐ (min) TANZE Pizza 200 - 10 - Verdure 15 - 25 Croissant 170 - 15 - Usare 200 ml di acqua. Usare un piatto di cottura in vetro. Lasagne, usare 200 ml 180 - 35 - ARRO‐...
- Page 124 Risultati di cottura Causa possibile Rimedio La torta si affloscia e La temperatura del forno è La prossima volta impostare la diventa inzuppata o troppo alta. temperatura del forno legger‐ striata. mente inferiore. La temperatura del forno è La prossima volta impostare un troppo alta e il tempo di tempo di cottura più...
- Page 125 ITALIANO COTTURA IN (°C) (min) STAMPI Cheesecake Cottura convenziona‐ 170 - 190 60 - 90 Utilizzare la posizione del terzo ripiano. Utilizzare la funzione: Cottura ventilata. Usare una piastra di cottura. TORTE / DOLCI / PANE (°C) (min) Dolce secco con granelli di zucchero 150 - 160 20 - 40 Torte di frutta (realizzati con pasta lievi‐...
- Page 126 TORTE / DOLCI / PANE (°C) (min) Ciambelle lievitate 160 - 180 40 - 80 guarnite (ad es. con formaggio morbido, panna, crema) Christstollen 160 - 180 50 - 70 Utilizzare la posizione del terzo ripiano. BISCOTTI (°C) (min)
- Page 127 ITALIANO (°C) (min) Lasagne Cottura convenziona‐ 180 - 200 25 - 40 Sformati di pesce Cottura convenziona‐ 180 - 200 30 - 60 Verdure farcite Cottura ventilata 160 - 170 30 - 60 Dolci al forno Cottura convenziona‐ 180 - 200 40 - 60 Pasta al forno Cottura convenziona‐...
- Page 128 BI‐ SCOTTI / TOR‐ (°C) (min) 2 posizioni 3 posizioni TE PICCOLE / PASTA / ROLL Biscotti realiz‐ 160 - 170 30 - 60 1 / 4 zati con pasta lievitata Macarons 100 - 120 40 - 80 1 / 4...
- Page 129 ITALIANO MAIALE Utilizzare la funzione: Turbo Grill. (kg) (°C) (min.) Spalla / Coppa / Co‐ 1 - 1.5 160 - 180 90 - 120 scia Braciole / Costoletta di 1 - 1.5 170 - 180 60 - 90 maiale Polpettone di carne 0.75 - 1 160 - 170 50 - 60...
- Page 130 SELVAGGINA Utilizzare la funzione: Cottura convenzionale. (kg) (°C) (min.) Sella / Coscia di le‐ fino a 1 30 - 40 pre, preriscaldare il forno vuoto Sella di cervo 1.5 - 2 210 - 220 35 - 40 Coscia di capriolo 1.5 - 2...
- Page 131 ITALIANO 10.10 Cottura croccante con:Funzione Pizza IMPOSTAZIONE IMPOSTAZIONE Preriscaldare il forno vuoto pri‐ ma di iniziare a utilizzarlo. Utilizzare la posizione del pri‐ mo ripiano. Utilizzare la posizione del se‐ condo ripiano. (°C) (min.) (°C) (min.) Torte 180 - 200 40 - 55 Torta di pa‐...
- Page 132 GRILL RAPIDO GRILL RAPIDO Usare la quarta posizione del Usare la quarta posizione del ripiano, salvo indicazione contraria. ripiano, salvo indicazione contraria. Utilizzare la funzione: Griglia Utilizzare la funzione: Griglia rapida rapida Grigliare con l'impostazione di Grigliare con l'impostazione di temperatura massima.
- Page 133 ITALIANO SBRINAMENTO Utilizzare la funzione: Cottura ventilata. (°C) (min.) Lasagne / Cannelloni, 170 - 190 35 - 45 freschi Lasagne / Cannelloni, 160 - 180 40 - 60 surgelati Cheesecake cotta 170 - 190 20 - 30 Ali di pollo 190 - 210 20 - 30 10.13 Marmellate/Conserve...
- Page 134 VERDURE VERDURE (min) (min) (°C) (ore) Tempi di Tempi di Fagioli 60 - 70 6 - 8 cottura fi‐ cottura re‐ no alla stanti a Peperoni 60 - 70 5 - 6 comparsa 100°C Verdure per mine‐ 60 - 70...
- Page 135 ITALIANO (°C) (min.) Grissini, 0,5 kg in totale 190 - 200 50 - 60 Capesante cotte 180 - 200 30 - 40 Pesce intero in sale, 0,3 - 0,5 kg 190 - 200 45 - 50 Pesce intero in carta da forno, 0,3 - 190 - 200 50 - 60 0,5 kg...
- Page 136 COTTURA SU UN LIVELLO Biscotti Utilizzare la posizione del terzo ripiano. (°C) (min) Frollini al burro / Strisce Cottura ventilata 25 - 40 di pasta Frollini al burro / Strisce Cottura convenzionale 160 20 - 30 di pasta, preriscaldare il...
-
Page 137: Pulizia E Cura
ITALIANO GRILL RAPIDO Preriscaldare il forno vuoto per 3 minuti. Grigliare con l'impostazione di temperatura massima. Utilizzare la posizione del quarto ripiano. (min) 1° lato 2° lato Hamburgers 8 - 10 6 - 8 Toast 1 - 3 1 - 3 11. - Page 138 11.2 Come eseguire la pulizia: Goffratura cavità Pulire la goffratura della cavità per rimuovere i residui di calcare dopo la pulizia con il vapore. Fase 1 Fase 2 Fase 3 Versare: 250 ml di aceto Lasciare che l'aceto dissol‐...
- Page 139 ITALIANO Fase 1 Spegnere il forno e attendere che sia freddo per pulirlo. Rimuovere i supporti ripiano. Fase 2 Tirarlo in avanti contro la mol‐ la a pressione ed estrarlo dai due supporti. La griglia si pie‐ Fase 3 Pulire la parte superiore del forno con acqua tiepida, un panno morbido e detergente delicato.
- Page 140 Fase 4 Afferrare sui due lati la guida della porta (B) sul bordo superiore della stessa e premere verso l'interno per rilasciare la chiusura a scatto. Fase 5 Rimuovere la copertura ti‐ randola in avanti Fase 6 Afferrare per il bordo su‐...
-
Page 141: Risoluzione Dei Problemi
ITALIANO Lampadina superiore Fase 1 Girare il rivestimento di vetro per toglierlo. Fase 2 Pulire il rivestimento di vetro. Fase 3 Sostituire la lampadina con una adatta, alogena, termoresistente fino a 300°C, 230 V, 40 W. Fase 4 Installare la calotta di vetro. Lampadina laterale Fase 4 Sostituire la lampadina con... -
Page 142: Efficienza Energetica
Non rimuovere la targhetta dei dati dalla cavità del forno. Consigliamo di annotarli in questo spazio: Modello (MOD.) ......... Codice Prodotto (PNC) ......... Numero di serie (S.N.) ......... 13. EFFICIENZA ENERGETICA 13.1 Informazioni sul prodotto e Scheda informativa sul prodotto*... -
Page 143: Garanzia
ITALIANO 13.2 Risparmio energetico Cucinare con ventola Ove possibile, servirsi delle funzioni di Il forno è dotato di funzioni cottura con la ventola per risparmiare che consentono di aiutarvi a energia. risparmiare energia durante Calore residuo le operazioni di cottura di Quando la durata di cottura è... - Page 144 15. CONSIDERAZIONI SULL'AMBIENTE Riciclare i materiali con il simbolo Per la Svizzera: Buttare l'imballaggio negli appositi Dove portare gli apparecchi contenitori per il riciclaggio. Aiutare a fuori uso? proteggere l’ambiente e la salute umana...
- Page 148 www.electrolux.com/shop...
Need help?
Do you have a question about the EB6L50DCN and is the answer not in the manual?
Questions and answers