
Related Manuals for Tektronix 5 Series MSO


Summary of Contents for Tektronix 5 Series MSO
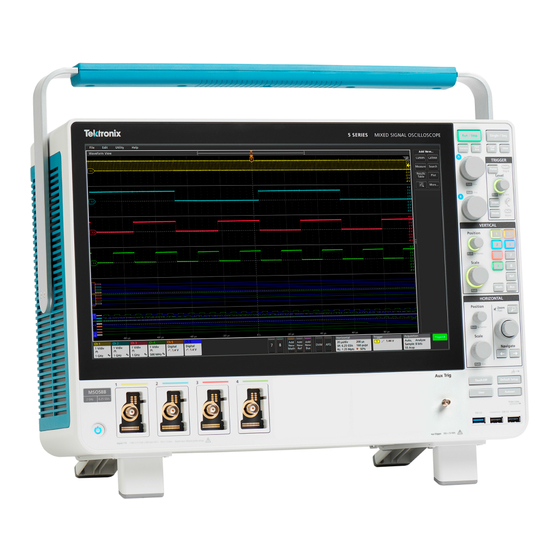
- Page 1 5 Series MSO Service Manual MSO54, MSO56, MSO58 Register now! Click the following link to protect your product. www.tek.com/register *P077130704* 077-1307-04...
- Page 2 Copyright © Tektronix. All rights reserved. Licensed software products are owned by Tektronix or its subsidiaries or suppliers, and are protected by national copyright laws and international treaty provisions. Tektronix products are covered by U.S. and foreign patents, issued and pending. Information in this publication supersedes that in all previously published material. Specifications and price change privileges reserved.
-
Page 3: Table Of Contents
Remove the baffle bracket............................22 Remove the power supply assembly..........................22 Remove carrier interface assembly..........................24 Remove the AFG riser assembly..........................26 Remove handle hub assembly............................27 Remove the main fan assembly............................27 Remove M.2 memory board............................28 5 Series MSO Service Manual MSO54, MSO56, MSO58... - Page 4 Module servicing.................................. 35 Abbreviations..................................36 Using the replaceable parts list............................36 Front cover and rear case..............................37 Carrier interface board and rear chassis..........................39 Baffle and power supply module............................42 Mid-plane chassis................................44 Front panel and display................................46 5 Series MSO Service Manual MSO54, MSO56, MSO58...
-
Page 5: List Of Figures
List of Figures List of Figures Figure 1: 5 Series MSO block diagram............................12 Figure 2: Primary troubleshooting tree............................31 Figure 3: Power status LEDs..............................32 Figure 4: Front cover and rear case exploded view........................37 Figure 5: Carrier interface board and rear chassis exploded view....................39 Figure 6: Rear chassis baffle and power supply exploded view....................42... -
Page 6: List Of Tables
Table 6: Front cover and rear case............................. 37 Table 7: Carrier interface board and rear chassis........................39 Table 8: Baffle and power supply module............................42 Table 9: Mid-plane chassis................................44 Table 10: Front panel and display............................... 46 5 Series MSO Service Manual MSO54, MSO56, MSO58... -
Page 7: Important Safety Information
Do not apply a potential to any terminal, including the common terminal, that exceeds the maximum rating of that terminal. Do not float the common terminal above the rated voltage for that terminal. 5 Series MSO Service Manual MSO54, MSO56, MSO58... - Page 8 Warning: The product is heavy. To reduce the risk of personal injury or damage to the device get help when lifting or carrying the product. Use only the Tektronix rackmount hardware specified for this product. Probes and test leads Before connecting probes or test leads, connect the power cord from the power connector to a properly grounded power outlet.
-
Page 9: Service Safety Summary
These terms may appear on the product: • DANGER indicates an injury hazard immediately accessible as you read the marking. • WARNING indicates an injury hazard not immediately accessible as you read the marking. 5 Series MSO Service Manual MSO54, MSO56, MSO58... -
Page 10: Symbols On The Product
(This symbol may also be used to refer the user to ratings in the manual.) The following symbols may appear on the product: 5 Series MSO Service Manual MSO54, MSO56, MSO58... -
Page 11: Preface
For information on installing, operating, and networking the instrument, refer to the online help or user manual that was provided with your oscilloscope. You can also find the manual at www.tek.com/manuals, by searching for your product. 5 Series MSO Service Manual MSO54, MSO56, MSO58... -
Page 12: Theory Of Operation
Note: A removable Embedded OS drive comes standard on instruments with a serial number of B020000 and above or C040000 and above. Figure 1: 5 Series MSO block diagram Power supply The Power Supply board converts AC line voltage to +12 V to power for all internal circuits. 5 Series MSO Service Manual MSO54, MSO56, MSO58... -
Page 13: Carrier Interface Assembly
The front panel routes the digital front-end signals from the probe directly to the front-end board. The front panel also provides the video interface to the internal HD display. 5 Series MSO Service Manual MSO54, MSO56, MSO58... -
Page 14: Adjustment Procedures
Adjustment procedures This chapter contains information about instrument adjustment. Adjustment Adjustment and calibration can be performed only by a Tektronix Service Center. See Contacting Tektronix, following the title page in this manual, for information on contacting Tektronix Service Support. Adjustment interval The voltage and timing references inside the instrument are very stable over time and do not need routine adjustment. -
Page 15: Maintenance
Use a 75% isopropyl alcohol solution as a cleaner for cabinet parts. Before using any other type of cleaner, consult your Tektronix Service Center or representative. Inspection - Exterior. Inspect the outside of the instrument for damage, wear, and missing parts. Immediately repair defects that could cause personal injury or lead to further damage to the instrument. -
Page 16: Flat Panel Display Cleaning
Do not disassemble or clean the front chassis assembly (other than cleaning the front panel display and removing panel knobs). Disassembling the front chassis assembly requires that the instrument be returned to your nearest Tektronix Service Center for calibration. Warning: To avoid electric shock or damage to the instrument, remove instrument power. Before performing any procedure that follows, power down the instrument and disconnect it from line voltage. -
Page 17: Lubrication
• Reason for returning. • A complete description of the required service. Mark the address of the Tektronix Service Center and the return address on the shipping carton in two prominent locations. 5 Series MSO Service Manual MSO54, MSO56, MSO58... -
Page 18: Removal And Replace Procedures
Before removing the rear chassis, order the 8 pieces of pre-cut aluminum tape (Tektronix part number 253-0582-XX). The existing tape has to be removed from the chassis to access the interior and cannot be re-applied after removal. The aluminum tape is only needed for instruments with a serial number below B020000 or below C040000. -
Page 19: Remove Sata Riser Board Assembly
6. To reinstall, reverse the steps. Use a screwdriver with T-10 Torx tip to secure the eight screws. First insert and tighten the screws that are near the front edge of the instrument, then insert and tighten the screws that are near the rear edge of the instrument. Tighten to 0.65 N·m. 5 Series MSO Service Manual MSO54, MSO56, MSO58... -
Page 20: Remove Handle
20 CAUTION: Order Tektronix part number 253-0582-XX (TAPE, ALUMINUM, BOTTOM PRE-CUT ) before removing the rear chassis. The aluminum tape that is installed on the bottom front between the rear chassis and the front chassis cannot be reused. - Page 21 Use a cloth dampened with 75% isopropyl alcohol to clean the chassis area where the aluminum tape pieces will be installed d) Install the new pre-cut aluminum tape (Tektronix part number 253-0582-XX) on the chassis at the positions noted in step on page 21.
-
Page 22: Remove The Baffle Bracket
Use the following steps to remove the power supply assembly from the rear chassis and access the power supply bracket, board, cable, and fan. Procedure 1. Disconnect the cables connecting the power supply to the carrier interface assembly, AFG riser board, and AC line filter. 5 Series MSO Service Manual MSO54, MSO56, MSO58... - Page 23 5. Remove the fan from the four elastic retaining grommets that secure the fan to the bracket. To reinstall the fan, use needle nose pliers to pull the grommet ends through the fan mounting holes. 5 Series MSO Service Manual MSO54, MSO56, MSO58...
-
Page 24: Remove Carrier Interface Assembly
The carrier interface assembly contains the AFG Riser assembly and the M.2 SSD memory board with the system OS. Only use this procedure to sanitize the instrument before sending for repairs at a Tektronix Service Center. Note: The M.2 memory board is only in instruments with a serial number below B020000 or below C040000. - Page 25 2. Disconnect the black cables connecting the power supply to the carrier interface assembly and the white cable on the AFG riser board. You do not need to disconnect the AC line filter cables. 3. Disconnect fan cable. 5 Series MSO Service Manual MSO54, MSO56, MSO58...
-
Page 26: Remove The Afg Riser Assembly
Use this procedure to remove and replace the AFG riser assembly from the carrier interface assembly. Only use this procedure as part of the sanitize process before sending the instrument for repairs at a Tektronix Service Center. Before you begin •... -
Page 27: Remove Handle Hub Assembly
27 next to the main fan • Remove carrier interface assembly on page 24 Procedure 1. Use a T-10 Torx screwdriver to remove the four screws from the main fan assembly bracket. 5 Series MSO Service Manual MSO54, MSO56, MSO58... -
Page 28: Remove M.2 Memory Board
Note: If the M.2 board is removed before sending the instrument to Tektronix for repair, Tektronix will install a new M.2 board and you will be charged for the new board. You will need to reassemble the instrument and send it to your nearest Tektronix Service Center to have a new M.2 board installed and the instrument recalibrated. -
Page 29: Troubleshooting 5 Series Mso
7. Install the seven T-10 Torx carrier board screws. Tighten to 0.65 N·m. 8. Install the five T-8 Torx screws on the carrier board heat sink. Tighten to 0.45 N·m. 9. Reassemble the instrument and return it to the nearest Tektronix Service Center for replacement of the M.2 SSD board and recalibration. -
Page 30: Service Level
This subsection contains information and procedures to help you determine if a faulty power supply is the problem with your instrument. If replacing the power supply does not fix the fault, you will need to return the instrument to a Tektronix Service Center for repair, as no other internal electronic assemblies or modules are user-replaceable. -
Page 31: Troubleshooting Flow Chart
Figure 2: Primary troubleshooting tree Status LEDs. A set of six bi-color LEDs report the power management status of the instrument. These LEDs are located under the cover on the bottom of the instrument. 5 Series MSO Service Manual MSO54, MSO56, MSO58... -
Page 32: Troubleshoot The Power Supply
10 of J3203 (large connector). If there is +12 V at pin 10, go to step on page 33. If you do not measure +12 V at Pin 10 of J3203 connected to the circuit board: 5 Series MSO Service Manual MSO54, MSO56, MSO58... -
Page 33: Instrument Self Tests
AC line filter. If there is AC at the line filter, replace the power supply module or reassemble and return the instrument to a Tektronix Service Center for repair. Warning: Be careful when measuring the AC line voltage to avoid injury to yourself or damage to the instrument. -
Page 34: After Power Supply Module Replacement
Specifications and Performance Verification manual (Tektronix part number 077-1306-xx) . Download this manual from the Tektronix Web site (www.tek.com/manuals). If the instrument fails the Performance Verification tests, it must be returned to a Tektronix Service Center for adjustment. 5 Series MSO Service Manual MSO54, MSO56, MSO58... -
Page 35: Replaceable Parts
Instrument serial number • Instrument modification number, if applicable If you order a part that has been replaced with a different or improved part, your local Tektronix field office or representative will contact you concerning any change in part number. Module servicing Modules can be serviced by selecting one of the following three options. -
Page 36: Abbreviations
Items in this section are referenced by figure and index numbers to the exploded view illustrations that follow. Tektronix part number Use this part number when ordering replacement parts from Tektronix. 3 and 4 Serial number Column three indicates the serial number at which the part was first effective. Column four indicates the serial number at which the part was discontinued. -
Page 37: Front Cover And Rear Case
CASE, ACCESSORY FRONT COVER 200-5406-XX COVER, FRONT PROTECTIVE 065-1078-XX MODULE ASSY: SERVICE REPLACEMENT KIT; HANDLE HUB LEFT & RIGHT (SET) 202-0521-XX CASE, REAR, SAFETY CONTROLLED 220-0325-XX INSERT, 2.5MM, SNAP IN Table continued… 5 Series MSO Service Manual MSO54, MSO56, MSO58... - Page 38 SCREW, MACHINE, M3 X 0.5 X 6MM PAN HEAD, TORX T10 214-5526-XX SPRING, CORD WRAP 437-0544-XX TRIM, REAR I/O 065-1008-XX MODULE ASSY: SERVICE REPLACEMENT KIT; FLIP FEET 200-5339-XX DOOR, HARD DRIVE 211-1585-XX SCREW, DELTA-PT, 3MM X 8MM, T10 5 Series MSO Service Manual MSO54, MSO56, MSO58...
-
Page 39: Carrier Interface Board And Rear Chassis
Name & description number number Figure 5 on page 39 211-1584-XX SCREW, MACHINE, M3 X 0.5 X 6MM PAN HEAD, TORX T10 119-8641-XX FAN ASSEMBLY,119864200 W / TERMINATION, SAFETY CONTROLLED Table continued… 5 Series MSO Service Manual MSO54, MSO56, MSO58... - Page 40 Return the instrument to Tektronix for service. 065-1076-XX B020000 and above MODULE ASSY: SERVICE REPLACEMENT KIT;CARRIER INTERFACE BOARD;WITH BIOS AND SSD; FULLY TESTED; MSO5 SERIES C040000 and above Return the instrument to Tektronix for service. Table continued… 5 Series MSO Service Manual MSO54, MSO56, MSO58...
- Page 41 Backup any important data before replacing the OS drive. 407-5877-XX BRACKET, HARDDRIVE 131-6643-XX CONTACT, ELECTRICAL 407-5896-XX BRACKET, SATA RISER 878-1100-XX CIRCUIT BOARD SUBASSY; SATA RISER CARD; UNTESTED; 389491600 211-1631-XX SCREW, MACHINE, M3-0.5, 3.5L, T8 (UNDER HEAD SERRATIONS) 5 Series MSO Service Manual MSO54, MSO56, MSO58...
-
Page 42: Baffle And Power Supply Module
Name & description number number Figure 6 on page 42 407-6080-XX BRACKET, BAFFLE, SINGLE FAN, HYBRID 407-5875-XX BRACKET, POWER SUPPLY, 750W, SAFETY CONTROLLED 337-4717-XX SHIELD, MOUNT, POWER SUPPLY, SAFETY CONTROLLED Table continued… 5 Series MSO Service Manual MSO54, MSO56, MSO58... - Page 43 LATCHING), SAFETY CONTROLLED 174-6614-XX CABLE ASSEMBLY (LINE INPUT), SAFETY CONTROLLED 348-2082-XX GROMMET, FAN MOUNT, NOISE DAMPING 119-8397-XX FAN WITH 2X2 CONN, 60X25MM, 12V, SAFETY CONTROLLED 343-0549-XX STRAP, TIEDOWN; 0.098 W X 4.0 L, ZYTEL 5 Series MSO Service Manual MSO54, MSO56, MSO58...
-
Page 44: Mid-Plane Chassis
44 214-5469-XX HEATSINK, AFE 4-8 CHANNEL Return the instrument to Tektronix for service. 348-2298-XX B020000 and above GASKET, CONDUCTIVE FOAM W/PSA 12MM X 29MM X 1.5MM THICK C040000 and above Table continued… 5 Series MSO Service Manual MSO54, MSO56, MSO58... - Page 45 Return the instrument to Tektronix for service. 4 channel quantity 6 and 8 channel quantity 407-5956-XX BRACKET, SO-DIMM RETENTION, ASSEMBLY Return the instrument to Tektronix for service. 4 channel quantity 6 and 8 channel quantity 5 Series MSO Service Manual MSO54, MSO56, MSO58...
-
Page 46: Front Panel And Display
Below B020000 CASE, FRONT, SAFETY CONTROLLED Below C040000 Return the instrument to Tektronix for service. 202-0582-XX B020000 and above CASE, FRONT C040000 and above Return the instrument to Tektronix for service. Table continued… 5 Series MSO Service Manual MSO54, MSO56, MSO58... - Page 47 B020000 and above CHASSIS, FRONT Return the instrument to Tektronix for service. C040000 and above 348-2297-XX B020000 and above GASKET, CONDUCTIVE, FOF W/PSA 1MM X 7MM X 290MM C040000 and above Table continued… 5 Series MSO Service Manual MSO54, MSO56, MSO58...
- Page 48 878-1145-XX CIRCUIT BOARD SUBASSY; FRONT PANEL ENCODER BOARD, UNTESTED, 389493700 Return the instrument to Tektronix for service. 361-1873-XX SPACER, FRONT PANEL, SAFETY CONTROLLED Return the instrument to Tektronix for service. Table continued… 5 Series MSO Service Manual MSO54, MSO56, MSO58...
- Page 49 MARKER IDENTIFICATION, LABEL PROBE INTERFACE MSO 4CH, SAFETY CONTROLLED 335-3679-XX MARKER IDENTIFICATION, LABEL PROBE INTERFACE MSO 6CH, SAFETY CONTROLLED 335-3678-XX MARKER IDENTIFICATION, LABEL FRONT PANEL, MSO, 6 CHANNEL, SAFETY CONTROLLED Table continued… 5 Series MSO Service Manual MSO54, MSO56, MSO58...
- Page 50 2GHZ, SAFETY CONTROLLED 335-3691-XX MARKER, IDENTIFICATION; LABEL NOMENCLATURE, MSO, 4CH, 1GHZ, SAFETY CONTROLLED 335-3692-XX MARKER, IDENTIFICATION; LABEL NOMENCLATURE, MSO, 4CH, 500MHZ, SAFETY CONTROLLED 335-3693-XX MARKER, IDENTIFICATION; LABEL NOMENCLATURE, MSO, 4CH, 350MHZ, SAFETY CONTROLLED 5 Series MSO Service Manual MSO54, MSO56, MSO58...
Need help?
Do you have a question about the 5 Series MSO and is the answer not in the manual?
Questions and answers