Table of Contents
Advertisement
Quick Links
Advertisement
Table of Contents

Related Manuals for Stelpro Maestro ASMT402


Summary of Contents for Stelpro Maestro ASMT402
- Page 1 USER GUIDE SMART THERMOSTAT Model: ASMT402 - 1 - - 1 -...
-
Page 2: Table Of Contents
USING THE THERMOSTAT Thermostat interface Storage and operating conditions Navigating the advanced menus WARRANTY Advanced menus Navigating the °STELPRO menu Setting the heating mode Connecting a thermostat to the MAESTRO controller thermostat • With the MAESTRO app Without the MAESTRO app... -
Page 3: Compatibility
COMPATIBILITY Your MAESTRO controller thermostat can control electric baseboards, convectors and fan-forced heaters. • IMPORTANT: This thermostat is not compatible with: • Systems with inductive loads • Central heating systems • Systems with resistive loads that are: o inferior to 150 W at 120 VAC / 260 W at 208 VAC / 300 W at 240 VAC o superior to 2000 W at 120 VAC / 3400 W at 208 VAC / 4000 W at 240 VAC page 25 for detailed technical specifications of the MAESTRO thermostat. -
Page 4: Warning
NOTE: °STELPRO reserves the right to modify its product without notice to improve operability. Therefore, the instructions in this user guide many not entirely match all the functions of your thermostat. To obtain the most recent documentation, visit the °STELPRO website. -
Page 5: Where To Install Your Maestro Controller
Before you start, take a few minutes to carefully read this guide and watch the step-by-step video on installing the MAESTRO thermostat. It will ensure safe and easy installation. The installation video is at the bottom of this page: www.stelpro.com/en-US/maestro - 5 - - 5 -... -
Page 6: Installing The Maestro Thermostat
INSTALLING THE MAESTRO THERMOSTAT IMPORTANT INSTALLATION OF THE THERMOSTAT MUST BE DONE BY A QUALIFIED ELECTRICIAN. CUT OFF POWER SUPPLY To avoid any risk of electric shock, cut off the power supply on the lead wires from the electrical panel. Make sure the power is off by checking, for example, that the heating system remains off even if the setpoint temperature is higher than the ambient temperature (mechanical thermostat). -
Page 7: Remove Existing Thermostat
If an existing thermostat is being replaced, remove it and disconnect its wires from the heating system and power supply. NOTE : These instructions apply to a thermostat with a °STELPRO mounting plate. Loosen the screw at the base of the thermostat, without completely removing it, to separate the thermostat from the mounting plate. -
Page 8: Secure The Maestro Thermostat Mounting Plate
SECURE THE MAESTRO THERMOSTAT MOUNTING PLATE Secure the MAESTRO thermostat mounting plate to the electrical box using the screws supplied. Loosen the screw at the base of the MAESTRO thermostat, without completely removing it, until the thermostat and the mounting plate are no longer holding together. Slide the mounting plate downward and then pull on it to separate it from the thermostat. -
Page 9: Connect The Wires
CONNECT THE WIRES Using the caps supplied (2), connect the wires of the MAESTRO thermostat to those of the heating system and power supply according to the corresponding connection diagram (2 or 4 wires). Tighten the caps onto the wires to ensure the connection is secure. -
Page 10: Secure The Thermostat On The Mounting Plate
SECURE THE THERMOSTAT ON THE MOUNTING PLATE Align and secure the thermostat on the mounting plate. Ensure the air vents in the thermostat are clean and clear of any obstruction. Align the slot on the top of the thermostat with the slot on the mounting plate. Then secure the thermostat to the mounting plate making sure that the wires do not get pinched between the unit and the mounting plate. -
Page 11: Turn Power Back On
TURN POWER BACK ON Restore power to the heating system and thermostat. Then ensure the thermostat turns on. If the thermostat does not turn on, touch any one of its buttons. The thermostat should turn on. If it doesn’t, read the Thermostat troubleshooting section on page At first power up, the thermostat will ask you to set-up the basic options. -
Page 12: Set-Up Basic Options On First Start
SET-UP BASIC OPTIONS ON FIRST START 2 settings to be set: > Temperature format (°Celsius / °Fahrenheit) > HEATING MODE (Baseboard / Fan-forced heater) Use the LEFT/RIGHT arrows to change the selection and used CENTER button to confirm. TEMPERATURE FORMAT HEATING MODE - 12 - - 12 -... -
Page 13: Using The Thermostat
USING THE THERMOSTAT As soon as your thermostat is installed, set the heating mode. if you want to connect your thermostat to a MAESTRO control- thermostat, you must also set up the Zigbee connection. Install all your thermostats before connecting them to the •... -
Page 14: Navigating The Advanced Menus
NAVIGATING THE ADVANCED MENUS To access the advanced menus and their options: Touch the button for three seconds to access the advanced menus. The first menu you’ll access is the Zigbee connection menu. Touch the button again to access the next menu. The current value will flash, indicating that it can be modified. Use the buttons to select another option for the displayed menu. -
Page 15: Navigating The °Stelpro Menu
To access the °STELPRO menu touch the button on the home screen for ten seconds. NOTE: After three seconds, the advanced menus will display (menu 1). Continue touching the button until the °STELPRO menu appears. The °STELPRO menu’s sub-menus provide information about the thermostat. -
Page 16: Connecting A Thermostat To The Maestro Controller
MAESTRO app, your controller ther- • • mostat must be linked to a Wi-Fi network (see www.stelpro.com/en-US/support-maestro). You may need a Zigbee repea- ter to get around obstacles or to strengthen the Zigbee signal. HOME SETTINGS In the MAESTRO app, access... -
Page 17: Without The Maestro App
Without the MAESTRO app The thermostat can be connected to the controller thermostat even if the controller thermostat is not linked to a Wi-Fi • • network. SETTINGS > ZIGBEE SETUP > ADD A NEW THERMOSTAT ADD A On the controller thermostat, access . -
Page 18: Connecting The Thermostat To Another Zigbee Network
CONNECTING THE THERMOSTAT TO ANOTHER ZIGBEE NETWORK If you do not have a MAESTRO controller thermostat, but your home already has a Zigbee network, you can connect the • thermostat to this network. However, you won’t be able to use the MAESTRO app or benefit from all the MAESTRO system advantages. -
Page 19: Displaying Ambient Relative Humidity Or Outdoor Temperature
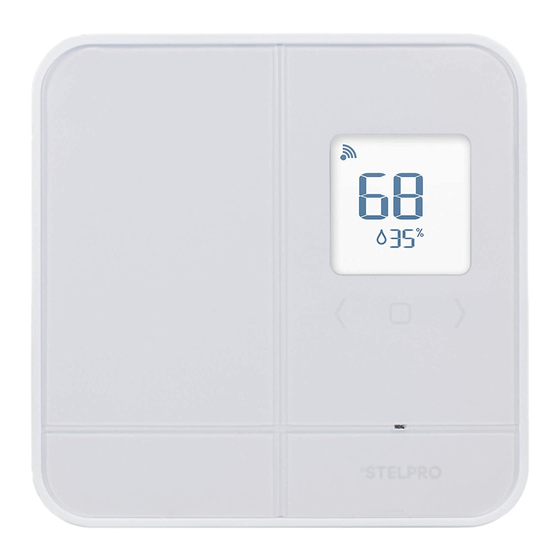
DISPLAYING AMBIENT RELATIVE HUMIDITY OR OUTDOOR TEMPERATURE In addition to room temperature, the home screen displays the percentage of ambient relative humidity by default. On the home screen, touch the button to switch the ambient humidity display to outdoor temperature. NOTE : NOTE: Outdoor temperature display is possible only if your thermostat is connected to a MAESTRO controller •... -
Page 20: Activating Or Deactivating Open Window Detection
ACTIVATING OR DEACTIVATING OPEN WINDOW DETECTION By default, the thermostat will detect if a window is open in the room where it is located, and the thermostat automatically adjusts the set temperature to 45 °F to avoid heating the room unnecessarily. Access menu 5. -
Page 21: The 360° Comfort Experience
• and the MAESTRO app. By using the complete MAESTRO system, you’ll benefit from maximum comfort, flexibility and energy savings. For more information on the MAESTRO system, visit www.stelpro.com/en-US/maestro. CONTROL YOUR COMFORT FROM WHEREVER YOU ARE GROUP ROOMS GEOFENCING:... -
Page 22: Thermostat Troubleshooting
The following table lists the most common problems and alerts that you may encounter with your thermostat. If your problem does not appear in this table or if the suggested solutions do not solve the problem, visit the support section on our website (www.stelpro.com/en-US/support-maestro) or contact our customer service team at: 1-866-628-5776 450-441-6988 s.technique@stelpro.com... - Page 23 Make sure the wires of the thermostat are properly connected and that the caps are tightened (see instruc- tions in Installing the MAESTRO thermostat on page The thermostat does not light up after being installed. Make sure the circuit breaker associated with the heating system in the electrical box is OFF. If the heating system has a switch, make sure it is ON.
-
Page 24: Thermostat Default Values
THERMOSTAT DEFAULT VALUES Setpoint temperature 70 °F Additional display Ambient humidity Zigbee connection Disconnected Temperature format Degrees Fahrenheit Heat mode Baseboard Locking Keyboard unlocked Open window detection Activated Proximity sensor Activated - 24 - - 24 -... -
Page 25: Technical Specifications
TECHNICAL SPECIFICATIONS ELECTRICAL DATA Supply voltage 120/240 VAC, 50/60 Hz Resistive only 150 W to 120 VAC, 50/60 Hz Minimum load 260 W to 208 VAC, 50/60 Hz 300 W to 240 VAC, 50/60 Hz Resistive only 2000 W to 120 VAC, 50/60 Hz Maximum load 3400 W to 208 VAC, 50/60 Hz 4000 W to 240 VAC, 50/60 Hz... -
Page 26: Warranty
The warranty is limited to the factory repair or the replacement of the unit, and does not cover the cost of disconnection, transport and installation. Email: contact@stelpro.com Website : www.stelpro.com Energy Verified Énergie Vérifié...
Need help?
Do you have a question about the Maestro ASMT402 and is the answer not in the manual?
Questions and answers