
Related Manuals for Hioki 3910-20


Summary of Contents for Hioki 3910-20
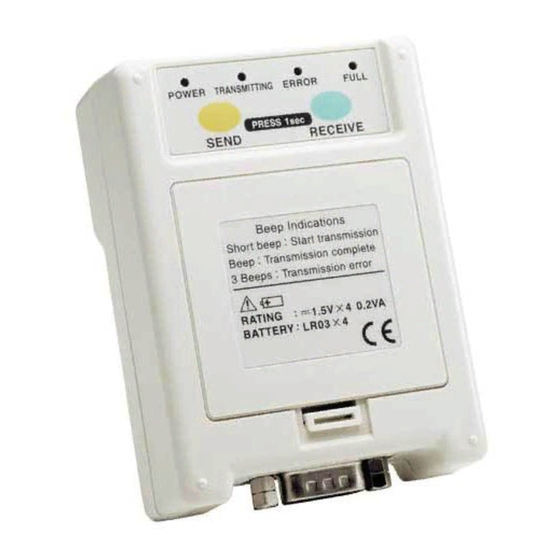
- Page 1 Operation Guide For...は専用機種。複数の場合は「/」で区切る。 不要の場合はとる。 3910-20, 3911-20, 3912-20 COMMUNICATION BASE 形名を入力。 複数の場合は「/」で区切る。 COMMUNICATION UTILITY 品名を入力。...
-
Page 3: Table Of Contents
Contents Software Installation Measurement Preparations Setting Measurement Conditions To set 3631-20 to 3635-2X, 3641 settings To set 3636-20 settings To set 3637-20 settings To set 3638-20 settings To set 3639-20 settings To set 3640-20 settings To set 3645-20 settings Loading Measurement Data Saving Measurement Data Graph Operation List of Functions... - Page 5 For details, refer to 3910-20, 3911-20, 3912-20 instruction manual and HELP in application software. Hereinafter, when the term "COMMUNICATION BASE" is used, the description is commonly applicable to the 3910-20, 3911-20, and 3912-20. This operation guide is divided into six sections.
- Page 6 USB1.1 or higher is necessary, COM port NOTE A USB is not necessary when the PC is used in conjunction with the 3910-20 or 3911-20. A COM port is not necessary when the PC is used in conjunction with the 3912-20.
-
Page 7: Software Installation
_____________________________________________________________________ Software Installation Packaged application software must be installed in personal computer to use COMMUNICATION BASE and logger series. How to install (1) Before installing, close all running applications on your personal computer. (2) Execute "X: \ ENGLISH\SETUP.EXE" from attached CD-R to COMMUNICATION BASE to install. -
Page 8: Measurement Preparations
Click on the appropriate port for your COMMUNICATION BASE. When the 3910-20 or 3911-20 is used, select the port number to which the 3910-20 or 3911-20 is connected from among COM1 through COM6. When the 3912-20 is used, select USB. -
Page 9: Setting Measurement Conditions
_____________________________________________________________________ Setting Measurement Conditions How to set measurement conditions with COMMUNICATION UTILITY. Go to Windows [ ] menu and start up [ Start COMMUNICATION UTILITY Select [ ] - [ ] on Communications Set Measurement Conditions the menu bar. After measurement conditions are set, select [ ] to send Send measurement conditions. -
Page 10: To Set 3631-20 To 3635-2X, 3641 Settings
_____________________________________________________________________ To set 3631-20 to 3635-2X, 3641 settings Settings for 3631-20 to 3635-2X, 3641 are available only when personal computer, COMMUNICATION BASE and logger are connected. Send is disabled when logger is recording, waiting for recording or at sleep. NOTE Settings for 3631-20 to 3635-2X and 3641 allow comment setting in addition to common settings such as current time, interval, recording method and start control. -
Page 11: To Set 3636-20 Settings
_____________________________________________________________________ To set 3636-20 settings Settings for 3636-20 are available only when personal computer, COMMUNICATION BASE and logger are connected. Send is disabled when logger is recording, waiting for recording or at sleep. NOTE Settings for 3636-20 allow comment setting in addition to common settings such as current time, interval, recording method and start control. -
Page 12: To Set 3637-20 Settings
_____________________________________________________________________ To set 3637-20 settings Settings for 3637-20 are available only when personal computer, COMMUNICATION BASE and logger are connected. Send is disabled when logger is recording, waiting for recording or at sleep. NOTE Settings for 3637-20 allow comment setting in addition to common settings such as current time, interval, recording method and start control. -
Page 13: To Set 3638-20 Settings
_____________________________________________________________________ To set 3638-20 settings Settings for 3638-20 are available only when personal computer, COMMUNICATION BASE and logger are connected. Send is disabled when logger is recording, waiting for recording or at sleep. NOTE Settings for 3638-20 allow comment setting in addition to common settings such as current time, interval, recording method and start control. -
Page 14: To Set 3639-20 Settings
_____________________________________________________________________ To set 3639-20 settings Settings for 3639-20 are available only when personal computer, COMMUNICATION BASE and logger are connected. Send is disabled when logger is recording, waiting for recording or at sleep. NOTE Settings for 3639-20 allow comment setting in addition to common settings such as current time, interval, recording method and start control. -
Page 15: To Set 3640-20 Settings
_____________________________________________________________________ To set 3640-20 settings Settings for 3640-20 are available only when personal computer, COMMUNICATION BASE and logger are connected. Send is disabled when logger is recording, waiting for recording or at sleep. NOTE Settings for 3640-20 allow comment setting in addition to common settings such as current time, interval, recording method and start control. -
Page 16: To Set 3645-20 Settings
_____________________________________________________________________ To set 3645-20 settings Settings for 3645-20 are available only when personal computer, COMMUNICATION BASE and logger are connected. Send is disabled when logger is recording, waiting for recording or at sleep. NOTE Settings for 3645-20 allow comment setting in addition to common settings such as current time, interval, recording method and start control. -
Page 17: Loading Measurement Data
_____________________________________________________________________ Loading Measurement Data Go to [ ] and select [ Communications Load Data from ] or [ ]. After COMMUNICATION BASE Load Data from Logger selecting the destination for saving data, select [ Start loading Choose [ ] when personal computer, Load Data from Logger COMMUNICATION BASE and logger are connected. -
Page 18: Saving Measurement Data
_____________________________________________________________________ Saving Measurement Data (1) Select [ File [Save Save Selected Channels window appears. (2) Select channels to be saved and saving file format. Select [ ] to proceed with selecting file names and destination for saving. (3) Select [ ] to execute saving. -
Page 19: Graph Operation
_____________________________________________________________________ Graph Operation Scrolling measurement data Click horizontal axis slider button or drag horizontal scroll bar to move time axis. Horizontal axis Horizontal axis slider button scroll bar Click vertical axis slider button or drag vertical axis scroll bar to move vertical axis. Vertical axis slider button Vertical axis scroll bar ______________________________________________________________... - Page 20 _____________________________________________________________________ Measuring with A/B cursors Click cursor control button to move cursor A and cursor B sideways. Drag cursor A/B scroll bars to move cursors. Cursor control button Cursor A/B scroll bars Time at cursor A/B position Cursor value Displays time and date at Displays data at cursor A cursor A/B position and cursor B position.
- Page 21 _____________________________________________________________________ Magnifying with mouse selection Use mouse button left to drag and select the area to be magnified with box cursor. Click mouse button right to select [ Zoom Selected Area When graph is magnified and scale is modified, click Store scale to store the scale.
- Page 22 _____________________________________________________________________ Operating displayed data Displays maximum, minimum, average value in all data etc. Click CH button to set waveform display ON/OFF. Click waveform display color box to change display color. CH button Waveform color Comment Double click either value or unit cell to display average value of selected CH data in center of graph.
- Page 23 _____________________________________________________________________ Graph type settings The graph type (line graph, bar graph) can be set individually for each channel. To alter the settings, first select [ ] from [ ] on CH Settings Graph the menu bar. In the CH Settings window, select the [ ] checkbox for the channel to be displayed as a bar Graph graph.
- Page 24 _____________________________________________________________________ Printing data/ Copying graph Go to [ ] and select [ ] or [ ] to print File Print Graph Print Data data. Go to [ ] on the menu bar and select [ ] to print graph. Edit Copy Graph's display area is copied onto clipboard in BMP format.
- Page 25 _____________________________________________________________________ Processing data Loaded data can be processed for ordering, deleting and scaling channels. Scaling formula can be registered. Register frequently used scaling formula. NOTE Scaling is a function to multiple loaded data by designated coefficient or to set offset value. For example, voltage value measurement data with PT ratio at 100 : 1 can be directly read by multiplying by 100.
-
Page 26: List Of Functions
_____________________________________________________________________ List of Functions COMMUNICATION UTILITY functions Displays single graph with up to 16 channels of data recorded regardless of recorder type, time and date of recording, interval or unit. Displays recording data change and cursor A and B. Graph display Line and bar graph displays can be set individually for each channel. -
Page 27: Troubleshooting
_____________________________________________________________________ Troubleshooting Installation-Related Problems Q. The device driver can't be installed because "Execution Error 6" occurs. A. This problem with the Visual Basic setup program occurs if the Region setting is not "Japanese." Change your PC's Region setting to "Japanese" and reinstall. Set the region using Region in the Control Panel (when using Windows 98). - Page 28 _____________________________________________________________________ A. Since "COMMUNICATION UTILITY" was created using Microsoft Visual Basic 5.0, the Windows "DLL files" must be copied at the time of installation. This is due to the fact that the "DLL files" that was attempted to be copied already exists in your PC and is in use by other applications running at the time of installation, or by Windows itself.
-
Page 29: Communication-Related Problems
PC's Instruction Manual. A. Check whether a cross cable is used for connection between the 3910-20 (or 3911-20) and the PC. A "cross" or "reverse" cable must be used for connection of the 3910-20 or 3911- 20. The "straight"-type cable that is employed for modem connection cannot be used. - Page 30 (3910-20 and 3911-20 only). A. Check whether the COM port is available. The COM port may be unavailable in any of the following cases (3910-20 and 3911-20 only): ・If the PC incorporates an infrared port (IrDA) or modem, the COM port is often shared or used exclusively.
- Page 31 _____________________________________________________________________ 5. A window with the name "Communications-Port (COM1) Properties" opens, with a "Disable in this hardware profile" check box displayed at the bottom of the window. Uncheck this check box. 6. Double-click the [ ] icon in the Device Manager tree Infrared view.
- Page 32 _____________________________________________________________________ modem is disabled. 8. Click [ ]. When the System Properties window is displayed again, click [ ] again. A message prompting Windows to be restarted may then be displayed. Exit all other applications, then restart. 9. If communication is still not possible after all these steps, check the power-saving feature and BIOS settings.
- Page 33 _____________________________________________________________________ Q. The 3912-20 communication window freezes, and the cursor will not return to the screen (the hourglass remains displayed on-screen). (See the figure below.). At this time, the "*" that represents the progress of communication also remains displayed. A. This problem occurs because the PC's USB driver retains data for an unspecified reason during USB communication.
- Page 34 _____________________________________________________________________ ______________________________________________________________ Troubleshooting...
- Page 35 HIOKI COMMUNICATION UTILITY Operation Guide Publication date: December 2007 Revised edition 5 Edited and published by HIOKI E.E. CORPORATION Technical Support Section All inquiries to International Sales and Marketing Department 81 Koizumi, Ueda, Nagano, 386-1192, Japan TEL: +81-268-28-0562 / FAX: +81-268-28-0568 E-mail: os-com@hioki.co.jp...
- Page 36 HEAD OFFICE 81 Koizumi, Ueda, Nagano 386-1192, Japan TEL +81-268-28-0562 / FAX +81-268-28-0568 E-mail: os-com@hioki.co.jp / URL http://www.hioki.com/ HIOKI USA CORPORATION 6 Corporate Drive, Cranbury, NJ 08512, USA TEL +1-609-409-9109 / FAX +1-609-409-9108 3911A983-05 07-12H Printed on recycled paper...
Need help?
Do you have a question about the 3910-20 and is the answer not in the manual?
Questions and answers