Advertisement
Quick Links
Advertisement

Related Manuals for Craftsman MUSKOKA CHAIR


Summary of Contents for Craftsman MUSKOKA CHAIR
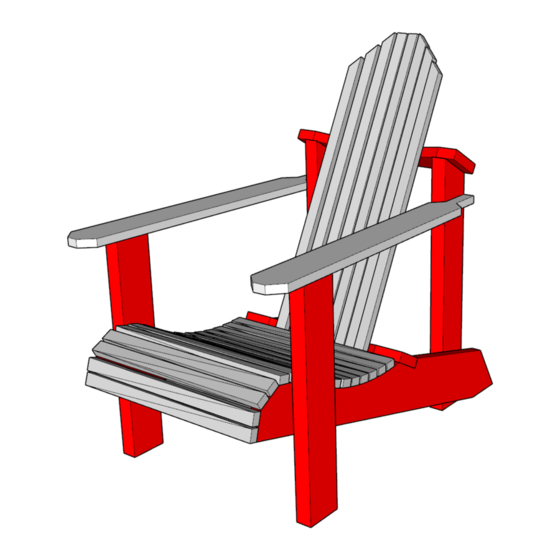
- Page 1 MUSKOKA CHAIR...
- Page 2 CONTENTS MATERIALS & TOOLS CUT LIST STEP-BY-STEP INSTRUCTIONS WARNING • To reduce the risk of injury, follow all warnings and instructions provided herein and in all tool operator manuals you use. • Do not stand on throne. You may fall or throne can tip, causing serious injury or death. •...
- Page 3 MATERIALS & TOOLS MATERIALS TOOLS • • One (1) 10' long piece of 5/4" deckboard (either cedar or pressure-treated wood) V20* ½-in. Cordless Drill/Driver • • One (1) 8' long piece of 2x4 (either cedar or pressure-treated wood) V20* Cordless 6½-in. Circular Saw Kit •...
- Page 4 CUT LIST – 1 OF 5 WARNING Sand and smooth all edges to avoid injuries due to splinters or rough edges.
- Page 5 CUT LIST – 2 OF 5 WARNING Sand and smooth all edges to avoid injuries due to splinters or rough edges.
- Page 6 CUT LIST – 3 OF 5 WARNING Sand and smooth all edges to avoid injuries due to splinters or rough edges.
- Page 7 CUT LIST – 4 OF 5 WARNING Sand and smooth all edges to avoid injuries due to splinters or rough edges.
- Page 8 CUT LIST – 5 OF 5 WARNING Sand and smooth all edges to avoid injuries due to splinters or rough edges.
- Page 9 STEP-BY-STEP INSTRUCTIONS – 1 OF 6 Start by putting on proper eye protective gear and gloves, and ensure you hold the tools properly with all safeguards in place – use the tool according to its instruction manual. Start by cutting out all the pieces according to the cut list. Pieces A, D, and E are made from the 5/4"...
- Page 10 STEP-BY-STEP INSTRUCTIONS – 2 OF 6 Attach the rear back brace post (C) to the runner (A) at the indicated location and angle using five (5) 2" deck screws in an “X” pattern. Repeat steps 4 and 5 using the second A, B, and C pieces that you cut.
- Page 11 STEP-BY-STEP INSTRUCTIONS – 3 OF 6 Attach the lower back brace (D) using four (4) 2" deck screws as shown. Attach the upper back brace (E) using four (4) 2" deck screws as shown.
- Page 12 STEP-BY-STEP INSTRUCTIONS – 4 OF 6 Attach hockey sticks (F) to the upper (E) and lower (D) back braces as shown using two (2) 2" deck screws per stick. The length of the hockey sticks used is up to the builder, but 32"...
- Page 13 STEP-BY-STEP INSTRUCTIONS – 5 OF 6 Attach goalie stick to rear back brace post (C) at indicated height using one (1) 2" deck screw. Repeat step 11 on the opposite side. Attach goalie stick armrests (H) to front armrest posts (B) at indicated location using four (4) 2"...
- Page 14 STEP-BY-STEP INSTRUCTIONS – 6 OF 6 Trim goalie stick armrests to desired shape using the jigsaw. Sand rough edges on goalie stick armrests using the cordless sander. Optional: Fill and stain screw holes using wood filler and wood stain. Take a step back and admire your craftsmanship! CREDIT Zachary Matchett-Smith –...
Need help?
Do you have a question about the MUSKOKA CHAIR and is the answer not in the manual?
Questions and answers