Advertisement
Quick Links
Advertisement

Related Manuals for German pool HTW-521


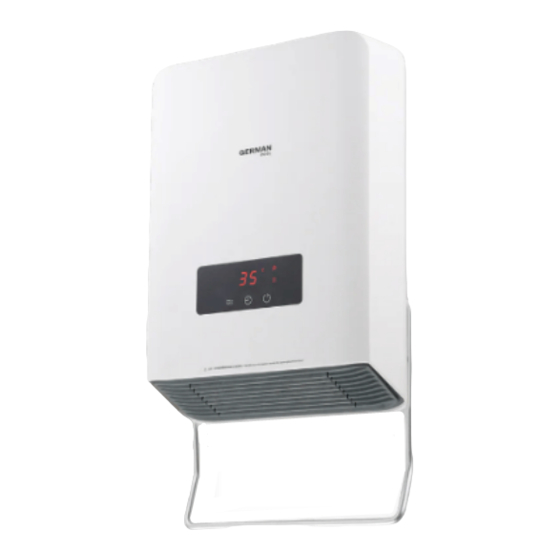
Summary of Contents for German pool HTW-521
-
Page 2: Table Of Contents
Table of Contents Safety Warnings And Precautions Product Structure Installation Instructions Operation Instructions 請即進行保用登記﹗ 有關保用條款細則,請看本說明書最後一頁。 Care & Maintenance Technical Specifications Please register your warranty information now! For Warranty Terms & Conditions, Warranty Terms & Conditions please refer to the last page of this user manual. -
Page 3: Safety Warnings And Precautions
Safety Warnings And Precautions Safety Warnings And Precautions 1. Please read all instructions carefully before using this product. 14. If the supply cord is damaged, it must be replaced by a special cord or assembly 2. Before use, please check whether the voltage used is consistent with the available from the manufacturer or its service agent. -
Page 4: Product Structure
Product Structure Installation Instructions FRONT Installation Requirements WARNING! When installing this product, must leave ample space on all sides to Front cover ensure adequate ventilation and heat dissipation. 1. Leave at least 500mm above the product. 2. Leave at least 800mm on either side of the product. 3. - Page 5 Installation Instructions Installation Instructions Install With Wall-Mounting Components Installing The Towel Rail 1. First insert the left / right ends of the aluminum towel rail into the grooves onto 1. Drill two holes in the wall, and make the diameter of hole as 6mm, depth as 29mm.
-
Page 6: Operation Instructions
Operation Instructions Operation Instructions Control Panel Remote Control CONTROL BUTTONS On/Off Key - / + Key Confirm Key Countdown Timer Key Set Key Warm and Cool Mode Selection Key ECO Mode Key Weekly Programme Key Buttons below are only for setting LED DISPLAY CONTROL BUTTONS Weekly Programme Mode... - Page 7 Operation Instructions Operation Instructions A. Control Panel: Basic Operation A2. Countdown to Switching Off 1. In Low Warm Air Mode / High Warm Air Mode / Cool Air Mode ,press to enter into Countdown to Switching Off Mode, Countdown Timer Indicator turns on, Control Panel shows “00”.
- Page 8 Operation Instructions Operation Instructions B. Remote Control: Basic Operation B2. Countdown to Switching Off 1. In Low Warm Air Mode / High Warm Air Mode / Cool Air Mode ,press to enter into Countdown to Switching Off Mode, Countdown Timer Indicator turns on, Control Panel shows “00”.
- Page 9 Operation Instructions Operation Instructions C. Remote Control: Advanced Operation ATTENTION: • When in “Thermostat Mode”, the product automatically runs at High Warm Air Mode • If user manually switches it to Low Warm Air Mode or Cool Air Mode , the product will automatically exit “Thermostat Mode”. C2.
- Page 10 Operation Instructions Operation Instructions D. Remote Control: Weekly Programme Mode D2. Setting Weekly Programme Mode ATTENTION: Before setting Weekly Programme Mode, user must first set the current day of the week and time. 1. In Standby Service Mode (Control Panel will show “SS”), press , and press to enter into Weekly Programme Mode.
-
Page 11: Care & Maintenance
Operation Instructions Care & Maintenance Power-Off Memory Function When power supply is cut off: 1. The week, time period and temperature data set in Weekly Programme Mode are memorized. When power is turned on again, the default Weekly Programme is turned off. - Page 12 Technical Specifications 目錄 Model No. HTW-521 Voltage/Frequency 220-240V / 50Hz 警告及注意事項 Power 1,500W / 2,100W 產品結構 Product Dimensions (H) 379 (W) 280 (D) 121 mm without Towel Rail 安裝說明 Product Dimensions (H) 492 (W) 280 (D) 121 mm with Towel Rail 操作說明...
- Page 13 警告及注意事項 警告及注意事項 警告:為了避免對年幼兒童造成危險,該設備的安裝應確保最低加熱面至 1. 使用此產品前,請仔細閱讀所有說明。 少高出地板600 mm。 2. 使用前,請先檢查所用電壓是否與本機標籤上的電壓相符。 18. 毛巾架的安裝應確保開關和其他控制裝置不會被沐浴或淋浴的人觸摸。 3. 當本產品由8歲或以上兒童、感官或精神有缺陷、及缺乏必要經驗和知識的人 19. 本產品僅供家用和室內使用。 使用時,必須有對其安全負責的人進行監管,並確保使用者的安全及其明白當 20. 不能用濕手觸摸開關和控制面板。 中潛在危險。當兒童對本產品進行清潔和維護時,必須有對其安全負責的人進 21. 對於附加保護,建議在浴室供電電路中安裝額定工作電流不超過30mA的過流保 行監管。 護裝置(RCD)。請向安裝人員諮詢。 4. 3歲以下的幼兒應遠離本產品,除非有對其安全負責的人進行持續監管。 22. 本產品僅用於烘乾水洗過的紡織品。 5. 當本產品被放置或安裝在正常工作位置時、在有對其安全負責的人的指導或協 23. 應保護電器插頭,例如遠離水源,或用防水盒保護插頭。 助、並確保使用者的安全及其明白當中潛在危險的前提下,3至8歲的兒童只可 24. 不要攝入電池,可能導致化學灼傷危險。 開啟/關閉本加熱器。3至8歲的兒童不可調節、清潔、保養本產品,亦不可把 25. 本產品包含紐扣電池。如果紐扣電池被吞下,可能在2小時內造成嚴重的內部 本產品插頭連接電源。 燒傷,並可能導致死亡。 警告:本產品的某些部分可能變得非常熱並導致燒傷,兒童和弱勢群體在 26.
- Page 14 產品結構 安裝說明 正面 安裝注意事項 警告: 請確保該安裝距離滿足下圖要求: 1. 頂部距離應不少於500mm。 2. 側壁距離應不少於800mm。 3. 地面距離應不少於1,300mm。 注意:切勿長時間晾掛烘乾毛巾或衣物! CAUTION: Never dry towels or laundry for a prolonged period of time! 底部 警告: 本產品不得安裝在區域1或2(如下圖)。 安裝時必須確保開關和其他控制裝置不會被沐浴或淋浴中的人觸摸。 P.26 P.27...
- Page 15 安裝說明 安裝說明 使用掛壁支架安裝 安裝毛巾架 1. 在牆上鑽兩個孔,孔的直徑 為6mm,深度為29mm;兩個孔之間的距離為59mm。 1. 將毛巾架裝入出風口左右兩側的孔。 2. 然後左右側均往外拉至卡住毛巾架即可。 2. 螺絲膠塞固定在兩個孔中。 3. 確保毛巾架固定好,完成。當不使用毛巾架時,左右側往裡推毛巾架即可拆卸 3. 將螺絲固定到螺絲膠塞中,然後擰緊。 下來。 注意:切勿長時間晾掛烘乾毛巾或衣物! CAUTION: Never dry towels or laundry for a prolonged period of time! 4. 本產品安裝在掛壁支架上:將機底的大孔對準掛壁裝置,然後向右轉到小孔 (如下圖)。 注意:切勿長時間晾掛烘乾毛巾或衣物! CAUTION: Never dry towels or laundry for a prolonged period of time! P.28 P.29...
- Page 16 操作說明 操作說明 遙控器 主機控制面板 控制按鍵 開關鍵 -/+鍵 確認鍵 定時鍵 設定鍵 涼暖風模式鍵 環保模式鍵 一周預設模式鍵 以下按鍵只供設定「一周預設模式」時使用 日期鍵 LED顯示屏 控制按鍵 程序鍵 涼風模式 涼暖風模式鍵 開機時間鍵 低檔暖風模式 定時鍵 關機時間鍵 高檔暖風模式 開關鍵 恆溫模式 注意: 定時模式 使用遙控器操作時,需將遙控器對準LED顯示屏,令遙控信號達到最好。 一周預設模式 環保模式 P.30 P.31...
- Page 17 操作說明 操作說明 A.主機控制面板:基本操作 A2. 定時關機模式 1. 在低檔暖風模式 / 高檔暖風模式 / 涼風模式 下,按 進 入定時關機模式,指示燈 常亮,顯示屏顯示「00」。 2. 再按 調整定時關機倒數時間,每按一次增加1小時,最長為12小時。 3. 設置完成後,時間閃爍5秒後自動確認,此時顯示屏顯示「C0」,指示燈 熄滅。 A3. 定時開機模式 1. 在待機狀態下(顯示屏顯示「SS」),按 進入定時開機模式,指示燈 常亮,顯示屏顯示「00」。 A1. 低檔暖風 高檔暖風 涼風 2. 再按 調整定時開機倒數時間,每按一次增加1小時,最長為12小時。 1. 插上電源後進入待機狀態,蜂鳴器發出聲響兩聲,顯示屏顯示「SS」 (Standby Service)。 3. 設置完成後,時間閃爍5秒後自動確認,此時顯示屏顯示倒數開機剩餘時間。 2.
- Page 18 操作說明 操作說明 B. 搖控器:基本操作 B2. 定時關機模式 1. 在低檔暖風模式 / 高檔暖風模式 / 涼風模式 下,按 進 入定時關機模式,指示燈 常亮,顯示屏顯示「00」。 2. 再按 調整定時關機倒數時間,每按一次增加1小時,最長為12小時。 3. 設置完成後,時間閃爍5秒後自動確認,或按 立即確認時間,此時顯示屏 顯示「C0」,指示燈 熄滅。 B3. 定時開機模式 1. 在待機狀態下(顯示屏顯示「SS」),按 進入定時開機模式,指示燈 常亮,顯示屏顯示「00」。 B1. 低檔暖風 高檔暖風 涼風 1. 插上電源後進入待機狀態,蜂鳴器發出聲響兩聲,顯示屏顯示「SS」。 2. 再按 調整定時開機倒數時間,每按一次增加1小時,最長為12小時。 2. 按 開機,進入低檔暖風模式,指示燈...
- Page 19 操作說明 操作說明 C. 搖控器:進階操作 C2. 環保模式 1. 在「恆溫模式」下,按 進入「環保模式」,指示燈 及 常亮。 2. 按 調整溫度,溫度設置範圍為15℃-35℃。 3. 「開窗檢測模式」是指:當本產品檢測到環境溫度急劇下降(在10分鐘內下降 5℃-10℃)時,本產品將自動停止加熱並返回待機狀態,從而達至節能。 4. 如需取消「環保模式」,按 即可,指示燈 熄滅。 C1. 調節恆溫溫度 1. 在待機狀態下(顯示屏顯示「SS」),按 開機,再按 調 整 溫 度,此時指示燈 常亮,溫度設置範圍為15℃-35℃。 2. 設置完成後,溫度閃爍5秒後自動確認,或按 立即確認溫度,並進入「恆 溫模式」。 3. 「恆溫模式」是指:每當環境溫度低於設定溫度時,本產品將自動進行加熱; 每當環境溫度達到設定溫度時,本產品將自動停止加熱,以達至持久恆溫。 4. 如需取消「恆溫模式」,按 返回低檔暖風模式...
- Page 20 操作說明 操作說明 D 搖控器操作:一周預設模式 D2. 設置一周預設模式 注意: 在設定周定時模式前,必需先設置當前星期和時間。 1. 在待機狀態下(顯示屏顯示「SS」),按 開機,再按 進入周定時模 式,指示燈 常亮。 2. 按 然後重複按 選擇所需的星期(d1-d7); 3. 按 PROG 然後重複按 PROG 選擇所需的程序(P1-P2); 4. 按 然後重複按 設定所需的開機時間(小時)(00-24); 「一周預設模式」是指為一周設定自動開機時間、自動關機時間及溫度,讓本產品 5. 按 然後重複按 設定所需的關機時間(小時)(00-24); 在一周裡按照所設置的時間及溫度自動運作。 6. 按 設定所需的溫度(15℃-35℃);按 確認設置。 D1. 設置當前星期和時間 7. 重複步驟3以設置星期一至星期日(d1-d7)的周定時模式,設置完成後,本...
- Page 21 清潔與保養 清潔與保養 警告: 更換遙控器電池 清洗前務必關掉電源並拔掉電源插頭,否則有觸電的可能。 1. 向內按住遙控器底部電池槽上的扣位,電池槽往外拉出。 2. 確認電池的極性,將電池裝進電池槽的凹槽內。 機身表面清潔 3. 將電池槽裝回遙控器的底部。 1. 機身表面清潔,應用濕布(或加上洗潔精)抹擦,不可使用汽油、天拿水、稀 電池槽 釋劑或有腐蝕性的洗滌劑、溶劑之類進行清潔,嚴禁用水沖或淋洗。 2. 若過濾網上附著過多的異物,將影響出風效果,因此應至少每隔一個月清洗一次。 往外拉 過濾網清洗 1. 按順序取出過濾網(如下圖)。 遙控器底部 2. 過濾網用清潔劑浸泡數分鐘,清洗晾乾即可。 3. 按照順序將過濾網濾網蓋安裝好,確保安裝無誤。 向內按 維護保養 1. 當產品長期不使用時,應拔下電源插頭,包裝好本機以防止灰塵進入機體。 2. 包裝前應確保產品表面、過濾網等是乾燥的。 3. 包裝好後應放置於乾燥通風處存放。 P.40 P.41...
- Page 22 技術規格 HTW-521 型號 220-240V / 50Hz 電壓 / 頻率 1,500W / 2,100W 功率 (H) 379 (W) 280 (D) 121 mm 產品尺寸(不包含毛巾架) (H) 492 (W) 280 (D) 121 mm 產品尺寸(包含毛巾架) 淨重 2.5 kg 產品 規 格 及設 計 如 有變 更, 恕不 另行 通知 。...
- Page 23 HT W-521-M-20(1) GPR-T150-M-CN_19(1) P.44...
Need help?
Do you have a question about the HTW-521 and is the answer not in the manual?
Questions and answers