
Related Manuals for German pool HTW-110


Summary of Contents for German pool HTW-110
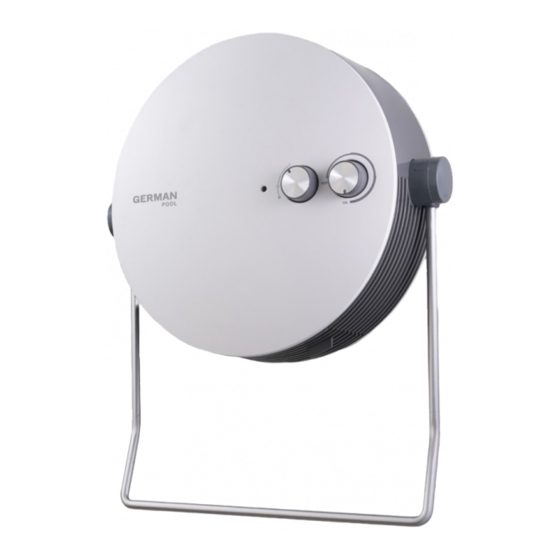
- Page 1 HTW-110 Portable Bathroom Heater Online Warranty Registration Please read these instructions and warranty information carefully before use and keep them handy for future reference. U S E R M A N U A L...
- Page 2 請即進行保用登記﹗ 有關保用條款細則,請看本說明書最後一頁。 Please register your warranty information now! For Warranty Terms & Conditions, please refer to the last page of this user manual.
-
Page 3: Table Of Contents
Table of Contents Safety Warnings And Precautions Product Structure Installation Instructions Operation Instructions Care & Maintenance Technical Specifications Warranty Terms & Conditions... -
Page 4: Safety Warnings And Precautions
Safety Warnings And Precautions 1. Please read all instructions carefully before using this product. 2. Before use, please check whether the voltage used is consistent with the voltage on the label of the heater. 3. This appliance can be used by children aged from 8 years and above and persons with reduced physical, sensory or mental capabilities or lack of experience and knowledge if they have been given supervision or instruction concerning use of the appliance in a safe way and understand the hazards... - Page 5 Safety Warnings And Precautions 16. If the supply cord is damaged, it must be replaced by the manufacturer, its service agent or similarly qualified persons in order to avoid a hazard. WARNING! In order to avoid a hazard for very young children, this appliance should be installed so that the lowest heated rail is at least 600 mm above the floor.
-
Page 6: Product Structure
Product Structure FRONT Upper cover Turn knob of f of f Towel rack Air outlet BACK Wall bracket Rear grill Bottom cover Anti-slip foot pad... -
Page 7: Installation Instructions
Installation Instructions Installation Requirements WARNING: When installing this product, must leave ample space on all sides to ensure adequate ventilation and heat dissipation (See diagram below): 1. Leave at least 500mm above the product. 2. Leave at least 800mm on either side of the product. 3. - Page 8 Installation Instructions Installation Method 1: Install With Wall Hook 1. Drill two holes in the wall, and make the diameter of hole as 6mm, depth as 29mm. The distance between two holes is 74mm. 2. Fix the rubber plugs into the two holes. 3.
- Page 9 Installation Instructions Method 2: Install Directly On The Wall 1. Drill two holes into the wall, and keep the distance between the two plugs at 148mm; 2. Fix the rubber plugs into the two holes. 3. Then attach two screws into the rubber plugs. The distance from the screws to the wall should be 10mm to ensure sufficient space.
- Page 10 Installation Instructions Installing The Tower Rail 1. First insert the left / right bracket of the towel rack into the holes on the left and right sides of the product. 2. Press the towel rack down and turn it to the corresponding position. 3.
-
Page 11: Operation Instructions
Operation Instructions Turn Knobs Heat Control Switch Mode Selection Switch Switching On The Product 1. When the power supply is connected, the heater enters into Standby Mode; the power indicator is off, and all other functions are turned off. 2. When the Heat Control switch and the Mode Selection switch are simultaneously turned on, the heater starts to work, and the indicator lamp lights up in orange. - Page 12 Operation Instructions Temperature Adjustment 1. The default starting position of the Heat Control Knob is “Off”. You can rotate the Heat Control knob clockwise to turn on the product, and continue to rotate the knob to desired heat level. The indoor temperature will gradually increase with the work of the heater.
-
Page 13: Care & Maintenance
Care & Maintenance WARNING! Before cleaning, be sure to turn off the power and unplug the power plug, or else it may cause electric shock. Cleaning The Surface 1. Clean the surface of the heater with a damp cloth (or moistened with mild & detergent). -
Page 14: Technical Specifications
Technical Specifications Model No. HTW-110 Voltage/Frequency 220-240V / 50Hz Power 1,100W / 1,500W Product Dimensions (H) 262 (W) 262 (D) 150 mm Without Towel Rail Product Dimensions (H) 380 (W) 306 (D) 150 mm With Towel Rail Net Weight 2.2kg Specifications are subject to change without prior notice. - Page 15 目錄 警告及注意事項 產品結構 安裝說明 操作說明 清潔與保養 規格 保用條款 27 P.15...
-
Page 16: 警告及注意事項
警告及注意事項 1. 使用此產品前,請仔細閱讀所有說明。 2. 使用前,請先檢查所用電壓是否與本機標籤上的電壓相符。 3. 當本產品由8歲或以上兒童、感官或精神有缺陷、及缺乏必要經驗和知識的人 使用時,必須有對其安全負責的人進行監管,並確保使用者的安全及其明白當 中潛在危險。當兒童對本產品進行清潔和維護時,必須有對其安全負責的人進 行監管。 4. 3歲以下的幼兒應遠離本產品,除非有對其安全負責的人進行持續監管。 5. 當本產品被放置或安裝在正常工作位置時、在有對其安全負責的人的指導或協 助、並確保使用者的安全及其明白當中潛在危險的前提下,3至8歲的兒童只可 開啟/關閉本加熱器。3至8歲的兒童不可調節、清潔、保養本產品,亦不可把 本產品插頭連接電源。 警告:本產品的某些部分可能變得非常熱並導致燒傷,兒童和弱勢群體在 場時請特別注意。 7. 本產品不適用於身體、感官或精神有缺陷,及缺乏必要經驗和知識的人群(包 括小孩),除非在能對其安全負責的人的監管下使用。 8. 兒童應進行監管,以確保他們不玩耍本產品。 警告:為避免過熱,禁止覆蓋本產品。 警告:本產品不得直接置於電源插座下面。 11. 在浴缸、噴頭或泳池的四周不得使用本產品。 12. 如果本產品有跌落過,請勿使用。 13. 如果本產品有明顯的損壞跡象,請勿使用。 14. 在水平和穩定的表面上使用本產品。 警告:當小房間內有無法自行離開房間的人員時,請勿在小房間內使用本 設備,除非提供持續的監督。 16. 如果電源軟線損壞,為了避免危險,必須由製造商、其維修部或類似部門的專 業人員更換。 P.16... - Page 17 警告及注意事項 警告:為了避免對年幼兒童造成危險,該設備的安裝應確保最低加熱面至 少高出地板600 mm。 18. 毛巾架的安裝應確保開關和其他控制裝置不會被沐浴或淋浴的人觸摸。 19. 本產品僅用於烘乾水洗過的紡織品。 20. 應保護電器插頭,例如遠離水源,或用防水盒保護插頭。 P.17...
-
Page 18: 產品結構
產品結構 正面 上蓋 旋鈕 of f of f 毛巾架 出風口 底部 掛壁孔 網蓋 底蓋 防滑腳墊 P.18... -
Page 19: 安裝說明
安裝說明 安裝注意事項 警告: 請確保該安裝距離滿足下圖要求: 1. 頂部距離應不少於500mm。 2. 側壁距離應不少於800mm。 3. 地面距離應不少於1,300mm。 警告: 本產品不得安裝在區域1或2(如下圖)。 安裝時必須確保開關和其他控制裝置不會被沐浴或淋浴的人觸摸。 區域 3 安全 區域 2 危險 危險 區域 1 危險 P.19... - Page 20 安裝說明 安裝方法 I(使用掛壁支架) 1. 在牆上鑽兩個孔,孔的直徑為6mm,深度為29mm;兩個孔之間的距離為74mm。 2. 將螺絲膠塞固定在兩個孔中。 3. 將螺絲固定到螺絲膠塞中,然後擰緊。 掛壁支架 螺絲膠塞 29mm 2個Φ6mm孔,孔深29mm Big hole Small hole 4. 將本產品安裝在掛壁支架上:將機底的大孔對準掛壁裝置,然後向右轉到小孔 (如下圖)。 小孔 小孔 大孔 大孔 P.20...
- Page 21 安裝說明 安裝方法 II(不使用掛壁支架) 1. 在牆上鑽兩個孔,孔的直徑為6mm,深度為29mm;兩個孔之間的距離為 148mm。 2. 將螺絲膠塞固定在兩個孔中,將螺絲固定到螺絲膠塞中,然後擰緊,螺絲必須 外露10mm。 10mm 2個Φ6mm孔,孔深29mm Big hole Small hole 3. 將本產品安裝在螺絲上:將機底的大孔對準螺絲,然後向右轉到小孔 (如下圖)。 小孔 小孔 大孔 大孔 P.21...
- Page 22 安裝說明 安裝毛巾架 1. 將毛巾架裝入產品左右兩側的孔,此時毛巾架向上傾斜。 2. 將毛巾架往下壓,轉動至對應位置。 3. 確保毛巾架固定好,完成。 P.22...
-
Page 23: 操作說明
操作說明 旋鈕 模式旋鈕 溫度調節旋鈕 開機 1.插上電源後進入待機狀態,電源指示燈不亮,其他所有功能均關閉。 2.扭動「模式」及「溫度調節」旋鈕;本產品開始運作,指示燈以橙色常亮。 注意: 如單獨扭動「模式」或「溫度調節」,本產品不會運作,指示燈不亮。 開關及模式調節 「模式」旋鈕的預設起始位置為「off」,扭動旋鈕以調節運行模式。 圖示 功能 關機 冷風模式 低檔熱風模式 高檔熱風模式 P.23... - Page 24 操作說明 溫度調節 1. 「溫度調節」旋鈕的預設起始位置為「off」,順時針扭動「溫度調節」旋鈕 至你所希望的溫度位置,此時室內溫度會隨著本產品運作而逐漸升高。 2. 使用過程中本產品會自動恆溫,當室內溫度達到所設定的溫度時,本產品會自 動關閉;當室內溫度低於所設定溫度時,本產品會自動開啟。 注意: 扭動「溫度調節」旋鈕時,不可超出有效的指示範圍,以免損壞旋鈕,影響本 機功能。 關機 扭動「模式」旋鈕至「off」,此時指示燈滅;然後扭動「溫度調節」旋鈕至 「off」即可。 P.24...
-
Page 25: 清潔與保養
清潔與保養 警告: 清洗前務必關掉電源並拔掉電源插頭,否則有觸電的可能。 機身表面清洗 1. 機身表面清潔,應用濕布(或加上洗潔精)抹擦,不可使用汽油、天拿水、稀 釋劑或有腐蝕性的洗滌劑、溶劑之類進行清潔,嚴禁用水沖或淋洗。 2. 若過濾網上附著過多的異物,將影響出風效果,因此應至少每隔一個月清洗一次。 過濾網清洗 1. 按順序取出過濾網(如下圖)。 2. 過濾網用清潔劑浸泡數分鐘,清洗晾乾即可。 3. 按照順序將過濾網及濾網蓋安裝好,確保安裝無誤。 過濾網 網蓋 維護保養 1. 當產品長期不使用時,應拔下電源插頭,包裝好本機以防止灰塵進入機體。 2. 包裝前應確保產品表面、過濾網等是乾燥的。 3. 包裝好後應放置於乾燥通風處存放。 P.25... - Page 26 規格 HTW-110 型號 220-240V / 50Hz 電壓 1,100W / 1,500W 功率 產品尺寸(不包含毛巾架) (H) 262 (W) 262 (D) 150 mm (H) 380 (W) 306 (D) 150 mm 產品尺寸(包含毛巾架) 2.2kg 淨重 產 品規 格及 設 計如 有 變 更 ,恕 不 另 行 通 知。...
-
Page 27: Warranty Terms & Conditions
- the serial number is modified, damaged or removed from the product. - 機身編號被擅自塗改、破壞或刪除。 4. German Pool will, at its discretion, repair or replace any 4. 總代理有權選擇維修或更換配件或其損壞部份。 defective part. 5. This warranty will be void if there is any transfer of 5. - Page 28 Fax: +86 757 2980 8318 HONG KONG TOP BRAND TEN YEAR ACHIEVEMENT AWARD © All rights reserved. Copying, reproducing or using the contents of this manual is not allowed without prior authorization from German Pool, violators will be prosecuted. www.germanpool.com HT W-110-M-20(1) GPR-T150-M-CN_19(1) P.28...
Need help?
Do you have a question about the HTW-110 and is the answer not in the manual?
Questions and answers