Table of Contents
Advertisement
Quick Links
Advertisement
Table of Contents

Related Manuals for KIDDY maxi pro


Summary of Contents for KIDDY maxi pro
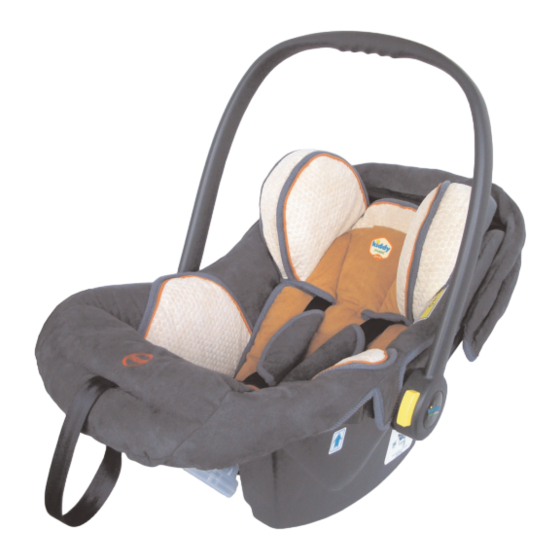
- Page 1 Komfort aus Tradition Directions for use kiddy maxi pro Stand 04/2006...
-
Page 2: Table Of Contents
Contents Introduction Applicability..............3 General safety instructions......... 4 General use..............Functions of the carrying frame........6 Functions of the sun canopy ........7 Fitting into the vehicle..........8 Choice of sea.............. 8 Fitting stages.............. Securing the baby into the seat pan......Height adjustment of 5-point belt system.... -
Page 3: Introduction
In order to secure your baby completely in the kiddy maxi pro seat, this is fitted in the head support area with the new mate- rial. The impact of a side collision will be absorbed particularly well before it reaches the sensitive head area of the baby. -
Page 4: General Safety Instructions
2. General safety instructions Read through the directions for use carefully before fitting the kiddy maxi pro seat for the first time. Incorrect use can be life-threatening for your child. Many injuries are caused by carelessness and are easily avoidable. - Page 5 Only use the seat pan for the weight category specified - up to a maximum of 13kg. Cf. chapter 1. Never use the seat pan without the original cover. It is part of the safety concept. Never use the seat pan as a shopping aid or other carrying aid. Never leave your baby unattended in the seat pan, especially not when you put the seat pan on raised surfaces (baby changing unit, table etc.).
-
Page 6: General Use
This way it is always there if you encounter pro- blems. 3.1 Functions of the carrying frame The carrying frame of your seat shell kiddy maxi pro can be locked in place in 4 places. Fig.2 Fig.1... -
Page 7: Functions Of The Sun Canopy
To adjust the carrying frame, press the yel- low button on both sides on the swivel joint. Fig.5 Make sure you never position the seat shell on sloping ground and avoid putting it down on raised items (table, baby changing unit, etc.) 3.2 Functions of the sun canopy The sun canopy can be opened to protect against direct sunlight. -
Page 8: Fitting Into The Vehicle
2. Swivel the sun canopy (fig. 8/no. 1) downwards over the top end rim of the pan. Now you can pull the clamp bracing (fig.8/no.2) down vertically and remove the clamp. (CAUTION: The clamp can only be loosened in the pan position specified. Fig.7 3. -
Page 9: Fitting Stages
The seat pan is not suitable for seats which are only fitted with a 2-point lap belt. Only use the seat pan on seats that have a 3-point vehicle belt. We recommend using the seat pan on the rear bench seat in cars. -
Page 10: Securing The Baby Into The Seat Pan
5. Securing the baby into the seat 5.1 Height adjustment of 5-point belt system and head support The kiddy maxi pro has a 5-point belt system, which guarantees optimal pro- tection for your baby in the seat pan. In order to guarantee the best possible safety for your baby with the 5-point belt system, this must be adapted accurately to the body size. -
Page 11: Loosening Of The 5-Point Belt System
5.1.1 Loosening of the 5-point belt system Before you can adapt the belt system, you must loosen this. By pressing the central belt adjustment, the area marked in red (press) in front on the cover of the seat pan and at the same time pulling on both shoul- der belts you can loosen the 5-point belt system (fig. -
Page 12: Buckling Up The Baby
Lock the head support adjustment in place again. The head support must be set so that the shoulder belt is at shoulder height of the baby or slightly above (fig. 15/no. 1). Fig.15 correct incorrect, too high incorrect, too low Make sure that the belts are never twisted. -
Page 13: Care Notes
Fig.18 Fig.19 The buckle is locked in place once To tighten the shoulder belt pull in hear clicking noise. front of the central belt adjustment (Fig.18/no.3) Check that this is until the belt system fits tightly. fastened securely by pulling on both (Fig.19/no.4) shoulder belts and the buckle at the same time. -
Page 14: Cleaning The Plastic Parts
6.2 Cleaning the plastic parts The plastic parts can be cleaned with a mild cleaning agent or a damp cloth. Do not use harsh cleaning products (e.g. solvent). 6.3 Cleaning the 5-point belt system The belt system can be cleaned with a damp cloth. Please never wash in a washing machine and never treat with chemical cleaning agents. -
Page 15: Dismantling The Shoulder Belt
6.4.2 Dismantling of shoulder belt Open the buckle. Weave the lap belt from the side belt tongues underneath the inner cover (fig. 21/22). Fig.21 Weave the belt through both slots on the seat pan as well as through the slot in the cover. -
Page 16: Fitting The Belts
Caution! Check the correct belt fitting. 6.6 Removing the cover In order to remove the covers of the kiddy maxi pro seat pan for cleaning, do the following: - Remove the clips of the seat pan cover from the outer rim of the plastic pan and detach the cover in the lower area from the seat pan. -
Page 17: Replacing The Cover
6.7 Replacing the cover When replacing the cover proceed in the reverse order of removing the cover. Make sure that when feeding the belt straps in the lower area of the seat pan, these are fed first through the outer slot and then through the inner slot. The belt strap must be inside the seat pan and fastened with the belt tongue (fig.21/no.1). - Page 18 Sicartex Autozubehör Curt Würstl GmbH Schaumbergstr. 8 D-95032 Hof / Saale Tel.: 0049 (0)9281 / 7080-0 Fax: 0049 (0)9281 / 7080-21 eMail: info@kiddy.de www.kiddy.de...
Need help?
Do you have a question about the maxi pro and is the answer not in the manual?
Questions and answers