
Subscribe to Our Youtube Channel
Related Manuals for Fimap GENIE B


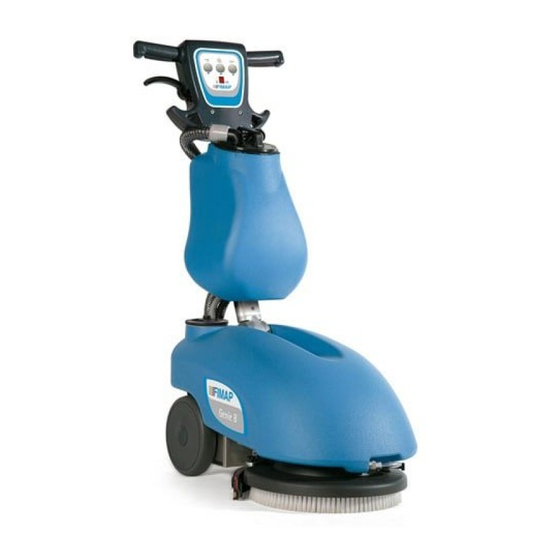
Summary of Contents for Fimap GENIE B
- Page 1 USE AND MAINTENANCE MANUAL GENIE B ED. 09-2019 Original instructions Doc. 10005707 Ver.
- Page 3 The descriptions contained in this document are not binding. The company therefore reserves the right to make any modifications at any time to elements, details, or accessory supply, as considered necessary for reasons of improvement or manufacturing/commercial requirements. The reproduction, even partial, of the text and drawings contained in this document is prohibited by law.
-
Page 4: Table Of Contents
CONTENTS ON CONSIGNMENT OF THE MACHINE ..............................5 SERIAL NUMBER PLATE ..................................5 INTRODUCTORY COMMENT ................................5 INTENDED USE ....................................5 TECHNICAL DESCRIPTION .................................. 6 SYMBOLS USED ON THE MACHINE ..............................7 GENERAL SAFETY REGULATIONS ............................... 8 MACHINE PREPARATION ..................................9 HANDLING THE PACKED MACHINE ............................ -
Page 5: On Consignment Of The Machine
Introductory comment GENIE B is a floor scrubbing machine which, by means of the mechanical action of the rotating brush and the chemical action of a water/detergent solution, can clean any type of flooring. As it advances, it also collects any removed dirt as well as the detergent solution not absorbed by the floor. -
Page 6: Technical Description
TECHNICAL DESCRIPTION Genie B Nominal input power [IEC 60335-2-72; IEC 62885-9] 0,61 Working width Width of rear squeegee Productivity theoretical 1332 Brushes (diameter or length) Ø mm Brush rpm Force exerted on brush Brush motor 12 / 360 Forward speed type Semi-aut. -
Page 7: Symbols Used On The Machine
SYMBOLS USED ON THE MACHINE Tap symbol Used to indicate the solenoid valve switch Brush symbol Used to indicate the brush motor switch Symbol denoting suction motor Used to indicate the suction motor switch Battery symbol Battery charge level indicator Indicates the maximum temperature of the detergent solution Located near the solution tank inlet Indicates the maximum gradient... -
Page 8: General Safety Regulations
GENERAL SAFETY REGULATIONS Before using the machine, please read the following document carefully and follow the instructions contained herein, along with the instructions in the document supplied with the machine itself, "GENERAL SAFETY REGULATIONS" (document code 10083659). -
Page 9: Machine Preparation
MACHINE PREPARATION 1. HANDLING THE PACKED MACHINE The machine is contained within specific packaging. Each pallet is composed of four machines on several levels. It is not possible to place more than two packages on top of each other. The total weight is 70kg The overall dimensions are: A : 500 mm 500 mm... -
Page 10: Inserting/Connecting The Batteries
PREPARATION OF THE MACHINE 4. INSERTING/CONNECTING THE BATTERIES In the CB version, the machine is supplied with a built-in battery charger and an airtight gel battery. If you use batteries other than those supplied with the machine, use only 12V AGM or Gel batteries and proceed as follows. -
Page 11: Connecting The Connector
PREPARATION OF THE MACHINE 5. CONNECTING THE CONNECTOR 1. Connect the battery connector to the machine connector. 2. Reassemble all the elements. ATTENTION: This process must be carried out by qualified personnel. The incorrect or imperfect connection of the cables to the connector can seriously harm people and damage objects 6. -
Page 12: Charging The Battery (With Built-In Battery Charger)
PREPARATION OF THE MACHINE 8. CHARGING THE BATTERY (WITH BUILT-IN BATTERY CHARGER) Perform a battery charging cycle before using the machine. When replacing the battery, be sure to use batteries that are suitable for the battery charger installed (use only 12V AGM or Gel batteries). To charge the battery you must: 1. -
Page 13: Battery Indicator
PREPARATION OF THE MACHINE 9. BATTERY INDICATOR The battery indicator is digital, with 4 fixed positions and a flashing one. The numbers that appear on the display show the approximate charge level. 4 = maximum charge 3 = ¾ charge 2 = 2/4 charge 1 = 1/4 charge 0 = discharged batteries (flashing) -
Page 14: Fixing The Handlebars
MACHINE PREPARATION 11. FIXING THE HANDLEBARS For packaging purposes the handlebars are supplied folded; they must now be put in the working position. Proceed as follows: 1. raise the handlebars by pulling the lever - indicated by the arrow - upwards. 2. -
Page 15: Recovery Tank
PREPARATION OF THE MACHINE ATTENTION: Always use detergents whose manufacturer's label indicates their suitability for use with floor scrubbing machines. Do not use acid or alkaline products or solvents without this indication. always use low-foam detergent. To avoid the production of foam, put a minimum quantity of antifoam liquid in the recovery tank before starting to clean. -
Page 16: Work
WORK 1. PREPARING TO WORK Before fitting the tanks, it is necessary to carry out certain operations: 1. Open the two rear hinges of the battery compartment. 2. Connect the connector to the batteries. 3. Close the battery compartment. 4. Make sure that the recovery tank is empty. 5. -
Page 17: At The End Of The Work
AT THE END OF THE WORK At the end of the work, and before carrying out any type of maintenance, perform the following operations: 1. Turn off the solenoid valve switch (3). 2. Turn off the suction switch (2). 3. Turn off the brush / main switch (1). 4. -
Page 18: Daily Maintenance
DAILY MAINTENANCE PERFORM ALL MAINTENANCE OPERATIONS IN SEQUENCE 1. CLEANING THE RECOVERY TANK 1. Remove the tubes attached to the connectors of the recovery tank cap. 2. Disconnect the recovery tank from the handlebars. 3. Remove the cap and empty the tank. 4. -
Page 19: Replacing The Squeegee Rubbers
DAILY MAINTENANCE 3. REPLACING THE SQUEEGEE RUBBERS Verify that the state of wear and tear of the squeegee rubbers and, if necessary, replace them. To replace it you must: 1. Raise the squeegee. 2. Remove the two knobs. 3. Dis-assemble the squeegee from its support. 4. -
Page 20: Periodic Maintenance
PERIODIC MAINTENANCE 1. CLEANING THE SQUEEGEE TUBE Periodically, or whenever suction seems to be unsatisfactory, verify that the squeegee tube is not obstructed. To clean it, proceed as follows: 1. Remove the tube from the sleeve on the squeegee 2. Remove the other end from the recovery tank 3. -
Page 21: Troubleshooting
To restore the power supply to the motor, switch off the machine and wait for the fuses to cool down (about 40 seconds). If the switch disconnects the current again, contact the FIMAP technical assistance centre. -
Page 22: Choosing And Using The Brushes
TABLE FOR CHOOSING THE BRUSHES Machine Code Type of bristles Bristles Brush Notes No. of brushes 421701 GENIE B 422213 Pad holder – anchor 422001 Pad holder – bristles... -
Page 23: Machine Disposal
MACHINE DISPOSAL Dispose of the machine in accordance with the waste disposal regulations in force in the country in which the machine is being used. -
Page 24: Ec Declaration Of Conformity
Via Invalidi del Lavoro, 1 37059 Santa Maria di Zevio (VR) declares under its sole responsibility that the products FLOOR SCRUBBING MACHINES mod. Genie B CB comply with the provisions of Directives: 2006/42/EC: Machinery Directive. 2014/35/EC: Low Voltage Directive. 2014/30/EC: Electromagnetic compatibility directive. - Page 25 Via Invalidi del Lavoro, 1 37059 Santa Maria di Zevio (VR) declares under its sole responsibility that the products FLOOR SCRUBBING MACHINES mod. Genie B comply with the provisions of Directives: 2006/42/EC: Machinery Directive. 2014/30/EC: Electromagnetic compatibility directive. They also comply with the following standards:...
- Page 28 FIMAP spa Via Invalidi del Lavoro, 1 - 37050 S. Maria di Zevio (Verona) Italy Tel. +39 045 6060411 r.a. - Fax +39 045 6060417 - E-mail: fimap@fimap.com - www.fimap.com...
Need help?
Do you have a question about the GENIE B and is the answer not in the manual?
Questions and answers