Table of Contents
Advertisement
Quick Links
Advertisement
Table of Contents

Subscribe to Our Youtube Channel
Related Manuals for BZB Gear BG-VPTZ-10HSU3


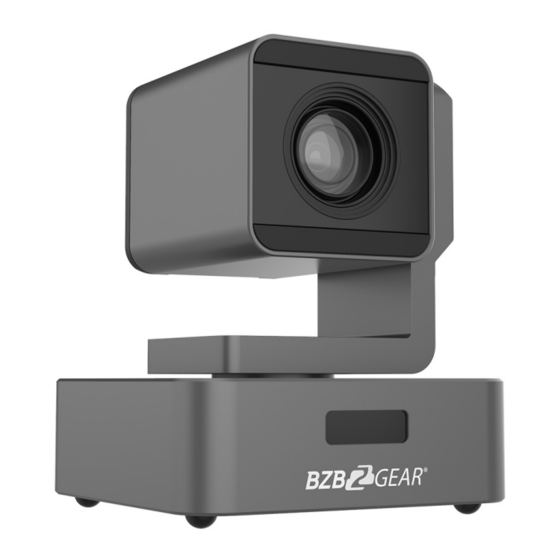
Summary of Contents for BZB Gear BG-VPTZ-10HSU3
- Page 1 PTZ VIDEO CAMERA BG-VPTZ-10HSU3 BG-VPTZ-20HSU3 BG-VPTZ-30HSU3 User Manual...
-
Page 2: Table Of Contents
Content 1. Warnings ...................... 3 2. Product Introduction ................... 4 2.1 Technical Specifications ................4 2.2 Product Features ..................5 3. Camera Overview ..................6 3.1 Connections Overview ................6 3.2 RS232 Interface Specifications ..............7 3.3 Camera Dimensions ................... 8 3.4 Remote Control.................. -
Page 3: Warnings
1. Warnings Electrical Safety Confirm country and local electrical safety standards when using or installing the product. The product has no power switch. Remove power immediately if camera is not in proper working condition to avoid electrical shock. Handle with Care Product should be protected against extremes of stress, vibration and moisture in transport, storage and installation. -
Page 4: Product Introduction
2. Product Introduction 2.1 Technical Specifications Model BG-VPTZ-10HSU3 BG-VPTZ-20HSU3 BG-VPTZ-30HSU3 Camera Parameters CMOS Sensor 1/2.7” Exmor CMOS 1/2.8”Exmor CMOS 1/2.8”Exmor CMOS Effective Pixels 2.7 Megapixels 2.38 Megapixels 2.7 Megapixels Video Format 1080P60/59.94/50/30/29.97/25; 1080I60/59.94/50/30/29.97/25; 720P60/50/30/25, 480I60, 576I50 Optical Zoom 10X Optical; 12X Digital Zoom 20X Optical;... -
Page 5: Product Features
2.2 Product Features 1/2.8" high quality CMOS sensor (1/2.7" sensor on 10x), can reach maximum 1920 x 1080 resolutions and output frame rate up to 60fps. 10/20/30X Optical Zoom with 72°/65°/65.4° horizontal field of view Equipped with advanced image processing technology and a full HD 1/2.8" CMOS Sensor (1/2.7"... -
Page 6: Camera Overview
3. Camera Overview 3.1 Connections Overview DC12V USB3.0 A-IN HDMI 8 10 Lens LAN (PoE) IR receiver 3G-SDI Output Power indicator HDMI Output DC12V Input USB 3.0 Type-B COM Port (RS485/RS232) 10. 3.5mm Audio-Input... -
Page 7: Rs232 Interface Specifications
3.2 RS232 Interface Specifications For serial connection to computers or joystick controllers. CAMERA DB-9 1. DTR 1. DCD 2. DSR 2. RXD 3. TXD 3. TXD 4. GND 4. DTR 5. RXD 5. GND 6. GND 6. DSR 7. IR OUT 7. -
Page 8: Camera Dimensions
3.3 Camera Dimensions 尺寸单位:MM 120mm... -
Page 9: Remote Control
3.4 Remote Control Function After pressing, the camera Power Key enters standby mode After pressing, the camera P/T RST Key enters self-check Flip Key Camera Select the camera to be Select Key controlled BLC Key Menu Key Enter/Exit Menu Press the HOME button to Camera PTZ return the camera to the center Control Key... -
Page 10: Operation Instructions
4. Operation Instructions 4.1 Camera ID Select Select the target camera ID (from No.1 to No.4) 4.2 Pan/Tilt Control Move camera lens up Move camera lens down Move camera lens to the left Move camera lens to the right Return camera lens to center [HOME] 4.3 Menu Display Click the [MENU] button to display the on-screen menu. -
Page 11: Backlight
Back Light Compensation Strong background light can create unwanted shadows. Press [BLC] to activate backlight compensation mode. Press [BLC] again to deactivate. 4.6 Zoom Click the [+] Button, to zoom in. Click the [-] Button, to zoom out. 4.7 Setting, Recalling, and Erasing Presets 1. -
Page 12: Menu Settings
5. Menu Settings MAIN MENU 1. Press the [MENU] button on the remote control to EXPOSURE COLOR display the OSD menu. PICTURE 2. Use the arrow keys to navigate the menu, press left P/T/Z NOISE REDUCE and right buttons to adjust the settings. VIDEO OUT SYSTEM SETUP DEFAULT SETUP... -
Page 13: Color
5.2 Color Press the [MENU] button to display the OSD menu, press arrow keys to highlight COLOR and then press right to enter the sub menu. COLOR WB MODE: AUTO [WB MODE]: AUTO/ONE-SHOT/ATW/ MANUAL/3000K/ R TUNING: 4000K/ 5000K/6500K B TUNING: [R TUNING]: 0-32 G TUNING: [B TUNING]: 0-32... -
Page 14: P/T/Z
5.2 P/T/Z Press the [MENU] button to display the OSD P / T / Z menu, then press the arrow keys to highlight [P/T/Z] and press right to enter the sub-menu. FLIP: [FILP]: ON/OFF L/R DIRECTION: AF MODE: AUTO [L/R DIRECTION]: ON/OF AF SENS: NORMAL PRESET FREEZE:... -
Page 15: Video Format
VIDEO OUT 5.4 Video Format VIDEO OUT: 720P50 Press the [MENU] button to display the OSD 720P60 menu, press the arrow keys to highlight [VIDEO 1080I25 OUT], then press right to enter the sub-menu. 1080I30 1080I50 [VIDEO OUT]: 1080I59.94 1080P60/59.9 4/50/30/29.97/25 1080I60 1080I60/59.94/50/30/25 1080P25... -
Page 16: Network Connection
6. Network Connection To successfully complete this process, you will need several pieces of information. The first is the IP address of your computer. You will also need to select an unused IP address on your local network (This is the address you will set the camera to). The third piece is the default IP address of your camera. - Page 17 • For the following steps refer to the diagram below. Select “Use the following IP address.” • In the IP address field enter a non-conflicting IP address on the same subnet as the camera. If there is another device with the same IP address you will not be able to connect.
- Page 18 • On the left side of your screen select Network. In the IP address field, you will enter the unused IP address you selected at the beginning. Our example will use an address of 192.168.20.186. *This address MUST NOT be in use by any other device on your network or you will create an IP conflict and be unable to access your camera.
- Page 19 • Your computer and camera should now be on your network. Open your web browser and enter the IP address you assigned to your camera and your setup is complete. 6.1 Camera Web Interface From the Web Interface you can control the camera, view the video feed, and adjust various camera settings and functions.
- Page 20 Service Tab MSG Port: default 8080 RTSP Port: default 554 HTTP Port: default 80 VISCA Port: default 52381 WebSocket Port: default 8880 Note: Changing the port number requires restarting the camera to valid. In order to avoid port conflicts, please be careful to modify. RTMP Tab Enable RTMP: (Check box) Server: Enter the server URL and Stream Key of your streaming platform in the format of :...
- Page 21 Stream Mix Type: Select Complex or Video Stream. Complex Stream includes audio. Encode Type: Select video encoding format. Bitrate Type: CBR (Coded Bit Rate), VBR (Variable Bit Rate), Fix QP (Fixed Bit Rate). -When CBR is selected stream quality, IFrame, and PFrame settings are unavailable. -When VBR is selected IFrame and PFrame settings are unavailable.
- Page 22 ICR Mode: Infrared Cut Filter Removal Mode AE Mode: Auto Exposure Mode AE Level: Auto Exposure Level adjustment HLC: Highlight Compensation Level DNR(2D): 2D Digital Noise Reduction adjustment Gamma: Gamma adjustment Safety Page From this screen you can modify the login information PTZ Page From this screen you can view and modify the PTZ control settings of the camera.
-
Page 23: Installation Instruction
7. Installation Instructions... -
Page 24: Tech Support
8. Tech Support Before contacting tech support, your questions may have been answered already! Visit our BZBGEAR support page at bzbgear.com/support for valuable information on our products. Here you will find our Knowledge Base (bzbgear.com/knowledge-base) consisting of tutorials, quick start guides, and step-by-step troubleshooting instructions. Also visit our YouTube channel BZB TV youtube.com/c/BZBTVchannel for help setting up, connecting, and other how-to videos regarding our products.
Need help?
Do you have a question about the BG-VPTZ-10HSU3 and is the answer not in the manual?
Questions and answers