Table of Contents
Advertisement
Quick Links
Advertisement
Table of Contents

Related Manuals for BZB Gear BG-BPTZ-3XU


Summary of Contents for BZB Gear BG-BPTZ-3XU
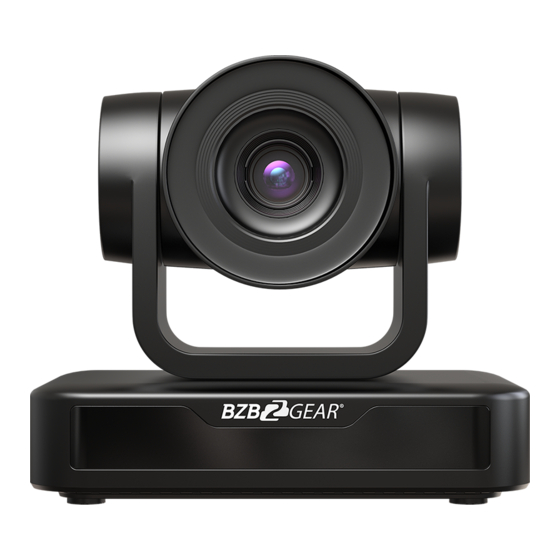
- Page 1 BG-BPTZ-3XU BG-BPTZ-10XU HD Color Video Camera User Manual...
- Page 2 To prevent the risk of electric shock, do not open the case. Installation and maintenance should only be carried out by qualified technicians. There are no serviceable parts inside the camera. BZB Gear is not responsible for any damage due to unauthorized disassembly.
-
Page 3: Table Of Contents
Content 1.FAST INSTALLATION ............................4 1.1 C ........................4 AMERA NTERFACE XPLANATION 1.2 P ........................4 OWER ON INITIAL CONFIGURATION 1.3 V ............................... 4 IDEO UTPUT 2. PRODUCT OVERVIEW ............................7 2.1 P ..........................7 RODUCT NTRODUCTION 2.1.1 Dimensions ............................7 2.1.2 Accessories ............................ - Page 4 5. CAMERA MAINTENANCE AND TROUBLESHOOTING ..................28 5.1 C ..........................28 AMERA AINTENANCE 5.2 T ............................28 ROUBLESHOOTING 6. W ..............................30 ARRANTY 7. M ............................30 ISSION TATEMENT 8. C ............................30 OPYRIGHT OTICE...
-
Page 5: Fast Installation
1. Quick Installation 1.1 Camera Interface Description Figure 1.1 Interface Camera Lens 6. RS232 Control Interface (output) Remote Controller Receiver Light 7. RS232 Control Interface (input) Camera Base 8. RS485 Input (left +, right-) Tripod Screw Hole 9. USB2.0 Interface Mounting hole 10. - Page 6 1.4 Bracket mount Note: Bracket can only be wall mounted or upside-down mounted on template and concrete wall; cannot be installed on plasterboard. 1) Wall mount step...
- Page 7 2). Upside down mount step...
-
Page 8: Product Overview
2. Product overview 2.1 Product Introduction 2.1.1 Dimensions Figure 2.2 Camera dimension... -
Page 9: Accessories
Configuration Accessories Power adapter 1piece USB2.0 cable 1 piece Standard User manual 1 piece IR Remote controller 1 piece BG-BPTZ-3XU Rubber pad BG-BPTZ-10XU Warranty card 1 piece Optional Wall mount bracket Ceiling mount bracket USB2.0 Video cable: If need USB2.0 cable to provide power but not a power adapter, USB2.0 Video cable with two ports is needed, among which red port is for power supply and black port for transmitting USB video signals. -
Page 10: Technical Specification
2.3 Technical Specification Model Camera Parameter Sensor 1/2.9-inch high quality HD CMOS sensor Effective Pixels 2.07 megapixel, 16:9 H264/H265/MJPG:1920*1080P@30/25/20/15/10/5fps;1280*720P@30/25/20/15/10/5fps; Video Format 960*540@30/25/20/15/10/5fps;800*600@30/25/20/15/10/5fps; 720*576@30/25/20/15/10/5fps;720*480@30/25/20/15/10/5fps; 640*480@30/25/20/15/10/5fps;640*360@30/25/20/15/10/5fps; 352*288@30/25/20/15/10/5fps;320*240@30/25/20/15/10/5fps; YUY2:1280*720@10/5fps;800*600@10/5fps;640*480@30/25/20/15/10/5fps; 640*360@30/25/20/15/10/5fps; View Angel 34.1°~85° 8.8°~ 66° F Value f=3.35mm~10.05mm f=4.34mm~41.66mm F1.7~3.0 F1.85 – F2.43 Optical Zoom Minimum Illumination 0.5Lux (F1.8, AGC ON) -
Page 11: Interface Instruction
Consumption 5W(max) Store Temperature -40℃~+70℃ Store Humidity 20%~90% Working Temperature -10℃~+50℃ Working Humidity 20%~80% 156.8mm×112.6mm×139.5mm Dimension Weight Working Environment Indoor Accessory Power Supply, Remote Controller, USB2.0 cable, Manual ,Warranty card, Packing list Optional Accessory Bracket 2.4 Interface Instruction 2.4.1 External Interface :RS232 in \out, USB2.0, A-in, DC12V External interface Figure 2.4 external interface diagram... -
Page 12: Rs-232 Interface
2.4.2 RS-232 Interface 1)RS-232 Interface Computer or keyboard and camera connection method Camera WindowsDB-9 1.DTR 1.DCD 2.DSR 2.RXD 3.TXD 3.TXD 4.GND 4.DTR 5.RXD 5.GND 6.GND 6.DSR 7.IR OUT 7.RTS 8.NC 8.CTS 9.RI 2)RS-232 Mini-DIN 8-pin Port Definition Port Definition Data Terminal Ready Data Set Ready Transmit Data System Ground... -
Page 13: Application Instruction
Request to Send Clear to Send Ring Indicator 4)VISCA networking as shown below: Camera cascade connection method Camera1 Camera 2 1.DTR 1.DTR 2.DSR 2.DSR 3.TXD 3.TXD 4.GND 4.GND 5.RXD 5.RXD 6.GND 6.GND 7.IR OUT 7.OPEN 8. NC 8.OPEN Note: this model has RS232 input and output interface, so you can cascade as the above way. 3. -
Page 14: Remote Controller
3.2 Remote Controll 3.2.1 Keys Instruction 3.2.1 Key Description 1. Power/Standby Key Press and hold for 3 seconds to place the camera into standby mode. Press and hold for 3 seconds a second time and the camera will self-test again and return to the HOME position. Note: Camera will default to preset 0 if no command is sent within 12 seconds of power on. - Page 15 Key Instruction: 1. In this instruction, “press the key” means a click rather than a long-press, and a special note will be given if a long-press for more than one second is required. 2. When a key-combination is required, do it in sequence. For example,“ 【 *】+【#】+【F1】”means press“【*】”first and then press“【#】”...
-
Page 16: Menu Setting
6) Presets Setting, Running, Clearing 1. Preset setting: to set a preset position, the users should press the “【SET PRESET】” key first and then press the number key 0-9 to set a relative preset, Note: 10 preset positions in total are available by remote controller. -
Page 17: System Setting
MENU ================ (Setup) (Camera) (P/T/Z) (Version) (Restore Default) [↑↓]Select [← →]Change Value [Menu]Back[Home]OK SETUP: System setting CAMERA : Camera setting P/T/Z:Pan tilt setting VERSON: camera version setting Restore Default: Reset setting [↑↓] Select: for selecting menu [← →] Change Value: for modify parameters [MENU] Back: Press [MENU] to return [Home] OK: Press [Home] to confirm 3.3.2 System Setting... -
Page 18: Camera Setting
VISCA ADDRESS: VISCA=1~7 Pelco-P=1~255 Pelco-D = 1~255 BAUD RATE : 2400/4800/9600/115200 VISCA ADDRESS FIX : On/Off 3.3.3 Camera Setting Move the pointer to the (CAMERA) in the Main Menu, click the【HOME】key and enter the (CAMERA) as follow: CAMERA ================= (Exposure) (Color)... - Page 19 Compensation Level: -7~7 (only available in auto mode when EV is ON) BLC: ON/OFF for options (only available in auto mode) Anti-Flicker: OFF/50Hz/60Hz for options (only available in Auto/Iris priority/Brightness priority modes) Gain Limit: 0~15(only available in Auto/ Iris priority /Brightness priority mode) WDR: Off,1~8 Shutter Priority:1/25,1/30,1/50,1/60,1/90,1/100,1/120,1/180,1/250,1/350,1/500,1/1000,1/2000,1/3000,1/4000,1/6000,1/10000(only...
- Page 20 IMAGE ================ Brightness Contrast Sharpness Flip-H Flip-V B&W-Mode Color Gamma Default Close Low-Light Mode [← →]Change Value [↑↓]Select [Menu]Back Brightness: 0~14 Contrast: 0~14 Sharpness: 0~15 Flip-H: On/Off Flip-V: On/Off B&W Mode: color, black/white Gamma: default, 0.47, 0.50, 0.52, 0.55 DZoom: digital zoom options: On/Off DCI: Dynamic Contrast: Off,1~8 4) FOCUS Move the pointer to the (FOCUS) in the Menu, click the【HOME】and enter the (FOCUS) as follow,...
-
Page 21: P/T/Z
NOISE REDUCTION ================ NR-2D Auto NR-3D Dynamic Hot Pixel [← →]Change [↑↓]Select Value [Menu]Back 2D Noise Reduction: Auto, close, 1~7 3D Noise Reduction: Close, 1~8 Dynamic Hot Pixel: Close, 1~5 3.3.4 P/T/Z Move the pointer to the (P/T/Z) in the Main Menu, click the【HOME】and enter the (P/T/Z) as follow, P/T/Z ===============... -
Page 22: Restore Default
VERSION ================= MCU Version 3.1.0 2019-09-26 Camera Version 1.0.5 2019-09-27 AF Version 1.0.0 2019-09-07 [← →]Change Value [↑↓]Select [Menu]Back [Home]OK MCU Version: Display MCU version information Camera Version: Display camera version information AF Version: Display the focus version information Lens: Display the lens zoom 3.3.6 Restore Default Move the pointer to the (RESTORE DEFAULT) in the Main Menu, click the【HOME】and enter the (RESTORE DEFAULT) as follow, RESTORE DEFAULT... -
Page 23: Visca Protocol List
4.1 VISCA protocol list 4.1.1 Camera return command Ack/Completion Message Command packet Note z0 41 FF Returned when the command is accepted. Completion z0 51 FF Returned when the command has been executed. z = camera address + 8 Error Messages Command packet Note Returned when the command format is different or when a... - Page 24 Command Function Command packet Note 5000k 8x 01 04 35 04 FF Manual 8x 01 04 35 05 FF 6500k 8x 01 04 35 06 FF 3500K 8x 01 04 35 07 FF 4500K 8x 01 04 35 08 FF 5500K 8x 01 04 35 09 FF 6000K...
- Page 25 Command Function Command packet Note 8x 01 04 53 0p FF P=0-7 0:OFF CAM_NR(2D) 8x 01 04 54 0p FF P=0-8 0:OFF CAM_NR(3D) p = 0 – 4 0: Default 1: 0.47 2: 0.50 CAM_Gamma 8x 01 04 5B 0p FF 3:0.52 4:0.55 8x 01 04 23 00 FF...
-
Page 26: Inquiry Command
Command Function Command packet Note DownLeft 8x 01 06 01 VV WW 01 02 FF DownRight 8x 01 06 01 VV WW 02 02 FF Stop 8x 01 06 01 VV WW 03 03 FF 8x 01 06 02 VV WW AbsolutePosition 0Y 0Y 0Y 0Y 0Z 0Z 0Z 0Z FF 8x 01 06 03 VV WW... - Page 27 CAM_NRLevel(2D) Inq 8x 09 04 53 FF y0 50 0p FF P: 2DNRLevel CAM_NRLevel(3D) Inq 8x 09 04 54 FF y0 50 0p FF P:3D NRLevel p: Flicker Settings (0: OFF,1: CAM_FlickerModeInq 8x 09 04 55 FF y0 50 0p FF 50Hz,2:60Hz) CAM_ApertureInq 8x 09 04 42 FF...
-
Page 28: Pelco -Dprotocol Command List
4.2 Pelco-D protocol command list Function Byte1 Byte2 Byte3 Byte4 Byte5 Byte6 Byte7 0xFF Address 0x00 0x08 Pan Speed Tilt Speed Down 0xFF Address 0x00 0x10 Pan Speed Tilt Speed Left 0xFF Address 0x00 0x04 Pan Speed Tilt Speed Right 0xFF Address 0x00... - Page 29 Zoom In 0xA0 Address 0x00 0x20 0x00 0x00 0xAF Zoom Out 0xA0 Address 0x00 0x40 0x00 0x00 0xAF Focus Far 0xA0 Address 0x01 0x00 0x00 0x00 0xAF Focus Near 0xA0 Address 0x02 0x00 0x00 0x00 0xAF Set Preset 0xA0 Address 0x00 0x03 0x00...
- Page 30 3) Image distorts when camera is moving- Check whether the camera installation position is solid Check whether there is machinery or objects nearby that could be transmitting vibration to the camera 4) Remote control does not work- Verify remote control address is set to 1 Check remote control batteries Verify the camera is in the normal operating mode Verify the OSD has been exited.
- Page 31 6. Warranty BZBGEAR wants to assure you peace of mind. All BZBGEAR cameras and camera-related products include our Stress-Free Three-Year Warranty. For complete warranty information, please visit BZBGEAR.com/warranty. For questions, please call 1.888.499.9906 or email support@bzbgear.com. 7. Mission Statement BZBGEAR manifests from the competitive nature of the audiovisual industry to innovate while keeping the customer in mind. AV solutions can cost a pretty penny, and new technology only adds to it.
Need help?
Do you have a question about the BG-BPTZ-3XU and is the answer not in the manual?
Questions and answers