
Subscribe to Our Youtube Channel
Related Manuals for Duplo KB-501


Summary of Contents for Duplo KB-501
- Page 1 Duplo Perfect Binder KB-501 Instruction Manual Provided By http://www.MyBinding.com http://www.MyBindingBlog.com...
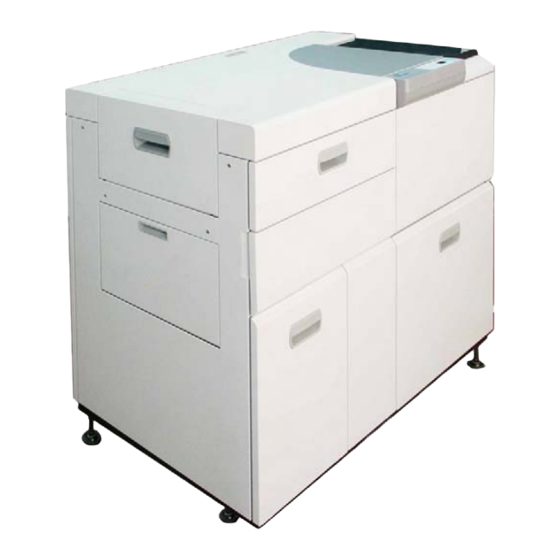
- Page 2 Chapter 1 Equipment overview PERFECT BINDER KB-501 INSTRUCTION MANUAL Duplo USA Corporation.
- Page 3 Chapter 1 Equipment overview...
- Page 4 Duplo USA Corp. will bear absolutely no responsibility for any lost profits or damages resulting from the operation of the K-BINDER501.
- Page 5 Chapter 1 Equipment overview Europe only CE Marking We declare under our sole responsibility that the printer and option to which this declaration relates is in conformity with the specifications below. This declaration is valid for the area of the European Union (EU) only. Product Type PERFECT BINDER Product Name...
- Page 6 Chapter 1 Equipment overview For safe use of the K-BINDER501 Please make sure to read this section completely before operating the K-BINDER501. Alert symbols, signal words, and other symbols used in this manual are shown below. This signal word indicates an immediately hazardous situation where death or serious injury to the user will result if this indication is ignored and the K-BINDER501 is used improperly.
- Page 7 Chapter 1 Equipment overview Precautions when installing and moving the K-BINDER501 CAUTION Do not install the K-BINDER501 at locations with high temperature and high humidity or at locations with dust and insufficient ventilation. This may result in fire or electric shock. Do not install the K-BINDER501 at locations close to heating devices such as a stove or heater.
- Page 8 Chapter 1 Equipment overview 600mm 1240mm 1000mm 23.6inch 48.8inch 39.4inch Space required for installation...
- Page 9 Chapter 1 Equipment overview Precautions regarding power supply and ground connections WARNING Insert the power plug into an outlet capable of supplying power of 1500W or more at ±10% of the rated supply voltage. Do not use an outlet with a starburst connection.
- Page 10 Chapter 1 Equipment overview Precautions for use WARNING Do not place containers with water (such as a vase, flowerpot, or glass) on the K-BINDER501. If the water is spilled into the K-BINDER501, it may result in fire or electric shock. Do not place metal objects on the K-BINDER501.
- Page 11 Chapter 1 Equipment overview Handling of alert labels The alert labels are attached to parts of the K-BINDER501 that are potentially dangerous to operators and maintenance personnel. There are three types of alert label (DANGER, WARNING, and CAUTION) that are rated according to the level of danger, and instructions are indicated on each label. However, as standard operation of the K-BINDER501 is unlikely to result in situations rated at the DANGER level, DANGER labels cannot be seen during normal operation.
- Page 12 Chapter 1 Equipment overview Attachment locations of alert labels The attachment locations of alert labels (CAUTION) are shown below. The types of alert label (WARNING) and their attachment locations are described below. • WARNING label 120 V Type 230 V Type...
- Page 13 Chapter 1 Equipment overview Precautions when disposing of the K-BINDER501 When disposing of the K-BINDER501, consult the dealer from which you purchased the equipment or entrust the disposal to a waste reclamation trader to ensure the procedure is environmentally safe. About this manual This manual describes precautions for safety and operational procedures of the K-BINDER501.
-
Page 14: Table Of Contents
Chapter 1 Equipment overview CONTENTS Chapter 1 Equipment overview ............1 Name and function of each component...........1 Chapter 2 Before operating the K-BINDER501 ....... 6 Setting a glue sheet roll................6 Loading covers..................10 2.1 About covers .................10 2.2 How to load covers................11 Chapter 3 Before starting bookbinding .......... - Page 15 Chapter 1 Equipment overview Chapter 7 Troubleshooting ............29 Book block jam..................29 1.1 When error code J2 is shown on the COUNT display ....29 Cover jam....................30 2.1 When error code J3 is shown on the COUNT display ....30 2.2 When error code J4 is shown on the COUNT display ....31 2.3 When error code J5 is shown on the COUNT display ....31 2.4 When error code J6 is shown on the COUNT display ....32 Bound book jam..................33...
-
Page 16: Chapter 1 Equipment Overview
Chapter 1 Equipment overview Chapter 1 Equipment overview 1. Name and function of each component [Main unit] 1. Main switch Turns ON/OFF the power of the K-BINDER501. 2. Book supply shutter When the warm-up has completed (warm-up will take about 13 minutes after turning ON the power), the book supply shutter automatically opens. - Page 17 Chapter 1 Equipment overview 6. Filter cover Opened when attaching/detaching the filter. 7. Filter Absorbs the vaporized material generated inside the K-BINDER501 when glue is heated and its smell. 8. Pasting cover Opened when setting a glue sheet roll. 9. Delivery cover Ejects a bound book from the K-BINDER501.
- Page 18 Chapter 1 Equipment overview 12. Molding unit Bonds a book block to a cover and drops the bound book on the delivery block. 13. Scraps tray Collects waste that is generated after cutting covers. 14. Total counter Indicates a total number of books bound (total count). 15.
- Page 19 Chapter 1 Equipment overview 18. Upper feed cover Opened when correcting a cover jam. 19. Lower feed cover Opened when correcting a cover jam. 120 V Type 230 V Type 20. Inlet Connects the power cable. 21. Fuse (only for 120 V type) Shuts OFF the power source when a short circuit is detected.
- Page 20 Chapter 1 Equipment overview [Operation panel] (Photo shown Europe 230V version) 1. START button Used when executing bookbinding. 2. COUNT display Indicates the total number of books bound from when the power was turned ON until now. Also indicates a relevant error code when an error occurs to the K-BINDER501. 3.
-
Page 21: Chapter 2 Before Operating The K-Binder501
Chapter 8 Technical information Chapter 2 Before operating the K-BINDER501 1. Setting a glue sheet roll Take out a glue sheet roll from the package. Glue sheet roll Take-up shaft Flanges Attach the flanges to both ends of the glue sheet roll. Glue sheet roll Flange Flange... - Page 22 Chapter 8 Technical information Hold the flanges on both ends of the glue sheet roll so that the winding direction corresponds to the direction indicated in the figure below. Then, mount the glue sheet roll on the cassette so that the flanges are located inside the collars.
- Page 23 Chapter 8 Technical information Pull the glue sheet over the guide shaft to the left end of the lower roller. Glue sheet Lower roller Guide shaft Make the leading edge of the glue sheet flush with the leading edge of the guide plate.
- Page 24 Chapter 8 Technical information While pressing the end of the take-up shaft against the bearing of the glue supplying section that is close to the front side of the K-BINDER501, set the other end of the take-up shaft by fitting its notch over the pin on the other side of the bearing.
-
Page 25: Loading Covers
Chapter 8 Technical information 2. Loading covers About covers The type and sizes of the book covers that can be used are shown in the table below. Cover paper Paper for covers Paper type 80g/m to 200g/m (thickness: 0.3mm or 12mil or Basis weight less) The “basis weight”... -
Page 26: How To Load Covers
Chapter 8 Technical information How to load covers Draw out the cassette unit as far as it will go. Be careful when drawing out the cassette unit. If the cassette unit is opened forcefully, it may hit your pelvis and cause injury. Cassette unit After inclining cover size adjustment guide 1 to your side, slide the guide until the arrow on the guide aligns with the line that indicates the cover size... - Page 27 Chapter 8 Technical information Set covers with the front surface up. Make sure that the cover pile height does not go beyond the indication on the label. Number of covers that can be piled differs according to the thickness and condition of the covers.
-
Page 28: Chapter 3 Before Starting Bookbinding
Chapter 8 Technical information Chapter 3 Before starting bookbinding 1. Turning ON the power Open the delivery cover. Set the covers in the cassette unit. (Refer to “2.2 How to load covers” in Chapter 2.) Turn the main switch on the right side of the K-BINDER501 to ON. When the power is turned ON, the bookbinding COUNT display on the operation panel blinks, and the equipment enters the warm-up mode. -
Page 29: Turning Off The Power
Chapter 8 Technical information Turning OFF the power Turn the main switch on the right side of the K-BINDER501 to OFF. The book supply shutter closes with an alarm beep. Even after the power is turned OFF, the exhaust fan will continue to run for a while. Close the delivery cover. -
Page 30: Chapter 4 Bookbinding Operation
Chapter 8 Technical information Chapter 4 Bookbinding operation 1. Loading a book block About a book block The types and sizes of book block that can be used are shown in the table below. Types of book block Copy paper is Paper type recommended. - Page 31 Chapter 8 Technical information While pressing down the release tab on book block size adjustment guide 2, slide the guide close to the line that indicates the book block size to be used. Then, without pressing down the release tab, slide the guide until it is locked on the groove.
-
Page 32: Bookbinding Workflow
Chapter 8 Technical information 2. Bookbinding workflow Turn ON the power. (Refer to “1. Turning ON the power” in Chapter 3.) When the operation in the warm-up mode completes, the book supply shutter opens and the equipment enters the standby mode. At this time, the COUNT display and the cover size lamp corresponding to the cover size set for cover size adjustment guide 2 light up. -
Page 33: Adjusting A Bound Book
Chapter 8 Technical information When the mode changes to the cool down mode, the book supply shutter closes with an alarm beep. The lamps other than the cover size lamp and the COUNT display go off. When the mode changes to the cool down mode and an alarm beep is heard, keep your hands and fingers away from the sub clamp unit. -
Page 34: Adjustment Procedure
Chapter 8 Technical information Adjustment procedure The adjustment procedure for the “length of the cover” corresponds to that for the “bonding position of the book block and the cover”. Select the item to be adjusted. The item to be adjusted can be selected by pressing the [RESET] button while the item to be adjusted (L or P) is indicated on the COUNT display. -
Page 35: How To Return To The Standby Mode
Chapter 8 Technical information Load a book block in the sub clamp unit. The setting value cannot be confirmed only by changing it but by executing bookbinding. Press the [START] button to execute bookbinding. Check the bound book ejected from the delivery section. Repeat steps through until it meets your satisfaction. -
Page 36: Chapter 5 Daily Maintenance
Chapter 8 Technical information Chapter 5 Daily maintenance In order to maintain high quality performance of the K-BINDER501 and to use the K- BINDER501 safely, daily maintenance is required. Also, in order to use the K-BINDER501 under stable operating conditions, make sure to have the K-BINDER501 maintained by service personnel periodically. -
Page 37: Delivery Block
Chapter 8 Technical information Delivery block Glue will adhere to the conveyor belt in front of the delivery block. Therefore, clean the belt at least once a week. Open the delivery cover. Wipe the surface of the conveyor belt in front of the delivery block using a cloth moistened with a neutral detergent. -
Page 38: Cut Off Waste Disposal
Chapter 8 Technical information 2. Cut off waste disposal Waste that is generated after cutting covers is collected in the scraps tray. When the tray becomes full, dispose the cut off waste inside the tray. The scraps tray will be full after about 500 to 600 books are bound. Even when the scraps tray has become full, no alarm indication will be displayed on the operation panel. -
Page 39: Filter Replacement
Chapter 8 Technical information 3. Filter replacement As a filter deteriorates, an odor that is generated inside the K-BINDER501 when glue is heated can be noticed around the K-BINDER501. Replace the filters every time a total of two glue sheet rolls is used up. Open the filter cover and take out the filter by holding its handle. -
Page 40: Chapter 6 Error Codes
Chapter 8 Technical information Chapter 6 Error codes An error code appears on the COUNT display to warn the operator of an operation failure or error occurring to the K-BINDER501. There are four types of error codes as shown below. •... - Page 41 Chapter 8 Technical information If the same error occurs repeatedly, even after the appropriate action shown above has been taken, please contact the service representative.
-
Page 42: Jam Related Errors
Chapter 8 Technical information 2. Jam related errors Error code Description Action to be taken Main clamp unit jam Refer to “1.1” in Chapter 7. Cassette unit jam Refer to “2.1” or “2.2” in Chapter Upper feed unit jam Refer to “2.2” in Chapter 7. Lower feed unit jam Refer to “2.3”... - Page 43 Chapter 8 Technical information If the same error occurs repeatedly, even after the appropriate action shown above has been taken, please contact the service representative.
-
Page 44: Errors That Require Maintenance By Service Personnel
Chapter 8 Technical information 4. Errors that require maintenance by service personnel When any error code from E01 to E99 is displayed, reboot the K-BINDER501. If the same error code is displayed after rebooting, please contact the service representative. Please note the error code that appears on the display before asking questions or requesting service maintenance so that an error can be corrected efficiently. -
Page 45: Chapter 7 Troubleshooting
Chapter 8 Technical information Chapter 7 Troubleshooting When an operation error such as cover jam or book block jam occurs to the K-BINDER501, the TROUBLE lamp on the operation panel lights up. At the same time, a relevant error code is shown on the COUNT display. -
Page 46: Cover Jam
Chapter 8 Technical information 2. Cover jam When error code J3 is shown on the COUNT display A cover is jammed in the cassette unit or the upper feed unit. When a cover is jammed in the upper feed unit, take the same corrective measures as those given on the next page in “2.2 When error code J4 is shown on the COUNT display”. -
Page 47: When Error Code J4 Is Shown On The Count Display
Chapter 8 Technical information When error code J4 is shown on the COUNT display A cover is jammed in the upper feed unit. Open the upper feed cover. Remove the jammed cover. Upper feed cover Cover Close the upper feed cover. If “P3”... -
Page 48: When Error Code J6 Is Shown On The Count Display
Chapter 8 Technical information If “P3” is shown on the COUNT display, remove the book block remaining in the sub clamp unit. When the book block is removed, the book supply shutter closes, the indication on the COUNT display blinks, and the equipment enters the warm-up mode. -
Page 49: Bound Book Jam
Chapter 8 Technical information 3. Bound book jam When error code J7 is shown on the COUNT display Open the front cover 2. Rotate the green knob to drop the book onto the delivery block. If the book has not dropped, tap the topside of the book. Green knob Book Close the front cover 2. -
Page 50: Chapter 8 Technical Information
Chapter 8 Technical information Chapter 8 Technical information 1. Specifications Item Specification 210 books/h (When 1.5mm or 0.06inch thick book block) Production rate 6 × 9 inch, Letter size Book size 1.5mm to 20mm or 0.06inch to 0.79inch Book thickness Copy paper is recommended. -
Page 51: Consumable Items
The K-BINDER501 uses the following consumable items. Make sure to use the specified items listed below. Duplo USA Corp. accepts no responsibility for any damages that occur to the K-BINDER501 due to use of items that are not specified here. -
Page 52: Outline Drawing
Chapter 8 Technical information 3. Outline drawing 735mm 1240mm 48 8inch 29inch... - Page 53 Chapter 8 Technical information Duplo USA Corp. All rights reserved. Copyright 2004 Duplo USA Corp. All information in this document is subject to change without notice.
Need help?
Do you have a question about the KB-501 and is the answer not in the manual?
Questions and answers