
Related Manuals for Duplo DC-445


Summary of Contents for Duplo DC-445
- Page 1 Duplo DC-445 Creaser Instruction Manual Provided By http://www.MyBinding.com http://www.MyBindingBlog.com...
- Page 2 DuCreaser DC-445 Instruction Manual Correct operation and periodic maintenance are essential for ensuring safe use of this machine. Thoroughly read this manual before using this machine. Store this manual so that it can be retrieved whenever needed.
-
Page 4: Introduction
▧ Introduction Thank you for your purchase of the DC-445 (DuCreaser). To ensure safe and efficient use, read and thoroughly understand this manual before using this machine. After using this manual, be sure to keep it in a handy place to reference. -
Page 5: Notes On Safety
Notes on Safety (Please Read and Observe) Safety Precautions Various symbols and pictures are used in this manual and on the stickers affixed to the machine. These symbols and pictures provide warnings and instructions to prevent danger to you or other personnel, and to prevent damage to office property. - Page 6 CAUTION ● Some paper may cause paper dust in the machine. Keep clean the machine and sufficient ventilation. ●Caution for Grounding (Be sure to use the supplied power cord) WARNING ● Use only the power cord that is provided among the accessories. Insert the power cord plug firmly into the socket, so that proper electrical contact is effected.
- Page 7 ●Prohibition of Disassembly or Modification WARNING ● Do not modify the machine. → Doing so may result in fire or electric shock. ● Do not remove the rear lid, cabinet, or covers from the machine. → The inside of the machine contains high-voltage parts, which may cause electric shock.
- Page 8 When using an optional cabinet ● Be sure to lock casters after placing the machine on the STAND. → The machine may move or fall over without lock causing personal injury. ● Push the STAND only, not the machine, when you desire to move the machine. →...
-
Page 9: Locations Of Warning Labels
● Locations of Warning Labels Keep the WARNING labels clean at all times. If labels become damaged or come off, please call our service person. NO. Part No. Name Q’ty M7-T3030 Warning label... -
Page 10: Table Of Contents
CONTENTS Page Introduction ························································································································ 1 Notes on Safety ················································································································· 2 Locations of Warning Labels ···························································································· 6 Chapter 1 Before Using This Machine Part Names and Their Functions ···················································································· 10 ●Appearance ················································································································ 10 ●Document Ejection Side ··························································································· 11 ●Inside ·························································································································· 12 ●Control Panel ·············································································································... - Page 11 Chapter 4 Daily Maintenance Daily Maintenance ··········································································································· 39 Chapter 5 Specifications Specifications ··················································································································· 41...
-
Page 12: Chapter 1 Before Using This Machine
Before Using This Machine Chapter 1... -
Page 13: Part Names And Their Functions
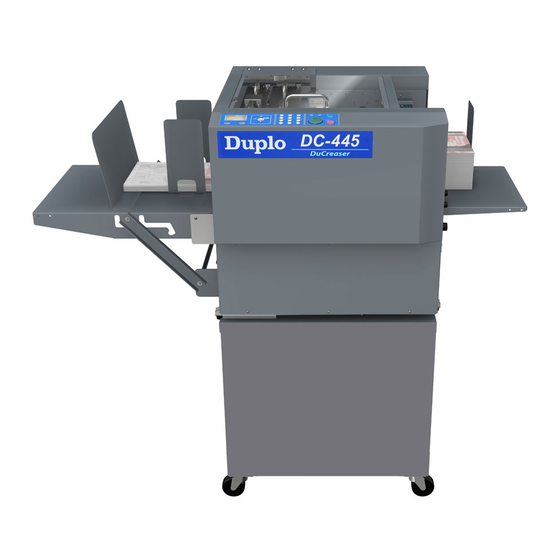
Part Names and Their Functions ●Appearance Name Function Control panel Displays operations and status. Stacker tray Receives finished document. Top cover Open this to remove paper jam from inside of the machine. Feed tray Original document is placed here. Airflow adjustment knob Adjusts airflow level. -
Page 14: Document Ejection Side
●Document Ejection Side Name Function AC inlet Connects the power cord. Back guide Prevents ejected papers being dropped. Power switch Press to switch the power on and off. -
Page 15: Inside
●Inside Name Function Creaser module Creases parallel in the paper feed direction. -
Page 16: Control Panel
●Control Panel Name Function LCD panel Displays the status of the machine. Displays message when an error or paper jam occurs. F key Switches to function selecting display. RETURN key Switches the current JOB entering screen to the previous one. Cursor (left/right) Press to move the cursor to horizontal direction. -
Page 17: Lcd Panel
●LCD Panel -- --- -- Sheets Name Function JOB No. Displays JOB No. currently selected. JOB name Displays JOB name currently selected. Counter Displays the number of document sheets processed with the JOB currently set. Select menu Select menu Retrieve JOB Settings Enter JOB Cleaning mode... -
Page 18: Turning Power On/Off
Turning Power ON/OFF ● Turning ON the Power 1. Connect the ‘female plug’ of the power cord to the ‘inlet’. 2. Connect the ‘male plug’ of the power cord to the ‘outlet’. 3. Press the ‘I’ side of the power switch. Model name of this machine appears on the LCD panel and warming-up stats. -
Page 19: Preparation Before Use
Preparation Before Use ● Loading Paper 1. Fan sheets and align them. 2. Put the sheets on the ‘feed tray’ and push them to the inside. 3. Adjust the ‘side guides’ according to the paper size. IMPORTANT: The height of the paper stack should not exceed the ‘MAX’... -
Page 20: How To Set The Stacker Tray
● How to Set the Stacker Tray 1. Open the stacker tray by pressing the stay. There are 3 setting positions of the stacker tray. IMPORTANT: When the finished document size is A3 or longer, or if the finished documents are adhered on the tray due to static electricity, set the stacker tray in the downward position. -
Page 21: Chapter 2 Programming Job
Programming JOB Chapter 2... -
Page 22: Before Programming Job
Before Programming JOB The DC-445 can save 30 patterns of JOB. This chapter describes how to program a JOB on the control panel of the DC-445. Before entering a JOB, accurately measure crease position in mm/inch unit. Please thoroughly read the description on pages 21 - 23 so that you can create correct JOB. -
Page 23: Setting Functions
In case printed documents are shrunk by heat generated on digital printer, by entering the original paper size and paper size after shrunk, the DC-445 automatically calculates the shrinkage ratio and adjusts the creasing position accordingly. This function compensates for the shrinkage in the feed direction only. -
Page 24: Entering A New Job
Entering a New JOB Hints for entering a JOB: ● Pressing the SET key goes on the next step. ● Pressing the ▲ key returns to the previous step. ● Pressing the ▼ key goes on the next step. ● Pressing the STOP key while entering JOB ends JOB entering and returns to the main menu. - Page 25 Example: DUPLO 1. Press the <3> key and the ► cursor key JOB01entry 1/24 Enter JOB name 2. Press the <8> key 2 times and the ► cursor key. JOB01entry 1/24 Enter JOB name 3. Press the <7> key and the ► cursor key.
- Page 26 10. (Only for machine installed with air knife) JOB01entry 20/24 Set Air knife ON or OFF. Air knife If double feed occurs frequently, set the Air knife ON. ON OFF Press the SET key. 11. Adjust Suction power. JOB01entry 21/24 Select MAX, MID, or MIN.
-
Page 27: Retrieving A Job For Processing
Retrieving a JOB for Processing 1. Turn the power ON. 2. Make sure that the LCD panel displays stand-by screen. 3. Press the F key. Select menu ‘Select menu‘ screen appears. Retrieve JOB Enter JOB 4. Select ‘Retrieve JOB’ using the cursor (UP/DOWN) key and press Setting the SET key. - Page 28 10. Install the back guide. 11. Make sure that the LED of the START key lights up in green. Press the START key. If the LED is red, error may be occurring. Please follow the instructions on the LCD panel.
-
Page 29: Setting
Setting REFERENCE: Contents registered in the “Setting” changes the JOB temporarily. Please note that changed setting is cleared and does not overwrite the already registered JOB when the power to the machine is turned OFF. However, the following 2 settings are valid for all JOBs and stored in the machine. Select unit mm / inch ・Setting Double detection ON/OFF... - Page 30 297.0 mm 297.0 mm → shrunk, the DC-445 automatically calculates the shrinkage ratio and adjusts the creasing position accordingly. This function compensates for the shrinkage in the feed direction only.
- Page 31 5-10. Adjust all Setting 10/10 In case printed document is skewed horizontally, you can correct Adjust all ← → the skew. +0.0 mm - 0.0 mm -...
-
Page 32: Adjusting Document Feed
Adjusting Document Feed Elevator level (Feed tray) The elevator level should be adjusted in the following cases. a. The machine does not feed. Turn the knob in the counterclockwise direction (to a smaller number). The level of the elevator is raised. b. -
Page 33: Skew
Skew If finished document is skewed, adjust the skew adjustment knob. -
Page 34: Cleaning Feed Rollers
As the DC-445 processes digital color outputs, toner etc. on the documents may adhere to the surface of the feed rollers of the DC-445. When the accumulation of such toner becomes excessive, it may affect the performance of the DC-445. In this case, clean the rollers in the following procedures. -
Page 35: Optional Modules
Optional Modules You can make slits or perforations in the paper by installing the optional modules (slitter module, perforation module). -
Page 36: Chapter 3 Troubleshooting
Troubleshooting Chapter 3... -
Page 37: Messages
Messages When an error occurs, illustration and message about the error are displayed on the LCD panel. In such cases, take measures according to the following instructions. Message Status and Countermeasures Status: There is no document on the feed tray. Countermeasure: Load document on the feed tray. - Page 38 Message Status and Countermeasures Status: Paper jam in the crease area. Countermeasure: Remove the jammed documents from the crease area and press the STOP key. Status: Paper jam in the paper exit area. Countermeasure: Remove the jammed documents from the stacker tray and press the STOP key.
- Page 39 Message Status and Countermeasures Status: Error in DC-445 Countermeasure: Turn off the power and turn on again after a few seconds. If the same message appears, contact our service person. Status: When Shrinkage is set, rear edge crease position is out of specification.
-
Page 40: When A Paper Jam Has Occurred
When a Paper Jam Has Occurred When a paper jam has occurred, the lamp blinks on the LCD panel and a message is displayed on the LCD panel. Remove the jam according to the following procedures. WARNING ● Do not touch the blade. Doing so may cause injury. ●... - Page 41 Daily Maintenance Chapter 4...
- Page 42 Daily Maintenance ● How to maintain the machine Check the machine periodically to maintain its performance. WARNING ● Before cleaning, be sure to turn the power off, wait until the machine cools off and unplug the power cord. Otherwise, fire or electric shock may occur.
-
Page 43: Specifications
Specifications Chapter 5... - Page 44 Model name DuCreaser DC-445 Product name Table top creaser Feed Belt suction Feed tray capacity 100mm Infeed Paper size Width: 140mm – 320mm Length : 150mm- 650mm Standard feed tray supports up to 460mm length of documents For longer documents, optional long paper tray is available.
- Page 45 Optional features Air Knife ( compressor for additional paper separation when feeding) Double Feed Detection Long Paper Tray (holds up to 650mm) Stand Slitter unit ( Option module is required) Perforation unit ( Option module is required.) Power supply 115VAC model 115VAC、50/60Hz 230VAC model 230VAC、50Hz...
- Page 47 Reproduction prohibited printing : 2007 Issued by : DUPLO CORPORATION PRINTED IN JAPAN...
- Page 48 DUPLO CORPORATION Duplo building, 1-6, Oyama 4 chome, Sagamihara, Kanagawa 229-1180, Japan PHONE: +81-42-775-3602 FAX: +81-42-775-3606 E-mail: info@duplo.com S7-Y1041 2007.12...
Need help?
Do you have a question about the DC-445 and is the answer not in the manual?
Questions and answers