Table of Contents
Advertisement
Quick Links
Advertisement
Table of Contents

Related Manuals for Fortis T2


Summary of Contents for Fortis T2
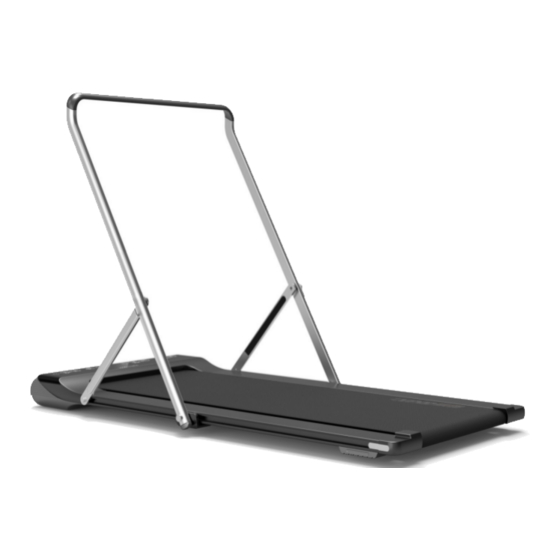
- Page 1 T2 ULTRA SLIM FOLDABLE 2-IN-1 WALKING & JOGGING SMART TREADMILL FST2JOGPADA...
-
Page 3: Safety And Warnings
SAFETY & WARNINGS Note: Ensure you have read and fully understand the instructions for this device. Failure to do so could cause, damage or serious harm. • When you start training with this product, please consider your physical condition, train properly and regularly to ensure that you have enough physical strength to train. - Page 4 Important Notes • Place the treadmill in a place where the plug can be plugged into the socket. • Plug the device into a socket and ensure it is not loose. • Ensure the socket has been installed professionally. • If the plug and socket are not compatible, please do not change the plug by yourself.
- Page 5 COMPONENTS Treadmill Silicone oil (x2) Installation tool Remote controller...
- Page 6 OVERVIEW...
- Page 7 Name Name Motor Top Cover Switch Group Motor Bottom Cover Overload Protector Motor Side Cover L AC Link Line 350 Motor Side Cover R AC Link Line 150 Motor Front Cover Ground Lead Motor Cover Support Cover DC Motor Move Wheel Cover Computer PCB End Cover L Magnet Ring...
- Page 8 Nylon Slider Handle Bar Rubber Cover For Handle Linking Piece Roller Fixing Block Left Rear Linkage Plate Roller Fixing Block Right Flat Gasket Rear Motor Cover Mounting Piece Corrugated Gasket M8 Move Wheel Corrugated Gasket M10 R Shape Clip Spring Shim M8 Oil Cap Locknut M8 Running Board...
- Page 9 Communication Line Cross Tapping Screw ST4.0x12 The Bluetooth Module Cross Tapping Screw ST4.0x16 Tube Bushing Cross Tapping Screw ST4.0x10 Running Belt Cross Screw M4x10 Poly V-Belt Cross Tapping Screw ST3.0x8 Front Foot Pad Cross Tapping Screw ST2.2x6 Front Support Mat Manual Hand Bar Silicone Ring Eva Sticker...
-
Page 10: Installation
INSTALLATION The main structure of the treadmill you purchased has already been assembled in the factory. It can simply be used when plugged in. The following operations are how to use handrails and how to fold and unfold them. Lift the treadmill out of the box and place it on a level surface (Make sure there is a 50cm open space before and after the treadmill to fold and place the power cord. - Page 11 Folding the Treadmill Vertical First put the column folded on the running platform, then grab the tail of the running platform with both hands and lift it up. (Note: Unplug the power cord when folding) The treadmill is laid flat: Grab the tail of the treadmill with both hands, gently put it on the ground and follow the installation steps.
-
Page 12: Operation
OPERATION Operating instructions in manual normal mode Place the treadmill horizontally on the ground. Tum on the power, turn on the power switch. The power switch indicator lights up and the buzzer will sound once. Check the screen to see if there is any abnormality in the data. Stand on the non- slip edge strip before clicking to prevent accidental fall. - Page 13 APP Guide Operation Download YPOO treadmill APP: Please enter "YPOO" in Apple APP Store or Google Play. Then you can download the treadmill app freely. Create your Account: Enter necessary information to create your sport account. Select Training Plan: Select training plan and create a customised plan on the app, then you can control your treadmill from your smart phone remotely and do your customised exercise! Note:...
-
Page 14: Cleaning And Care
CLEANING & CARE Once the treadmill has been run on for 50km cumulatively (about 3 months), maintenance is needed. Put the lubricating oil (about one third each time) squeezed into the silicone oil valve and then the running belt will be automatically maintained. Tips: Do not use sandpaper or solvents to clean the treadmill. - Page 15 How to adjust the running belt? Adjust the screw on the left side of the belt by Allen Key, turning 1/4 times clockwise to adjust the rear roller to tight the belt. Repeat step 1 to adjust the right screw. Check that the left and the right screw are adjusted to the same distance so that the rear roller can be paralleled to the treadmill frame.
-
Page 16: Specification
SPECIFICATION With handle bar Colour Silver & Black Net weight 30kg Running belt 420x1200mm Folding size 1430x690x125mm Peak horsepower 1.5hp Speed 0.8-6.0/8.8km/h Shock absorption Max user Weight 100kgs Without handle bar Colour Silver Net weight 25kg Running belt 420x1200mm Folding size 1430x620x125mm Peak horsepower 1.5hp... - Page 17 NOTES...
- Page 20 Need more information? We hope that this user guide has given you the assistance needed for a simple set-up. For the most up-to-date guide for your product, as well as any additional assistance you may require, head online to help.kogan.com...
Need help?
Do you have a question about the T2 and is the answer not in the manual?
Questions and answers