Table of Contents
Advertisement
Quick Links
Advertisement
Table of Contents

Related Manuals for Fortis FSEFBTM520A


Summary of Contents for Fortis FSEFBTM520A
- Page 1 520MM BELT LUXURY TREADMILL FSEFBTM520A...
-
Page 3: Safety And Warnings
SAFETY & WARNINGS • Install the treadmill in a dry location away from water, dampness, and dust. • Do not run on the treadmill with bare feet. Wear appropriate exercise clothing. • Plug the treadmill into a grounded electrical socket. •... - Page 4 Electrical Grounding • Use this product with appropriate electrical grounding. If there is malfunction, the grounding system will provide a low resistance pathway to ground to protect against electric path. • Install this product using Equipment-Grounding Conductor (EGC) and grounding plug.
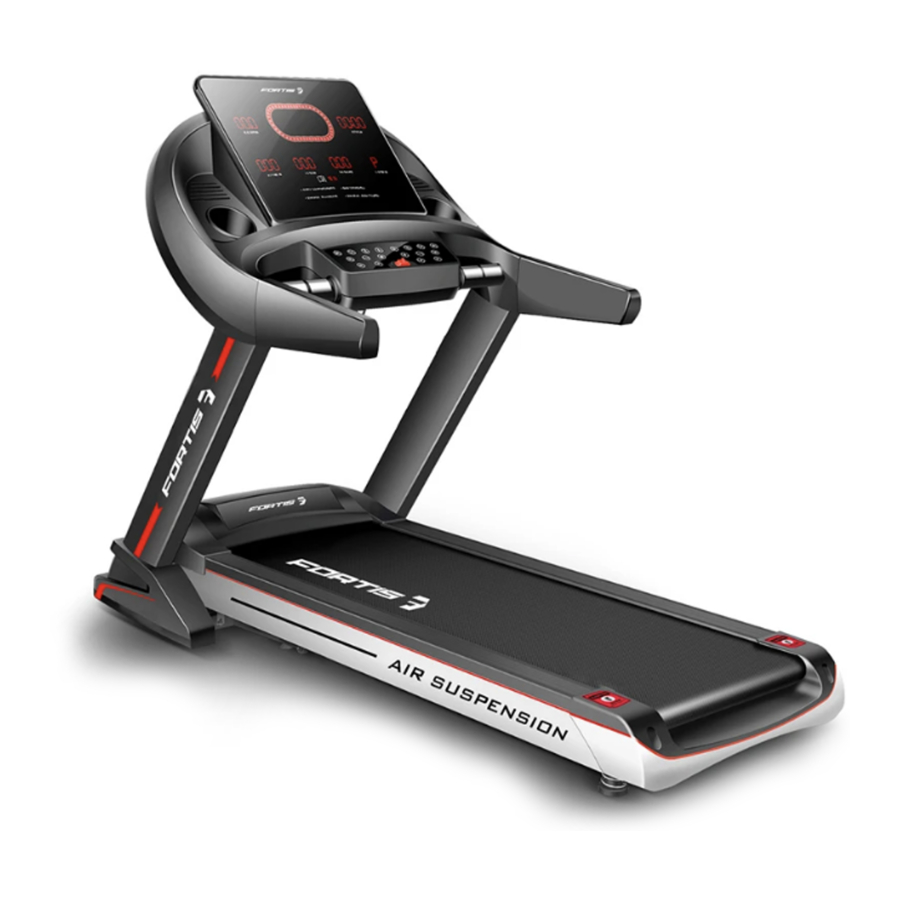
- Page 5 OVERVIEW Upper Frame Running Deck Control Console Running Belt Input Keys Rear Guard Handles Folding Lock Upright Post Side Cover Gas Strut Lower Frame...
- Page 6 ASSEMBLY Step 1: Raise the Upper Frame upright into the position. Fix the Control Console into the position using the following: Half-Round Head Hexagon Screw (M8x20) M8 Flat Washer...
- Page 7 Fix the left and right Upright Post onto the pedestal using the following: Half-Round Head Hexagon Screw (M8x20) Half-Round Head Hexagon Screw (M8x65) M8 Flat Washer...
- Page 8 Step 2: Fix the left and right Side Covers on both sides of the pedestal with drilling screws. Connect the electrical line and place it into the small round tube and then fix left and right handles onto electronic meter with drilling screws. Fix the Rear Guard at the end of the Running Belt with drilling screws.
-
Page 9: Operation
OPERATION Note: Always use a power outlet that is earthed. Insert the power cord into the back of the treadmill and then connect it to a power outlet. Turn on the power switch on the back of the treadmill, it will illuminate red light to indicate the treadmill has been powered on. - Page 10 START To start the treadmill. STOP To stop the treadmill. Following modes available: • Manual Control • Automatic Program • Custom Program • HRC Program • Body Fat Test PROG To change functions, do the following: • When in Manual Control, press the PROG button to enter the Automatic Program.
-
Page 11: Countdown Mode
Manual Control Mode • When the treadmill is in standby, press the START key to start the treadmill and enter manual control mode. • The initial speed will be is 1 kilometer/hour. • Time, Distance and Calorie counts will start from 0. •... - Page 12 Automatic Program Function In the Manual Control mode state or MODE setting state, press the PROG key to enter the Automatic Program function. The display shows 30:00 minutes and can be adjusted by pressing the SPEED +/- key or INCLINE +/- key. Set the range to 8:00 ~ 99: 00t minutes. Press the START key to start an automatic program.
- Page 13 Heart Rate Function • Hold the steel sensor plates on the handlebars. Use natural grip on both handles. • After about 5 seconds, the LED pulse display window will display a heartbeat initial value. Keep your hands still on the sensors for roughly 30 seconds to get an accurate heart rate measurement.
- Page 14 Folding the Treadmill Before moving the treadmill, ensure it is turned off and unplugged from the power outlet. Release the Folding Lock. Fold the Running Deck towards the Upper Frame by holding the Rear Guard as shown in the image. Folding Lock The Gas Strut will lock the Running Deck in the upright position.
- Page 15 Moving the Treadmill Fold the treadmill as per the instructions under the Folding Treadmill section. Move the treadmill by placing a foot at the base to hold it steady. Pull the treadmill towards you by the hands. After moving to a safe place for storing, gently tread the Gas Strut as shown in the image below.
-
Page 16: Cleaning And Care
CLEANING & CARE Appropriate maintenance is required to keep your treadmill in optimal condition. Incorrect maintenance will damage or shorten the service life of the treadmill. Regulate the Running Belt • The running belt can be adjusted in two variables: the degree of tightness and central position of the running belt. - Page 17 Adjust Running Belt Position When using the treadmill, the force of your feet can cause pressure on running belt and making it unbalanced, which makes the running belt deviate from the center portion. Such deviation is normal. It will return to the center position when nobody is running on the running belt.
-
Page 18: Lubricating Oil
Lubricating Oil The treadmill is oiled when leaving the factory, but lubrication of the treadmill should be inspected frequently to maintain the condition of the treadmill. The treadmill must be oiled after 1 year or running for 100 hours. Lift one side of the running belt and touch the surface of the running platform after running for 30 hours or 30 days. -
Page 19: Troubleshooting
TROUBLESHOOTING Code Description Solution Inspect connections between speed sensors and control console. Poor Communication If there is no display, contact Kogan.com to between Speed Sensors replace it. and Control Console If there is no signal from the control console, contact Kogan.com to replace it. If there is open circuit in the treadmill motor, cease use immediately and contact Kogan.com If there is a poor contact with the motor, check the... - Page 20 Need more information? We hope that this user guide has given you the assistance needed for a simple set-up. For the most up-to-date guide for your product, as well as any additional assistance you may require, head online to help.kogan.com...
Need help?
Do you have a question about the FSEFBTM520A and is the answer not in the manual?
Questions and answers