Table of Contents
Advertisement
Quick Links
Advertisement
Table of Contents

Related Manuals for Fortis FST1WLKPADA


Summary of Contents for Fortis FST1WLKPADA
- Page 1 T1 ULTRA SLIM WALKING SMART TREADMILL FST1WLKPADA...
-
Page 3: Safety And Warnings
SAFETY & WARNINGS Note: Ensure you have read and fully understand the instructions for this device. Failure to do so could cause, damage or serious harm. • When you start training with this product, please consider your physical condition, train properly and regularly to ensure that you have enough physical strength to train. - Page 4 Special Notice • Place the treadmill in a place where the plug can be plugged into the socket. • Plug the device into a socket and ensure it is not loose. • Ensure the socket has been installed professionally. • If the plug and socket are not compatible, please do not change the plug by yourself.
- Page 5 COMPONENTS Treadmill Silicone oil (x2) Cushion (x4) Remote controller Installation tool...
- Page 6 OVERVIEW...
- Page 7 Name Quantity Name Quantity Main Frame Oil Pipe Bushing Motor Base Poly V-Belt Front Roller Rubber Gasket Rear Roller Silicone Oil Tank Running Board Silicone Refuelling Tube Running Belt Wireless Governor Dc Motor Silicone Oil L-Shaped Hex Electronic Meter L-Shaped Hex Wrench...
- Page 8 Controller (Lower Cross Open End Wrench Controller) Communication Flat Gasket Ø8.5 Line Power Line Spring Gasketø8.5 Power Line Locknut M8 Buckle Motor Cover Cylindrical Head In (Upper) Hexagonal Screw M8*55 Motor Cover Cylindrical Head In (Lower) Hexagonal Screw M8*12 Semicircular Head In Rear Tail Cover Hexagonal Screw M8*35 Countersunk Head In...
-
Page 9: Installation
INSTALLATION The main structure of the treadmill you purchased has already been assembled in the factory. It can simply be used when plugged in. The following operations are how to use handrails and how to fold and unfold them. Lift the treadmill out of the box and placed it on a level surface. (Make sure the front and back of the treadmill has 50cm space for folding and running power lines. -
Page 10: Operation
OPERATION LED window display "SPEED" Window: Displays the current speed. The speed display range is: 0.8-6.0km/h. When the countdown is started, "3", "2" and "1" are displayed. “TIME” Window: Display’s the exercise time. The time is from 0:00-99:59. When the time is 99:59, the treadmill speed steadily decreases until it stops running. - Page 11 Remote Button Function • “□” is start/stop button: This button can be used to stop the treadmill from running state and reset to zero during exercise. Use this button also as the start button when the power is on. • "+"...
- Page 12 APP Guide Operation: • Download YPOO treadmill APP: Please enter “YPOO” in Apple APP Store or Google Play. Then you can download the treadmill app freely. • Create your Account: Enter necessary information to create your sport account. • Select Training Plan: Select training plan and create a customised plan on the app, then you can control your treadmill from your smart phone remotely and do your customized exercise! Note:...
- Page 13 Numerical display range: Setting parameters Start Default Setting range Display Range Time (min : sec) 0:00 0:00-99:59 Incline (%) Speed (km/h) 0.8- 6.0 0.8- 6.0 Distance (km) 0.00 0.00-99.90 Heart rate (/MIN) Calorie (Kcal) 0.0-999.0 VI. Treadmill Shut down instructions: The treadmill can be turned off at any time by turning off the power switch so that it does not damage the treadmill.
-
Page 14: Cleaning And Care
CLEANING & CARE Once the treadmill has been run on for 50km cumulatively (about 3 months), maintenance is needed. Put the lubricating oil (about one third each time) squeezed into the silicone oil valve and then the running belt will be automatically maintained. Tips: Do not use sandpaper or solvents to clean the treadmill. - Page 15 How to adjust the running belt? Adjust the screw on the left side of the belt by Allen Key, turning 1/4 times clockwise to adjust the rear roller to tight the belt. Repeat step 1 to adjust the right screw. Check that the left and the right screw are adjusted to the same distance so that the rear roller can be paralleled to the treadmill frame.
-
Page 16: Specification
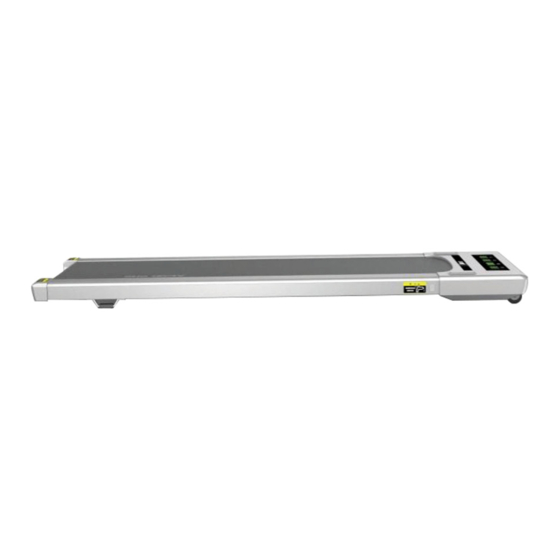
SPECIFICATION Colour Grey Net weight 29kg Running belt 45*120cm Product size 61*150*125cm Power (W) Speed 0.8-6km/h Max user weight 100kg Motorised Walking Treadmill... - Page 17 NOTES...
- Page 20 Need more information? We hope that this user guide has given you the assistance needed for a simple set-up. For the most up-to-date guide for your product, as well as any additional assistance you may require, head online to help.kogan.com...
Need help?
Do you have a question about the FST1WLKPADA and is the answer not in the manual?
Questions and answers