Advertisement
Quick Links
Operator's Guide
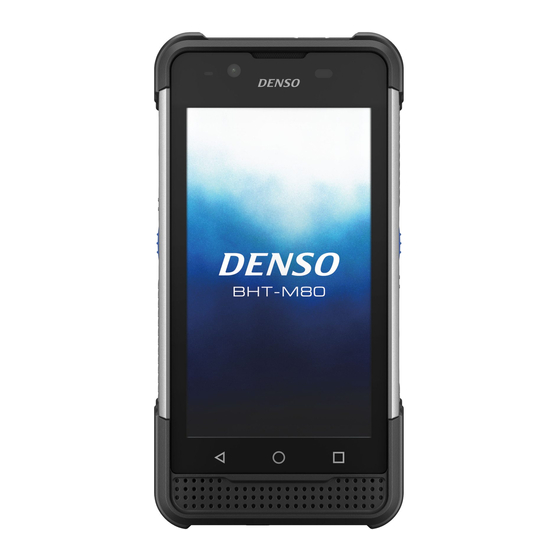
Handy Terminal
BHT-M80-QW (WLAN model)
BHT-M80-QWG (WLAN + WWAN model)
Thank you for using the DENSO WAVE Handy Terminal.
Please read this manual thoroughly prior to operation to ensure full use of the product's functionality,
and store safely in a convenient location for quick reference even after reading.
This manual contains only the basic details required for operation.
Please refer to the User's Manual for further details on general operation.
The User's Manual can be downloaded from the DENSO WAVE Web site.
https://www.denso-wave.com /
496996-0850
1
Chapter 2
Components
2.1 BHT-M80
Upper side
Status indicator
Front camera
Receiver
Speaker, microphone
Interface connector
Lower side
USB connector
Rear camera
Code reading window
Battery cover locks
Wrist strap
Status indicator
Front camera
Receiver
Power key
M1 key
M2 key
Left trigger key
Right trigger key
M3 key
M4 key
Speaker, microphone
5
Charging to the BHT
Place the BHT upright and gradually incline it backward.
Note: When placing the BHT on the cradle, be careful not to get the strap entangled between the BHT
and the cradle. A specific part of BHT may get warm while charging depending on the operating
environment and condition. This is not a malfunction.
Removing the BHT from the Cradle
Incline the BHT frontward and pull it out.
Notice on the power connection of the charging cradle
As for CU-M80U with the USB interface, both the power adapter and the USB cable can be used.
To charge both BHT and the spare battery, use the power adapter.
When charging with the USB cable, only BHT can be charged. Under the conditions, such as when the
large capacity battery is installed in the BHT or when the BHT is under operation while charging, the
use of the power adapter is recommended because these conditions may result in long-time charging
or a charging error. Using a deteriorated battery may cause a charging error. In this case, replace the
battery with the new one.
9
Chapter 6
Troubleshooting Guide
6.1 The BHT power does not turn ON
Make sure that the main-battery is properly inserted into the BHT.
Check the battery power level and charge the battery if necessary.
Wipe any dirt from the main-battery and the BHT terminals.
6.2 The BHT cannot be charged.
Make sure that the dedicated charger is used.
Make sure that the main-battery is properly inserted into the BHT.
Make sure that the BHT has been properly placed in the Cradle.
The BHT status indicator will turn red when properly placed in the Cradle.
Wipe any dirt from the main-battery and BHT terminals.
Replace the main-battery with a new one if it has been charged more than 300 times, or if more
than one year has elapsed in order to avoid any trouble caused by the battery deterioration.
6.3 The BHT unexpectedly turns OFF.
Make sure that the battery has been fully charged. If not, charge the battery.
Check whether auto power off is set. If auto power off is set, the power will be turned off
automatically when the BHT is not used for the set time.
Auto power off setting can be changed only in the user program.
The BHT may be broken if the above measures are not adequate.
Notify the system administrator.
Refer to the User's Manual for appropriate measures if an error message is displayed on the BHT
during the operation.
Chapter 7
Memory Contents after power off
Data retention
Data location
Data retained
Internal storage flash memory
microSD card
Data retained
Data being edited
Data erased
13
Chapter 1
Please read me first
Please contact your nearest distributor, if using in other countries.
The latest precision manufacturing technology yields LCD panels with an effective resolution of
99.99% or higher. The downside, however, is that up to 0.01% of the pixels can remain permanently
dark or lit on today's state-of-the-art panels.
Furthermore, please be aware that individual differences may occur in the screen color and brightness
due to the characteristics of the white LEDs used in the LCD display backlight.
The Customer shall not modify, reverse compile, reverse engineer, reverse assemble, and or
otherwise tamper with our BHT's firmware.
1.1 About This Manual
Due to changes and improvements, the content of this manual may be subject to change without prior
notice.
The reproduction or duplication of the whole or part of this manual is strictly prohibited without prior
consent.
Please contact DENSO WAVE if this manual is lost.
Every attempt has been made to ensure that the content of this manual is thorough and up to date,
however, we kindly ask you to report any questionable descriptions, mistakes or omissions, if any, to
DENSO WAVE.
1.2 Liability Limitations
DENSO WAVE INCORPORATED ("DENSO WAVE") does not assume any product liability (including
damages for lost profits, interruption of operations, or the loss of business-related information) arising
out of, or in connection with, the use of, or inability to use the BHT system software or related
manuals.
DENSO WAVE takes reasonable precautions to ensure its products do not infringe upon any patents
or other intellectual property rights of other(s), however, DENSO WAVE cannot be responsible for any
patent or other intellectual property right infringement(s) or violation(s) arising from any of the
following.
(1)
The use of DENSO WAVE's products in connection or in combination with other
components, products, devices, data processing systems or software not supplied by
DENSO WAVE.
(2)
The use of DENSO WAVE's products in a manner for which they were not intended nor designed.
(3)
The modification of DENSO WAVE's products by parties other than DENSO WAVE.
If it is judged by DENSO WAVE that malfunction of the product is due to the product having been
dropped or subjected to impact, repairs will be made at a reasonable charge even within the warranty
period.
DENSO WAVE will not bear any responsibility for data which customers have recorded and are
received by DENSO WAVE for repair and analysis.
1.3 Free/Open source software (FOSS)
This product contains Free / Open Source Software (FOSS.) DENSO WAVE is ready to provide
compliant source codes. For details, please contact our dealer or contact the site below.
https://www.denso-wave.com/
2
Chapter 3
Preparation before use
3.1 Fasten the wrist strap.
3.1.1
Fasten the wrist strap to the BHT-M80 as shown on the
right.
3.2 Inserting and removing the main battery
3.2.1
3.2.2
Insert the battery in the arrow direction.
Push the battery in the arrow direction.
3.2.3
3.2.4
Push the battery cover locks in the arrow direction.
Pull out the battery with the battery tab held.
6
Chapter 4
How to Use
4.1 Turn ON the Power
Power ON
To power on the BHT, press and hold the power button
located on the upper side of the device.
The OS starts up and the lock screen is displayed. Swipe the lock screen from bottom to top to display
the home screen.
Note. In order to power on the handy terminal, the battery must be secured in place. When using the
BHT under the low temperature environment such as inside the refrigerated room, power on the BHT
at the ambient temperature and then take it to the low temperature environment. Powering on the BHT
at the low temperature may not start up the BHT successfully. Operating the BHT under the low
temperature environment may result in delayed BHT operation or extremely reduced operating time
due to the battery characteristics. Please verify the operating conditions prior to use.
4.2 Scan Codes
Follow the procedure below to read codes.
4.2.1
Press the power key to start up the BHT from the sleep status.
4.2.2
Tap the Scan Settings.
Turn on the Reading Enable, and tap the
TEST
on the menu bar.
Then the test scan form opens to display the scanned data.
4.2.3
Point the code reading window towards the barcode to scan and
press a trigger key on the side of the scanner.
Light for scanning is irradiated and the printed barcode is
scanned.
When the data is successfully scanned and displayed, or the time
has elapsed, the light for scanning disappears.
10
14
1.4 Product Contents Check
Ensure you have all of the following items prior to use. In the event of missing or damaged item,
please contact your dealer.
Handy terminal ×1
Operator's guide (this manual) ×1
Wrist strap ×1
1.5 Customer Registration
To allow us to provide our customers with comprehensive service and support, we request that all
customers complete a Member Registration Form. Registered members will be offered the following
privileges.
The latest upgrade information
Free exhibition and event information for new products
Free web-information service "QBdirect."
Information searching service (FAQ) Offers detailed information on each product.
The latest OS systems for the BHT Series, repair software, and
Download service
sample programs can be downloaded.
Product related queries can be sent in by e-mail.
E-mail inquiries
Please note that these privileges may be subject to change without prior notice.
How to Register
Access the URL below and follow the instruction provided.
https://www.denso-wave.com/
1.6 Secured Three-year Warranty
If you register the serial number of the product within one month after your purchase, the warranty of
the registered product will be prolonged to three years from the one-year warranty.
Please access the URL below to register.
https://www.denso-wave.com/
The serial number for registration is found under the QR Code on the name plate.
3
3.3 Charging the BHT
The main battery may not be fully charged for shipment. Please charge the main battery to full before
using the handy terminal. You may use the Charging Cradle or USB cable to charge the handy
terminal.
3.3.1 Charging Time
Main battery
The main battery powers the handy terminal to work. It takes approximately 3 hours to charge an
empty main battery to full. The status indicator above the screen will light up in red while charging
and will turn green when charging is complete.
Sub-battery
The sub-battery is mounted on the main board and used for retaining data when the battery is
replaced or when it is removed.
When the sub-battery is fully charged, data can be retained for at least five minutes.
It may take approximately ten minutes to fully charge an empty sub-battery after installing the
main one. Do not remove the battery so as to retain data properly.
3.3.2 Charging Temperature
Charging the battery at room temperature (18 °C to 25 °C) is recommended in order to deliver optimal
performance. Please note that battery charging stops when ambient temperature drops below 0°C or
exceeds 40°C. The temperature to stop charging may vary according to the practical operating
environment.
3.3.3 Operation on Battery Power
When 802.11a/b/g/n/ac, GSM/GPRS/EDGE/WCDMA/UMTS/HSDPA/HSUPA/HSPA+/LTE, Bluetooth
v5.1&v2.1+EDR and GPS are all enabled on battery power, the main battery level will drop down
substantially. Prolonged use of the display and continued scanning of barcodes will also affect battery
level.
In order to avoid the unexpected system shutting down when the battery level is low, we suggest that
you keep a fresh battery for replacement at all times, or connect the BHT to an external power.
Remove the battery from the BHT or the Cradle then store in a cool and dry place if not using the BHT
for an extended period of time.
Storing a fully charged or depleted (unable to turn on the BHT) battery for long periods time may
deteriorate the performance and life of the battery.
For long-term storage, storing the battery at the 50% of the power level is recommended.
During long-term storage, charge the battery cartridge fully once a year in order to maintain the battery
performance. When fully charge, allow the battery to discharge down to the recommended level before
restoring.
The battery may swell over the years depending on usage environment. This is a characteristic of a
lithium-ion battery and is not safety hazard.
3.3.4 Charging Status of the BHT
The Charge status of the BHT is shown on the status indicator above the display screen.
Status indicator
Indication
Description
Red, solid
Charging the BHT
Charging
Red, blink
Charging error
Green, solid
Charging complete
Not light
Charging error (Charging stops.)
7
4.3 Turn OFF the Power
Power OFF
To power off the BHT, press and hold the power button
, and tap the pop up
Power off
Make sure that all user data and tasks are saved before tapping the
Power off
menu.
4.4 Battery Power Level Indicator
The main-battery power level can be confirmed at the battery icon displayed in the top right of the LCD
screen. Since the indicator shows only a rough estimate of main-battery power not an accurate
remaining power level, please be charged early.
The main-battery power level indicator shows only a rough estimate of battery power not an accurate
remaining power level. Please read Safety Precautions to ensure the proper use of the battery.
Battery icon
Status
100%
100%
76%
Slightly reduced
15%
Dropping below 15%
Charging
4.5 Using the BHT after Long Non-Use
Data stored in the BHT may be lost or damaged and the calendar clock may stop if the BHT is left
unused for a long period.
Keep a backup copy of important or critical information beforehand.
Reset the calendar clock if it is stopped.
The battery is also used as a backup power source. You should not remove the battery from the
BHT for at least 10 minutes until the sub-battery is fully charged.
Please refer to the User's Manual for more information on trouble shooting.
11
15
1.7 Usage Precautions
1.7.1 Usage environment restrictions
Do not use the BHT where it may be exposed to fire, high temperatures, or direct sunlight.
(Failure to observe this may result in damage, overheating, explosion, or fire.)
When the BHT is stored in a high-temperature, high-humidity environment of 50° to 60°C, leave to sit
in a location at room temperature and normal humidity for at least 1 day prior to use.
Failure to observe this may cause a reading failure or damage the BHT.
Do not use the BHT in places with extreme temperature variations.
(Failure to observe this may lead to BHT malfunction due to condensation.)
Leave the BHT for a short while prior to use when moved from a cold to a warm environment.
Do not use the BHT in places where it may be exposed to strong impact or significant static electricity.
1.7.2 Keep the BHT away from electromagnetic waves and metallic objects.
Wireless communication may not be possible in the following locations and using.
In the vicinity of the following devices operating on a 2.4 GHz waveband
(Communication may not be possible due to electromagnetic interference.)
Industrial, scientific, or medical equipment such as microwave ovens
Wireless LAN devices
Logistics systems in places such as plants or warehouses
Wireless devices such as amateur radio stations
In the vicinity of household appliances emitting electromagnetic waves such as computers or
televisions (Communication may not be possible due to electromagnetic noise.)
In the vicinity of metallic objects, in places with high levels of metallic dust, or in places surrounded by
metal walls (Communication may not be possible due to the presence of metallic objects.)
Putting on any metallic objects around the antenna. Placing your hand over the antenna
1.8 Proper Care of the BHT
Make sure to turn OFF the BHT before cleaning.
Terminal dirt on the BHT and battery
Periodically wipe any dirt from the terminals of the BHT and battery with a cotton swab or similar
soft object. Be sure not to scratch or deform the terminals while cleaning.
Never use organic solvents such as thinner or alcohol, as this may cause terminal plating to be
peeled off.
Housing dirt
Wipe any dirt from the housing with a dry, soft cloth.
If excessively dirty, wipe with a soft cloth that has been soaked in soapy water (always use a
neutral detergent) and wrung out thoroughly.
Never use organic solvents such as thinner or alcohol, as this may cause the housing to be
marred or paint to be peeled off.
LCD screen dirt
Never rub or strike the LCD screen with anything hard, as this may result in scratches on the
screen or breakage.
Code reading window dirt
Any dirt or dust adhering to the clear plate of the code reading window will adversely affect reading
performance.
When using in dusty areas, check regularly whether any dust has accumulated on the clear plate
of the code reading window, and if so, first blow the dust away with an airbrush, and then gently
wipe the plate with a cotton swab or similar soft object.
If sand or hard particles have accumulated, rubbing the plate will result in scratches. Blow the
particles away with an airbrush or wipe with a soft brush.
4
3.3.5 Using the USB Cable
(1)
Plug the USB Type-C connector into the connector at the
bottom end of the terminal.
(2)
Plug the USB Type-A connector into the USB power
adapter.
3.3.6 Using the Charging Cradle
Connecting the cradle to the power supply
Connect the cradle to the power supply using
the dedicated power adapter or the USB cable
and USB power adapter.
Plug the AC plug or the AC adapter into an
electrical outlet.
Using the power adapter to connect the CU-
M80U to the power supply
Using the USB power adapter to connect the
CU-M80UQ to the power supply
8
Chapter 5
When Unable to Successfully Read Codes
When the light is focused on the printed
surface of the code from directly above, the
menu.
BHT may not read the code due to specular
reflection.
Specular
reflection
The code may not be read if it is too close
Distance from
to or too far from the BHT reading window,
code
even when the code is within the read area.
Code surface
The code may not be read if its surface is
curvature
extremely curved.
The code may not be read if its surface is
Code surface dirt
dirty.
The code may not be read if the code
Code reading
reading window is dirty.
window dirt
Code reading may be adversely affected by
Direct sunlight,
direct sunlight or the brightness of the
ambient light
surrounding light.
12
All rights reserved. No part of this publication may be reproduced in any form or by any means
without permission in writing from the publisher. All products and company names mentioned are
trademarks or registered trademarks of their respective holders.
DENSO WAVE INCORPORATED does not assume any product liability arising out of, or in
connection with, the application or use of any product, circuit, or application described herein.
If it is judged by DENSO WAVE INCORPORATED that malfunction of the product is due to the
product having been dropped or subjected to impact, repairs will be made at a reasonable
charge even within the warranty period.
Intellectual Property Precaution
DENSO WAVE INCORPORATED ("DENSO WAVE") takes reasonable precautions to ensure its
products do not infringe upon any patent of other intellectual property rights of other(s), but
DENSO WAVE cannot be responsible for any patent or other intellectual property right
infringement(s) or violation(s) which arise from (i) the
connection or in combination with other component(s), product(s), data processing system(s) or
equipment or software not supplied from DENSO WAVE; (ii)
products in a manner for which the same were not intended nor designed; or (iii) any
modification of
than DENSO WAVE.
Copyright © DENSO WAVE INCORPORATED, 2018
All rights reserved. No part of this publication may be reproduced in any form or by any means without
permission in writing from the publisher.
All products and company names mentioned in this document are trademarks or registered
trademarks of their respective holders.
QBdirect is a trademark of DENSO WAVE INCORPORATED. Android
Other products and company names mentioned in this document are trademarks or registered
trademarks of their respective holders.
Specifications are subject to change without prior notice.
1 Yoshiike Kusagi Agui-cho, Chita-gun, Aichi 470-2297, Japan
This manual uses recycled paper.
16
Change the BHT reading angle and
try again.
Move the BHT slowly toward or
away from the code and try again.
Read the code at the center of the
code reading window.
Wipe the dirt from the code and try
again.
Blow any dust away with an
airbrush, and then gently wipe the
reading window with a cotton swab
or similar soft object.
Read the code away from direct
sunlight. Adjust the brightness of the
surrounding light when reading
indoors.
in
TM
is a trademark of Google LLC.
https://www.denso-wave.com/
Advertisement

Related Manuals for Denso BHT-M80 Series


Summary of Contents for Denso BHT-M80 Series
- Page 1 Please access the URL below to register. peeled off. The User’s Manual can be downloaded from the DENSO WAVE Web site. If it is judged by DENSO WAVE that malfunction of the product is due to the product having been https://www.denso-wave.com/ Housing dirt https://www.denso-wave.com /...
- Page 2 DENSO WAVE DENSO WAVE DENSO WAVE DENSO WAVE DENSO WAVE DENSO WAVE DENSO WAVE © DENSO WAVE INCORPORATED, 2018 QBdirect DENSO WAVE INCORPORATED Android Google LLC 1 Yoshiike Kusagi Agui-cho, Chita-gun, Aichi 470-2297, Japan https://www.denso-wave.com/ This manual uses recycled paper.