
Subscribe to Our Youtube Channel
Related Manuals for Scansonic IN210


Summary of Contents for Scansonic IN210
- Page 1 UK User Manual DK Brugervejledning DE Bedienungsanleitung FR Guide d'instructions ES Manual de instrucciones Manuale di istruzioni NL Gebruikershandleiding...
- Page 2 Important Safety Instructions 1. Read these instructions. CAUTION 2. Keep these Instructions. RISK OF ELECTRIC SHOCK DO NOT OPEN 3. Heed all Warnings. CAUTION: 4. Follow all instructions. TO REDUCE THE RISK OF ELECTRIC SHOCK: 5. Do not use the speaker near water. DO NOT REMOVE SCREWS, COVERS OR THE CABINENT.
-
Page 3: Table Of Contents
Storing Preset Stations ......................19 Recalling a Preset Station ......................19 Aux in Mode �����������������������������������������������������������������������������������������������������������������������������������20 Wireless Device Remote Control App �����������������������������������������������������������������������������������������21 App installation .........................21 Scansonic Remote App installation ..................21 Setting up the connection ......................22 Starting the Navigation ......................22 General Operation �������������������������������������������������������������������������������������������������������������������������23... - Page 4 Setting Time/Date ........................25 Setting Language ........................25 Factory Reset ...........................25 Software Update ........................25 Setup Wizard ..........................26 Viewing System Info ......................... 26 Setting Backlight ........................26 Specifications ��������������������������������������������������������������������������������������������������������������������������������27 Made in China Imported by Dantax Radio A/S Bransagervej 15 · 9490 Pandrup · Denmark www.scansonic.dk...
-
Page 5: Getting Started
Getting Started Carefully remove your radio from the box. You may want to keep the packaging for future use. What you can find inside of your package ■ Main unit ■ Instruction manual ■ Power adapter Positioning your Radio Place your radio on a flat/stable surface that is not subjected to vibrations. Avoid the following locations: ■... - Page 6 Using Headphones You will require headphones fitted with a 3.5 mm diameter stereo plug. The Headphones socket is located on the front of this unit. Headphones are not supplied with this radio. Turn down the volume before connecting earphones. Slowly raise the volume with the earphones on until you reach your desired level.
-
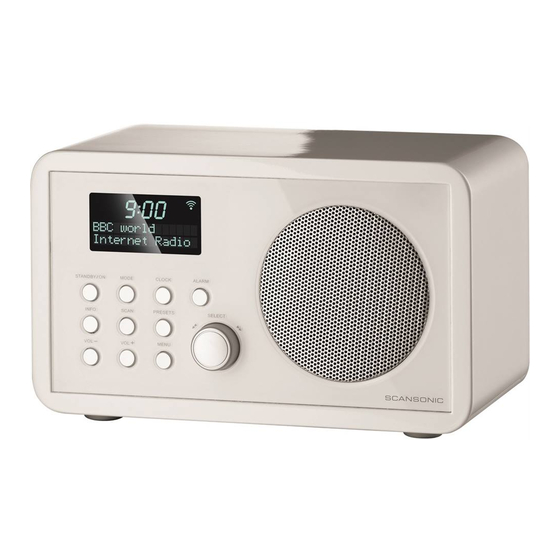
Page 7: Unit Front View
Unit Front View STANDBY/ON button INFO button Press to switch radio on or standby. Press to browse station information. button button Press to skip to previous track in Spotify Press to skip to next track in Spotify and and Music player modes. Music player modes. -
Page 8: Unit Back View
Unit Back View FM antenna Headphones socket AUX IN socket DC IN socket... -
Page 9: Setup Wizard
Setup Wizard For initial use, the display will show 'Setup wizard' screen. Press SELECT/SNOOZE knob to confirm 'YES' to start setup. Options in the setup wizard include the following: Date/Time Set 12 or 24 hour format Auto update • Update date/time from FM •... - Page 10 Turn SELECT/SNOOZE knob to cycle through the alphanumeric character list, press SELECT/SNOOZE knob to select an appointed character. Note: WEP/WPA pass codes are case-sensitive. If a wrong character is being input while entering your password, select to delete that character. Note: = Backspace;...
-
Page 11: Internet Radio Mode
Internet Radio Mode The display will show 'Main menu' after 'Setup wizard' completed. Press SELECT/SNOOZE knob to select Internet radio mode. While 'Station list' is highlighted, press SELECT/SNOOZE knob to confirm. Then refer to following section to choose stations. Or if failed to connect to network, please follow: a. -
Page 12: Selecting A Station Through Stations
Selecting a station through Stations Press MENU button > Station list > Stations, press SELECT/SNOOZE knob to confirm. In 'Stations' menu: ■ 'Location' enables you to choose from the radio stations provided by any country which you choose from a list. While 'Location' is highlighted to show, press SELECT/SNOOZE knob to confirm. -
Page 13: Getting Access Code And Faq Solutions
Getting Access Code and FAQ Solutions To access to this order, press MENU button > Station list > Help, press SELECT/SNOOZE knob to confirm. Note: at this step, you can also listen the radio FAQ solutions. When 'Get access code' is highlighted, press SELECT/SNOOZE knob to confirm, you will get Adding Station to 'My Favourites' To register your radio with the portal: www.wifiradio-frontier.com. -
Page 14: Storing Preset Stations
Storing Preset Stations Your radio can store up to 10 of your favourite Internet stations. While an Internet station is playing, press and hold PRESET button until display shows 'Save to Preset', and then turn SELECT/SNOOZE knob to select a preset number. Press SELECT/SNOOZE knob to confirm, the display will show 'Preset stored'. -
Page 15: Music Player Mode
Music Player Mode Setting up a Music Server • In order for your radio play music files from a computer, the computer must be set up to share files or media. • UPnP media sharing allows devices like this radio to play music from a shared media library, navigating through tag menus such as Artist, Album or Genre. -
Page 16: My Playlist
When a track is playing, you can: a. Press button to skip to previous track; press and hold button to rewind current playing track. b. Press button to play/pause current playing track. c. Press button to skip to next track; press and hold button to fast forward current playing track. -
Page 17: Prune Servers
Prune Servers The Prune Servers feature enables you to remove music servers that are no longer available to you to browse for music. Press MENU button, turn SELECT/SNOOZE knob to select 'Prune servers' and then press SELECT/SNOOZE knob to confirm. Select 'YES' to 'Prune shared media wake on LAN servers'. -
Page 18: Fm Mode
FM Mode Selecting FM Mode Press MODE button repeatedly to select FM mode. For initial use, it will start at the beginning of the FM frequency range (87.50MHz). Otherwise, the last listened FM station will be selected. To manually change the FM frequency, while FM frequency shows up, press VOL/TUNE button to activate the tuning function and then turn SELECT/SNOOZE knob to change the frequency by 0.05MHz per step. -
Page 19: Viewing Station Information
Viewing Station Information FM stations broadcast additional information. Press INFO button repeatedly to view information through Radio Text, Program Type, Program Name and Date. Storing Preset Stations Your radio can store up to 10 of your favourite FM stations. While a FM station is playing, press and hold PRESET button until display shows 'Save to Preset', and then turn SELECT/SNOOZE knob to select a preset number. -
Page 20: Aux In Mode
Aux in Mode AUX IN allows for quick and easy connection to an MP3 player or other external audio sources. Before connecting to the mains socket, use a 3.5mm audio cable (not supplied) to connect to your external audio device through the AUX IN socket on the rear of unit. Connect power adapter to mains socket, press STANDBY/ON button to switch unit on. -
Page 21: Wireless Device Remote Control App
Once it is complete, you can access your new app. Scansonic Remote App installation Scansonic Remote is an application that allows your iOS device to control your radio. To install the Scansonic Remote App on your iOS device, type App Store icon on the iOS device to open the App store. -
Page 22: Setting Up The Connection
Select Setting > Wi-Fi. Choose the network of your radio accessed. Starting the Navigation Tap Scansonic icon on the main menu of your iOS device, then start to navigate your radio. In menu screen can find controls below: ■ Browse: allows you to browse mode menu of Internet radio, Music player or AUX in modes. -
Page 23: General Operation
General Operation Setting Sleep This feature enables your radio to switch to standby mode by itself after a set sleep time. Press MENU button > Main menu > Sleep, and then press SELECT/SNOOZE knob to confirm. Turn SELECT/SNOOZE knob to view options Sleep OFF, 15, 30, 45 or 60 MINS, press SELECT/SNOOZE knob to confirm. -
Page 24: Equaliser
Equaliser This feature enables you to choose a sound equalization profile. Each of the equalization setting will change the tone of the sound from your radio when selected. Press MENU button > Main menu > System settings > Equaliser, and then press SELECT/SNOOZE knob to confirm. -
Page 25: Setting Time/Date
Setting Time/Date Press MENU button > Main menu > System settings > Time/Date, press SELECT/SNOOZE knob to confirm. Turn SELECT/SNOOZE knob to select options, and then press SELECT/SNOOZE knob to confirm the setting. Set Time/date: Manually set-up both Time and Date Auto update: 'Update from FM', 'Update from Network' or 'No update' Set format:... -
Page 26: Setup Wizard
Press MENU button > Main menu > System settings > Software update, press SELECT/SNOOZE knob to confirm. Turn SELECT/SNOOZE knob to select 'Auto-check setting', your radio will check periodically for new version software. Turn SELECT/SNOOZE knob to select 'Check now', your radio will check now if any new version software available for upgrade. -
Page 27: Specifications
Specifications Items Specifications Descriptions: Internet and FM radio with Spotify connect AC Input: 100-240Vac, 50-60Hz Power Requirements: DC Output: 9V, 1A Frequency Range: FM: 87.5-108 MHz Audio Output Power: 5W rms Power Consumption: 9W (Max) Dimensions (W x H x D): 215mm x 130mm x 110mm This symbol on the product or in the instructions means that your electrical and electronic equipment should be disposed at... - Page 28 DK Brugervejledning...
- Page 29 Vigtige sikkerhedsoplysninger 1. Læs disse anvisninger. FORSIGTIG RISIKO FOR 2. Behold disse instruktioner. ELEKTRISK STØD MÅ IKKE ÅBNES 3. Overhold alle advarslerne. FORSIGTIG: 4. Følg alle anvisninger. FOR AT REDUCERE RISIKOEN FOR ELEKTRISK STØD: UNDGÅ AT FJERNE NOGEN AF SKRUERNE, DÆKSLERNE ELLER 5.
- Page 30 Genkald af en forindstillet station ..................... 19 Tilstanden Aux in ���������������������������������������������������������������������������������������������������������������������������20 Fjernbetjening via trådløst udstyr med App ������������������������������������������������������������������������������� 21 Installation af App'en ........................21 Scansonic Remote App installation ..................21 Oprettelse af forbindelsen ......................22 Start af navigationen ........................ 22 Generel betjening ��������������������������������������������������������������������������������������������������������������������������23...
- Page 31 Indstilling af sprog ........................25 Factory Reset ...........................25 Software-opdatering ......................... 25 Opsætningsprogram ........................ 26 Se systeminformation ....................... 26 Indstilling af baggrundsbelysning ..................... 26 Specifikationer �������������������������������������������������������������������������������������������������������������������������������27 Made in China Imported by Dantax Radio A/S Bransagervej 15 · 9490 Pandrup · Denmark www.scansonic.dk...
-
Page 32: Kom Godt I Gang
Kom godt i gang Tag forsigtigt apparatet ud af æsken. Det kan være nyttigt at gemme emballagen til fremtidig brug. Dette finder du inden i pakken ■ Hovedenhed ■ Brugervejledning ■ Strømforsyning Placering af radio Anbring radioen på en jævn og stabil overflade, der ikke er udsat for vibrationer. Undgå... - Page 33 Sådan bruges høretelefonerne Høretelefonerne skal tilsluttes med et 3,5 mm diameters stereostik. Høretelefonerne tilsluttes stikindgangen på radioens forside. Høretelefoner medfølger ikke sammen med radioen. Skru ned for lydstyrken, før du tilslutter høretelefonerne. Skru langsomt op for lydstyrken, når du har høretelefonerne på, indtil du finder det ønskede lydniveau.
-
Page 34: Set Fra Forsiden
Set fra forsiden STANDBY/ON-knap INFO-KNAP Tryk for at tænde radioen eller sætte i standby. Tryk for at browse i stationsoplysningerne. knap knap Tryk for at springe til det tidligere musikstykke i Tryk for at springe til det næste musikstykke i Spotify og Music player-tilstand. -
Page 35: Set Fra Bagsiden
Set fra bagsiden FM-antenne Høretelefonernes indgangsstik AUX IN indgang DC IN indgangsstik... -
Page 36: Opsætningsprogram
Opsætningsprogram Når du bruger radioen første gang, viser displayet 'Setup wizard' –skærmen. Tryk på SELECT/SNOOZE-knappen for at bekræfte 'YES' til at starte opsætningen. Valgmulighederne i opsætningsprogrammet inkluderer det følgende: Date/Time Indstilling af 12/24 timeformat Auto update • Update date/time from FM •... - Page 37 Drej på SELECT/SNOOZE-knappen for at flytte dig rundt gennem listen med de alfanumeriske tegn, og tryk så på SELECT/SNOOZE-knappen for at vælge det markerede tegn. Bemærk: WEP/WPA-adgangskoder skelner mellem store og små bogstaver. Hvis du indtaster et forkert tegn, når du indtaster adgangskoden, så vælg for at slette det pågældende tegn.
-
Page 38: Internetradio-Funktion
Internetradio-funktion Displayet viser 'Main menu' når opsætningsprogrammet 'Setup wizard' er fuldført. Tryk på SELECT/SNOOZE-knappen for at vælge Internet radio tilstanden. Når du ser at 'Station list' er markeret, så tryk på SELECT/SNOOZE-knappen for at bekræfte. Se herefter det følgende afsnit om, hvordan man vælger stationer. Hvis radioen ikke blev tilsluttet netværket, så... -
Page 39: Valg Af En Stationer Gennem Stationer
Valg af en stationer gennem Stationer Tryk på MENU-knappen > Station list > Stations, tryk på SELECT/SNOOZE-knappen for at bekræfte. I 'Stations' menuen: ■ 'Location' giver dig mulighed for at vælge de radiostationer, der udsendes fra ethvert andet land, og som du kan vælge på... -
Page 40: Sådan Får Du En Adgangskode Og Svar På Ofte Stillede Spørgsmål
Sådan får du en adgangskode og svar på ofte stillede spørgsmål For at få adgang, tryk på MENU-knappen > Station list > Help, tryk på SELECT/SNOOZE-knappen for at bekræfte. Bemærk: På dette trin kan du også høre radioen med svar på Ofte Stillede Spørgsmål. Når 'Get access code' er markeret, tryk på... -
Page 41: Lagring Af Forindstillede Stationer
Lagring af forindstillede stationer Din radio kan lagre op til 10 af dine favorit internetstationer. Når du er ved at lytte til en internetstation, kan du trykke og holde PRESET-knappen, indtil displayet viser 'Save to Preset', og herefter dreje på SELECT/SNOOZE-knappen for at vælge et forindstillingsnummer. Tryk på... -
Page 42: Musikafspillerfunktion
Musikafspillerfunktion Opsætning af en Musikserver • For at din radio skal kunne afspille musikfiler fra din computer, skal computeren være sat op til at kunne dele filer eller medier. • UPnP mediedeling gør det muligt for udstyr, som fx din radio, at kunne afspille musik fra delte mediebiblioteker og at kunne navigere gennem specifikke menuer opdelt på... -
Page 43: My Playlist
Under afspilning af et lydfil kan du: a. Tryk på -knappen for at gå tilbage til den forrige lydfil; tryk og hold på -knappen for at spole den aktuelle lydfil tilbage til start. b. Tryk på -knappen for at sætte den aktuelle lydfil på spil/pause. c. -
Page 44: Rydde Ud I Servere
Rydde ud i servere Funktionen Ryd ud i servere giver dig mulighed for at fjerne musikservere, der ikke længere er tilgængelige til afspilning af musik. Tryk på MENU-knappen og drej på SELECT/SNOOZE for at vælge 'Prune servers' og tryk herefter på SELECT/SNOOZE for at bekræfte. -
Page 45: Fm-Tilstanden
FM-tilstanden Valg af FM-tilstand Tryk gentagne gange på MODE, for at vælge FM-tilstanden. For indledende brug, begynder den i begyndelsen af FM frekvensområdet (87,50MHz). Ellers vælges den sidst hørte FM-kanal. For at ændre FM-frekvensen manuelt, når FM-frekvensen vises, tryk på VOL/TUNE-knappen for at aktivere tuning-funktionen og drej herefter på... -
Page 46: Sådan Ser Du Oplysninger Om Stationen
Sådan ser du oplysninger om stationen Yderligere oplysninger om udsendelser fra FM-stationer. Tryk på INFO-knappen flere gang for at se oplysninger om radiotekst, programtype, programnavn og dato. Lagring af forindstillede stationer Din radio kan lagre op til 10 af dine favorit FM-stationer. Når du er ved at lytte til en FM-station, kan du trykke og holde PRESET-knappen, indtil displayet viser 'Save to Preset', og herefter dreje på... -
Page 47: Tilstanden Aux
Tilstanden Aux in AUX-IN giver mulighed for nem og hurtig tilslutning til en MP3-afspiller og andre eksterne lydkilder. Før du tilslutter til stikkontakten, så brug et 3,5 mm lydkabel (medfølger ikke) til at tilslutte dit eksterne lydudstyr gennem indgangsstikket AUX IN på radioens bagside. Tilslut strømadapteren til stikkontakten, tryk på... -
Page 48: Fjernbetjening Via Trådløst Udstyr Med App
Du kan åbne appen, når den er blevet downloadet. Scansonic Remote App installation Scansonic Remote er en app, der giver dit iOS-udstyr mulighed for at styre din radio. For at installere Scansonic Remote App'en på dit iOS- udstyr, tryk på... -
Page 49: Oprettelse Af Forbindelsen
Når du har downloadet app'en til trådløst udstyrs fjernbetjening, skal du opsætte en forbindelse mellem dit iOS- udstyr og din radio. Begynd med at trykke på 'Scansonic Remote' ikonet, dit udstyr viser så en dialogboks, der beder dig indtaste 'Net Remote Pin code', hvor standardkoden er 1234. Du kan angive en brugerdefineret kode via din radio: Tryk på... -
Page 50: Generel Betjening
Generel betjening Indstilling af Sleep-tid Med denne funktion kan din radio skifte over til standby-tilstand automatisk, når den indstillede sleep-tid er gået. Tryk på MENU-knappen > Main menu > Sleep, og tryk så på SELECT/SNOOZE for at bekræfte. Drej på SELECT/SNOOZE for at finde valgmulighederne Sleep OFF, 15, 30, 45 eller 60 MINS, tryk på SELECT/SNOOZE for at bekræfte. -
Page 51: Equalizer
Equalizer Denne function giver dig mulighed for at vælge en lyd-equalization profil. Hver af equalizerindstillingerne ændrer tonen i lyden. Tryk på MENU-knappen > Main menu > System settings > Equaliser, og tryk på SELECT/SNOOZE for at bekræfte. Drej på SELECT/SNOOZE og tryk på knappen for at vælge Normal, Flat, Jazz, Rock, Movie, Classic, Pop, News, My EQ eller My EQ profile setup. -
Page 52: Indstilling Af Tid/Dato
Indstilling af Tid/Dato Tryk på MENU-knappen > Main menu > System settings > Time/Date, tryk på SELECT/SNOOZE for at bekræfte. Drej på SELECT/SNOOZE-knappen for at vælge mulighederne og tryk på SELECT/SNOOZE-knappen for at bekræfte indstillingen. Set Time/date: Manuel indstilling af dato og klokkeslæt Auto update: 'Update from FM', 'Update from Network' eller 'No update' Set format:... -
Page 53: Opsætningsprogram
Tryk på MENU-knappen > Main menu > System settings > Software update, og tryk på SELECT/SNOOZE for at bekræfte. Drej på SELECT/SNOOZE for at vælge 'Auto-check setting', så tjekker din radio regelmæssigt, om der findes en nyere version af softwaren. Drej på... -
Page 54: Specifikationer
Specifikationer Emner Specifikationer Beskrivelser: Internet og FM radio med Spotify-forbindelse AC indgangsstrøm: 100-240Vac, 50-60Hz Tilslutningskrav: DC udgang: 9V, 1A Frekvensomfang: FM: 87,5-108MHz Audio Output-effekt: 5W rms Strømforbrug: 9W (Maks.) Mål (B x H x D): 215 mm x 130 mm x 110 mm Dette symbol på... - Page 55 DE Bedienungsanleitung...
- Page 56 Wichtige Sicherheitshinweise 1. Lesen Sie die gesamte Anleitung. VORSICHT 2. Bewahren Sie diese Anleitung auf. STROMSCHLAGGEFAHR NICHT ÖFFNEN 3. Befolgen Sie sämtliche Warnhinweise. 4. Befolgen Sie sämtliche Hinweise. VORSICHT: ZUR VERMEIDUNG EINES ELEKTRISCHEN SCHLAGS: 5. Benutzen Sie das Gerät nicht in ENTFERNEN SIE WEDER SCHRAUBEN NOCH ABDECKUNGEN ODER DAS GEHÄUSE.
- Page 57 Sendersuche einstellen ......................18 Audio einstellen ........................18 Senderinformationen anzeigen ....................19 Senderspeicher belegen ......................19 Senderspeicher aufrufen ......................19 Aux-Eingangsmodus ���������������������������������������������������������������������������������������������������������������������20 Fernbedienungs-App ��������������������������������������������������������������������������������������������������������������������21 App installieren .........................21 Scansonic Remote App installieren ..................21 Verbindung herstellen ......................22 Navigation ..........................22 Allgemeine Bedienungshinweise�������������������������������������������������������������������������������������������������23...
- Page 58 Sprache einstellen ........................25 Rückstellung zu den Werkseinstellungen................. 25 Software-Aktualisierung ......................25 Einstellungsassistent ........................ 26 Systeminformationen anzeigen ....................26 Hintergrundbeleuchtung einstellen ................... 26 Technische Daten ��������������������������������������������������������������������������������������������������������������������������27 Made in China Imported by Dantax Radio A/S Bransagervej 15 · 9490 Pandrup · Denmark www.scansonic.dk...
-
Page 59: Erste Schritte
Erste Schritte Nehmen Sie das Radio vorsichtig aus der Verpackung. Bewahren Sie die Verpackungsmaterialien ggf. auf. Lieferumfang ■ Hauptgerät ■ Bedienungsanleitung ■ Netzteil Aufstellen des Radios Stellen Sie Ihr Radio flach und eben auf einer Fläche auf, die keinen Stößen oder Vibrationen ausgesetzt ist. Vermeiden Sie Aufstellorte, an denen: ■... - Page 60 Kopfhörer Kopfhörer müssen mit einem 3,5 mm Stereo-Klinkenstecker ausgestattet sein. Die Kopfhörerbuchse befindet sich vorn auf dem Radio. Kopfhörer gehören nicht zum Lieferumfang des Radios. Regeln Sie die Lautstärke herunter, bevor Sie Kopfhörer anschließen. Erhöhen Sie mit den angeschlossenen Kopfhörern die Lautstärke langsam bis zum gewünschten Pegel. Vorsicht: Langes Hören von lauter Musik kann zu Hörschäden führen.
-
Page 61: Frontansicht
Frontansicht STANDBY/ON-TASTE INFO-Taste Taste drücken, um das Radio ein- oder Taste drücken, um Senderinformationen auszuschalten (Stand-by-Modus). anzuzeigen. -TASTE -TASTE Taste drücken, um im Spotify- und Musicplayer- Taste drücken, um im Spotify- und Musicplayer- Modus zum vorherigen Titel zu springen. Modus zum nächsten Titel zu springen. Taste gedrückt halten, um im Musicplayer-Modus Taste gedrückt halten, um im Musicplayer-Modus rückwärts durch den Titel zu spulen. -
Page 62: Geräterückseite
Geräterückseite UKW-Antenne Kopfhörerbuchse AUX-IN-Buchse Netzteileingang DC IN... -
Page 63: Einstellungsassistent
Einstellungsassistent Bei erstem Einschalten wird im Display „Setup wizard“ angezeigt. Drücken Sie SELECT/SNOOZE zur Bestätigung der Einstellung mit „YES“. Im Einstellungsassistenten haben Sie folgende Optionen: Date/Time 12- oder 24-Stundenformat einstellen Auto update • Update date/time from FM • Update date/time from Network Zeitzone und Sommerzeit wählen. - Page 64 Mit SELECT/SNOOZE durchlaufen Sie die alphanumerischen Schriftzeichen, dann drücken Sie SELECT/SNOOZE zur Auswahl des gewünschten Schriftzeichens. Hinweis: Beachten Sie für WEP-/WPA-Schlüssel die Groß-und Kleinschreibung. Bei Fehleingabe wählen Sie zum Löschen des letzten Schriftzeichens. Hinweis: = Rückschritt; bedeutet Rückkehr zum vorherigen Titel; das Radio speichert automatisch den eingegebenen WEP-/WPA-Schlüssel.
-
Page 65: Internetradio-Modus
Internetradio-Modus Im Display wird „Main menu“ angezeigt, nachdem der Einstellungsassistent beendet wurde. Drücken Sie SELECT/SNOOZE zur Auswahl des Internet radio. Während Station list markiert ist, drücken Sie SELECT/SNOOZE zur Bestätigung. Zur Senderwahl folgen Sie den nachstehenden Abschnitten. Wurde keine Netzwerkverbindung hergestellt, so gehen Sie wie folgt vor: a. -
Page 66: Senderwahl Mit Stations
Senderwahl mit Stations Drücken Sie MENU > Station list > Stations, dann drücken Sie SELECT/SNOOZE zur Bestätigung. Im Menü „Stations“ gehen Sie wie folgt vor: ■ Mit „Location“ wählen Sie einen Sender eines Landes in der Liste. Während „Location“ markiert ist, drücken Sie SELECT/SNOOZE zur Bestätigung. Drehen Sie SELECT/SNOOZE zur Auswahl der gewünschten Region, dann drücken Sie SELECT/SNOOZE zur Bestätigung. -
Page 67: Zugangscode Und Häufig Gestellte Fragen
Zugangscode und häufig gestellte Fragen Zum Zugang drücken Sie MENU > Station list > Help, dann drücken Sie SELECT/SNOOZE zur Bestätigung. Hinweis: In diesem Schritt können Sie ebenfalls die FAQ-Lösungen für das Radio hören. Während „Get access code“ markiert ist, drücken Sie SELECT/SNOOZE zur Bestätigung, um den Zugangscode zu erhalten. -
Page 68: Senderspeicher Belegen
Senderspeicher belegen Ihr Radio kann bis zu 10 Favoriten-Internetsender speichern. Während der Wiedergabe eines Internetsenders halten Sie PRESET gedrückt, bis „Save to Preset“ angezeigt wird, dann drehen Sie SELECT/SNOOZE zur Auswahl einer Senderspeichernummer. Drücken Sie SELECT/SNOOZE zur Bestätigung, im Display wird „Preset stored“ angezeigt. Der Sender ist gespeichert und im Display erscheint „P#“. -
Page 69: Musikplayer-Modus
Musikplayer-Modus Music-Server einrichten • Damit Ihr Radio Musikdateien von einem Computer wiedergeben kann, muss der Computer zur Medienfreigabe eingestellt sein. • Die UPnP-Medienfreigabe ermöglicht es Geräten wie diesem Radio, Musik von freigegebenen Mediatheken wiederzugeben und Menüs wie Interpret, Album oder Genre zu navigieren. •... -
Page 70: Wiedergabeliste
Während der Musikwiedergabe haben Sie folgende Optionen: a. Drücken Sie , um zum vorherigen Titel zu springen; halten Sie zum schnellen Rücklauf durch den aktuellen Titel gedrückt. b. Drücken Sie , um den Titel wiederzugeben oder zu unterbrechen (Pause). c. Drücken Sie , um zum nächsten Titel zu springen;... -
Page 71: Server Löschen
Server löschen Die Funktion Server löschen ermöglicht das Entfernen von Music-Servern, die nicht mehr zum Durchsuchen nach Musik zur Verfügung stehen. Drücken Sie MENU und drehen Sie SELECT/SNOOZE zur Auswahl von „Prune servers“, dann drücken Sie SELECT/SNOOZE zur Bestätigung. Wählen Sie mit „YES“, „Prune shared media wake on LAN servers“. Informationen zur aktuellen Wiedergabe Während der Wiedergabe eines Titels werden der Titel und ein Fortschrittsbalken für die vergangene und Gesamtspielzeit angezeigt. -
Page 72: Ukw-Modus
UKW-MODUS UKW-MODUS wählen Drücken Sie die Taste MODE wiederholt, um den UKW-Modus auszuwählen. Nach dem erstmaligen Einschalten beginnt das Radio am Anfang des UKW-Frequenzbereichs (87,50MHz) mit der Suche. Andernfalls wird der zuletzt gehörte UKW-Sender ausgewählt. Zum manuellen Sendersuche während der Anzeige der Frequenz drücken Sie VOL/TUNE zur Aktivierung der Senderwahl, dann drehen Sie SELECT/SNOOZE zum Einstellen der Frequenz in 0,05 MHz-Schritten. -
Page 73: Senderinformationen Anzeigen
Senderinformationen anzeigen UKW-Sender übertragen zusätzliche Informationen. Drücken Sie mehrmals INFO zum Durchlaufen von Radiotext, Programmtyp, Programmname und Datum. Senderspeicher belegen Ihr Radio kann bis zu 10 UKW-Sender speichern. Mit eingestelltem UKW-Sender halten Sie PRESET gedrückt, bis „Save to Preset“ angezeigt wird, dann drehen Sie SELECT/SNOOZE zur Auswahl einer Senderspeichernummer. -
Page 74: Aux-Eingangsmodus
Aux-Eingangsmodus Am Aux-Eingang können Sie schnell und bequem MP3-Spieler oder andere externe Audioquellen anschließen. Schließen Sie ein externes Gerät über 3,5 mm Audiokabel (nicht mitgeliefert) an der Buchse AUX IN auf der Geräterückseite an. Dann schließen Sie das Netzteil an und drücken Sie STANDBY/ON, um das Gerät einzuschalten. Drücken Sie die Taste MODE wiederholt, um den Modus Auxiliary Input auszuwählen. -
Page 75: Fernbedienungs-App
Zeit an. Nach Abschluss können Sie sofort auf Ihre App zugreifen. Scansonic Remote App installieren Scansonic Remote ist eine App, mit der Ihr iOS-Gerät Ihr Radio fernbedienen kann. Zur Installation der Scansonic Remote App auf Ihrem iOS-Gerät, tippen Sie auf das App Store Symbol auf dem IOS-Gerät, um den App Store zu öffnen. -
Page 76: Verbindung Herstellen
Nach dem Herunterladen der Fernbedienungs-App müssen Sie eine Verbindung zwischen dem iOS-Gerät und Ihrem Radio herstellen. Bei erstem Gebrauch tippen Sie auf das „Scansonic Remote“ Symbol, ein Dialogfenster fordert Sie zur Eingabe des „Net Remote Pin code“ auf, der Standard-Code lautet 1234. Sie können den PIN-Code über Ihr Radio ändern: Drücken Sie MENU >... -
Page 77: Allgemeine Bedienungshinweise
Allgemeine Bedienungshinweise Sleeptimer Mit dieser Funktion schaltet sich Ihr Radio nach einer voreingestellten Einschlafzeit in den Stand-by-Modus. Drücken Sie MENU > Main menu > Sleep und dann SELECT/SNOOZE zur Bestätigung. Drehen Sie SELECT/SNOOZE zur Anzeige der Optionen Sleep OFF, 15, 30, 45 oder 60 MINS, dann drücken Sie SELECT/SNOOZE zur Bestätigung. -
Page 78: Equalizer
Equalizer Mit dieser Funktion nehmen Sie die EQ-Einstellung vor. Jede dieser Equalizereinstellungen passt die Klangwiedergabe Ihres Radios entsprechend an. Drücken Sie MENU > Main menu > System settings > Equaliser und dann SELECT/SNOOZE zur Bestätigung. Drehen Sie SELECT/SNOOZE, dann drücken Sie den Drehregler zur Auswahl von Normal, Flat, Jazz, Rock, Movie, Classic, Pop, News, My EQ oder My EQ profile setup. -
Page 79: Datum/Uhrzeit Einstellen
Datum/Uhrzeit einstellen Drücken Sie MENU > Main menu > System settings > Time/Date, dann drücken Sie SELECT/SNOOZE zur Bestätigung. Drehen Sie SELECT/SNOOZE zur Auswahl der Option, dann drücken Sie SELECT/SNOOZE zur Bestätigung Einstellung. Set Time/date: Stellen Sie Uhrzeit und Datum manuell ein Auto update: „Update from FM“, „Update from Network“... -
Page 80: Einstellungsassistent
Drücken Sie MENU > Main menu > System settings > Software update, dann drücken Sie SELECT/SNOOZE zur Bestätigung. Drehen Sie SELECT/SNOOZE zur Auswahl von „Auto-check setting“, damit überprüft Ihr Radio regelmäßig auf neue Software-Versionen. Drehen Sie SELECT/SNOOZE zur Auswahl von „Check now“, damit überprüft Ihr Radio unverzüglich auf neue Software zur Aktualisierung. -
Page 81: Technische Daten
Technische Daten Parameter Technische Daten Beschreibung: Internet- und UKW-Radio mit Spotify connect AC-Eingang: 100-240 V AC, 50-60 Hz Stromversorgung: Gleichstromausgang: 9 V, 1 A Frequenzbereich: UKW: 87,5 bis 108 MHz Audio Ausgangsleistung: 5 W rms Leistungsaufnahme: 9 W (max.) Abmessungen (B × H × T): 215mm ×... - Page 82 FR Guide d'instructions...
- Page 83 Recommandations de sécurité importantes 1. Lisez ces instructions. ATTENTION RISQUE DE CHOC 2. Conservez le manuel. ÉLECTRIQUE NE PAS OUVRIR 3. Respectez tous les avertissements. ATTENTION : 4. Conformez-vous à toutes les instructions. POUR REDUIRE LES RISQUES D'ELECTROCUTION : N’ENLEVER PAS LES VIS OU LE PANNEAU ARRIERE DU BOITIER. 5.
- Page 84 Mode Aux ���������������������������������������������������������������������������������������������������������������������������������������20 Application de commande à distance d'un appareil sans fil ���������������������������������������������������� 21 Installation de l'application ....................... 21 Installation de l'application Scansonic Remote ................ 21 Configuration de la connexion ....................22 Démarrage de la navigation ..................... 22 Instructions générales ������������������������������������������������������������������������������������������������������������������23...
- Page 85 Mise à jour logicielle ......................... 25 Assistant de configuration ......................26 Affichage des informations sur le système ................26 Éclairage de l'écran ........................26 Spécifications ��������������������������������������������������������������������������������������������������������������������������������27 Made in China Imported by Dantax Radio A/S Bransagervej 15 · 9490 Pandrup · Denmark www.scansonic.dk...
-
Page 86: Mise En Route
Mise en route Retirez doucement la radio de la boîte. Conservez l'emballage pour le réutiliser ultérieurement. La boîte qui vous a été remise contient ■ Une unité principale ■ Un guide d'instructions ■ Un adaptateur secteur Emplacement de la radio Posez votre radio sur une surface plate et stable, non sujette à... - Page 87 Utilisation des écouteurs Des écouteurs équipés d'une prise stéréo de 3,5 millimètres de diamètre vous sont nécessaires. La sortie écouteurs se trouve sur le panneau avant de votre radio. Les écouteurs ne sont pas fournis avec cette radio. Réduisez le volume sonore avant de connecter les écouteurs à votre radio. Branchez les écouteurs, posez-les sur vos oreilles et augmentez doucement le volume jusqu'à...
-
Page 88: Vue Du Panneau Avant
Vue du panneau avant Touche STANDBY/ON Touche INFO Appuyez sur cette touche pour allumer la radio ou Appuyez sur cette touche pour naviguer dans les la placer en mode veille. informations disponibles pour la station. Touche Touche Appuyez sur cette touche pour revenir au titre En mode Spotify et Lecteur de musique, appuyez précédent en mode Spotify et Lecteur de musique. -
Page 89: Vue Du Panneau Arrière
Vue du panneau arrière Antenne FM Sortie écouteurs Prise AUX IN Prise DC IN... -
Page 90: Assistant De Configuration
Assistant de configuration Lorsque vous allumez votre radio pour la première fois, celle-ci vous propose de démarrer Setup wizard. Appuyez sur le bouton SELECT/SNOOZE pour valider la réponse "YES" et démarrer l'assistant. Depuis cet assistant, vous configurez les fonctions suivantes : Date/Time Cette fonction vous permet de choisir entre un affichage de l'horloge sur 12 ou 24 heures. - Page 91 Tournez le bouton SELECT/SNOOZE jusqu'à atteindre le premier caractère du code et appuyez sur ce même bouton SELECT/SNOOZE pour valider votre choix. Recommencez pour les autres caractères. Remarque : Les codes d'accès WEP/WPA différencient les majuscules des minuscules. Si vous saisissez un caractère incorrect, sélectionnez pour l'effacer.
-
Page 92: Mode Radio Internet
Mode radio Internet Après que vous quittez "Setup Wizard", la page-écran du "Main menu" apparaît. Appuyez sur le bouton SELECT/SNOOZE pour sélectionner le mode Internet radio. Amenez la surbrillance sur l'option "Station list" et appuyez sur le bouton SELECT/SNOOZE pour valider votre choix. -
Page 93: Sélection D'une Station Depuis L'option Stations
Sélection d'une station depuis l'option Stations Appuyez sur la touche MENU > Station list > Stations. Appuyez sur le bouton SELECT/SNOOZE pour valider votre choix. Depuis le menu "Stations" : ■ "Location" vous permet de choisir une station parmi celles qui sont associées au pays que vous sélectionnez dans une liste. -
Page 94: Affichage Du Code D'accès Et Des Réponses Aux Faq
Affichage du code d'accès et des réponses aux FAQ Pour accéder aux options illustrées,appuyez sur MENU > Station list > Help. Appuyez sur le bouton SELECT/SNOOZE pour valider votre choix. Remarque : arrivé à ce point, vous pouvez également écouter les réponses aux FAQ. Alors que la surbrillance se trouve sur l'option "Get access code", appuyez sur le bouton SELECT/SNOOZE pour valider votre choix et obtenir le code d'accès. -
Page 95: Présélection De Stations
Présélection de stations Vous pouvez présélectionner jusqu'à 10 stations de radio Internet. Pendant la diffusion d'une station Internet, appuyez sur la touche PRESET et maintenez-la enfoncée jusqu'à afficher le message "Save to Preset". Tournez ensuite le bouton SELECT/SNOOZE jusqu'à sélectionner la position de présélection pour cette station. -
Page 96: Mode Lecteur De Musique
Mode lecteur de musique Configuration d'un serveur de musique • Pour que la radio puisse diffuser un contenu musical stocké sur un ordinateur, vous devez configurer l'ordinateur pour accepter de partager des fichiers ou des médias. • Le partage de médias UPnP permet aux systèmes audio tels que votre radio de diffuser la musique d'une bibliothèque multimédia partagée, naviguant via des menus d'étiquettes tels que Artist, Album ou Genre. -
Page 97: Liste D'écoute My Playlist
Pendant la lecture d'un contenu audio, vous pouvez : a. appuyer sur la touche pour revenir au titre précédent ; appuyer sur la touche et la maintenir enfoncée pour revenir en arrière à l'intérieur du titre qui est en cours de lecture ; b. -
Page 98: Purge Des Serveurs
Purge des serveurs Vous pouvez supprimer les serveurs de musique qui ne sont plus accessibles en tant que tels. Appuyez sur la touche MENU, tournez le bouton SELECT/SNOOZE jusqu'à sélectionner "Prune servers" et appuyez sur ce même bouton SELECT/SNOOZE pour valider votre choix. Sélectionnez "YES"... -
Page 99: Mode
Mode FM Sélection du mode FM Appuyez plusieurs fois sur la touche MODE pour sélectionner le mode FM. Si vous n'avez encore jamais utilisé la radio FM, la recherche commence à partir de la première fréquence FM accessible (87,50 MHz). Dans le cas contraire, la dernière station FM écoutée sera syntonisée. Pour modifier manuellement la fréquence FM, lorsque celle-ci est affichée sur l'écran, appuyez sur la touche VOL/TUNE pour activer la fonction de recherche de fréquence. -
Page 100: Affichage D'informations Sur Une Station De Radio
Affichage d'informations sur une station de radio Informations supplémentaires sur la diffusion des stations FM. Chaque pression sur la touche INFO affiche une information différente, selon la séquence : radio-texte, type d'émission, nom de l'émission et date. Présélection de stations Vous pouvez présélectionner jusqu'à... -
Page 101: Mode Aux
Mode Aux L'entrée AUX IN permet la connexion rapide et facile d’un lecteur MP3 ou d'autres sources audio externes. Avant de brancher la radio sur le secteur, reliez la sortie audio d'un autre appareil à l'entrée AUX IN de votre radio l'aide d'un câble audio 3,5 mm (ce câble n'est pas fourni). -
Page 102: Application De Commande À Distance D'un Appareil Sans Fil
Une fois le téléchargement terminé, l'application devient accessible. Installation de l'application Scansonic Remote L'application Scansonic Remote vous permet de commander votre radio depuis un appareil iOS. Pour installer l'application Scansonic Remote sur un appareil iOS, tapez sur l'icône App Store de cet appareil. -
Page 103: Configuration De La Connexion
Choisissez le réseau de votre radio. Démarrage de la navigation Tapez sur l'icône Scansonic dans le menu principal de votre appareil iOS. Vous pouvez commander maintenant votre radio depuis cet appareil. Pour cela, vous disposez à l'écran des éléments suivants : ■... -
Page 104: Instructions Générales
Instructions générales Configuration de l'arrêt automatique Cette fonction vous permet d'arrêter la radio et de la placer en mode veille après l'expiration d'un certain délai. Appuyez sur la touche MENU > Main menu > Sleep et appuyez sur le bouton SELECT/SNOOZE pour valider votre choix. -
Page 105: Egaliseur
Egaliseur Cette fonction vous permet de choisir une configuration d'égaliseur. Chacun des réglages d'égalisation change la tonalité sonore de la radio. Appuyez sur la touche MENU > Main menu > System settings > Equaliser et appuyez sur le bouton SELECT/SNOOZE pour valider votre choix. Tournez le bouton SELECT/SNOOZE jusqu'à... -
Page 106: Configuration De La Date Et De L'heure
Configuration de la date et de l'heure Appuyez sur la touche MENU > Main menu > System settings > Time/Date et appuyez sur le bouton SELECT/SNOOZE pour valider votre choix. Tournez le bouton SELECT/SNOOZE pour accéder aux réglages qui sont disponibles et appuyez sur ce même bouton SELECT/SNOOZE pour valider la nouvelle valeur. -
Page 107: Assistant De Configuration
Appuyez sur la touche MENU > Main menu > System settings > Software update et appuyez sur le bouton SELECT/SNOOZE pour valider votre choix. Tournez le bouton SELECT/SNOOZE jusqu'à sélectionner "Auto-check setting" pour rechercher régulièrement les nouvelles versions du logiciel. Tournez le bouton SELECT/SNOOZE jusqu'à... -
Page 108: Spécifications
Spécifications Éléments Spécifications Description : radio Internet et FM, avec connexion à Spotify Entrée secteur CA : 100-240 V CA, 50-60 Hz Alimentation électrique : Sortie CC : 9 V, 1 A Plage de fréquences : FM : 87,5-108 MHz Puissance audio en sortie : 5 W rms Consommation :... - Page 109 ES Manual de instrucciones...
- Page 110 Instrucciones de seguridad importantes 1. Lea estas instrucciones. PRECAUCIÓN RIESGO DE DESCARGA 2. Conserve estas instrucciones. ELÉCTRICA NO ABRIR 3. Cumpla todas las advertencias. PRECAUCIÓN: 4. Siga todas las instrucciones. PARA REDUCIR EL RIESGO DE DESCARGAS ELÉCTRICAS: NO QUITE LOS TORNILLOS, LAS CUBIERTAS O LA CARCASA. 5.
- Page 111 Modo de entrada Aux ��������������������������������������������������������������������������������������������������������������������20 App de Mando a distancia de dispositivos inalámbricos ���������������������������������������������������������� 21 Instalación de la app ........................ 21 Instalación de la app Scansonic Remote ................. 21 Configurar la conexión ......................22 Empezar la navegación ......................22 Funcionamiento general ���������������������������������������������������������������������������������������������������������������23...
- Page 112 Actualización del software ......................25 Asistente de configuración ....................... 26 Ver la información del sistema ....................26 Ajustar la luz de fondo ......................26 Especificaciones ���������������������������������������������������������������������������������������������������������������������������27 Made in China Imported by Dantax Radio A/S Bransagervej 15 · 9490 Pandrup · Denmark www.scansonic.dk...
-
Page 113: Primeros Pasos
Primeros pasos Saque cuidadosamente su radio de la caja. Puede ser que desee conservar el embalaje para usarlo en el futuro. Qué encontrará en el interior del paquete ■ Unidad principal ■ Manual de instrucciones ■ Adaptador eléctrico Dónde colocar su radio Coloque su radio sobre una superficie plana y estable que no esté... - Page 114 Usar auriculares Necesitará auriculares con una clavija de conexión estéreo de 3,5mm de diámetro. El conector de los Auriculares se encuentra en la parte delantera de esta unidad. Los auriculares no se entregan con esta radio. Baje el volumen de la unidad antes de conectar los auriculares. Suba lentamente el volumen con los auriculares puestos hasta que alcance el nivel deseado.
-
Page 115: Vista Frontal De La Unidad
Vista frontal de la unidad Botón STANDBY/ON Botón INFO Púlselo para encender la radio o ponerla en modo Púlselo para navegar por la información de la en espera. emisora. Botón Botón Púlselo para saltar a la canción previa en los Púlselo para saltar a la canción siguiente en los modos Spotify y Reproductor de música. -
Page 116: Vista Trasera De La Unidad
Vista trasera de la unidad Antena FM Conector paraauriculares Entrada AUX IN Conector de alimentación DC IN... -
Page 117: Asistente De Configuración
Asistente de configuración La primera vez que use la unidad, le aparecerá la pantalla 'Setup wizard' . Pulse el control SELECT/SNOOZE para confirmar 'YES' para iniciar la configuración. Las opciones del asistente de configuración incluyen las siguientes: Date/Time Establecer el formato 12h o 24h para la hora Auto update •... - Page 118 Gire el control SELECT/SNOOZE para desplazarse por la lista de caracteres alfanuméricos, pulse el control SELECT/SNOOZE para seleccionar el carácter señalado. Nota: Las contraseñas WEP/WPA diferencian entre mayúsculas y minúsculas. Si escribe un carácter equivocado al introducir la contraseña, seleccione para eliminar dicho carácter.
-
Page 119: Modo Radio Por Internet
Modo Radio por Internet En la pantalla le aparecerá el 'Main menu' una vez haya terminado con el 'Setup wizard'. Pulse el control SELECT/SNOOZE hasta seleccionar el modo Internet radio. Mientras esté resaltada la opción 'Station list', pulse el control SELECT/SNOOZE para confirmar. Entonces consulte la sección siguiente para elegir una emisora. -
Page 120: Seleccionar Una Emisora De La Lista De Emisoras
Seleccionar una emisora de la lista de emisoras Pulse el botón MENU > Station list > Stations, y pulse el control SELECT/SNOOZE para confirmar. En el menú 'Stations': ■ La opción 'Location' le permite elegir entre las emisoras de radio proporcionadas por cualquier país que elija de la lista. -
Page 121: Obtener El Código De Acceso Y Respuestas A Las Preguntas Más Frecuentes (Faq)
Obtener el código de acceso y respuestas a las preguntas más frecuentes (FAQ) Para acceder a esta solicitud, pulse el botón MENU > Station list > Help, y pulse el control SELECT/SNOOZE para confirmar. Nota: en este paso también podrá oír las respuestas a las Preguntas más frecuentes (FAQ) sobre la radio. -
Page 122: Guardar En Memoria Emisoras Presintonizadas
Guardar en memoria emisoras presintonizadas Su radio puede guardar hasta 10 de sus emisoras de Internet favoritas. Mientras esté escuchando una emisora de Internet, mantenga pulsado el botón PRESET hasta que aparezca 'Save to Preset' en la pantalla, y luego gire el control SELECT/SNOOZE para seleccionar un número de la memoria. -
Page 123: Modo De Reproductor De Música
Modo de Reproductor de música Configurar el Servidor de música • Para que su radio pueda reproducir archivos de música desde un PC, el PC debe de estar configurado para compartir archivos multimedia. • El protocolo para compartir archivos UPnP permite que dispositivos como esta radio reproduzcan archivos desde la biblioteca de medios compartidos, y navegar por los menús de etiquetas como Artista, Álbum o Género. -
Page 124: Mi Lista De Reproducción
Mientras esté reproduciendo una pista de audio, podrá: a. Pulsar el botón para saltar a la pista de audio previa; mantener pulsado el botón para rebobinar la pista actualmente en reproducción. b. Pulsar el botón para hacer una pausa/reanudar la reproducción de la pista. c. -
Page 125: Recortar Servidores
Recortar servidores La función de recortar servidores le permite eliminar servidores de música que ya no están disponibles para navegar por música. Pulse el botón MENU, gire el control SELECT/SNOOZE hasta seleccionar 'Prune servers', y luego pulse el control SELECT/SNOOZE para confirmar. Seleccione 'YES' para 'Prune shared media wake on LAN servers'. -
Page 126: Seleccionar Modo Fm
Modo FM Seleccionar Modo FM Pulse el botón MODE varias veces hasta seleccionar el modo FM. La primera vez que la use, comenzará en el principio del margen de frecuencias FM (87.50MHz). En otro caso seleccionará la última emisora FM que estuvo escuchando. Para cambiar manualmente la frecuencia FM, mientras aparece la frecuencia FM en la pantalla, pulse el botón VOL/TUNE para activar la función sintonizar, y luego gire el control SELECT/SNOOZE para cambiar la frecuencia en intervalos de 0.05MHz. -
Page 127: Ver La Información De La Emisora
Ver la información de la emisora Las emisoras FM retransmiten información adicional. Pulse el botón INFO varias veces para ver la información a través del Texto de radio, Tipo de programa, Nombre del programa y Fecha. Guardar en memoria emisoras presintonizadas Su radio puede guardar hasta 10 de sus emisoras de FM favoritas. -
Page 128: Modo De Entrada Aux
Modo de entrada Aux La entrada AUX IN le permite una conexión sencilla y rápida de un reproductor MP3 o de otras fuentes de audio externas. Antes de enchufar la unidad a una toma de corriente, use un cable de audio con clavijas de 3.5mm (no suministrado) para conectar su dispositivo de audio externo al conector AUX IN en la parte trasera de la unidad. -
Page 129: App De Mando A Distancia De Dispositivos Inalámbricos
Una vez completada la descarga, podrá acceder a su nueva app. Instalación de la app Scansonic Remote Scansonic Remote es una aplicación que permite a su dispositivo iOS controlar su radio. Para instalar la app Scansonic Remote en su dispositivo iOS, toque sobre el icono de App Store en su dispositivo para abrir la App Store. -
Page 130: Configurar La Conexión
Elija la misma red a la que tiene acceso su radio. Empezar la navegación Toque sobre el icono Scansonic en el menú principal de su dispositivo iOS y luego empiece a navegar por su radio. En la pantalla del menú podrá encontrar los controles siguientes: ■... -
Page 131: Funcionamiento General
Funcionamiento general Apagado automático Esta función le permite pasar automáticamente su radio a modo en espera transcurrido un tiempo establecido. Pulse el botón MENU > Main menu > Sleep, y luego pulse el control SELECT/SNOOZE para confirmar. Gire el control SELECT/SNOOZE para ver las opciones Sleep OFF, 15, 30, 45 o 60 MINS, y pulse el control SELECT/SNOOZE para confirmar. -
Page 132: Ecualizador
Ecualizador Esta función le permite elegir un perfil de ecualización del sonido. Cada una de las configuraciones de ecualización cambiará el tono del sonido de su radio cuando las seleccione. Pulse el botón MENU > Main menu > System settings > Equaliser, y luego pulse el control SELECT/SNOOZE para confirmar. -
Page 133: Austar La Fecha/Hora
Austar la Fecha/Hora Pulse el botón MENU > Main menu > System settings > Time/Date, y luego pulse el control SELECT/SNOOZE para confirmar. Gire el control SELECT/SNOOZE para seleccionar las opciones, y luego pulse sobre el control SELECT/SNOOZE para confirmar la configuración. Set Time/date: Ajusta manualmente tanto la fecha como la hora Auto update:... -
Page 134: Asistente De Configuración
Pulse el botón MENU > Main menu > System settings > Software update, y pulse el control SELECT/SNOOZE para confirmar. Gire el control SELECT/SNOOZE hasta seleccionar 'Auto-check setting', y su radio comprobará periódicamente si hay una nueva versión de software. Gire el control SELECT/SNOOZE hasta seleccionar 'Check now', y su radio comprobará... -
Page 135: Especificaciones
Especificaciones Elementos Especificaciones Descripciones: Radio FM y por Internet con conexión a Spotify Entrada de CA: 100-240V CA, 50-60Hz Requisitos eléctricos: Salida CC: 9V, 1A Margen de Frecuencias: FM: 87.5-108MHz Potencia de salida de sonido: 5W RMS Consumo de potencia: 9W (máx.) Dimensiones (An X Al x F): 215mm x 130mm x 110mm... - Page 136 Manuale di istruzioni...
- Page 137 Importanti istruzioni di sicurezza 1. Leggere queste istruzioni. ATTENZIONE RISCHIO DI SCOSSE 2. Conservare queste istruzioni. ELETTRICHE NON APRIRE 3. Osservare tutte le avvertenze. ATTENZIONE: 4. Seguire tutte le istruzioni. PER RIDURRE IL RISCHIO DI SCOSSE ELETTRICHE: NON RIMUOVERE LE VITI, COPERTURE O LA CUSTODIA. 5.
- Page 138 Come richiamare una stazione preselezionata ................ 19 Modalità Ingresso ausiliario Aux IN ���������������������������������������������������������������������������������������������20 Applicazione di controllo remoto senza fili �������������������������������������������������������������������������������� 21 Installazione dell'applicazione ....................21 Installazione dell'app Scansonic Remote ................. 21 Impostazione della connessione ....................22 Avvio della navigazione ......................22 Operazioni generiche ��������������������������������������������������������������������������������������������������������������������23...
- Page 139 Aggiornamento del software ....................25 Impostazione guidata ....................... 26 Visualizzazione delle informazioni di sistema ................26 Impostazione della retroilluminazione ..................26 Specifiche tecniche �����������������������������������������������������������������������������������������������������������������������27 Made in China Imported by Dantax Radio A/S Bransagervej 15 · 9490 Pandrup · Denmark www.scansonic.dk...
-
Page 140: Guida Introduttiva
Guida introduttiva Estrarre delicatamente la radio dalla scatola. Conservare il materiale dell'imballaggio per un eventuale uso futuro. Contenuto della confezione ■ Unità principale ■ Manuale di istruzioni ■ Alimentatore Collocazione della radio Posizionare la radio su una superficie stabile e piana che non sia sottoposta a vibrazioni. Evitare le seguenti posizioni: ■... - Page 141 Uso delle cuffie È possibile utilizzare cuffie con uno spinotto stereo da 3,5 mm. L'ingresso cuffie è posto nella parte anteriore della radio. Le cuffie non sono fornite in dotazione con la radio. Abbassare il volume prima di collegare le cuffie. Mentre si indossano le cuffie, aumentare gradualmente il volume fino a quando si raggiunge il livello desiderato.
-
Page 142: Vista Frontale Del Dispositivo
Vista frontale del dispositivo Pulsante STANDBY/ON Pulsante INFO Premere per accendere la radio o accedere alla Premere per navigare tra le informazioni della modalità di standby. stazione. Pulsante Pulsante Premere per passare alla traccia precedente in Nella modalità di lettore musicale o in Spotify, Spotify o nella modalità... -
Page 143: Retro Del Dispositivo
Retro del dispositivo Antenna FM Presa cuffie Presa AUX IN Presa DC IN... -
Page 144: Impostazione Guidata
Impostazione guidata Se il dispositivo è utilizzato per la prima volta, sul display apparirà la schermata "Setup wizard". Premere la manopola SELECT/SNOOZE per confermare con "YES" e avviare la procedura di impostazione guidata. L'impostazione guidata include quanto segue: Date/Time Impostazione dell'ora nel formato 12 o 24 ore Auto update •... - Page 145 Ruotare la manopola SELECT/SNOOZE per scorrere tra i caratteri alfanumerici, premere la manopola SELECT/SNOOZE per selezionare un carattere. Nota: la chiave di crittografia WEP/WPA distingue tra minuscole e maiuscole. Se durante l'immissione della password si immette un carattere errato, selezionare cancellarlo.
-
Page 146: Modalità Internet Radio
Modalità Internet Radio Una volta completata la procedura di impostazione guidata "Setup wizard", sullo schermo apparirà la schermata del menu principale "Main menu". Premere la manopola SELECT/SNOOZE per selezionare la modalità Internet radio. Selezionare la voce "Station list" e premere la manopola SELECT/SNOOZE per confermare. Consultare il paragrafo seguente per selezionare le stazioni radio. -
Page 147: Selezione Di Una Stazione
Selezione di una stazione Premere il tasto MENU > Station list > Stations, poi premere la manopola SELECT/SNOOZE per confermare. Nel menu "Stations": ■ La voce "Location" consente di selezionare tra le stazioni radio del paese precedentemente scelto nell'elenco dei paesi. Dopo avere selezionato la voce "Location", premere la manopola SELECT/SNOOZE per confermare. -
Page 148: Codice Di Accesso, Domande Frequenti E Risoluzione Dei Problemi
Codice di accesso, domande frequenti e risoluzione dei problemi Per accedere a questa cartella, premere il tasto MENU > Station list > Help, poi premere la manopola SELECT/SNOOZE per confermare. Nota: tramite questa voce di menu è anche possibile ascoltare le domande frequenti e la risoluzione dei problemi. -
Page 149: Memorizzazione Delle Stazioni Preimpostate
Memorizzazione delle stazioni preimpostate La radio può memorizzare fino a dieci stazioni radio Internet. Durante la riproduzione di una stazione radio Internet, premere e tenere premuto il pulsante PRESET fino a quando sul display apparirà "Save to Preset", poi ruotare la manopola SELECT/SNOOZE per selezionare un numero di preselezione. -
Page 150: Modalità Di Lettore Musicale
Modalità di lettore musicale Impostazione di un music server • Affinché la radio possa riprodurre file musicale da un computer, è necessario che il computer sia configurato in modo da condividere file o contenuti multimediali. • La condivisione dei contenuti multimediali tramite server UPnP consente a dispositivi come questa radio di riprodurre musica da una libreria multimediale condivisa e navigare tra etichette di menu quali artista, album o genere. -
Page 151: La Mia Playlist
Durante la riproduzione di un brano è possibile: a. Premere il pulsante per passare alla traccia precedente; premere e tenere premuto il pulsante per il riavvolgimento veloce della traccia in riproduzione. b. Premere il pulsante per riprodurre/mettere in pausa la traccia corrente. c. -
Page 152: Rimozione Dei Server Invalidi
Rimozione dei server invalidi Questa funzione consente di rimuovere i server musicali non più disponibili. Premere il pulsante MENU, ruotare la manopola SELECT/SNOOZE per selezionare "Prune servers" e poi premere la manopola SELECT/SNOOZE per confermare. Selezionare "YES" per "Prune shared media wake on LAN servers". Informazioni sul brano in riproduzione Durante la riproduzione di un brano, il display mostrerà... -
Page 153: Selezione Della Modalità Fm
Modalità FM Selezione della modalità FM Premere ripetutamente il pulsante MODE per selezionare la modalità FM. Per il primo utilizzo, si avvierà all'inizio della gamma di frequenza FM (87,50MHz). Altrimenti, verrà selezionato l'ultima stazione FM ascoltato. Per cambiare manualmente la frequenza FM che appare sul display, premere il pulsante VOL/TUNE per attivare la funzione di sintonizzazione, poi ruotare la manopola SELECT/SNOOZE per cambiare la frequenza in passi da 0,05 MHz. -
Page 154: Come Visualizzare Le Informazioni Delle Stazioni
Come visualizzare le informazioni delle stazioni Le stazioni radio FM trasmettono informazioni aggiuntive. Premere ripetutamente il pulsante INFO per navigare tra informazioni quali radio text, tipo di programma, nome del programma e data. Memorizzazione delle stazioni preimpostate La radio può memorizzare fino a dieci stazioni radio FM. Durante la riproduzione di una stazione radio FM, premere e tenere premuto il pulsante PRESET fino a quando sul display apparirà... -
Page 155: Modalità Ingresso Ausiliario Aux
Modalità Ingresso ausiliario Aux IN AUX IN permette la connessione semplice e veloce a un lettore MP3 o altre sorgenti audio esterne. Prima di collegare alla presa di corrente, utilizzare un cavo audio con spinotto da 3,5 mm (non in dotazione) per collegare la radio alla sorgente audio esterna tramite l'ingresso AUX IN posto sul retro dell'unità. -
Page 156: Applicazione Di Controllo Remoto Senza Fili
Una volta che è completo, è possibile accedere alla nuova app. Installazione dell'app Scansonic Remote Scansonic Remote è un'applicazione che consente il controllo della radio da un dispositivo iOS. Per installare l'applicazione Scansonic Remote su un dispositivo iOS, toccare l'icona dell'App Store sul dispositivo per aprire l'App store. -
Page 157: Impostazione Della Connessione
Selezionare Setting > Wi-Fi. Selezionare la rete utilizzata dalla radio. Avvio della navigazione Toccare l'icona Scansonic sul menu principale del dispositivo iOS e avviare per navigare tra i menu della radio. Nella schermata dei menu è possibile trovare i seguenti comandi: ■... -
Page 158: Operazioni Generiche
Operazioni generiche Impostazione della funzione Sleep Questa funzione consente alla radio di entrare automaticamente in modalità standby dopo un periodo prestabilito. Premere il tasto MENU > Main Menu > Sleep, poi premere la manopola SELECT/SNOOZE per confermare. Ruotare la manopola SELECT/SNOOZE per visualizzare le opzioni Sleep OFF, 15, 30, 45 o 60 MINS, premere la manopola SELECT/SNOOZE per confermare. -
Page 159: Equalizzatore
Equalizzatore Questa funzione consente di selezionare un profilo di equalizzazione del suono. Ognuna delle impostazioni di equalizzazione cambierà il tono del suono dalla radio quando selezionato. Premere il pulsante MENU > Main menu > System settings > Equaliser e poi premere la manopola SELECT/SNOOZE per confermare. -
Page 160: Impostazione Dell'ora E Della Data
Impostazione dell'ora e della data Premere il pulsante MENU > Main menu > System settings > Time/Date e poi premere la manopola SELECT/SNOOZE per confermare. Ruotare la manopola SELECT/SNOOZE per selezionare le opzioni, poi premere la manopola SELECT/SNOOZE per confermare le impostazioni. Set Time/date: Impostare manualmente data e ora Auto update:... -
Page 161: Visualizzazione Delle Informazioni Di Sistema
Premere il pulsante MENU > Main menu > System settings > Software update e poi premere la manopola SELECT/SNOOZE per confermare. Ruotare la manopola SELECT/SNOOZE e selezionare "Auto-check setting"; in questo modo la radio verificherà periodicamente la presenza di una nuova versione del software. Ruotare la manopola SELECT/SNOOZE e selezionare "Check now";... -
Page 162: Specifiche Tecniche
Specifiche tecniche Voce Specifiche tecniche Descrizione: FM e Internet radio con Spotify Ingresso CA: 100-240 V CA, 50-60 Hz Requisiti di alimentazione: Uscita CC: 9 V, 1 A Gamma di frequenza: FM: 87,5-108 MHz Potenza di uscita audio: 5 W rms Consumo energetico: 9 W (Max) Dimensioni (L x A x P):... - Page 163 NL Gebruikershandleiding...
- Page 164 Belangrijke Veiligheidsvoorschriften 1. Lees deze instructies. OPGELET RISICO OP ELEKTRISCHE 2. Bewaar deze instructies. SCHOK NIET OPENEN 3. Neem alle waarschuwingen in acht. OPGELET: 4. Volg alle instructies. OM HET RISICO OP ELEKTRISCHE SCHOKKEN TE VOORKOMEN: 5. Gebruik de luidspreker niet in de buurt van water. DE SCHROEVEN, COVERS OF BEHUIZING NIET VERWIJDEREN.
- Page 165 Stations in het Geheugen Opslaan ..................19 Een Opgeslagen Station Herroepen ..................19 Aux in Modus ���������������������������������������������������������������������������������������������������������������������������������20 Draadloze Apparaat Afstandsbediening App ������������������������������������������������������������������������������ 21 App installatie ...........................21 Scansonic Remote App installatie .................... 21 De Verbinding Instellen ......................22 De Navigatie Starten ........................ 22 Algemene Bediening ���������������������������������������������������������������������������������������������������������������������23...
- Page 166 Netwerkinstelling ........................24 Tijd/Datuminstelling ........................25 Taalinstelling ..........................25 Fabrieksterugstelling ........................ 25 Software-update ........................25 Instelling Wizard ........................26 Systeeminformatie Weergeven ....................26 Achtergrondlicht Instellen ......................26 Specificaties�����������������������������������������������������������������������������������������������������������������������������������27 Made in China Imported by Dantax Radio A/S Bransagervej 15 · 9490 Pandrup · Denmark www.scansonic.dk...
-
Page 167: Aan De Slag
Aan de Slag Haal uw radio voorzichtig uit de verpakking. U kunt de verpakking eventueel bewaren voor toekomstig gebruik. Leveringsomvang ■ Hoofdeenheid ■ Gebruikshandleiding ■ Stroomadapter Uw Radio Plaatsen Plaats uw radio op een vlak/stabiel oppervlakte, waar deze niet wordt blootgesteld aan vibraties. Vermijd de volgende locaties: ■... - Page 168 Hoofdtelefoon Gebruiken U hebt een hoofdtelefoon nodig met een stereo stekker met een diameter van 3,5 mm. De Hoofdtelefoonuitgang is te vonden op de voorzijde van dit apparaat. Er is geen hoofdtelefoon meegeleverd met deze radio. Verlaag het volume voordat u de hoofdtelefoon aansluit. Verhoog vervolgens geleidelijk het volume met de hoofdtelefoon op uw oren totdat het gewenste geluidsniveau is bereikt.
-
Page 169: Vooraanzicht Van Het Apparaat
Vooraanzicht van het Apparaat STANDBY/ON toets INFO toets Indrukken om de radio in of op stand-by te Indrukken om stationinformatie te browsen. schakelen. toets toets Indrukken om de volgende track te selecteren in de Indrukken om de vorige track te selecteren in de modi Spotify en Muziekspeler. -
Page 170: Achteraanzicht Van Het Apparaat
Achteraanzicht van het Apparaat FM-antenne Hoofdtelefooningang AUX IN ingang DC IN ingang... -
Page 171: Instelling Wizard
Instelling Wizard Wanneer u het apparaat voor het eerst inschakelt, zal het 'Setup wizard' scherm op de display verschijnen. Druk op de knop SELECT/SNOOZE om 'YES' te bevestigen en de instellingen te starten. De Instelling Wizard biedt de volgende opties: Date/Time 12- of 24-uurs formaat instellen Auto update... - Page 172 Draai de knop SELECT/SNOOZE om de alfanumerieke karakters te doorlopen en druk op de knop SELECT/SNOOZE om een gemarkeerd karakter te selecteren. Opmerking: WEP/WPA-codes zijn hoofdlettergevoelig. Als u tijdens het invoeren van uw wachtwoord in verkeerd karakter invoert, kunt u selecteren om dat karakter te wissen.
-
Page 173: Internetradiomodus
Internetradiomodus De display zal 'Main menu' tonen nadat de 'Setup wizard' is voltooid. Druk op de knop SELECT/SNOOZE om de modus Internet radio te selecteren. Terwijl 'Station list' is gemarkeerd, druk ter bevestiging op de knop SELECT/SNOOZE. Verwijs hierna naar de volgende sectie om stations te selecteren. Ga echter als volgt te werk als de verbinding met het netwerk mislukt: a. -
Page 174: Een Station Selecteren Via Stations
Een station selecteren via Stations Druk op de toets MENU > Station list > Stations, druk ter bevestiging op de knop SELECT/SNOOZE. In het menu 'Stations': ■ U kunt met 'Location' kiezen uit de radiostations beschikbaar in een willekeurig land dat u uit een lijst kiest. Terwijl 'Location' is gemarkeerd, druk ter bevestiging op de knop SELECT/SNOOZE. -
Page 175: Toegangscode Krijgen En Veelgestelde Vragen
Toegangscode Krijgen en Veelgestelde Vragen Om deze optie te openen, druk op de toets MENU > Station list > Help, druk vervolgens ter bevestiging op de knop SELECT/SNOOZE. Opmerking: u kunt in deze stap ook luisteren naar de Veelgestelde Vragen. Wanneer 'Get access code' is gemarkeerd, kunt u op de knop SELECT/SNOOZE drukken om te bevestigen en uw toegangscode te krijgen. -
Page 176: Stations In Het Geheugen Opslaan
Stations in het Geheugen Opslaan U kunt maximaal 10 favoriete Internetstations in uw radio opslaan. Terwijl een Internetstation wordt afgespeeld, houd de toets PRESET ingedrukt totdat de display 'Save to Preset' toont, draai vervolgens de knop SELECT/SNOOZE om een geheugennummer te selecteren. Druk ter bevestiging op de knop SELECT/SNOOZE en de display zal 'Preset stored' tonen. -
Page 177: Muziekspelermodus
Muziekspelermodus Een Muziekserver Instellen • Uw radio kan muziekbestanden afspelen vanuit een computer, vooropgesteld dat de computer is ingesteld om bestanden of media te delen. • U kunt met 'UPnP media sharing' apparaten zoals deze radio muziek laten afspelen vanuit een gezamenlijk gebruikte mediabibliotheek en door tagmenu's navigeren zoals Artiest, Album of Genre. -
Page 178: Mijn Afspeellijst
U hebt tijdens het afspelen van een track de volgende opties: a. Druk op de toets om de vorige track te selecteren; houd de toets ingedrukt om de huidige track terug te spoelen. b. Druk op de toets om de huidige track te starten/pauzeren. c. -
Page 179: Servers Bijwerken
Servers Bijwerken U kunt de functie Servers Bijwerken gebruiken om muziekservers te verwijderen die niet langer beschikbaar zijn voor het browsen van muziek. Druk op de toets MENU, draai de knop SELECT/SNOOZE om 'Prune servers' te selecteren en druk vervolgens ter bevestiging op de knop SELECT/SNOOZE. Selecteer 'YES' voor 'Prune shared media wake on LAN servers'. -
Page 180: Fm-Modus
FM-modus De FM-modus Selecteren Druk op meerdere keren op de toets MODE om de FM-modus te selecteren. Wanneer u deze modus voor het eerst selecteert, zal de radio starten aan het begin van het FM-frequentiebereik (87.50MHz). Zo niet zal het laatst beluisterde FM-station worden geselecteerd. Om de FM-frequentie handmatig te veranderen, terwijl de FM-frequentie wordt weergegeven, druk op de toets VOL/TUNE om de tunerfunctie te activeren en draai vervolgens de knop SELECT/SNOOZE om de frequentie met stappen van 0.05MHz te veranderen. -
Page 181: Stationinformatie Weergeven
Stationinformatie Weergeven FM-stations zenden aanvullende informatie uit. Druk meerdere keren op de toets INFO om verschillende soorten informatie te doorlopen: Radio Text, Program Type, Program Name en Date. Stations in het Geheugen Opslaan Uw radio kan maximaal 10 van uw favoriete FM-stations opslaan. Houd tijdens het afspelen van een FM-station de toets PRESET ingedrukt totdat de display 'Save to Preset' toont, draai vervolgens de knop SELECT/SNOOZE om een geheugennummer te selecteren. -
Page 182: Aux In Modus
Aux in Modus U kunt AUX IN gebruiken voor een snelle en eenvoudige aansluiting op een MP3-speler of andere externe audiobronnen. Voordat u de stroomadapter in het stopcontact steekt, gebruik a.u.b. een 3,5mm audiokabel (niet inbegrepen) om uw externe audiobron aan te sluiten op de AUX IN ingang op de achterzijde van het apparaat. Sluit nu de stroomadapter aan op het stopcontact en druk op de toets STANDBY/ON om het apparaat in te schakelen. -
Page 183: Draadloze Apparaat Afstandsbediening App
Zodra de download is voltooid, kunt u uw nieuwe app openen. Scansonic Remote App installatie Scansonic Remote is een applicatie waarmee uw iOS apparaat uw radio kan bedienen. U kunt de Scansonic Remote App op uw iOS apparaat installeren door op het icoontje App Store op het iOS apparaat te klikken om de App Store te openen. -
Page 184: De Verbinding Instellen
Selecteer Setting > Wi-Fi. Selecteer het netwerk dat uw radio gebruikt. De Navigatie Starten Druk op het icoontje Scansonic in het hoofdmenu van uw iOS apparaat en start vervolgens met navigatie van uw radio. De volgende opties zijn beschikbaar op het menuscherm: ■... -
Page 185: Algemene Bediening
Algemene Bediening Slaapinstelling U kunt met deze functie uw radio zichzelf na een ingestelde slaaptijd op stand-by modus laten schakelen. Druk op de toets MENU > Main menu > Sleep, en druk vervolgens ter bevestiging op de knop SELECT/SNOOZE. Draai de knop SELECT/SNOOZE om de opties Sleep OFF, 15, 30, 45 of 60 MINS te doorlopen en druk ter bevestiging op de knop SELECT/SNOOZE. -
Page 186: Equalizer
Equalizer U kunt met deze functie equalizereffecten voor het geluid selecteren. Elke geselecteerde equalizerinstelling zal de toon van het radiogeluid veranderen. Druk op de toets MENU > Main menu > System settings > Equaliser en druk vervolgens ter bevestiging op de knop SELECT/SNOOZE. -
Page 187: Tijd/Datuminstelling
Tijd/Datuminstelling Druk op de toets MENU > Main menu > System settings > Time/Date en druk ter bevestiging op de knop SELECT/SNOOZE. Draai de knop SELECT/SNOOZE om opties te selecteren en druk vervolgens op de knop SELECT/SNOOZE om de instelling te bevestigen. Set Time/date: Beide Tijd en Datum handmatig instellen Auto update:... -
Page 188: Instelling Wizard
Druk op de toets MENU > Main menu > System settings > Software update en druk ter bevestiging op de knop SELECT/SNOOZE. Draai de knop SELECT/SNOOZE om 'Auto-check setting' te selecteren en uw radio zal regelmatig naar nieuwe softwareversies zoeken. Draai de knop SELECT/SNOOZE om 'Check now' te selecteren en uw radio zal onmiddellijk controleren of er een nieuwe softwareversie beschikbaar is voor upgrade. -
Page 189: Specificaties
Specificaties Onderwerpen Specificaties Beschrijvingen: Internet- en FM-radio met Spotify verbinding AC-ingang: 100-240Vac, 50-60Hz Stroomvereisten: DC-uitgang: 9V, 1A Frequentiebereik: FM: 87.5-108 MHz Audio Uitgangsvermogen: 5W rms Stroomverbruik: 9W (Max) Afmetingen (B x H x D): 215mm x 130mm x 110mm Dit symbool op het product of in de instructies betekent dat uw elektrische en elektronische apparatuur aan het einde van de levensduur ervan gescheiden van uw huishoudelijke afval moet worden afgevoerd.
Need help?
Do you have a question about the IN210 and is the answer not in the manual?
Questions and answers