Table of Contents
Advertisement
Advertisement
Table of Contents

Subscribe to Our Youtube Channel
Related Manuals for sitrex DM 6


Summary of Contents for sitrex DM 6
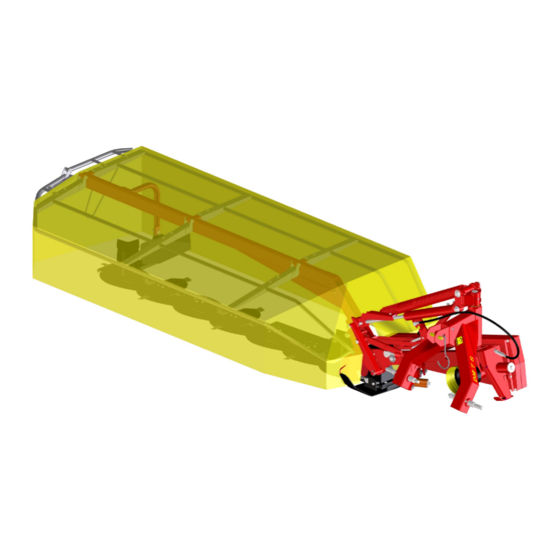
- Page 1 ASSEMBLY, USE AND MAINTENANCE SPARE PARTS LIST DM 6-7-8 S 201301...
-
Page 3: Table Of Contents
TABLE OF CONTENT SECTION 1 SPARE PARTS LIST _________________________________________________________ 1 SECTION 2 GENERAL INFORMATION ___________________________________________________29 WARRANTY __________________________________________________________________29 SECTION 3 GUIDE TO THE SIGNS AND SYMBOLS USED IN THIS MANUAL AND THEIR LOCATION ON THE MACHINE _____________________________________________________________________30 SIGNS AND SYMBOLS _________________________________________________________30 WARNING AND DANGER SIGNS _________________________________________________30 INDICATION SIGNS ____________________________________________________________31 SECTION 4... -
Page 5: Spare Parts List
SPARE PARTS LIST SECTION 1 SPARE PARTS LIST TABLE NO. 910.148... - Page 6 SPARE PARTS LIST TABLE N O. 910.148 DM -6 ITE M Q .TY P ART/N O D ES CRIPTION N OTE 100.882 GE A R BOX CA SING 620.129 BEA RING 100.883 W A SH ER 620.141 100.772 BEV E L GE AR 620.130 SCRE W 100.770...
- Page 7 SPARE PARTS LIST TABLE N O. 910.148 DM-6 ITEM Q .TY PART/N O D ESCRIPTION N OTE 100.795 W ASH ER 620.165 R IN G OR 100.803 BUSH 100.800 GEAR 620.176 BEARING 100.995 SUPPOR T 110.463 D ISC 620.139 N UT 100.996 C OVER 620.150...
- Page 8 SPARE PARTS LIST TABLE NO. 910.149...
- Page 9 SPARE PARTS LIST TABL E N O . 910.149 D M-7 ITEM Q .T Y PART/N O DES CRIPT IO N NOT E 100.992 GEAR B OX CASIN G 620.129 BEAR IN G 100.883 W ASHER 620.141 100.772 BEVEL GEAR 620.130 SCREW 100.770...
- Page 10 SPARE PARTS LIST TABLE NO. 910.149 DM-7 ITEM Q.TY PART/NO DESCRIPTION NOTE 100.795 WASHER 620.165 RING OR 100.803 BUSH 100.800 GEAR 620.176 BEARING 100.995 SUPPORT 110.463 DISC 620.139 100.996 COVER 620.150 WASHER 620.128 BEARING 110.127 SUPPORT DEFLEKTOR 620.143 SPRING PIN 100.890 HOOK 100.790...
- Page 11 SPARE PARTS LIST...
- Page 12 SPARE PARTS LIST DM8 S TABLE NO. 910.147...
- Page 13 SPARE PARTS LIST DM8 S TABLE NO. 910.147...
- Page 14 SPARE PARTS LIST DM8 S TABLE NO. 910.147 Item Part No. Q.tè Pos. Code Q.ty DESCRIPTION NOTE 100.774 PLUG 610.232 BUSHING 620.129 BEARING 100.883 WASHER 620.141 100.772 BEVEL GEAR 100.992 GEAR BOX CASING 100.770 COVER 620.130 SCREW 620.156 OIL SEAL 100.884 BUSH 100.771...
- Page 15 SPARE PARTS LIST DM8 S TABLE NO. 910.147 Item Part No. Q.ty Pos. Code Q.tè DESCRIPTION NOTE 620.126 BEARING 100.798 100.801 GEAR 100.787 SCREW 100.797 DISTANCE PIN 100.786 SCREW 100.785 DISTANCE 100.789 PLUG 620.175 WASHER 620.139 620.150 WASHER 620.128 BEARING 100.783 SCREW 100.795...
- Page 16 SPARE PARTS LIST TABLE NO. 910.150...
- Page 17 SPARE PARTS LIST TABLE NO. 910.150...
- Page 18 SPARE PARTS LIST TABLE NO. 910.150 Item Pa rt No. Pos. Code DESCRIPTION NOTE 600.306 PLUG 110.429 LEVER 110.486 600.551 SCREW 110.493 WASHER 110.482 SPACER 620.480 SNAP RING 630.931 BALL JOINT M8 600.061 SCREW 110.487 WASHER 110.476 PROTECTION 600.229 WASHER 600.037 620.475 SCREW...
- Page 19 SPARE PARTS LIST TABLE NO. 910.150 Item Part No. Pos. Code DESCRIPTION NOTE 620.248 BEARING 100.969 SPACER 620.249 BELT TENSION SCREW 100.970 WASHER 100.968 TIGHTENER WASHER 600.533 RETAINING RING 100.758 600.702 SCREW 600.076 640.007 SPRING PIN 620.251 BELT 110.022 SPACER 110.016 BELT COVER SUPPORT 610.185...
- Page 20 SPARE PARTS LIST TABLE NO. 910.151...
- Page 21 SPARE PARTS LIST TABLE NO. 910.151 Item Part No. Pos. Code DESCRIPTION NOTE 600.040 FITTING D 3/8 610.118 SHACKLES 110.475 SPACER 110.459 100.979 SPRING PIN 630.005 SCREW 600.646 O RING 600.875 O RING 600.273 QUICK COUPLING 610.436 GASKET 110.447 110.495 PISTON 600.647 GASKET...
- Page 22 SPARE PARTS LIST TABLE NO. 910.151...
- Page 23 SPARE PARTS LIST TABLE NO. 910.151 Item Part No. Pos. Code DESCRIPTION NOTE 110.457 ROD PLATE 600.539 SPRING PIN 100.977 SPRING SUPPORT 100.978 SPRING HEAD 100.976 SPACER 620.252 SPRING PIN 600.200 100.980 SPRING HEAD 100.981 SPRING SUPPORT 110.009 RUBBER SPRING 600.075 110.010 WASHER...
- Page 24 SPARE PARTS LIST TABLE NO. 910.152...
- Page 25 SPARE PARTS LIST TABLE NO. 910.152...
- Page 26 SPARE PARTS LIST TABLE NO. 910.152 Item Part No. Pos. Code DESCRIPTION NOTE 110.493 WASHER 200.279 SPRING 110.465 HAY DEFLECTOR 110.442 COVER CANVAS 110.441 COVER CANVAS 110.012 COVER CANVAS 600.077 600.826 SCREW 600.029 600.322 WASHER 610.185 WASHER 600.076 600.018 SPRING WASHER 600.086 SPRING WASHER DM7 - DM8...
- Page 27 SPARE PARTS LIST...
- Page 28 SPARE PARTS LIST DM 6-7 S CARDAN SHAFT 630.932 Z6 Tractor takeoff...
- Page 29 SPARE PARTS LIST CARDAN SHAFT DM 6-7 S PART NO 630.932 Z6 Tractor takeoff Item Part No. Pos. Code DESCRIPTION NOTE 630.382 YOKE Z6 Tractor takeoff 610.368 CROSS JOURNAL ASS. 610.370 OUTER TUBE YOKE 001.411 LABEL "DANGER ROTATING ……" 001.316 LABEL "DANGER SHIELD…"...
- Page 30 SPARE PARTS LIST DM8 S CARDAN SHAFT 620.237 Z6 Tractor takeoff...
- Page 31 SPARE PARTS LIST CARDAN SHAFT DM 8 S PART NO. 620.237 Z6 Item Part No. Pos. Code DESCRIPTION NOTE 620.079 YOKE 620.080 CROSS JOURNAL ASS. 620.081 OUTER TUBE YOKE 630.383 FLEXIBLE PIN 620.083 CARDAN TUBE 610.373 CARDAN TUBE 630.384 FLEXIBLE PIN 620.085 INNER TUBE YOKE 630.851 FREE WHEEL 630.386 CONE SHIELD BELL 05-06...
- Page 32 SPARE PARTS LIST...
-
Page 33: General Information
GENERAL INFORMATION SECTION 2 GENERAL INFORMATION WARRANTY The manufacturer warrants new machinery to be free from defects in material and workmanship at the time of delivery to the original purchaser if correctly set up and operated according to this Operator's Handbook. The manufacturer undertakes to repair or replace free of charge any defective part which should be returned by the purchaser (freight prepaid) and found to be defective on inspection authorized by the manufacturer during the warranty period. -
Page 34: Guide To The Signs And Symbols Used In This Manual And Their Location On The Machine
GUIDE TO THE SIGNS AND SYMBOLS USED IN THIS MANUAL AND THEIR LOCATION ON THE MACHINE SECTION 3 GUIDE TO THE SIGNS AND SYMBOLS USED IN THIS MANUAL AND THEIR LOCATION ON THE MACHINE SIGNS AND SYMBOLS These signs and symbols give information to the operator on how to make the best use of the machine so as to prolong life, avoid damage, optimise work and, above all, to avoid injury to the operator and anyone within range of the machine WARNING AND DANGER SIGNS... -
Page 35: Indication Signs
GUIDE TO THE SIGNS AND SYMBOLS USED IN THIS MANUAL AND THEIR LOCATION ON THE MACHINE 3.2.3 FIG. 3.3 Component shielding MUST be in place when PTO is engaged. 3.2.4 FIG. 3.4 See HOW TO DISCONNECT THE MACHINE in this manual. INDICATION SIGNS 3.3.1 FIG. -
Page 36: General Summary Of Safety And Accident - Prevention Instructions
GENERAL SUMMARY OF SAFETY AND ACCIDENT - PREVENTION INSTRUCTIONS SECTION 4 GENERAL SUMMARY OF SAFETY AND ACCIDENT - PREVENTION INSTRUCTIONS GENERAL SUMMARY OF SAFETY AND ACCIDENT-PREVENTION INSTRUCTIONS Read all the directions carefully before using the machine. When in doubt, seek advice from the manufactur- ers. - Page 37 GENERAL SUMMARY OF SAFETY AND ACCIDENT - PREVENTION INSTRUCTIONS Before engaging the power takeoff check the preset revolution speed. Do not change speed from 540 rpm to 1000 rpm. Under no circumstances should anybody stand near the machine or any moving parts. It is the duty of the operator to ensure that this requirement is respected.
- Page 38 GENERAL SUMMARY OF SAFETY AND ACCIDENT - PREVENTION INSTRUCTIONS Do not engage the power takeoff when the engine is not running. Always disengage the power takeoff when the cardan shaft is at too wide an angle (it should never be more than 35°...
-
Page 39: Product Identification
PRODUCT IDENTIFICATION SECTION 5 PRODUCT IDENTIFICATION TRACTOR REQUIREMENTS revs/min Power takeoff speed (PTO) Max hydraulic pressure Minimum power required (see 5.2) Simple distributor n° MACHINE TECHNICAL DATA Type of machine DM/6 S DM/7 S DM/8 S n° Number of disks Number of knives per disk n°... -
Page 40: Assembly
ASSEMBLY SECTION 6 ASSEMBLY TECHNICAL NOTES We will provide a few examples to make it easier to choose which of the various accessories to use for each step of assembly. An approximate equivalent of the metric measurements is given in inches. 6.1.1 PINS AND SCREWS (fig. -
Page 41: Instructions On How To Assemble
ASSEMBLY INSTRUCTIONS ON HOW TO ASSEMBLE In fig. 6.4 is shown the packag- ing of the machine in crate. To put the machine as in fig. 6.5, using a forklift truck, crane or other suitable equipment of suffi- cient capacity attach, the ma- chine in holes 1 and lift the ma- chine pivoting in pin 5 until posi- tion in fig. - Page 42 ASSEMBLY 6.2.1 see pict. 6.6 Refer to fig. 6.6 and carry out the following steps in the order indi- cated: Use pin 5 (ø35 x 244 - ø 1”3/8 x 9”19/32) to mount tie rod 1 into the support 20 and fasten with two spring pin (ø...
- Page 43 ASSEMBLY 6.2.3 see pict. 6.8 Conveyor Disc Mount internal conveyor disc The conveyor disk 5 (see fig. 6.9) are splined to a shaft and have to be positioned so that the main Gear box axle is at right angles with those next to it (see fig. 6.8).
- Page 44 ASSEMBLY 6.2.4 see pict. 6.10 6.10 Refer to fig. 6.10 and carry out the following steps in the or- der indicated: 1) Mount protection canvas support 4 to the gearbox (align it vertically) with four screws 1, growers 2 and washer 3: screws M12 x 40 (15/32 x 1”9/16) for 6 discs model (100 Nm torque)
- Page 45 ASSEMBLY 6.2.6 see pict. 6.12 6.12 Refer to fig. 6.12 and carry out the following steps in the order indicated: 1) Mount hay plate 1 to the cutter bar with screws item 2 (M12x35 – 1/2” x 1”3/8) and 3 in picture (M10x35 – 3/8”...
- Page 46 ASSEMBLY 6.2.8 see pict. 6.14 6.14 1) Mount lift lever 1 as in figure on pin 2 and fasten with one spring pin (ø6 x 45 - ø15/64 x 1”49/64) and washer (ø26 - ø1”). 2) Mount lift lever 3 as in figure on pin 4 and fasten with one spring pin (ø6 x 45 - ø15/64 x 1”49/64) and bush with hole (ø25–ø40x21...
- Page 47 ASSEMBLY 6.2.9 see pict. 6.16 6.16 Refer to fig. 6.16 and carry out the following steps in the order indicated: Mount conveyor sheet 4 with: 1) point 9: screw (M 8 x 25 – 5/16” x 1”), two large washers and nut 2) point 8: screw (M 10 x 25 –...
- Page 48 ASSEMBLY 6.17 6.2.10 see pict. 6.17 Refer to fig. 6.17 and carry out the following steps in the order indicated: 1) Mount rear protection 13 on support canvas 1 as shown with five screw 14 (M10 x 20 – 25/64 x 25/32) and nut 16 (M10 –...
- Page 49 ASSEMBLY 6.2.11 see pict. 6.18 6.18 Refer to fig. 6.18 and carry out the following steps in the order indicated: 1) Mount protection canvas with the open- ing for cylinder and spring bar in right position. Fasten all the belt of the can- vas.
-
Page 50: Instructions For Installation And Use
INSTRUCTIONS FOR INSTALLATION SECTION 7 INSTRUCTIONS FOR INSTALLATION AND USE HOW TO ADAPT TO THE TRACTOR The machine can be adapted to tractors with various gauges by placing the two hoist arms as shown in figure 7.1, so that distance A is about 5 cm (2 inch- es) when the machine is in the work position. -
Page 51: Adjustment Of The Height Of The Frame Above The Ground
INSTRUCTIONS FOR INSTALLATION Adjustment of the height of the frame above the ground For tractors equipped with a hydraulic lift limiter with controlled position: On flat ground, lower the tractor’s hydraulic lift until bar A (Fig. 7.5) hooks into place. Bar A must have a functional play “X”... -
Page 52: How To Adapt The Cardan Shaft
INSTRUCTIONS FOR INSTALLATION HOW TO ADAPT THE CARDAN SHAFT In order to make sure that the cardan shaft is the right length compared with the tractor power takeoff (with the machine already attached to the tractor), proceed as follows(see pict. 7.2): Remove the two cardan joint axle shafts and insert them separately on the two power take- offs (tractor and mowing machine) with the... -
Page 53: Putting In The Transport Position
INSTRUCTIONS FOR INSTALLATION PUTTING IN THE TRANSPORT POSITION DANGER !!! Make sure that no person or object is standing within the turnover range of the disk carrier bar. IMPORTANT Before transport the machine on public roads, the user must always make sure that it complies with the highway code. -
Page 54: Putting In The Work Position
INSTRUCTIONS FOR INSTALLATION PUTTING IN THE WORK POSITION W ARNING !!! BEFORE PUTTING IN THE WORK POSITION, SEND ALL PEOPLE AWAY FROM THE MOWER BAR PIVOTING ZONE. 7.10 With the machine in the transport position, proceed as follows: 1) Put the hydraulic cylinder under pressure to lighten the locking hook A (Fig. -
Page 55: Use Of The Disc Mower
INSTRUCTIONS FOR INSTALLATION USE OF THE DISC MOWER DANGER !!! MAKE SURE THAT THE PROTECTIVE COVER IS SECURELY IN PLACE ALL AROUND THE MOWER BAR HAZARD. 7.13 The protective cover avoids the throwing out of plant residues and foreign objects. Before putting the mower bar into the forage, con- nect the tractor power takeoff and accelerate gradu- ally up to 540 RPM. -
Page 56: How To Disconnect The Machine
INSTRUCTIONS FOR INSTALLATION HOW TO DISCONNECT THE MACHINE W ARNING !!! During operations to disconnect the machine, be careful not to lower the mower bar below the horizontal line (Fig. 7.17). 1) Using the hydraulic cylinder, lower the disc mower bar into the horizontal position (Fig. 7.15 7.17). -
Page 57: Adjustments And Set-Up
ADJUSTMENTS AND SET-UP SECTION 8 ADJUSTMENTS AND SET-UP BELT TENSION Belt tension must be checked regularly particularly during the first few hours of use. In order to adjust tension proceed as follows (see pict. 8.1): In order to have the right belt tension, you have to tighten screw A till the spacing pipe C is in contact with upright D and washer B, then you have to tighten screw A for other 2 compete turns. -
Page 58: Spring Tension
ADJUSTMENTS AND SET-UP SPRING TENSION To adjust spring tension (fig. 8.4): Lift the disk carrier bar until spring is not ten- sioned. Loose the nut A and turn the spring B. When adjust is completed, tighten the nut A. The dimension C is (standard adjustment): 100 mm (4") for 7-8 discs model 130 mm (4") for 6 discs model The dimension C must be always lower than... -
Page 59: Faults: Reasons And Remedies
FAULTS: REASONS AND REMEDIES SECTION 9 FAULTS: REASONS AND REMEDIES The disk carrier bar vibrates too much during work: the nylon bushings of the joints in question are over worn or completely worn out. replace the bushings; the pins and/or respective bushings/bearings of the joints in question are over worn. replace the worn-out parts and lubricate regularly;... -
Page 60: Maintenance
MAINTENANCE SECTION 10 MAINTENANCE 10.1 10.1 HOW TO FASTEN CUTTING DEVICES After they have been used the first time, the disks, knives and relevant parts to fasten them must be controlled regularly every 15-20 working hours. More frequent checks will have to be made if mow- ing is carried out on stoned ground and after impact with an obstacle. -
Page 61: How To Check The Mowing Devices
MAINTENANCE 10.4 10.2 HOW TO CHECK THE MOWING DEVICES The knives should be replaced when: the width of the knife at point B=1 cm (0.4 inches) from the edge of the disk is 3/4 of the original width A (fig. 10.4). -
Page 62: Lubrication
MAINTENANCE 10.4 LUBRICATION Change the oil in the disk carrier bar and the over- gear box after the first 50 hours use. After this first change, we advise changing the oil every 100 work- 10.10 ing hours or at least once a year. •... -
Page 63: End Of Season Storage
MAINTENANCE 10.5 END OF SEASON STORAGE At the end of the season we recommend storing the machine with the bar lying horizontally after having cleaned it carefully. You should also: • lubricate and grease each point shown in this use and maintenance handbook; •... - Page 65 Zona Industriale-Viale Grecia, 8 06018 TRESTINA-(Perugia)-ITALY Tel. +39.075.8540021-Telefax +39.075.8540523 e-mail: sitrex@sitrex.it www.sitrex.com...
Need help?
Do you have a question about the DM 6 and is the answer not in the manual?
Questions and answers