Sign In
Upload
Download
Table of Contents
Contents
Add to my manuals
Delete from my manuals
Share
URL of this page:
HTML Link:
Bookmark this page
Add
Manual will be automatically added to "My Manuals"
Print this page
×
Bookmark added
×
Added to my manuals
Manuals
Brands
Wacker Neuson Manuals
Excavators
75Z3
Operator's manual
Wacker Neuson 75Z3 Operator's Manual
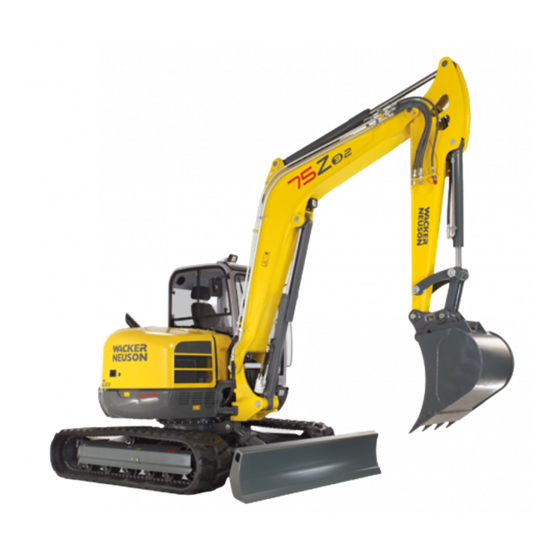
Track excavator
Hide thumbs
1
2
3
4
5
6
7
8
9
10
11
12
13
14
15
16
17
18
19
20
21
22
23
24
25
26
27
28
29
Table Of Contents
30
page
of
30
Go
/
30
Contents
Table of Contents
Bookmarks
Table of Contents
Introduction
Important Operator Information
Abbreviations/Symbols
Machine Overview
Brief Description
Travelling Drive
Operating Hydraulics
Shock Cartridges (Option)
Cooling System
Fields of Application of Attachments
Use: Attachment
Regulations
Requirements to be Met by the Operator
Declaration of Conformity
Type Labels and Component Numbers
Serial Number
Type Label Information
Hydraulic Excavator
Engine Number
Hydraulic Quickhitch
Powertilt with Easy Lock Type Label
Signs and Symbols
General Indication of Danger
Noise Levels Produced by the Machine
Points for Tying down the Machine
In the Engine Compartment
Add Diesel Fuel Only
Hydraulic Oil Reservoir. Use Only Specified Hydraulic Fluids
Hydraulic Oil Reservoir under Pressure
Pinch Point Hazard
This Label Describes the Pedal and Control Lever Functions
Describes the Throttle Lever Function
Describes the Stabilizer Blade Lever Function
Overview of Adhesive Labels
Lifting Points for Raising the Machine
This Label Shows the Forward Driving Direction
Only Add Diesel Fuel with a Low Content of Sulphur
The Tank Contains Biodegradable Hydraulic Oil
States the Pressures that Can be Measured
Explains the Joystick Functions (Control Pattern B)
Refuelling Explained with a Fuel-Filling Pump
Bear in Mind the Authorized (Pay)Load According to the Table
Safety Labels
Entanglement Hazard
Cutting Hazard. Cooling Fan Can Cut When Rotating
Burn Hazard. Hot Surface
The Tank Is Hot and under Pressure
Crushing Hazard
Collision Hazard
Fire Extinguisher
Installation in Cab
Advertisement
Quick Links
1
Introduction
2
Important Operator Information
3
Machine Overview
4
Operating Hydraulics
5
Signs and Symbols
Download this manual
OPERATOR'S MANUAL
1
0
0
0
1
8
3
7
0
5
1000183705
0312
Track Excavator
75Z3, 8003
www.wackerneuson.com
4.0
Table of
Contents
Previous
Page
Next
Page
1
2
3
4
5
Advertisement
Table of Contents
Need help?
Do you have a question about the 75Z3 and is the answer not in the manual?
Ask a question
Questions and answers
Subscribe to Our Youtube Channel
Related Manuals for Wacker Neuson 75Z3
Excavators Wacker Neuson 8003 Operator's Manual
Track excavator (30 pages)
Excavators Wacker Neuson 8003 2 Operator's Manual
Track excavator (30 pages)
Excavators Wacker Neuson 803 Service Manual
Track excavator (196 pages)
Excavators Wacker Neuson EZ38 Operator's Manual
Track excavator (255 pages)
Excavators Wacker Neuson E13-01 Operator's Manual
Track excavator (252 pages)
Excavators Wacker Neuson ET65 Operator's Manual
Track excavator (356 pages)
Excavators Wacker Neuson ET18 Operator's Manual
(299 pages)
Excavators Wacker Neuson EZ17 Operator's Manual
Track excavator (257 pages)
Excavators Wacker Neuson ET42 Operator's Manual
Track excavator (292 pages)
Excavators Wacker Neuson 50Z3 Operator's Manual
Track excavator (20 pages)
Excavators Wacker Neuson DW100 Operator's Manual
Dumpers (228 pages)
Excavators Wacker Neuson 2503 Operator's Manual
Track excavator (280 pages)
Excavators Wacker Neuson EZ26 Operator's Manual
Tracked excavator (272 pages)
Excavators Wacker Neuson 50Z3 Operator's Manual
Track excavators (292 pages)
Excavators Wacker Neuson ET16 Operator's Manual
Track excavator (249 pages)
Excavators Wacker Neuson ET42 Operator's Manual
Tracked excavator (306 pages)
This manual is also suitable for:
8003
75z3 2
8003 2
Table of Contents
Print
Rename the bookmark
Delete bookmark?
Delete from my manuals?
Login
Sign In
OR
Sign in with Facebook
Sign in with Google
Upload manual
Upload from disk
Upload from URL


Need help?
Do you have a question about the 75Z3 and is the answer not in the manual?
Questions and answers