
Related Manuals for THOMSON SpeedTouch 716


Summary of Contents for THOMSON SpeedTouch 716
- Page 1 SpeedTouch™716/716g Broadband Voice IAD User’s Guide Release R1.0 SpeedTouch™716g only...
- Page 3 SpeedTouch™ 716/716g User’s Guide R1.0...
- Page 4 Passing on, and copying of this document, use and communication of its contents is not permitted without written authorization from THOMSON. The content of this document is furnished for informational use only, may be subject to change without notice, and should not be construed as a commitment by THOMSON. THOMSON assumes no responsibility or liability for any errors or inaccuracies that may appear in this document.
-
Page 5: Table Of Contents
Contents Contents 1 SpeedTouch™ Installation ........... 9 Getting Acquainted with the SpeedTouch™ ........ 10 Setting up the SpeedTouch™............13 2 SpeedTouch™ Local Networking Setup....15 Ethernet Connection Setup............16 USB Connection Setup..............17 Wireless Connection Setup ............19 2.3.1 First-time Wireless Client Association ................. 21 2.3.2 Connecting Additional Wireless Clients............... - Page 6 Contents 4 SpeedTouch™ Internet Connectivity ......39 Using the MS Windows XP Internet Gateway Device Control Agent ................40 Using the SpeedTouch™ Web Pages ..........42 5 SpeedTouch™ Web Interface ........43 Accessing the SpeedTouch™ Web Pages........44 Navigating the SpeedTouch™ Web Pages........46 Quick Start ...................
- Page 7 Contents 6 Voice over IP..............77 Session Initiation Protocol............78 6.1.1 Configuration ......................... 79 6.1.2 SIP Web Pages ....................... 81 Media Gateway Control Protocol..........83 6.2.1 Configuration ......................... 84 6.2.2 MGCP Web Pages ......................86 VoIP Call Features................ 87 6.3.1 Call Transferring ......................
- Page 8 Contents E-DOC-CTC-20041126-0014 v3.0...
- Page 9 Generally, the SpeedTouch™716 and SpeedTouch™716g will be referred to as SpeedTouch™ in this User’s Guide. Documentation and THOMSON continuously develops new solutions, but is also committed to improve software updates its existing products. For more information on THOMSON's latest technological innovations, documents and software releases, visit us at: www.speedtouch.com...
- Page 10 About this User’s Guide E-DOC-CTC-20041126-0014 v3.0...
-
Page 11: Speedtouch™ Installation
Chapter 1 SpeedTouch™ Installation 1 SpeedTouch™ Installation Introduction Thank you for purchasing the SpeedTouch™ Broadband Voice IAD. The SpeedTouch™716 and 716g allow ADSL Internet connectivity while providing voice over IP functions for home and office users. ADSL functionality Both the SpeedTouch™716 and SpeedTouch™716g support: ADSL2 RE-ADSL ADSL2+... -
Page 12: Getting Acquainted With The Speedtouch
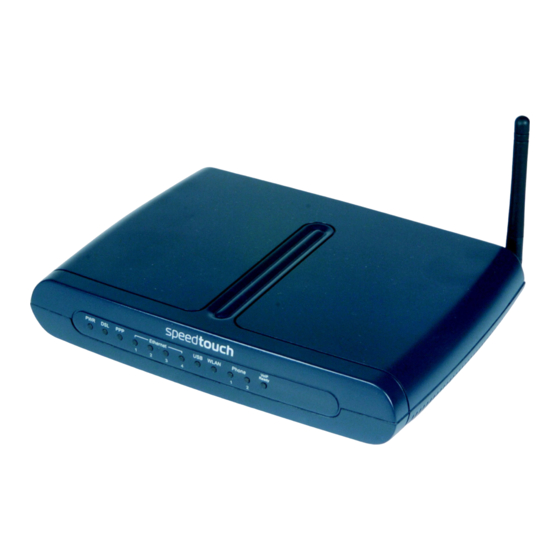
Chapter 1 SpeedTouch™ Installation 1.1 Getting Acquainted with the SpeedTouch™ Introducing the Make sure to read the safety instructions first. SpeedTouch™ Delivery check Next to your SpeedTouch, your DSL package should contain: SpeedTouch™716/716g Colour coded cables Yellow Ethernet cable (RJ-45) Blue USB cable Grey DSL cable (RJ-11) Power adapter (18V AC) - Page 13 Chapter 1 SpeedTouch™ Installation Front panel LEDs Indicator Description Colour Status Green Power on. Startup pending. Flashing Updating Firmware Power off. Green Flashing Internet activity. DSL synchronised, no Internet activity. Power off or DSL line synchronising. Green At least one PPPoA or PPPoE connection is up.
- Page 14 Chapter 1 SpeedTouch™ Installation SpeedTouch™ back The following connections are available on your SpeedTouch™: panel layout Antenna USB port (marked blue) (SpeedTouch™716g only) Phone set connector Recessed reset button (marked green) PSTN port Power button (ON/OFF) DSL line port (marked grey) Power inlet 10/100Base-T Ethernet switch (marked yellow)
-
Page 15: Setting Up The Speedtouch
Chapter 1 SpeedTouch™ Installation 1.2 Setting up the SpeedTouch™ ADSL service The appropriate DSL service must be available at your premises: ADSL service must be enabled on your telephone line. As both telephone and ADSL service are simultaneously available from the same copper pair, you will need a central splitter or distributed filters for decoupling ADSL and telephone signals. - Page 16 Chapter 1 SpeedTouch™ Installation Switch on Once all previous steps are completed, push the ON/OFF button on the back panel SpeedTouch™ to switch on the SpeedTouch™. The SpeedTouch™ is ready for service as soon as the Power LED on the front panel is solid green.
-
Page 17: Speedtouch™ Local Networking Setup
Chapter 2 SpeedTouch™ Local Networking Setup 2 SpeedTouch™ Local Networking Setup Introduction The SpeedTouch™ offers you following networking solutions: Wired Ethernet “2.1 Ethernet Connection Setup” on page 16 for more information. USB (1.1) You must install the USB drivers, if you want to connect your computer to the SpeedTouch™... -
Page 18: Ethernet Connection Setup
Chapter 2 SpeedTouch™ Local Networking Setup 2.1 Ethernet Connection Setup The SpeedTouch™ The SpeedTouch™ four-port 10/100 Mbps auto-sensing MDI/MDI-X Ethernet switch Ethernet switch allows you to create a local Ethernet network of up to four devices, without needing extra networking devices or to expand an existing 10 or 100Base-T Ethernet network. -
Page 19: Usb Connection Setup
You can also connect your computer to the SpeedTouch™ using a USB hub. Windows detects the presence of the new Thomson USB Remote NDIS device: If the Found New Hardware Wizard asks your authorisation to connect to Window Update to search for software select No, not this time and click Next. - Page 20 Chapter 2 SpeedTouch™ Local Networking Setup Following window appears: Insert the SpeedTouch™ Setup CD and click Next. The Found New Hardware Wizard installs the necessary divers on your computer. Click Finish to conclude the installation. Verifying USB If the USB LED is solid green or flashing, you are successfully connected to the connectivity SpeedTouch™...
-
Page 21: Wireless Connection Setup
Chapter 2 SpeedTouch™ Local Networking Setup 2.3 Wireless Connection Setup SpeedTouch™ wireless The SpeedTouch™716g features a Wireless LAN Access Point (AP), that behaves as access point a networking hub allowing to wirelessly interconnect several devices to the local (W)LAN and provide - via the SpeedTouch™ DSL router - access to the public network, for example the Internet. - Page 22 Chapter 2 SpeedTouch™ Local Networking Setup Setting up your wireless If you are configuring the SpeedTouch™ proceed as follows: network Associate your wireless client with the SpeedTouch™. “2.3.1 First-time Wireless Client Association” on page 21 for more information. Configure your SpeedTouch™. “3 Configuration”...
-
Page 23: First-Time Wireless Client Association
Chapter 2 SpeedTouch™ Local Networking Setup 2.3.1 First-time Wireless Client Association Preparing the first-time Make sure that: wireless client The SpeedTouch™716g is powered on and ready for service. The SpeedTouch™716g is in its default configuration. If needed, reset the SpeedTouch™716g to its default configuration as described in “8.3 Reset to Defaults”... - Page 24 Chapter 2 SpeedTouch™ Local Networking Setup First-time association To associate your wireless client to the SpeedTouch™716g on a computer running example MS Windows XP Service Pack 2: Click the network icon in the notification area. The Wireless Network Connection window appears: In the Choose a wireless network list, select the SpeedTouch™716g wireless network and click Connect.
-
Page 25: Connecting Additional Wireless Clients
Chapter 2 SpeedTouch™ Local Networking Setup 2.3.2 Connecting Additional Wireless Clients Preconditions Make sure that: The SpeedTouch™ is powered on and ready for service. Optionally, the SpeedTouch™ wireless settings have been personalised. The wireless client adapters are installed on all computers you want to connect to the WLAN. -
Page 26: Securing Your Wireless Network
Chapter 2 SpeedTouch™ Local Networking Setup 2.4 Securing your Wireless Network Introduction After going through the SpeedTouch™716g configuration setup procedures, it is strongly recommended to secure your wireless network. If you choose not to secure your wireless network, be aware that all clients within the range of your wireless network are able to connect to the SpeedTouch™... -
Page 27: Encryption
Chapter 2 SpeedTouch™ Local Networking Setup 2.4.1 Encryption Methods The SpeedTouch™ offers you following encryption methods: Disabled WPA-PSK 802.1x Before configuring the SpeedTouch™ encryption, make sure you know which encryption methods are supported by your wireless client. E-DOC-CTC-20041126-0014 v3.0... -
Page 28: Wep
Chapter 2 SpeedTouch™ Local Networking Setup 2.4.2 WEP Definition The Wired Equivalent Protocol (WEP) relies on a secret key that is shared between the wireless client (for example a laptop with a wireless client) and the SpeedTouch™716g. The fixed secret key is used to encrypt data before being transmitted. -
Page 29: Wpa
Chapter 2 SpeedTouch™ Local Networking Setup 2.4.3 WPA Definition WPA Enterprise is a part of the Wi-Fi Protected Access standard. In this mode, authentication is done by a dedicated authentication server, which is normally not available for residential use. RADIUS Server Remote Authentication Dial-in User Service (RADIUS) is a protocol for carrying authentication, authorization, and configuration information between a Network Access Server which desires to authenticate its links and a shared Authentication... - Page 30 Chapter 2 SpeedTouch™ Local Networking Setup Wireless client Configure your wireless clients with the same settings. configuration For more information, see your wireless client’s user documentation. E-DOC-CTC-20041126-0014 v3.0...
-
Page 31: Wpa-Psk
Chapter 2 SpeedTouch™ Local Networking Setup 2.4.4 WPA-PSK Definition Contrary to WPA, WPA-Pre Shared Key (WPA-PSK) does not need the presence of an authentication server on your network. WPA Personal features 3 basic improvements over WEP. Mutual authentication of access point and client via a 4-way handshake. In this handshake, both client and access point check whether they share the same Pre-Shared Key (without sending the PSK “in the clear”). - Page 32 Chapter 2 SpeedTouch™ Local Networking Setup Wireless client(s) Configure your wireless client(s) with the same settings. configuration For more information, see your wireless client’s user documentation. E-DOC-CTC-20041126-0014 v3.0...
- Page 33 Chapter 2 SpeedTouch™ Local Networking Setup 2.4.5 802.1x Definition When a wireless client requests access to a network, it is required to be authenticated by a central authentication server (RADIUS Server). Only an authenticated user can access the wireless network. RADIUS Server Remote Authentication Dial-in User Service (RADIUS) is a protocol for carrying authentication, authorization, and configuration information between a Network...
- Page 34 Chapter 2 SpeedTouch™ Local Networking Setup Wireless client(s) Configure your wireless client(s) with the new authentication and encryption configuration settings. For more information, see your wireless client’s user documentation. E-DOC-CTC-20041126-0014 v3.0...
-
Page 35: Restricting Wireless Access
Chapter 2 SpeedTouch™ Local Networking Setup 2.4.6 Restricting Wireless Access The Access Control List (ACL) enables you to allow/deny access to your wireless network for specific wireless clients. ACL modes Following modes are supported: Off: All new stations are allowed to access the SpeedTouch™716g WLAN. On in Allow mode Only stations that are listed in the ACL are allowed to access the SpeedTouch™716g WLAN. -
Page 36: Hiding Your Wireless Network
Chapter 2 SpeedTouch™ Local Networking Setup 2.4.7 Hiding your Wireless Network SSID The WLAN's 'radio' link is a shared medium. As no physical connection exists between the SpeedTouch™716g and its wireless clients, a name must be given to allow unique identification of your WLAN radio link. This is done by the Service Set ID (SSID), also referred to as Network Name. -
Page 37: Extending The Range Of Your Wireless Network
Chapter 2 SpeedTouch™ Local Networking Setup 2.5 Extending the Range of your Wireless Network Introduction The Wireless Distribution System (WDS) allows you to extend the range of your SpeedTouch™716g by means of one or more wireless repeaters (e.g. a SpeedTouch™180). The following illustration depicts two WDS-enabled devices communicating via WDS: WDS Link Internet... - Page 38 Chapter 2 SpeedTouch™ Local Networking Setup SpeedTouch™716g Proceed as follows: configuration Open the SpeedTouch™ web pages. For more information, see “5.1 Accessing the SpeedTouch™ Web Pages” on page On the top menu, click Wireless. On the menu on the left, click Repeater. Click Scan Now to scan all radio channels for wireless networks.
-
Page 39: Configuration
Chapter 3 Configuration 3 Configuration Internet connectivity Some configuration may be required to prepare the SpeedTouch™ for Internet connectivity. What you need from In most cases, you need a user account with an Internet Service Provider (ISP) for your ISP Internet access. - Page 40 Chapter 3 Configuration E-DOC-CTC-20041126-0014 v3.0...
-
Page 41: Speedtouch™ Internet Connectivity
Chapter 4 SpeedTouch™ Internet Connectivity 4 SpeedTouch™ Internet Connectivity Introduction This chapter provides information on how to configure your SpeedTouch™ according to your preferences and how to access the Internet. Access methods As soon as the SpeedTouch™ and your computers have been configured as outlined in “3 Configuration”... -
Page 42: Using The Ms Windows Xp Internet Gateway Device Control Agent
Chapter 4 SpeedTouch™ Internet Connectivity 4.1 Using the MS Windows XP Internet Gateway Device Control Agent Introduction MS Windows XP users can easily establish PPP sessions, without the need of first browsing to the SpeedTouch™ web pages, thanks to Windows XP Internet Gateway Device Discovery and Control Client that allows you to control the SpeedTouch™... - Page 43 Chapter 4 SpeedTouch™ Internet Connectivity The connected Internet As long as the SpeedTouch™’s embedded PPP dial-in client is connected, you are Gateway able to view the connection status and some counters by double-clicking the Internet Connection icon in your PC’s Network Connections window: More detailed monitoring is provided via the SpeedTouch™...
-
Page 44: Using The Speedtouch™ Web
Chapter 4 SpeedTouch™ Internet Connectivity 4.2 Using the SpeedTouch™ Web Pages Introduction As the SpeedTouch™ web pages are controllable from any Operating System with an installed web browser, the method to establish PPP sessions described below can be used by any computer system. Starting an Internet Proceed as follows: session... -
Page 45: Speedtouch™ Web Interface
Chapter 5 SpeedTouch™ Web Interface 5 SpeedTouch™ Web Interface Introduction The SpeedTouch™ comes with integrated configuration web pages. It allows you to configure your SpeedTouch™ simply by using a web browser from any local computer connected to the SpeedTouch™. This chapter aims to give a brief overview of the SpeedTouch™ web pages and their respective functionality. -
Page 46: Accessing The Speedtouch™ Web
Chapter 5 SpeedTouch™ Web Interface 5.1 Accessing the SpeedTouch™ Web Pages Preconditions Make sure that: The SpeedTouch™ and your computer share the same IP subnet (192.168.1.0/ 24). By default the SpeedTouch™ has a local IP address 192.168.1.254. To be able to access the web pages, your computer needs to be configured for an IP address in the same subnet, for example 192.168.1.2. - Page 47 Chapter 5 SpeedTouch™ Web Interface Type User name (default: “admin”) and password (default: “admin”) and click OK to access the SpeedTouch™ web pages: The SpeedTouch™ As a result the Connect to Internet page appears: start page E-DOC-CTC-20041126-0014 v3.0...
-
Page 48: Navigating The Speedtouch™ Web
Chapter 5 SpeedTouch™ Web Interface 5.2 Navigating the SpeedTouch™ Web Pages Topic menu and links With the help of this menu you can navigate through all configurable aspects of the SpeedTouch™. The SpeedTouch™ web pages are grouped into following categories: Quick Start Status Advanced... -
Page 49: Quick Start
Chapter 5 SpeedTouch™ Web Interface 5.3 Quick Start The Quick Start menu The Quick Start menu consists of following submenus: The Connect to Internet page The Quick Setup page The Connect to Internet The Connect to Internet page allows you to establish dial-in connections, if page applicable: For more information, see... - Page 50 Chapter 5 SpeedTouch™ Web Interface ATM PVC The ATM PVC section allows you to configure the VPI/VCI settings: Following fields are available: VPI (Virtual Path Identifier): Identifies the virtual path between endpoints in an ATM network. The valid range is from 0 to 255. VCI (Virtual Channel Identifier): Identifies the virtual channel endpoints in an ATM network.
- Page 51 Chapter 5 SpeedTouch™ Web Interface WAN IP settings The WAN IP Settings page allows you to configure the WAN IP settings: Click: Obtain an IP address automatically if your ISP wants you to get a dynamic IP address. Use the following IP address if your ISP has provided you with a static IP address.
- Page 52 Chapter 5 SpeedTouch™ Web Interface Manually Connect: Click this option if you want to connect to the Internet via the SpeedTouch™ web pages. Enter the timeout to cut off the network connection if there is no activity for this router. For more information, see “...
- Page 53 Chapter 5 SpeedTouch™ Web Interface Configure the DHCP settings of the SpeedTouch™. Following fields are available DHCP Server On: Click this option if you want the SpeedTouch™ to assign IP addresses to the devices connected to the SpeedTouch™ network. Following fields will become available: Start IP Address: Enter the start point IP address for the pool of IP addresses used by...
-
Page 54: Status
Chapter 5 SpeedTouch™ Web Interface 5.4 Status The Status menu The Status section consists of following pages: The Overview page The ADSL Line Status page The Internet Connection page The Traffic Statistics page The DHCP Table page The Wireless Clients page The Routing Table page The ARP Table page The Overview page... - Page 55 Chapter 5 SpeedTouch™ Web Interface Click the ADSL BER Test button to determine the quality of your ADSL connection: To start the ADSL Bit Error Rate (BER) test: Select the duration time (in seconds) in the Tested Time list. Click Start. The SpeedTouch™...
- Page 56 Chapter 5 SpeedTouch™ Web Interface The DHCP Table page This page lists the current IP address leases provided by the SpeedTouch™ DHCP server: The Wireless Clients This page lists the wireless clients currently associated to the SpeedTouch™ Access page Point: The Routing Table page This page shows the static routes used by the SpeedTouch™...
-
Page 57: Advanced
Chapter 5 SpeedTouch™ Web Interface 5.5 Advanced The Advanced menu The Advanced menu consists of the following submenus: Local Network Internet IP Routing DNS Server Virtual Server Firewall Quality of Service IGMP Proxy E-DOC-CTC-20041126-0014 v3.0... -
Page 58: Local Network
Chapter 5 SpeedTouch™ Web Interface 5.5.1 Local Network The Local Network The Local Network section consists of the following pages: menu The IP Address page The DHCP Server page The UPnP page The IP Address page Following figure shows the LAN IP Address Configuration page: This page allows you to configure: The LAN IP address of the SpeedTouch™. - Page 59 Chapter 5 SpeedTouch™ Web Interface The DHCP Server page The DHCP Server Configuration page allows you to configure the SpeedTouch™ DHCP server: Click: DHCP Server On if DHCP service is needed on the LAN. The router will assign IP address, gateway address for each of your PCs. Click Reserved IP Address List to assign a static IP address to a computer on your LAN.
-
Page 60: Internet
Chapter 5 SpeedTouch™ Web Interface 5.5.2 Internet The Internet menu The Internet section consists of the following pages: The Connection page The ADSL Settings page The Connection page The Internet Connection Configuration page allows you to view/change the WAN settings for each service: If you click the Connect link of the connection, the SpeedTouch™... -
Page 61: Ip Routing
Chapter 5 SpeedTouch™ Web Interface 5.5.3 IP Routing The IP Routing menu The IP Routing menu consists of the following pages: The Static Route page The Dynamic Routing page The Static Route page This page allows you to add/delete static routes for the SpeedTouch™ router: The Dynamic Routing The Routing Information Protocol (RIP) is used to exchange routing information page... -
Page 62: Dns Server
Chapter 5 SpeedTouch™ Web Interface 5.5.4 DNS Server The DNS Server page The DNS Server Configuration page allows you to configure your DNS settings: If Enable Automatic Assigned DNS check box is: Selected: The SpeedTouch™ will accept the first received DNS assignment from one of the PPPoA, PPPoE or MER/DHCP enabled PVC(s) when establishing the connection. -
Page 63: Virtual Server
Chapter 5 SpeedTouch™ Web Interface 5.5.5 Virtual Server The Virtual Server The Virtual Server section consists of following pages: menu The Port Forwarding page Port Triggering DMZ Host Dynamic DNS The Port Forwarding This page allows you to add/delete port forwarding rules: page For more information on port forwarding and virtual servers, see “7.1 Setting up a Virtual Server”... - Page 64 Chapter 5 SpeedTouch™ Web Interface DMZ Host The DMZ host page allows you to specify a Direct Mapping Zone (DMZ) host: All incoming connections that do not match any static or dynamic port forwarding rule will be forwarded to this DMZ Host. If you specify a DMZ host, make sure that this host is using a static IP address.
-
Page 65: Firewall
Chapter 5 SpeedTouch™ Web Interface 5.5.6 Firewall Basics Firewalls are computer network devices that protect a network from other less trusted networks. They are essentially network access control devices that permit and deny different types of traffic to travel into and out of an organization's network. -
Page 66: Quality Of Service
Chapter 5 SpeedTouch™ Web Interface 5.5.7 Quality of Service Quality of Service (QoS) is an industry-wide initiative to provide preferential treatment to certain subsets of data, enabling those data to traverse the Internet or intranet with higher quality transmission service. The Quality of Service The Quality of Service section consists of following pages: menu... -
Page 67: Igmp Proxy
Chapter 5 SpeedTouch™ Web Interface 5.5.8 IGMP Proxy IGMP The Internet Group Management Protocol (IGMP) is an Internet protocol that enables an Internet computer to report its multicast group membership to adjacent routers by means of IGMP messages. IGMP proxy However, when acting as a proxy, the system performs the host portion of the IGMP task as follows: When it is queried, the system will send group membership reports to the... -
Page 68: Wireless
Chapter 5 SpeedTouch™ Web Interface 5.6 Wireless Availability This menu item is only available if you purchased a SpeedTouch™716g. Wireless basics For more information on wireless networking basics, see “2.3 Wireless Connection Setup” on page Navigation Following menu items are available on the Wireless menu: Basic Security Access Control... -
Page 69: Basic
Chapter 5 SpeedTouch™ Web Interface 5.6.1 Basic The Basic page Following figure shows you the Wireless Basic Settings page: Configuring the If the Enable Wireless Network check box is selected, following fields are available: SpeedTouch™ Access Hide Wireless Network: Point Select this check box to prevent the SpeedTouch™... -
Page 70: Security
Chapter 5 SpeedTouch™ Web Interface 5.6.2 Security The Security page The security page allows you to choose an encryption method for data sent over the SpeedTouch™ wireless network: For more information, see “2.4.1 Encryption” on page E-DOC-CTC-20041126-0014 v3.0... -
Page 71: Access Control
Chapter 5 SpeedTouch™ Web Interface 5.6.3 Access Control The Access Control The Wireless MAC Access Control page allows you to enable the wireless MAC page control configuration: For more information, see “2.4.6 Restricting Wireless Access” on page E-DOC-CTC-20041126-0014 v3.0... -
Page 72: Repeater
Chapter 5 SpeedTouch™ Web Interface 5.6.4 Repeater WDS functionality The Wireless Distribution System (WDS) allows you to extend the range of your SpeedTouch™716g by means of one or more wireless repeaters. The Repeater page The Repeater page allows you to configure a WDS link with other Access Points: For more information, see “2.5 Extending the Range of your Wireless Network”... -
Page 73: Voice
Chapter 5 SpeedTouch™ Web Interface 5.7 Voice Protocols Depending on the SpeedTouch™ variant you purchased, one of the following protocols are used for Voice over IP (VoIP): Session Initiation Protocol (SIP) For more information on the SIP web pages, see “6.1.2 SIP Web Pages”... -
Page 74: Diagnostics
Chapter 5 SpeedTouch™ Web Interface 5.8 Diagnostics The Diagnostics page The Diagnostics page allows you to check the SpeedTouch™ connections: For more information, see “8.4.1 Diagnostics Tests” on page 104. E-DOC-CTC-20041126-0014 v3.0... -
Page 75: Management
Chapter 5 SpeedTouch™ Web Interface 5.9 Management Admin Account The Admin Account page allows you to configure a system password to restrict access to the SpeedTouch™: It is highly recommended to configure a system password, to protect the SpeedTouch™. Make sure however not to use an obvious password such as your name, date of birth and so on. - Page 76 Chapter 5 SpeedTouch™ Web Interface Click Authorized Host IP Address List to configure which users are allowed to use remote access the SpeedTouch™: Internet Time This page allows you to adjust the time used in the syslog and call log pages: You are able to set the time: Manually By means of a time server...
- Page 77 Chapter 5 SpeedTouch™ Web Interface System Log The System Log page allows you to: View the activity on the SpeedTouch™ since power on. Change the System Log options: Following fields are available: Log Level: Allows you to specify the activities that will be logged. All the items above the selected item will be logged.
- Page 78 Chapter 5 SpeedTouch™ Web Interface Backup Config The Backup Config page allows you to: Backup your current configuration: Upload and apply a SpeedTouch™ backup configuration file. Update Firmware The Update Firmware page allows you to update your firmware: For more information, see “8.1 Updating your Firmware”...
-
Page 79: Voice Over Ip
Chapter 6 Voice over IP 6 Voice over IP Traditional telephony For many years, most of the telephony was made on the old Public Switched Telephone Network (PSTN) and, over time, telephone service providers have enhanced their services by providing Custom Local Area Signalling Service (CLASS) features to the customers. -
Page 80: Session Initiation Protocol
Chapter 6 Voice over IP 6.1 Session Initiation Protocol Definition Session Initiation Protocol (SIP), defined in RFC 3261, is a signalling protocol used for: Initiating sessions in an IP network. Modifying the sessions in an IP network. Terminating sessions in an IP network. Components A SIP-enabled IP network includes usual IP components and services such as routers and DNS servers, as well as SIP User Agents (UA) and SIP network servers. -
Page 81: Configuration
Chapter 6 Voice over IP 6.1.1 Configuration Hardware installation Use a phone cable to: Wire the SpeedTouch™ Phone port(s) to your phone(s). Wire the SpeedTouch™ PSTN port to your telephone wall outlet or distributed filter depending on your Service Provider’s specific needs. This step is only required if you still want to make phone calls using the PSTN. - Page 82 Chapter 6 Voice over IP PSTN Configuration Proceed as follows: On the left menu, click PSTN Control. In the Select Tone/Ring Signals for list, click your region. In the Prefix digits to dial PSTN phone call box, type the prefix you want to dial to make phone calls using the PSTN.
-
Page 83: Sip Web
Chapter 6 Voice over IP 6.1.2 SIP Web Pages The Voice menu Following items are available on the Voice menu: SIP Basic SIP Extension Audio Codec PSTN Control Call Log SIP Basic The SIP Basic Settings page allows you to configure your connection to the SIP servers: SIP Extension The SIP Extension page allows you to configure advanced SIP settings:... - Page 84 Chapter 6 Voice over IP PSTN Control The PSTN Control page allows you to configure: The tone ring signals specific to your country. The prefix digits for PSTN calls. If you dial this prefix (default “*”), the SpeedTouch™ will use the PSTN network to call the number following the prefix.
-
Page 85: Media Gateway Control Protocol
Chapter 6 Voice over IP 6.2 Media Gateway Control Protocol Definition Media Gateway Control Protocol (MGCP) is a standard protocol for handling the signalling and session management needed during a multimedia conference. MGCP can be used to: Set up Maintain Terminate calls between multiple endpoints. -
Page 86: Configuration
Chapter 6 Voice over IP 6.2.1 Configuration Hardware installation Use a phone cable to: Wire the SpeedTouch™ Phone port(s) to your phone(s). Wire the SpeedTouch™ PSTN port to your telephone wall outlet or distributed filter depending on your Service Provider’s specific needs. Basic MGCP Proceed as follows: configuration... - Page 87 Chapter 6 Voice over IP PSTN Configuration Proceed as follows: On the left menu, click PSTN Control. In the Select Tone/Ring Signals for list, click your region. In the Prefix digits to dial PSTN phone call box, type the prefix you want to dial to make phone calls using the PSTN.
-
Page 88: Mgcp Web
Chapter 6 Voice over IP 6.2.2 MGCP Web Pages The VoIP menu Following items are available on the VoIP menu: MGCP Audio Codec PSTN Control MGCP The MGCP Configuration page allows you to configure your connection to the call agent: Following fields are available for configuration: Status: Indicates the current status of your VoIP network. -
Page 89: Voip Call Features
Chapter 6 Voice over IP 6.3 VoIP Call Features Introduction The SpeedTouch™ offers you following VoIP call features: Call Transferring Call Waiting 3-ways Conference Calls E-DOC-CTC-20041126-0014 v3.0... -
Page 90: Call Transferring
Chapter 6 Voice over IP 6.3.1 Call Transferring Example You receive a phone call from person A and you want to transfer him to person B. Procedure Proceed as follows: If your phone has: A hook flash button, press it. For more information, consult your phone’s user documentation No hook flash button, put down the hook for 1/2 second to put person A on hold. -
Page 91: Call Waiting
Chapter 6 Voice over IP 6.3.2 Call Waiting Example You are in a phone conversation with person A while person B is calling you. The phone produces a waiting tone and displays the name or number of person B on the display. -
Page 92: 3-Ways Conference Calls
Chapter 6 Voice over IP 6.3.3 3-ways Conference Calls Example You want to make a conference call with person A and person B. Procedure Proceed as follows: Call person A. If your phone has: A hook flash button, press it. For more information, consult your phone’s user documentation. -
Page 93: Advanced Configuration
Chapter 7 Advanced Configuration 7 Advanced Configuration Introduction This chapter will guide you through some advanced features of the SpeedTouch™. Contents Following topics are described: Setting up a Virtual Server SNMP E-DOC-CTC-20041126-0014 v3.0... -
Page 94: Setting Up A Virtual Server
Chapter 7 Advanced Configuration 7.1 Setting up a Virtual Server Introduction Using Network Address Translation (NAT), the SpeedTouch™ is able to make your local network act as a single machine to the Internet. This enables you to divide the services of your server over different host computers. When the SpeedTouch™... - Page 95 Chapter 7 Advanced Configuration Host computer Make sure that: configuration The firewall on the host computer (for example Windows Firewall) allows the service to be accessed on this computer. The host computer is configured with a static IP address. You can also reserve an IP address for this computer. For more information on the SpeedTouch™, see “...
-
Page 96: Snmp
Chapter 7 Advanced Configuration 7.2 SNMP Function The Simple Network Management Protocol (SNMP) is used to refer to a collection of specifications for network management that include the protocol itself, the definition of data structures and associated concepts. SNMP A management station performs the monitoring function by retrieving the value of MIB objects. - Page 97 Chapter 7 Advanced Configuration Configuring SNMP on Proceed as follows: the SpeedTouch™ Open the SpeedTouch™ web pages. For more information, see “5.1 Accessing the SpeedTouch™ Web Pages” on page Browse to Management > SNMP. The SNMP Configuration page appears: Enter your settings. Click Apply.
- Page 98 Chapter 7 Advanced Configuration E-DOC-CTC-20041126-0014 v3.0...
-
Page 99: Support
Chapter 8 Support 8 Support In this chapter This chapter contains following topics: Updating your Firmware UPnP™ on Windows XP Systems Reset to Defaults Troubleshooting E-DOC-CTC-20041126-0014 v3.0... -
Page 100: Updating Your Firmware
Chapter 8 Support 8.1 Updating your Firmware Before you start Make sure: To inform all people relying on the SpeedTouch™ services, that the service may be down for some short period That the new system software file is stored on your local disk or another storage device. -
Page 101: Upnp™ On Windows Xp Systems
Chapter 8 Support 8.2 UPnP™ on Windows XP Systems Adding UPnP™ If you are running Microsoft Windows XP, it is recommended to add the UPnP™ component to your system. Proceed as follows: On the Start menu, click Control Panel. The Control Panel window appears. Click Add or Remove Programs. The Add or Remove Programs window appears. - Page 102 Chapter 8 Support Windows firewall If your computer runs Windows XP Service Pack 2 (SP2) and you are using the configuration Windows Firewall, make sure the Windows Firewall allows incoming network connections for the UPnP service: On the Start menu, point to Connect To and then click Show all connections. Under Network Tasks, click Change Windows Firewall settings.
- Page 103 Chapter 8 Support Adding Internet Your MS Windows XP system is able to discover and control Internet Gateway Gateway Device Devices (IGD), like the SpeedTouch™ on your local network. Therefore it is Discovery and Control recommended to add the IGD Discovery and Control client to your system. Proceed as follows: On the Start menu, click Control Panel.
-
Page 104: Reset To Defaults
Chapter 8 Support 8.3 Reset to Defaults Using the Proceed as follows: SpeedTouch™ web Open the SpeedTouch™ web pages. pages For more information, see “5.1 Accessing the SpeedTouch™ Web Pages” on page Browse to Management > Reset Router. Select Reset to factory default settings. Click Reboot. -
Page 105: Troubleshooting
Chapter 8 Support 8.4 Troubleshooting Diagnostics tests The Diagnostics Tests page allows you to troubleshoot your SpeedTouch™ connections in a swift and easy way. For more information, see “8.4.1 Diagnostics Tests” on page 104 Common problems If you are having problems with: LAN connectivity, go to “8.4.2 Problems with LAN”... -
Page 106: Diagnostics Tests
Chapter 8 Support 8.4.1 Diagnostics Tests The Diagnostics page The Diagnostics page allows you to check the SpeedTouch™ connections: The testing items are listed in chronological order. If a test fails, all remaining tests will fail as well. Starting the Proceed as follows: Diagnostics Tests Open the SpeedTouch™... -
Page 107: Problems With Lan
Chapter 8 Support 8.4.2 Problems with LAN Troubleshooting table Problem Solution LAN computer does not get an IP Make sure the DHCP server is enabled address. on the SpeedTouch™. Cannot access the SpeedTouch™ Web Make sure that your computer and the pages. -
Page 108: Upgrading Problems
Chapter 8 Support 8.4.3 Upgrading Problems Problems The following lists the error messages that you may see during upgrading and the action to take. Error: All the ADSL LEDs light up and cannot light off as usual. When accessing the SpeedTouch™ web pages only a reduced functionality is given. Action: Use the browser to connect to the router for executing image upgrade. - Page 110 Need more help? Additional help is available online at www.speedtouch.com...
Need help?
Do you have a question about the SpeedTouch 716 and is the answer not in the manual?
Questions and answers