
Related Manuals for Z GRILLS ZPG - 50B


Summary of Contents for Z GRILLS ZPG - 50B
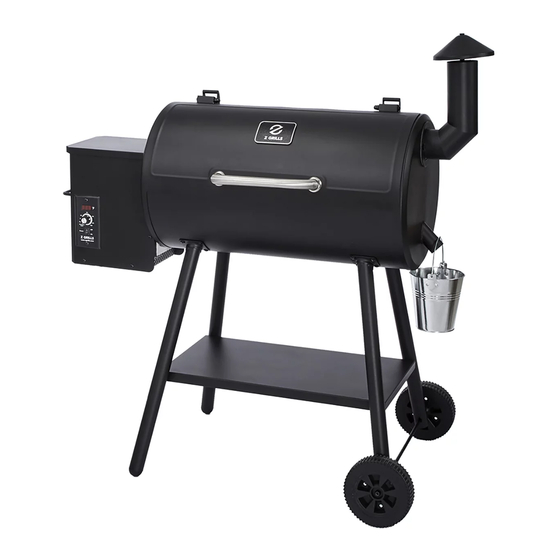
- Page 1 WOOD PELLET GRILL ZPG - 50B OWNER’S MANUAL 1-833-947-4557 EMAIL:support@zgrills.com WEBSITE:www.zgrills.com...
-
Page 2: Table Of Contents
CONTENTS WARNINGS COMPONENT LIST ASSEMBLY INSTRUCTIONS INITIAL FIRING INSTRUCTIONS SUBSEQUENT START-UP OPERATING TIPS MAINTENANCE & CLEANING TROUBLESHOOTING DIGTAL THERMOSTAT CONTROL WIRING DIAGRAM Z GRILLS SUPPORT -YEAR LIMITED WARRANTY... -
Page 3: Warnings
Do not try to smother the fire. Clean and maintain your grill after each use. We suggest that you use Z GRILLS BBQ WOOD PELLETS, which are specifically made to work in our grills. DO NOT use your grill on rainy days. -
Page 4: Component List
ASSEMBLY INSTRUCTIONS COMPONENT LIST ITEM Description ITEM Description Grill Chamber Assembly Digital Control Hopper Guard Hopper Assembly Warming Rack Auger Drive Motor Porcelain Grills Auger Nylon Ring Grease Drain Pan Auger Foam Gasket Heat Baffle RTD Temperature Probe Hot Rod (Ignitor) RTD Guard Feeder Assembly Lid Handle... - Page 5 3.) Push the Axle(19) through the wheel and then through the hole in the legs as shown. The Flat Washer(E), Spring Washer(F), and Cap Nut(G) are used to secure the wheel assembly in place. Repeat for the other wheel. Press the Wheel Caps(38) firmly into the outer recess on the wheels as shown.
- Page 6 2.INSTALLING THE CHAMBER HANDLE TO THE LID 4.INSTALLING THE HEAT BAFFLE 1.) Lift the Grill Assembly, turn, and place on the floor. 1.) Place the lower bracket of the Heat Baffle(6) into the groove of the feeder. As shown. 2.) From the inside of the raised lid, push the Blots(H) through the Washers(D) and then through the lid and Handle Guide(10).
-
Page 7: Initial Firing Instructions
Please read this manual carefully and follow it step by step before starting your Z Grills for the first time and each time the grill runs out of pellets. 1.Remove the Porcelain Grills, Grease Drain Pan and Heat Baffle from the interior of the grill. -
Page 8: Subsequent Start-Up
Temperature Dial to any cooking setting desired. FIRE IN THE HOPPER CHAMBER. 5.If this step is not successful, see TROUBLESHOOTING or contact Z GRILLS Technical Support to help diagnose the problem. SHUTDOWN CYCLE •Auger turns off •Fan continues to run for 10 minutes After you have finished cooking, turn the Temperature Dial to the Shutdown Cycle position. -
Page 9: Operating Tips
•It is highly recommended that you use Z GRILLS Cover to protect your grill. •You can use a high-quality car wax on the outside surfaces of your grill to protect it's finish Internal component •To clean the Porcelain-coated Grill Grates we recommend using a long-handled... -
Page 10: Troubleshooting
Contact Z Grills Verify there is power at the electrical outlet. have the following information available: Customer Service Your authorized Z GRILLS dealer, your to place an order name, phone number, address, your Z Get your new parts GRILLS serial number and part... -
Page 11: Digtal Thermostat Control Wiring Diagram
SENSOR •Purchaser's name, phone number and address •Z GRILLS model number and part identification numbers can be found in this manual from the COMPONENT LIST. The serial number can be found on the inside of the Hopper Lid. •Please be prepared to describe your problem accurately so we can help you resolve your issue •Providing pictures or videos is beneficial... -
Page 12: 3 Year Limited Warranty
Z GRILLS 3 YEAR LIMITED WARRANTY Z GRILLS, Inc. provides a 3 years warranty from the date of purchase by the original owner. This warranty applies to defects in all materials and workmanship. During the warranty period, Z GRILLS, Inc. will at its option repair or replace defective parts or units.
Need help?
Do you have a question about the ZPG - 50B and is the answer not in the manual?
Questions and answers