Commercial copying, redistribution, hiring or lending is prohibited. No part of this publication may be stored in a retrieval system or transmitted in any other form or means without written permission from Draper Tools Limited. In all cases this copyright notice must remain intact.
This warranty applies in lieu of any other warranty expressed or implied and variations of its terms are not authorised. Your Draper warranty is not effective unless you can produce upon request a dated receipt or invoice to verify your proof of purchase within the warranty period.
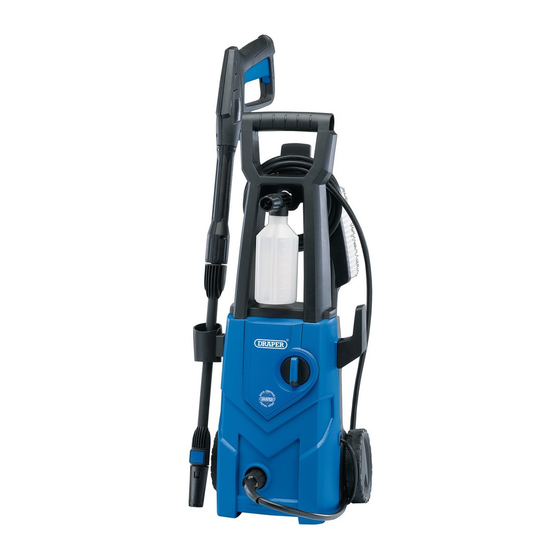
Compact, lightweight and mobile pressure washer for cleaning vehicles, caravans, motor vans, driveways, boats and other domestic duties. Any other application is considered misuse. SPECIFICATION Stock No ..............98676 ............98677 Part No .............. PW1600/90D ........PW2200/110D Rated voltage ............ 230V~50Hz ......... 230V~50Hz Rated input ............
HEALTH AND SAFETY INFORMATION GENERAL SAFETY INSTRUCTIONS FOR POWER TOOL USE When using any type of power tool there are steps that should be taken to make sure that you, as the user, remain safe. Common sense and a respect for the tool will help reduce the risk of injury. Read the instruction manual fully.
HEALTH AND SAFETY INFORMATION Wait for the machine to stop. Unless the machine is fitted with a safety brake, some parts may continue to move due to momentum. Wait for all parts to stop, then unplug it from the power supply before making any adjustments, carrying out maintenance operations or just finishing using the tool.
HEALTH AND SAFETY INFORMATION − The safety button on the gun is not there to lock the lever during operation, but to prevent its accidental operation. − Appliances equipped with Total Stop System: these appliances should not be left in standby for more than 5 minutes.
Lay the contents out and check them against the parts shown below. If any part is damaged or missing, please contact the Draper Help Line (the telephone number appears on the Title page) and do not attempt to use the product.
ASSEMBLY FITTING THE TRANSPORT Stock No.98676 shown HANDLE SECTION – FIGS.1 – 2 − Slide the transport handle section (3) over the mounting points (A) at the top of the main body of the pressure washer. − From the back of the pressure washer, locate...
ASSEMBLY ATTACHING THE LANCE – FIGS.5 – 6 − Connect the lance (9) to the trigger assembly section (12) by pushing in the bayonet fitting and turning anti-clockwise 45° to lock in place. ATTACHING THE NOZZLES TO (12) THE LANCE – FIGS.7 – 8 −...
(13) and screw the shrouded end of the hose onto the threaded outer section of the pressure outlet, taking care not to cross the threads. (22) FIG. (12) (10) FIG. Stock No.98677 (13) (10) (13) (10) Stock No.98676 FIG. – 13 –...
ASSEMBLY CONNECTING THE WATER SUPPLY – FIGS.13 – 14 − Screw the supplied water inlet adaptor (6) to the water inlet connection (6.1) taking care not to cross the threads. − To connect the pressure washer to the water supply, a push fit hose connector will be required (FIG.14).
ACCESSORIES DETERGENT BOTTLE (98676) – FIG.15 − Remove the bottle spray nozzle (16.1) from the detergent bottle (16) and fill the bottle with a (12) suitable detergent, according to the manufacturer’s recommended instructions. (16.2) (16.1) − Re-fit the bottle spray nozzle back onto the...
ACCESSORIES TURBO NOZZLE – FIG.18 The turbo nozzle (19) is a very effective tool that can significantly reduce cleaning times. The turbo nozzle combines the power of a narrow high impact stream and the efficiency of a 25 degree fan pattern. This swirls the narrow high impact stream into a cone shape that cleans a larger area.
10. OPERATION 10.1 TOTAL STOP DEVICE This pressure washer is fitted with the Auto Control Total Stop Device. This will cause the motor to start and stop when the trigger is activated, unlike standard washers where the motor would run continuously. This device reduces the amount of water and electricity used and the amount of wear and tear on the machines components.
11. MAINTENANCE AND TROUBLESHOOTING 11.1 TROUBLESHOOTING GUIDE Problem Possible Cause Remedy Motor pulsing. Air in the system. See the below section regarding bleeding. procedure (section 11.3). Pump fails to start. Plug fuse blown/power supply Replace fuse/have the cable cable damaged. repaired by an authorised repair agent.
12. DISPOSAL 12.1 DISPOSAL – At the end of the machine’s working life, or when it can no longer be repaired, ensure that it is disposed of according to national regulations. – Contact your local authority for details of collection schemes in your area. In all circumstances: •...
13. EXPLANATION OF SYMBOLS 13.1 EXPLANATION OF SYMBOLS WEEE – Waste Electrical & Electronic Equipment. Read the instruction manual. Do not dispose of Waste Electrical & Electronic Equipment in with domestic rubbish. Wear face mask and safety Continuous A-Weighted Sound glasses.
Need help?
Do you have a question about the 98676 and is the answer not in the manual?
Questions and answers