Advertisement
Quick Links
Advertisement

Related Manuals for Electrolux Ergorapido ZB2925


Summary of Contents for Electrolux Ergorapido ZB2925
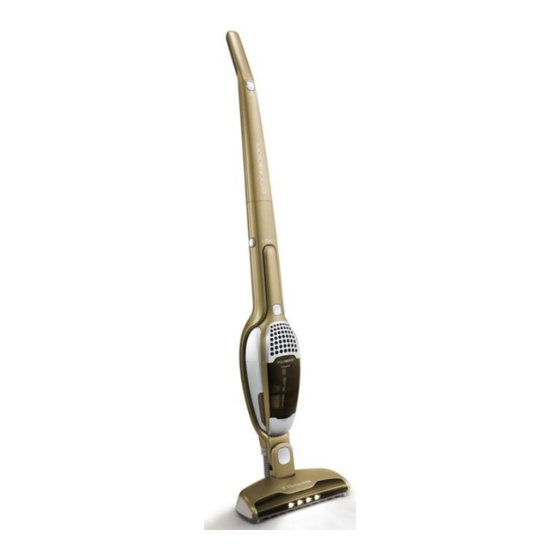
- Page 1 MARQUE: ELECTROLUX REFERENCE: ZB2925 CODIC: 4066251...
- Page 2 Vacuum cleaner User manual Aspirateur Mode d’emploi Aspiradora Manual de instrucciones Aspirapolvere Istruzioni per l’uso Aspirador Manual de Instruções Stofzuiger Gebruikershandleiding Staubsauger Bedienungsanleitung Ηλεκτρική σκούπα Εγχειρίδιο Dammsugare Bruksanvisning Stovsuger Bruksanvisning Støvsuger Brugervejledning Polynimuri Kayttoohje Прахосмукачка Ръководство на потребителя Vysavač Návod k použití Usisivač...
- Page 3 Français ..............5 Merci d’avoir choisi un aspirateur Electrolux Ergorapido. Ergorapido est un aspirateur balai rechargeable adapté aux poussières domestiques légères sèches. Pour des résultats optimaux, utilisez toujours des accessoires Electrolux. Ils ont été conçus tout spécialement pour votre aspirateur.
-
Page 4: Table Of Contents
TABLE DES MATIÈRES Précautions de sécurité ........9 Déballage et assemblage . -
Page 5: Précautions De Sécurité
Précautions de sécurité Cet appareil peut être utilisé par des enfants de Ne jamais utiliser l’aspirateur : plus de 8 ans, ainsi que des personnes dont les • Dans les endroits humides ; capacités physiques, sensorielles et mentales sont • À proximité de gaz infl ammables, etc. réduites ou dont les connaissances et l’expérience •... - Page 7 FONCTIONS/ACCESSOIRES Bouton marche/arrêt, aspirateur bali Bouton marche/arrêt, aspirateur à main Manche Vis de blocage du manche Bouton de déverrouillage, aspirateur à main Station de charge murale Station de charge posable Adaptateur Filtre fi n (fi ltre interne) 10. Préfi ltre (fi ltre externe) 11.
-
Page 8: Déballage Et Assemblage
Unpacking and assembly 2. Secure the handle by tightening the locking screw supplied. 1. Check that all parts are in the box. Fit the handle by carefully inserting Use a screwdriver or a coin. it into the lower main body. Make sure that the cable does not jam. Déballage et assemblage 2. - Page 9 41 41 Charging station 2. On the bottom of the charging station there is a hollow space where unused 3. The wall unit can also be mounted on a wall. Separate it from the fl oor 1. Position the charging station well away from heat sources, direct cable can be wound.
-
Page 10: Mise En Charge
42 42 Charging 2. Ergorapido Plus: The battery capacity display lights will come on one 3. When fully discharged, approximately 16 hours’ charging is required to 1. Ergorapido: The indicator light will come on once the Ergorapido is after another as the machine is charging after being positioned correctly in regain full battery capacity (4 hours for Ergorapido Plus). - Page 11 43 43 Battery capacity display* 2. If a red light is lit: Unit is too hot. Clean fi lters, brush roll, hose and put 4. When fully charged the LED’s* will turn off and go into standby mode = 1. 3 blue lights: battery capacity >75%; 2 blue lights: battery capacity 75-25% on charge.
-
Page 12: Utilisation
44 44 Vacuuming fl oors and carpets 2. Start Ergorapido by pushing the on/off button. 3. Adjust the power level by pushing the lower part of the on/off button. 1. You should regularly check that the nozzle wheels and the brush roll are clean in order to avoid scratching sensitive fl oors. - Page 13 45 45 Vacuuming furniture, car seats etc. 2. Attach the crevice nozzle to facilitate cleaning of areas diffi cult to reach, 3. Start/stop the hand unit by pushing the start button. 1. Remove the hand unit by pressing the release buttons. The crevice or attach the brush for dusting.
-
Page 14: Vidage Et Nettoyage
46 46 Emptying and cleaning 1. Quick emptying of the dust container. Open the vacuum cleaner lid. 2. Emptying of the dust container. Remove the fi lters, empty the contents Ergorapido’s dust container must be emptied regularly and the dust container Clean the dust container by placing the hose of another vacuum cleaner at into a dustbin. - Page 15 47 47 3. Quick cleaning of the fi ne fi lter. (Recommended every cleaning). 4a. Cleaning of dust container and fi lters. 4b. Separate both fi lters. Dust container and fi lters can be shaken clean (Recommended every 5th cleaning). Release dust container, take out both Release the dust container, pull/release spring 5-6 times to dislodge dust.
-
Page 16: Nettoyage De La Brosse Rotative, Coude D'aspiration Fl Exible Et Des Roues
Nettoyage de la brosse avec la fonction BRUSHROLLCLEAN™ TECHNOLOGY* La brosse, le fl exible d’aspiration et les roues doivent être nettoyés s’ils sont bloqués ou sont obstrués. Certains modèles Ergorapido sont équipés de la fonction de nettoyage de la brosse BRUSHROLLCLEAN™ TECHNOLOGY. Cette fonction vous aidera à... - Page 17 49 49 49 49 1. Make sure the cleaner is switched on and stands on hard even surface. Do not use the BRUSHROLLCLEAN™ 2. Press the BRUSHROLLCLEAN™ TECHNOLOGY button with your foot while the cleaner is switched on. TECHNOLOGY function on deep carpets or long haired rugs. Hold for ca.
- Page 18 La fonction BRUSHROLLCLEAN™ TECHNOLOGY est dotée d’une sécurité 1. Ergorapido plus: Si, pendant que vous appuyez sur la touche 2. Ergorapido: Autres modèles Ergorapido dotés de la touche thermique. La rotation de la brosse sera désactivée si la fonction BRUSHROLLCLEAN™ TECHNOLOGY : Si, pendant que vous appuyez sur la touche BRUSHROLLCLEAN™...
- Page 19 Une fois la touche relâchée, la brosse se remet à tourner et l’éclairage frontal de la brosse se rallume. Vous pouvez alors continuer à aspirer avec Ergorapido tout à fait normalement. La fonction BRUSHROLLCLEAN™ TECHNOLOGY reste désactivée. Pour la réinitialiser, Ergorapido doit être chargé au moins pendant 10 minutes consécutives sur support de charge.
- Page 20 52 52 Cleaning the brush roll 1. First turn Ergorapido off . Push the brush roll release button. The hatch 2. Lift out the brush roll and clean it. Use a sharp object to remove To remove thicker threads or wires as well as on models that are not cover will come slightly free and the brush roll can be removed.
- Page 21 53 53 Cleaning the hose and wheels 2. If the wheels needs to be cleaned, remove them carefully by using a 3. Remove objects that may have become jammed in the wheel shafts. 1. Loosen the catch and pull the hose from the attachment. Remove any small screwdriver.
-
Page 22: Enlèvement Des Batteries
54 54 Removing batteries 1. Batteries should always be run fl at before removed. Ergorapido must 2. Cut the connecting cables, remove the batteries, put tape over the Improper handling of the batteries may be hazardous. Return the complete be disconnected from the charging station when removing the visible metal areas. -
Page 23: Informations Consommateur
En cas de panne ou de dysfonctionnement, ramener votre Ergorapido à un Centre Service Agréé Electrolux. Si le cordon d’alimentation ou le chargeur est endommagé, il doit être remplacé par Electrolux, l’un de ses réparateurs ou toute autre personne dûment qualifi ée afi n d’éviter tout danger. Cette intervention n’est pas prise en charge par la garantie. - Page 24 Share more of our thinking at www.electrolux.com ZB292x-4x-2-rev6...
Need help?
Do you have a question about the Ergorapido ZB2925 and is the answer not in the manual?
Questions and answers