Advertisement
Quick Links
Model:R313M
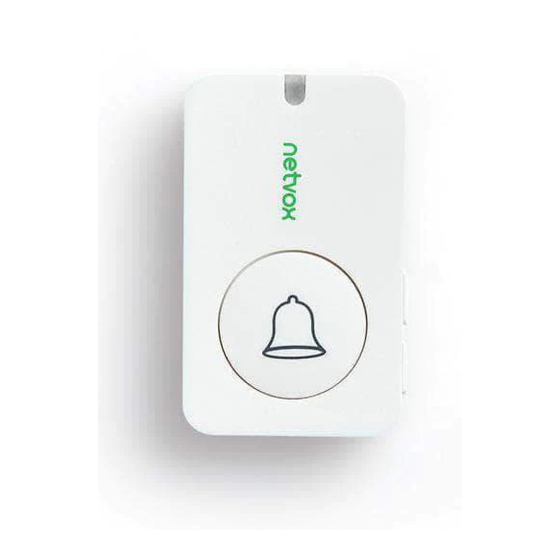
Wireless Door Bell Button
Wireless Door Bell Button
User Manual
Copyright©Netvox Technology Co., Ltd.
This document contains proprietary technical information which is the property of
NETVOX Technology. It shall be maintained in strict confidence and shall not be
disclosed to other parties, in whole or in part, without written permission of NETVOX
Technology. The specifications are subject to change without prior notice.
Advertisement

Summary of Contents for netvox R313M
- Page 1 This document contains proprietary technical information which is the property of NETVOX Technology. It shall be maintained in strict confidence and shall not be disclosed to other parties, in whole or in part, without written permission of NETVOX Technology. The specifications are subject to change without prior notice.
-
Page 2: Table Of Contents
Table of Content 1. Introduction ......................... 2 2. Appearance ........................2 3. Main Features ......................3 4. Set up Instruction ......................4 5. Data Report ......................... 6 6. Installation ........................ 11 7. Important Maintenance Instruction ................12... -
Page 3: Introduction
1. Introduction The R313M is a door bell button device for Netvox ClassA type devices based on the LoRaWAN open protocol and is compatible with the LoRaWAN protocol. LoRa Wireless Technology: LoRa is a wireless communication technology dedicated to long distance and low power consumption. -
Page 4: Main Features
Applicable to third-party platforms: Actility/ThingPark, TTN, MyDevices/Cayenne Improved power management for longer battery life Battery Life ⁻Please refer to web: http://www.netvox.com.tw/electric/electric_calc.html ⁻At this website, users can find battery life time for various models at different configurations. 1. Actual range may vary depending on environment. -
Page 5: Set Up Instruction
4. Set up Instruction On/Off Insert batteries (users may need a screwdriver to open) Power on Insert two sections of 3V CR2450 button batteries and close the battery cover. Note: Require 2 button batteries to supply power at the same time. Press any function key and indicator flashes once meaning it is turned on Turn on successfully. - Page 6 Function Key Restore to factory setting / Turn off Press and hold for 5 seconds The green indicator flashes 20 times: success The green indicator remains off: fail The device is in the network: green indicator flashes once and sends a report Press once The device is not in the network: green indicator remains off Trigger the doorbell alarm...
-
Page 7: Data Report
R313M was pressed, Alarm=1 R313M was not pressed, Alarm=0 Note: MinInterval is the sampling period for the Sensor. Sampling period >= MinInterval. Please refer Netvox LoRaWAN Application Command document and Netvox Lora Command Resolver http://loraresolver.netvoxcloud.com:8888/page/index to resolve uplink data. Data report configuration and sending period are as following: Current Change<... - Page 8 MinTime MaxTime 0x01 Change (4Bytes,Fixed ReportReq (2bytes Unit:s) (2bytes Unit:s) (1byte Unit:0.1v) 0x00) Config Status Reserved 0x81 ReportRsp (0x00_success) (8Bytes,Fixed 0x00) R313M 0x55 ReadConfig Reserved 0x02 ReportReq (9Bytes,Fixed 0x00) Battery Reserved ReadConfig MinTime MaxTime 0x82 Change (4Bytes,Fixed ReportRsp (2bytes Unit:s) (2bytes Unit:s) (1byte Unit:0.1v)
- Page 9 Example of Config Button Press Time FPort:0x0D Default Press Time : 0x00 Description CmdID PayLoad(Fix byte,1byte) PressTime (1bytes) 0x00_QuickPush_Less then 1 Second, 0x01_1 Second push, SetButtonPressTimeReq 0x01 0x02_2 Seconds push, 0x03_3 Seconds push, 0x04_4 Seconds push, 0x05_5 Seconds push, Other value is reserved Status SetButtonPressTimeRsp 0x81...
- Page 10 Example for MinTime/MaxTime logic Example#1 based on MinTime = 1 Hour, MaxTime= 1 Hour, Reportable Change i.e.BatteryVoltageChange=0.1V MaxTime MaxTime Sleeping(MinTime) Sleeping(MinTime) Wakes up and collects data Wakes up and collects data Wake up and collects data REPORTS 2.8V REPORTS 2.8V REPORTS 2.8V Note: MaxTime=MinTime.
- Page 11 Example#3 based on MinTime = 15 Minutes, MaxTime= 1 Hour, Reportable Change i.e. BatteryVoltageChange= 0.1V. MaxTime Wakes up and collects Users push the button, data REPORTS 2.7V. 2.7V |2.7-2.8|=0.1 Recalculate MaxTime. REPORTS 2.7V Wakes up and collects data 2.7V sleeping sleeping Does not report 1H 10...
-
Page 12: Installation
(Users may need a flat blade screwdriver to open the battery cover.) 1. Remove the 3M release paper on the back of the 2. When the doorbell (R313M) button is device and attach the device to the smooth wall pressed, the message "Alarm" is sent. -
Page 13: Important Maintenance Instruction
The figure shows the smart Doorbell Button (R313M) applied to the home entrance door scene. It can also be applied to the following scenarios: Villa Office front desk Hotel Apartment 7. Important Maintenance Instruction Kindly pay attention to the following in order to achieve the best maintenance of the product: •...


Need help?
Do you have a question about the R313M and is the answer not in the manual?
Questions and answers