
Related Manuals for SCHUNK FTN-AXIA


Summary of Contents for SCHUNK FTN-AXIA
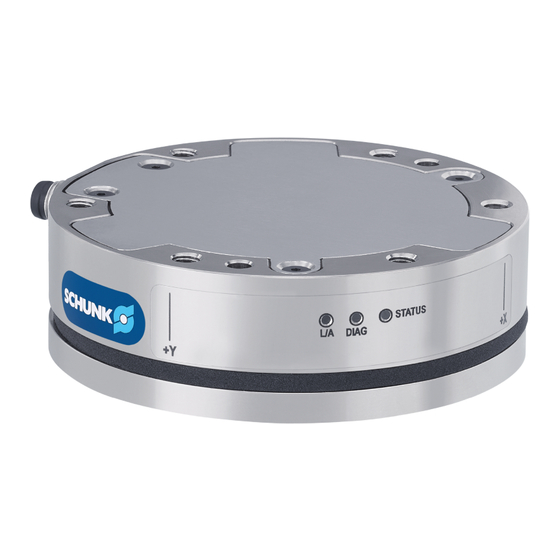
- Page 1 Translation of Original Operating Manual Assembly and Operating Manual FTN-AXIA Force/torque sensor...
- Page 2 Imprint Imprint Copyright: This manual is protected by copyright. The author is SCHUNK GmbH & Co. KG. All rights reserved. Technical changes: We reserve the right to make alterations for the purpose of technical improvement. Document number: 1366833 Version: 03.00 | 12/05/2021 | en...
-
Page 3: Table Of Contents
Measurements .................... 17 4.3.1 X/Y-axis force measurements.............. 17 4.3.2 Z-axis force measurement .............. 17 4.3.3 Torque measurements ................ 18 Ethernet connection................... 18 Assembly and installation .................. 20 Connections...................... 20 5.1.1 Mechanical connection................ 20 03.00 | FTN-AXIA | Assembly and Operating Manual | en | 1366833... - Page 4 Telnet........................ 39 Configuration page ..................... 42 Troubleshooting ..................... 51 Maintenance ...................... 53 Maintenance intervals.................. 53 Removing the product from the robot arm............ 53 Drawing ...................... 55 EU Declaration of Conformity ................. 56 03.00 | FTN-AXIA | Assembly and Operating Manual | en | 1366833...
-
Page 5: General
Non-observance can cause minor injuries. CAUTION Material damage! Information about avoiding material damage. 1.1.2 Definition of Terms The term "product" replaces the product name on the title page in this manual. 03.00 | FTN-AXIA | Assembly and Operating Manual | en | 1366833... -
Page 6: Variants
– Y-cable with M12 socket to 5-pin voltage supply (open wire strands) and RJ45 connector for connecting the product to a PC or the local network • Assembly and Operating Manual • Accessory pack 03.00 | FTN-AXIA | Assembly and Operating Manual | en | 1366833... -
Page 7: Accessories
A wide range of accessories are available for this product For information regarding which accessory articles can be used with the corresponding product variants, see catalog data sheet. 03.00 | FTN-AXIA | Assembly and Operating Manual | en | 1366833... -
Page 8: Basic Safety Notes
• Structural changes should only be made with the written approval of SCHUNK. 03.00 | FTN-AXIA | Assembly and Operating Manual | en | 1366833... -
Page 9: Spare Parts
Due to its technical training, knowledge and experience, service the manufacturer personnel of the manufacturer is able to perform the delegated tasks and to recognize and avoid possible dangers. 03.00 | FTN-AXIA | Assembly and Operating Manual | en | 1366833... -
Page 10: Personal Protective Equipment
• Eliminate any malfunction immediately. • Observe the care and maintenance instructions. • Observe the current safety, accident prevention and environmental protection regulations regarding the product's application field. 03.00 | FTN-AXIA | Assembly and Operating Manual | en | 1366833... -
Page 11: Malfunctions
• If the energy supply is connected, do not move any parts by hand. • Do not reach into the open mechanism or movement area of the product during operation. 03.00 | FTN-AXIA | Assembly and Operating Manual | en | 1366833... -
Page 12: Protection During Handling And Assembly
Falling and violently ejected components can cause serious injuries and even death. • Take appropriate protective measures to secure the danger zone. • Never step into the danger zone during operation. 03.00 | FTN-AXIA | Assembly and Operating Manual | en | 1366833... -
Page 13: Technical Data
More technical data is included in the catalog data sheet. Whichever is the latest version. 03.00 | FTN-AXIA | Assembly and Operating Manual | en | 1366833... -
Page 14: Ranges Of Measurement
Version FTN-AXIA SI-200-8/SI-500-20 Parameter [Nm] Range of measurement 1 Range of measurement 2 Version FTN-AXIA SI-480-20/SI-1200-50 Parameter [Nm] Range of measurement 1 1200 2000 Range of measurement 2 03.00 | FTN-AXIA | Assembly and Operating Manual | en | 1366833... -
Page 15: Design And Description
• Individual vibration damping due to programmable low-pass filter with limit frequency. • Dust and splash water protection enable flexible use. LEDs Three LEDs on the product indicate the current operating status. 03.00 | FTN-AXIA | Assembly and Operating Manual | en | 1366833... - Page 16 Diagnostics LED lights up red in case of error or is switched off, LEDs 32]. STATUS Status LED indicates correct or incorrect functioning of the product via a red, green or orange indicator, LEDs 32]. 03.00 | FTN-AXIA | Assembly and Operating Manual | en | 1366833...
-
Page 17: Measurements
When measuring force in Z-axis direction, the tool side of the product is moved in Z-axis direction compared to the assembly side. This leads to the result F 03.00 | FTN-AXIA | Assembly and Operating Manual | en | 1366833... -
Page 18: Torque Measurements
• Equip the PC with an additional network card. • Connect the additional network adapter to PC via the USB interface. • Use the switch. Follow the installation instructions of the respective product here. 03.00 | FTN-AXIA | Assembly and Operating Manual | en | 1366833... - Page 19 • Switch off network services that are not required. • Use network analysis software (for example, the packet- oriented free software Wireshark.org). • Use the supplied cables or cables of comparable quality. 03.00 | FTN-AXIA | Assembly and Operating Manual | en | 1366833...
-
Page 20: Assembly And Installation
• The adapter plate must have bore holes for screws and alignment pins for precise positioning on the robot and product. Alignment pins prevent unwanted shifting and twisting. 03.00 | FTN-AXIA | Assembly and Operating Manual | en | 1366833... - Page 21 The customer tool may only touch the tool adapter plate. If the customer tool touches any other part of the product, the measurement may be distorted. Item Description Product Fastening screw M5 x 8.5 (provided by customer) 03.00 | FTN-AXIA | Assembly and Operating Manual | en | 1366833...
- Page 22 Alignment pin 4 mm (provided by customer) Alignment pin 3 mm (provided by customer) Fastening screw M5 x 8.5 (provided by customer) provided by customer (available from Schunk on request) 03.00 | FTN-AXIA | Assembly and Operating Manual | en | 1366833...
-
Page 23: Electrical Connection
RX + RX − V + V − Pin assignment sensor cable Sensor cable, pin assignment M12 connector, 8-pin Signal Not assigned V + V − TX − RX + TX + Not assigned RX − Shield- Housing 03.00 | FTN-AXIA | Assembly and Operating Manual | en | 1366833... - Page 24 Not assigned Cable assignment Cable assignment voltage supply Item Cable color Assignment Shielding Brown V + Brown/White V – Blue/White (TP1+) Sync (not assigned) Blue (TP1-) Sync Ground (not assigned) 03.00 | FTN-AXIA | Assembly and Operating Manual | en | 1366833...
-
Page 25: Initial Installation
4. Connect the Ethernet plug of the control line to the PC (6). 5. Switch on the PC. 6. Connect the power network connector (5) to the mains. 03.00 | FTN-AXIA | Assembly and Operating Manual | en | 1366833... -
Page 26: Initial Configuration
Welcome Start page with overview of the individual pages of the configuration Snapshot Display of the currently recorded (highest) measured values. Option must be switched on if required 03.00 | FTN-AXIA | Assembly and Operating Manual | en | 1366833... -
Page 27: Mounting The Product
After successful initial installation: 1. Do not disconnect the product from the power supply. 2. Switch off the PC. 3. Mounting the product, see Mounting the product 28]. 03.00 | FTN-AXIA | Assembly and Operating Manual | en | 1366833... - Page 28 Use alignment pins of the correct length. • Make sure the adapter plate and product are flush. • 03.00 | FTN-AXIA | Assembly and Operating Manual | en | 1366833...
- Page 29 20]. 4. Attach the product (7) to the robot. Use a hexagon socket wrench for this purpose. ✓ Tighten the screws (5). Observe the tightening torque, ✓ Mechanical connection 20]. 03.00 | FTN-AXIA | Assembly and Operating Manual | en | 1366833...
- Page 30 20]. 4. Secure the end effector (3) to the product (1) using the screws (4) and alignment pin (2). Observe the tightening torque, depth of engagement and ✓ strength class, if required. 03.00 | FTN-AXIA | Assembly and Operating Manual | en | 1366833...
-
Page 31: Starting Up The Product
5. Observe the LEDs on product during the self-test, LEDs 32]. 6. Install the cable. 7. Make sure that all cables are fastened, bunched and tension- relieved to ensure sufficient freedom of movement during operation. 03.00 | FTN-AXIA | Assembly and Operating Manual | en | 1366833... -
Page 32: Operation
Product switched off or during status check. Error detected in the sensor system, error code entered in the status word. Green Normal operation. Red/Green Measured value of an axis outside the permissible range. (Orange) 03.00 | FTN-AXIA | Assembly and Operating Manual | en | 1366833... -
Page 33: Measurement And Transmission Data
(2) are not transferred. Selecting a data rate that is higher than the sampling rate is recommended if other devices in the network are operated at a higher frequency, for example. 03.00 | FTN-AXIA | Assembly and Operating Manual | en | 1366833... -
Page 34: Filters And Dampening
The following table shows the influence of filter selection on the limit frequency with different sampling rates. Filter 488 kHz 976 kHz 1953 kHz 3906 kHz 7912 kHz 1000 2000 935.10 364.04 169.52 81.24 39.84 20.31 9.37 5.47 03.00 | FTN-AXIA | Assembly and Operating Manual | en | 1366833... - Page 35 Depending on the selected sampling rate, this leads to the following relations between frequency and damping: Frequency Filter damping at 0.5 kHz sampling rate Frequency Filter damping at 1 kHz sampling rate 03.00 | FTN-AXIA | Assembly and Operating Manual | en | 1366833...
- Page 36 Operation Frequency Filter damping at 2 kHz sampling rate Frequency Filter damping at 4 kHz sampling rate Frequency Filter damping at 8 kHz sampling rate 03.00 | FTN-AXIA | Assembly and Operating Manual | en | 1366833...
-
Page 37: Measurement Deviations
With this example, the rotation about the Z-axis results only from the rotations about the X and Y-axis; the tool does not turn about the Z-axis itself in this application. 03.00 | FTN-AXIA | Assembly and Operating Manual | en | 1366833... - Page 38 For this, the software collects forces and torques currently acting on the product and subtracts them as a reference from future measurements. This reference for setting to zero is controlled via the BIAS command. 03.00 | FTN-AXIA | Assembly and Operating Manual | en | 1366833...
-
Page 39: Telnet
192.168.1.1). 3. Enter ati as the user name. 4. Enter ati7720115 as password. After successful login to the product, commands can be ✓ entered directly via the console. 03.00 | FTN-AXIA | Assembly and Operating Manual | en | 1366833... - Page 40 Diagnostic status overview SIMERR [ON | OFF] Control of simulated errors SAVEALL Save all parameters set in the permanent memory STATUS Output the status report RESET Reset controller 03.00 | FTN-AXIA | Assembly and Operating Manual | en | 1366833...
- Page 41 Filter selection (0–8) setNum Serial number hwProdCode Product code of the hardware sipmode Select IP mode 0 (DHCP) or 1 (static). sipadr Static IP address (sipmode = 1) 03.00 | FTN-AXIA | Assembly and Operating Manual | en | 1366833...
-
Page 42: Configuration Page
1. Avoid overloading the product to prevent damage. 2. Avoid prolonged overload, which can lead to material fatigue. 03.00 | FTN-AXIA | Assembly and Operating Manual | en | 1366833... - Page 43 2. Display measurement data in real time in bar and cube displays. 3. Download measurement data as a CSV file. 4. Set to zero. 5. Create error reports. 03.00 | FTN-AXIA | Assembly and Operating Manual | en | 1366833...
- Page 44 4. Define the bias values for the software side offset of measurements as set to zero parameters (Software Bias Values). If required, the values can be set to zero. 5. Click the Apply button to apply the settings. 03.00 | FTN-AXIA | Assembly and Operating Manual | en | 1366833...
- Page 45 Operation FT Configuration (config.htm) Select calibration, read out the specifications of the product. 1. Select calibration (Calibration Select). 2. Click the Apply button to apply the settings. 03.00 | FTN-AXIA | Assembly and Operating Manual | en | 1366833...
- Page 46 (RDT Buffer Size). 3. Click the Apply button to apply the settings. 4. Switch the product off and on again. System Info (manuf.htm) Call up system information. 03.00 | FTN-AXIA | Assembly and Operating Manual | en | 1366833...
- Page 47 Operation • Display system information and forward to Schunk for troubleshooting, if necessary. 03.00 | FTN-AXIA | Assembly and Operating Manual | en | 1366833...
- Page 48 Hardware Hardware version of the product Revision Hardware Item number of the hardware Product Code Hardware Current diagnostic data (with status display for Diagnostics a quick overview) 03.00 | FTN-AXIA | Assembly and Operating Manual | en | 1366833...
- Page 49 Relay Trigger "Any condition is true" = Meets one of the selected conditions sufficient for triggering. Relay Trigger "All conditions are true" = For triggering, all selected conditions must be met. 03.00 | FTN-AXIA | Assembly and Operating Manual | en | 1366833...
- Page 50 Newton was set as the unit and 1 million as the counter per force value (counts per force) or per torque value (counts per torque). Exact limit for 6.25 N is therefore 6.25 x 1000000 = 6250000. 03.00 | FTN-AXIA | Assembly and Operating Manual | en | 1366833...
-
Page 51: Troubleshooting
Reduce load, perform a precision check and reset the permissible limits. error code. Electrical malfunction. Check the plug connection, detach if required and reconnect it. Switch off the product and restart it. 03.00 | FTN-AXIA | Assembly and Operating Manual | en | 1366833... - Page 52 Check product and cable; cables may not touch the product. Internal error Switch off the product and restart it. Replace component or send it to SCHUNK for repair. 03.00 | FTN-AXIA | Assembly and Operating Manual | en | 1366833...
-
Page 53: Maintenance
Before starting any work on the product: Switch off the • energy supply and secure against re-connection. Ensure that no residual energy remains in the system. • Secure components from falling down or over. • 03.00 | FTN-AXIA | Assembly and Operating Manual | en | 1366833... - Page 54 4. Support the product (5) and use a hexagon socket wrench to loosen the secured screws (2) and (4) that fasten the product to the robot (1) or adapter plate (3). 5. Remove the product (5). 03.00 | FTN-AXIA | Assembly and Operating Manual | en | 1366833...
-
Page 55: Drawing
Maintenance 8.3 Drawing Drawing 03.00 | FTN-AXIA | Assembly and Operating Manual | en | 1366833... -
Page 56: Eu Declaration Of Conformity
Signed for and on behalf of: SCHUNK GmbH & Co. KG Dr.-Ing. Manuel Baumeister,Technology & Innovation, Mechatronics & Sensors Lauffen/Neckar, May 2021 03.00 | FTN-AXIA | Assembly and Operating Manual | en | 1366833... - Page 60 Translation of Original Operating Manual SCHUNK GmbH & Co. KG Clamping and gripping technology Bahnhofstr. 106 - 134 D-74348 Lauffen/Neckar Tel. +49-7133-103-0 Fax +49-7133-103-2399 info@de.schunk.com schunk.com Folgen Sie uns I Follow us...
Need help?
Do you have a question about the FTN-AXIA and is the answer not in the manual?
Questions and answers