Table of Contents
Advertisement
Quick Links
Advertisement
Table of Contents

Related Manuals for Etan Premium 0965


Summary of Contents for Etan Premium 0965
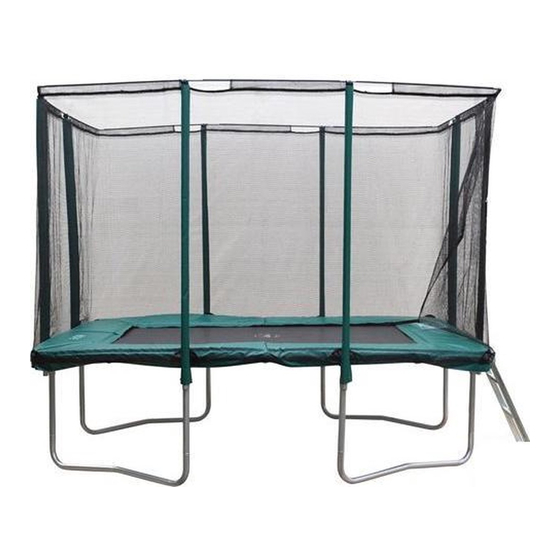
- Page 1 Size 0965 / 1075 / 1259 Etan Premium Inground Trampoline Etan Premium Inground Trampoline with net (standard and deluxe) 0965ft (281 x 201 cm) 1075ft (310 x 232 cm) 1259ft (380 x 275 cm) Scan here for the instructional video...
- Page 2 TRAMPOLINE Toprail hoek (met knik) / Top rail corner (bent) / Toprail met pootsokkels / Top rail with leg socket / Verenspanner / Spring tensioner Eckenstange (gebogen) / Tubes de coin (courbe) Toprail-Stangen ohne Verbindungsstücken / Federspanner / Tendeur de ressort Tube de structure avec liaison en T Toprail hoek (recht) / Top rail corner (straight) / Pootbasis / Leg basis /...
- Page 3 TRAMPOLINE Type 0965 Type 1259 Type 0965 Type 1075 Type 1259 Type 1075 WARNINGS • Deze trampoline is alleen geschikt voor • Only for domestic use. huishoudelijk gebruik. • Maximum user weight: 150 kg. • Maximaal gebruikersgewicht: 150 kg. • This trampoline is intended for outdoor •...
-
Page 4: Safety Net
SAFETY NET Element topring (hoek) / Element top ring (corner) / Element topring / Element top ring / Element Topring (Ecke) / Element Topring (angle) Element Topring / Element Topring Deel paal / Part pole / Stange / Tubes Zwarte sleeve / Black sleeve / Schwarze Hülle / Manchon noir Deluxe palen bestaan ook uit 2 delen. - Page 5 SAFETY NET T-stuk / T-part Net (met 1 zwarte sleeve) / Net (with 1 black T-Kupplungsstück / Jonction en T sleeve) / Netz (mit 1 schwarzen Hülle) / Filet (avec 1 manchon noir) Mesh afwerking / Mesh finishing Mesh Finish / Mesh finition...
- Page 6 WAARSCHUWINGEN • Deze trampoline is alleen geschikt voor huishoudelijk • Spring niet met meerdere personen tegelijkertijd op de gebruik. trampoline. Je loopt anders kans op letsel door botsingen. • Niet geschikt voor kinderen <3 jaar. • Draag nooit schoenen bij het springen op de trampoline, •...
- Page 7 WARNINGS • This trampoline is suitable for domestic use only. • Only one user at the same time. Collision hazard. • Not suitable for children <3 years. • Never wear shoes when jumping on the trampoline. • Maximum user weight: 150 kg. (0965 = 75kg) •...
- Page 8 WARNUNGEN • • Trage niemals Schuhe beim Springen auf dem Das Trampolin ist nur für den Hausgebrauch bestimmt. Trampolin. Springe Barfuß oder mit Socken. • Nicht für Kinder unter 3 Jahren geeignet. • Achte darauf, während des Springens keine Spitzen •...
- Page 9 ALERTES • Ce trampoline est conçu pour un usage par les particu- • Quitte tes chaussures : saute pieds nus ou en liers. chaussettes. • Ne convient pas aux enfants de moins de 3 ans. • Vide tes poches et garde les mains vides avant de te •...
-
Page 10: Montage Instructies
FIRST STEPS... VOOR JE BEGINT... MONTAGE INSTRUCTIES ASSEMBLY INSTRUCTIONS 1. Zorg dat de trampoline op een vlakke onder 1. Make sure the trampoline is placed on a flat grond geplaatst wordt. surface. 2. Plaats de trampoline niet op beton, asfalt of 2. -
Page 11: Instructions De Montage
ERSTE SCHRITTE… AVANT LE MONTAGE… MONTAGEANLEITUNG INSTRUCTIONS DE MONTAGE 1. Achte darauf, dass das Trampolin auf einem 1. Assure toi que le trampoline sera positionné sur geraden Untergrund aufgebaut wird. une surface plane. 2. Das Trampolin sollte nicht auf Beton, Asphalt oder 2. - Page 12 FRAME FRAME RAHMEN CADRE 20 cm Type 0965 65 cm Type 1075 70 cm Type 1259 95 cm Type 0965 Type 1075 Type 1259 230 x 150 cm 260 x 180 cm 330 x 225 cm...
- Page 13 Start met het graven van een kuil. Niet de ge- Start by digging a hole. It is not necessary hele kuil dient uitgegraven te worden. Graaf de to dig out the entire hole. Make the hole kuil in een komvorm. bowl-shaped.
- Page 15 2 – 8: 2 – 8: Zet het frame in elkaar zoals aangegeven op de Assemble the frame as indicated in the illustra- tekeningen. Start met een toprail met pootsokkels tions. Start with a top rail with leg sockets short korte zijde en een toprail hoek recht.
- Page 16 SPRINGMAT JUMPING MAT SPRUNGMATTE TAPIS DE SAUT...
- Page 17 9 – 11: 9 – 11: Bevestig in elke hoek een veer en plaats de rest van Connect a spring on each corner and place the rest de veren zoals aangegeven op de tekeningen. Hier- of the springs as indicated in the illustration. For voor kun je gebruik maken van de bijgeleverde this you can use the supplied spring tensioner.
- Page 18 RANDKUSSEN SAFETY PAD RANDABDECKUNG LE COUSSIN DE PROTECTION...
- Page 19 Leg het randkussen ondersteboven op de tram- Place the safety pad upside down on the trampoli- poline en rijg de elastieken. Schuif het foam in de ne and thread the elastic bands through the holes. enveloppe van het randkussen. Slide the foam into the envelope of the safety pad. 13: Draai het randkussen om en bevestig de elastie- 13: Turn the safety pad over and attach the elastic ken aan het frame zoals aangegeven.
- Page 21 Wanneer je geen veiligheidsnet plaatst is de monta- If you are not installing a safety net the assembly ge nu gereed. Veel springplezier! is now complete. Have fun jumping! Wenn du kein Sicherheitsnetz anbringst, ist dein Si tu n’installe pas de filet, alors l’assemblage est Aufbau nun vollständig.
- Page 22 VEILIGHEIDSNET SAFETY NET SICHERHEITSNETZES FILET DE SÉCURITÉ...
- Page 23 16 – 17: 16 – 17: Schuif een element voor de topring in de tunnel van Slide one element for the topring in the tunnel of the het net. Schuif een tweede element in de tunnel. net. Slide a second element in the tunnel. Before Alvorens de twee elementen in elkaar te schuiven, attaching the two elements, slide a T-part over the schuif je eerst een T-stuk over het element op de...
- Page 25 19– 20: 19– 20: Plaats de gemonteerde palen in de steunen voor Install the 7 poles in the connection parts of the het veiligheidsnet. Zorg ervoor dat de laatste zwar- safety net. Make sure the last pole can be placed te paal altijd op een korte zijde aan de rechterkant at a short side at the right position, as depicted in komt te staan zoals te zien op afbeelding 20.
- Page 27 Neem de haak van de onderzijde van het veilig- Take the hook that is attached to the bottom of heidsnet, trek deze onder de frame rand door en the safety net, pull it underneath the top rail of the bevestig deze aan de voorzijde van de veer (zoals frame and attach it to the front side of the spring afgebeeld op afbeelding 22).
- Page 28 ONDERHOUD Etan Premium trampolines zijn van uitstekende kwaliteit en staan garant voor een lange levensduur wanneer deze goed onderhouden wordt. Het is belangrijk om aan het begin van elk seizoen en met regelmaat de belangrijkste delen te controleren (frame, springmat, randkussen en veiligheidsnet). Indien deze controles niet worden uitgevoerd, kan het gebruik van de trampoline gevaarlijk worden.
-
Page 29: Garantie
Als de gebruiker landt op de springmat moeten de knieën worden 15 jaar* Veren gebogen, totdat je stopt en de springkracht van de mat wordt * Bij registratie op de Etan website 15 jaar, zonder geabsorbeerd. Voor een betere balans de armen gestrekt voor je registratie 10 jaar. houden. -
Page 30: Maintenance
MAINTENANCE Our Etan Premium trampolines are of excellent quality and guarantee a long lifespan when maintained properly. You need to carry out regular checks and maintenance of the main parts (frame, jumping mat, safety pad, and safety net) at the beginning of each season. if these checks are not carried out, the trampoline could become dangerous. -
Page 31: Jumping Instructions
Springs 15 years* that they stop and absorb the jumping power of the bed. Arms are * When you register on the Etan website 15 years, extended horizontally out for increased level of balance. without registration 10 years. Safety net... -
Page 32: Wartung
WARTUNG Unsere Etan Premium Trampoline sind von hoher Qualität und garantieren eine lange Lebensdauer, wenn sie richtig benutzt und gepflegt werden. Es ist wichtig, die Hauptbestandteile (Rahmen, Federung, Sprungtuch, Randabdeckung und Sicherheitsnetz) zu Beginn jeder Saison und in regelmäßigen Abständen zu kontrollieren. -
Page 33: Gewährleistung
15 Jahre* Übung 1: Stoppen * Bei Registrierung auf der Webseite von Etan 15 Jahre, Wenn du nach dem ersten Absprung wieder auf dem Sprungtuch ohne Registrierung 10 Jahre. landest, ist es wichtig, dass du mit den Knien in die Hocke gehst,... - Page 34 MAINTENANCE Avec un bon entretien, les trampolines de haute qualité Etan Premium sont garantie pour une longue durée de vie. Il est important de vérifier les pièces principales, au début de chaque saison mais aussi régulièrement pendant la saison (structure, ressorts, tapis, coussins de protection et filet de sécurité). Si ces contrôles ne sont pas effectués, l’utilisation du trampoline peut s’avérer dangereuse.
- Page 35 Au moment du contact avec le tapis de saut, tu dois plier les gen- Ressorts 15 ans* oux afin d’absorber la puissance du tapis de saut et ainsi t’arrêter. * Si tu t’enregistre sur le site Etan: 15 ans. Sinon Maintiens tes bras à l’horizontal pour : 10 ans améliorer ton équilibre.
- Page 36 Etan Premium inground trampoline and Etan Premium In- ground Trampoline with net (Standard and deluxe) 0965ft (281 x 201 x 240 cm) and 1075ft (310 x 232 x 270 cm) 1259ft (380 x 275 cm) Deze handleiding is van toepassing op / This manual is applicable to / Dieses Handbuch gilt für / Ce manuel est valide pour...
Need help?
Do you have a question about the Premium 0965 and is the answer not in the manual?
Questions and answers