Table of Contents
Advertisement
Advertisement
Table of Contents

Related Manuals for CNET CSH-1600W


Summary of Contents for CNET CSH-1600W
- Page 1 Smart Access Web Management Switch USER’S GUIDE...
-
Page 2: Table Of Contents
2.2.3 Status LEDs... 4 2.3 The Rear Panel ... 5 2.3.1 Power Socket ... 5 INSTALLATION... 6 3.1 To locate the Switch on a desktop... 6 3.2 Rackmount Placement ... 6 SMART FUNCTIONS SETTINGS ... 7 4.1 Start Smart Function ... 7 CONFIGURING THE SWITCH... -
Page 3: Unpacking Information
1 UNPACKING INFORMATION Thank you for purchasing this Switch. Before continuing, please check the contents of the product package. The package should contain the following items: .One (1) Switch .One (1) Power Cord .Four (4) Rubber Feet (for desktop placement) .One (1) Rack Mount Kit... -
Page 4: Product Introduction
2.2.2 Cabling Port Type 10BASE-T 100BASE-TX Category 5, 5E TP 2.2.3 Status LEDs This Switch comes with a complete range of LEDs. The table below lists each LED’s name, color and a brief description of its function. Name Color Green... -
Page 5: The Rear Panel
2.3 The Rear Panel 19 inches case 2.3.1 Power Socket The Power Socket is designed to be used with the power cord included in the product package. ‧Attach the female end of the power cord to the male power connector on the back panel. ‧Attach the male end of the power cord to a grounded power outlet. -
Page 6: Installation
3 INSTALLATION 3.1 To locate the Switch on a desktop .Attach the four rubber feet included in the product package to the bottom of the Switch, one in each corner. .Place the Switch on a clean, flat desk or tabletop close to a power outlet. -
Page 7: Smart Functions Settings
A. Please ask your LAN administrator to map port #8888(or your choice), on the network’s gateway to the IP address of the PC running the management program “vega.exe”. B. Execute vega.exe which is on the CD accompanied by the switch on a PC located in the same local area network.(Fig 4-1) - Page 8 C. The program will show.(Fig 4-2) Fig 4-2 Note: In the above window, there are 6 function icons that you can use to control the program: 1. Start: Start the program. 2. Stop: Stop the program. 3. Server Setting: Setting the server’s parameters. (Fig 4-3)
- Page 9 Fig 4-3 4. Proxy Setting: View the existing switches in this LAN, and also add/delete/modify any switch in the LAN for configuration convenience. (Fig 4-4)
- Page 10 Fig 4-4 5. Log: log the server’s activity messages into a log file. 6. Help: view the help file. D. Click the Server Setting icon, the following window will show.(Fig 4-5)
- Page 11 Fig 4-5 E. Please change the Server Port from “80” to “8888”, and press OK for it to take effect. The next window shows that it runs using port 8888.(Fig 4-6)
- Page 12 Fig 4-6 F. From internet side, connect to the WAN IP of your LAN gateway with port 8888 as below: http://XXX.XXX.XXX.XXX:8888/proxy.htm . Then the web page will show. (Fig 4-7)
- Page 13 Fig 4-7 G. Select the switch to be configured from the left side and the device information will be shown on the right. (Fig 4-8). Fig 4-8...
- Page 14 Click on Configure this Device to start the configuration of the selected switch.(Fig 4-9) Fig 4-9...
-
Page 15: Configuring The Switch
5 Configuring the Switch 5.1 How to login to the switch 1. When a switch is selected for configuration, the login window for that switch will pop up. (Fig 5-1) The default user name and password are: User name: admin Password: 1234 2. -
Page 16: Configuration Items
Fig 5-2 5.2 Configuration Items The configurable features of the web smart switch are listed in (Fig 5-3). Upon selecting any item from the list, a page with detail information on that item will come up. Fig 5-3 5.2.1 Port Status... - Page 17 Fig 5-4 Link Status – Indicates the link status of each port ON/OFF. Speed –Indicates Link Speed of each port 10/100. Duplex –Indicates Half duplex or Full duplex connection on each port Flow Control –Indicates Flow Control status of each port enable/disable. For example, if we want to know the number of packets received or transmitted on port 4: 1.
- Page 18 Fig 5-5 2. Click the “Counters” button (Fig 5-6), and the information we are looking for will be seen on Fig 5-7. Fig 5-6...
-
Page 19: Port Config
Fig 5-7 3. You can click the “Reset Counters” button (Fig 5-7), to reset the counter number. 5.2.2 Port Config 1. Select Port number to be configured. (Fig 5-8) 2. To enable this port, select “Turn on”, otherwise select “Turn off”. 3. -
Page 20: Vlan
5.2.3 VLAN 1. Select port-based VLAN or tag-based VLAN. (Fig 5-9) Fig 5-9 2. Click “Apply” to enable and save selection. 3. Clink “Set Vlan” to edit the VLAN configuration. 5.2.3.1 Port Based VLAN 1. Select VLAN group number. It supports up to 24 VLAN Groups. (Fig 5-10). 2. -
Page 21: Trunk
5.2.4 Trunk 1. Enter the Trunk menu. 2. Select the port to be grouped in this trunk. This switch only supports one trunk group and any port combination can be grouped into this trunk. 3. Click “Apply” to save the configuration. -
Page 22: 802.1P/Tos Priority
5.2.5 802.1p/TOS Priority 1. Enter 802.1p/TOS Priority menu 2. Select the priority value for every 802.1p and TOS. This switch supports two level of priority. 3. Click “Apply” to save the configuration. 5.2.6 QoS 1. Select the Priority Ratio. (“High Queues & Low Queue” Ratio) (Fig 5-11) -
Page 23: General System Setting
2. Click “Apply” to save the configuration. Fig 5-14 5.2.7 General System Setting... -
Page 24: Advanced Configuration
A. IP address: If the Switch is not a DHCP Client, select “Disable” for DHCP Client and fill out the IP Address, Subnet Mask and Default Gateway information fields. Otherwise, select “Enable” in DHCP Client column. B. Boot Version, Firmware Version and MAC Address of the Switch. - Page 25 Fig 5-13 To change Login Name and Password: 1. Type in the Login Name. The default Login Name is admin. 2. Enter a new password. The default password is 1234. 3. Confirm your password in the Confirm Password field. 4. Click “Change” to save your changes. To restore the factory default settings: 1.
-
Page 26: Reset Button
2. Press the reset button 3. Turn on the switch 4. After 3 seconds, release the reset button 5. The switch will reset the “User name”, “password” and “IP address” to default value, i.e. User name: admin Password: 1234 IP address: 192.168.0.100... -
Page 27: Helpful Suggestions
Switch is powered “OFF” or reset. Note: When the network needs reconfiguration, we recommend you to turn off the power first. After all nodes have been moved, turn the Switch back "ON" to rebuild the internal MAC address table. -
Page 28: Product Specifications
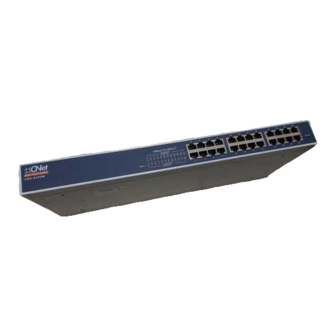
This is a Class A product. In a domestic environment this product may cause radio interference in which case the user may be required to take adequate measures. 24-Port 10/100Mbps Smart Web Access Management Switch FCC WARNING CE MARK WARNING...
Need help?
Do you have a question about the CSH-1600W and is the answer not in the manual?
Questions and answers