Bunn Titan Dual Installation And Operating Manual
Bunn titan dual: operating manual
Hide thumbs
Also See for Titan Dual:
- Installation & operating manual (58 pages) ,
- Programming manual (36 pages) ,
- Service & repair manual (30 pages)
Table of Contents
Advertisement
TITAN DUAL™
INSTALLATION & OPERATING MANUAL
BUNN-O-MATIC CORPORATION
POST OFFICE BOX 3227
SPRINGFIELD, ILLINOIS 62708-3227
PHONE: (217) 529-6601 FAX: (217) 529-6644
To ensure you have the latest revision of the manual or to obtain the illustrated parts catalog, please visit the Bunn-O-Matic website, at
www.bunn.com. This is absolutely FREE, and the quickest way to obtain the latest catalog and manual updates. Contact Bunn-O-Matic
Corporation at 1-800-286-6070 to obtain a paper copy of the required Illustrated Parts Catalog mailed via U.S. Postal Service.
www.bunn.com
40119.0000B 10/07 ©2007 Bunn-O-Matic Corporation
Advertisement
Chapters
Table of Contents

Related Manuals for Bunn Titan Dual


Summary of Contents for Bunn Titan Dual
- Page 1 PHONE: (217) 529-6601 FAX: (217) 529-6644 To ensure you have the latest revision of the manual or to obtain the illustrated parts catalog, please visit the Bunn-O-Matic website, at www.bunn.com. This is absolutely FREE, and the quickest way to obtain the latest catalog and manual updates. Contact Bunn-O-Matic Corporation at 1-800-286-6070 to obtain a paper copy of the required Illustrated Parts Catalog mailed via U.S.
-
Page 2: Warranty
SOLE OPTION AS SPECIFIED HEREIN, TO REPAIR, REPLACEMENT OR REFUND. In no event shall BUNN be liable for any other damage or loss, including, but not limited to, lost profits, lost sales, loss of use of equipment, claims of Buyer’s customers, cost of capital, cost of down time, cost of substitute equipment, facilities or services, or any other special, incidental or consequential damages. -
Page 3: Table Of Contents
This equipment will brew coffee into an awaiting server or airpot. The brewer may have an auxillary hot water faucet. It is only for indoor use on a sturdy and level counter or shelf. Please install in an area where there are no water jet devices. -
Page 4: User Notices
Carefully read and follow all notices in this manual and on the equipment. All labels on the equipment should be kept in good condition. Replace any unreadable or damaged labels. #00986.0000 #37881.0000 Optional Field Wiring 120/208 V, 40.1 A, 8200 W 1PH, 3-Wire + GND, 50/60HZ 29710.0015 USER NOTICES... -
Page 5: Electrical Requirements
ELECTRICAL REQUIREMENTS WARNING - If the power cord is ever damaged, it must be replaced by the manufacturer or its service agent with a special cord available from the manufacturer or its service agent in order to avoid a hazard. Refer to Data Plate on the Brewer, and local/national electrical codes to determine circuit requirements. -
Page 6: Plumbing Requirements
NOTE - Bunn-O-Matic recommends 3⁄8" copper tubing for all installations from the 1⁄2" water supply line. A tight coil of copper tubing in the water line will facilitate moving the brewer to clean the counter top. Bunn-O-Matic does not recommend the use of a saddle valve to install the brewer. The size and shape of the hole made in the supply line by this type of device may restrict water flow. -
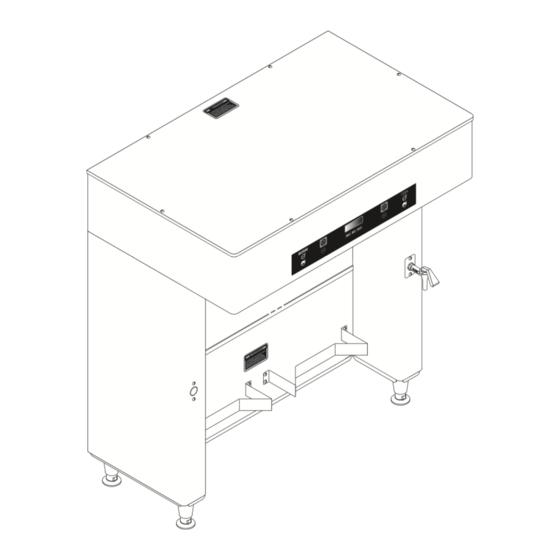
Page 7: Operating Controls
ENABLE ON / OFF BREW LARGE BREW SMALL A. MAIN ON/OFF SWITCH This switch, located under the brewer in front of the right rear leg, turns power on and off to all components in the brewer. B. ON/OFF SWITCH (ENABLE BREW) Pressing the "ON/OFF"... -
Page 8: Initial Set-Up
Insert an empty funnel into the funnel rails of one of the brew stations. Place an empty server under the funnel. Connect the brewer to the power source. Make sure the corresponding ON/OFF switch is ON (LED will be lit). Water will flow into the tank and stop when the tank is filled to its capacity. -
Page 9: Coffee Brewing
1. Begin each brew cycle with a clean empty brew funnel. 2. Insert a BUNN filter into the funnel. NOTE: The funnels are equipped with 4 wire loops that can be folded over top edge of filter if desired, to prevent filter from folding in during the brew cycle. -
Page 10: Cleaning
1. The use of a damp cloth rinsed in any mild, nonabrasive, liquid detergent is recommended for cleaning all surfaces on Bunn-O-Matic equipment. Do NOT clean this equipment with a water jet device. 2. Check and clean each sprayhead. The sprayhead holes must always remain open. -
Page 11: Glossary
GLOSSARY BREW LOCKOUT: The inability to initiate a brew if the water temperature is less than the ready temperature programmed into the brewer. BREW METER: The setting of a pulse brew routine by entering in the total desired water delivery time. The brewer will then calculate and perform a pulse brew routine using a predetermined formula. -
Page 12: Programming
Using the menu-driven display on the front of the brewer, the operator has the ability to alter or modify various brewing parameters such as brew temperatures, brew volumes, bypass percentages, pulse brew, etc. This allows for the precise brewing of various flavors of coffee. Programming of the brewer is achieved by entering a certain function. -
Page 13: Programming The Brewer
The programming of the brewer is divided into two levels. There is one function in Level 1. All other functions are accessed in Level 2. The following function screens are in order of appearance. Each screen will have instructions on how to access and the procedures for programming the various functions of the brewer. - Page 14 PROGRAMMING THE BREWER (cont.) PROGRAMMING FUNCTIONS - FLOW CHART PROGRAMMING FUNCTIONS - LEVEL I PROGRAMMING FUNCTIONS - LEVEL 2 SET LANGUAGE? BREW SETTINGS ? L BYPS OZ/M: XX.X DONE ENABLE ADS? DONE ENTER ASSET # ? BREW LOCKOUT? DONE UNITS METRIC DONE ENG REFILL L SPRY OZ/M: XX.X...
-
Page 15: Brew Lockout
PROGRAMMING THE BREWER (cont.) PROGRAMMING FUNCTIONS - LEVEL I BREW LOCKOUT This function allows the operator to prevent or allow brewing if the water temperature is less than the set READY temperature. Procedure for setting Brew Lockout: 1. To access this function screen press and hold the right hidden button. Release when the display reads: 2. -
Page 16: Set Language
PROGRAMMING THE BREWER (cont.) PROGRAMMING FUNCTIONS - LEVEL 2 (cont.) The functions in the second level of programming allow the operator to adjust brew settings and other feature options. To access the level 2 function screens press and hold the right hidden button for approximately 5 seconds. Release when the display reads: SET LANGUAGE This function allows the operator to select the language used for the display. -
Page 17: Units
PROGRAMMING THE BREWER (cont.) PROGRAMMING FUNCTIONS - LEVEL 2 (cont.) UNITS This function allows the operator to select if numeric settings are displayed in English or Metric units. Procedure for setting the Units: 1. Press and hold the right hidden button until the display reads SET LANGUAGE? Press and release the right hidden button until the display reads UNITS. -
Page 18: Set Temp: Xxx
PROGRAMMING THE BREWER (cont.) PROGRAMMING FUNCTIONS - LEVEL 2 (cont.) SET TEMP This function allows the operator to adjust the brew water temperature in the tank. This also sets the hot water faucet dispense temperature. Procedure for setting the Set Temp Range: 185°... -
Page 19: Ready Temp
PROGRAMMING THE BREWER (cont.) PROGRAMMING FUNCTIONS - LEVEL 2 (cont.) READY TEMP This function allows the operator to set the minimum temperature allowable to start a brew cycle. The range can be from 2° to 20° F within the set temperature. The water must be at the READY temperature or higher for the display to indicate READY TO BREW. -
Page 20: Brew Settings
PROGRAMMING THE BREWER (cont.) PROGRAMMING FUNCTIONS - LEVEL 2 (cont.) BREW SETTINGS This function allows the operator to modify the BREW VOLUMES, BYPASS PERCENTAGES and BREW METER for each batch size of both brew stations. Procedure to set or modify brew volumes. Range: 10 to 500 oz. -
Page 21: Brew
PROGRAMMING THE BREWER (cont.) PROGRAMMING FUNCTIONS - LEVEL 2 (cont.) BREW SETTINGS (cont.) Procedure to set or modify % Bypass settings. Range: 0 to 90% for both batch sizes 1. Press and hold the right hidden button until display reads SET LANGUAGE. Press the right hidden but- ton until display reads BREW SETTINGS ?. -
Page 22: Brew Meter
PROGRAMMING THE BREWER (cont.) PROGRAMMING FUNCTIONS - LEVEL 2 (cont.) BREW SETTINGS (cont.) Procedure to set or modify BREW METER. Range: 1 to 14 for both batch sizes NOTE: Using BREW METER will overwrite PULSE BREW settings. This function allows the operator to program the brewer to a non-pulsed brew cycle (setting 1), or to “pulse”... - Page 23 PROGRAMMING THE BREWER (cont.) PROGRAMMING FUNCTIONS - LEVEL 2 (cont.) BREW SETTINGS (cont.) SET PULSE BREW/PREINFUSION This function allows the operator to program the brewer to “pulse” the sprayhead flow on and off during a brew cycle (start and stop the flow of water out of the spray- head).
-
Page 24: Pulse Brew
PROGRAMMING THE BREWER (cont.) PROGRAMMING FUNCTIONS - LEVEL 2 (cont.) BREW SETTINGS (cont.) BREW SETTINGS ? PRESSING NO WILL LEFT SIDE ADVANCE TO NEXT FUNCTION SCREEN MODIFY SHOW NEXT PRESS AND RELEASE RIGHT HIDDEN SWITCH UNTIL DISPLAY READS: SET PULSE BREW SET BOTH BATCH SIZES SET BOTH... -
Page 25: Drip Time
PROGRAMMING THE BREWER (cont.) PROGRAMMING FUNCTIONS - LEVEL 2 (cont.) BREW SETTINGS (cont.) DRIP TIME This function allows the operator to adjust the DRIP TIME (time from end of sprayhead flow to when liquid stops dripping from the funnel). When the brew cycle is complete, the display will show DRIPPING and will countdown the time until the funnel empties. -
Page 26: Please Wait
PROGRAMMING THE BREWER (cont.) PROGRAMMING FUNCTIONS - LEVEL 2 (cont.) BREW SETTINGS (cont.) BREW SETTINGS ? PRESSING NO WILL LEFT SIDE ADVANCE TO NEXT FUNCTION SCREEN MODIFY SHOW NEXT PRESS AND RELEASE RIGHT HIDDEN SWITCH UNTIL DISPLAY READS: DRIP TIME X:XX SET BOTH DONE BATCH SIZES... -
Page 27: Refill
PROGRAMMING THE BREWER (cont.) PROGRAMMING FUNCTIONS - LEVEL 2 (cont.) REFILL Range: 0 to 155 This function allows the operator to adjust the sensitiv- ity of the refill circuit. This is mainly a troubleshooting feature. Water in different geographical locations can have different conductivities. - Page 28 PROGRAMMING THE BREWER (cont.) PROGRAMMING FUNCTIONS - LEVEL 2 (cont.) L/R SPRAY OZ/M This function allows the operator to view or to enter the actual flow rate coming out of the sprayhead for each side of the brewer. This is NOT used to control the actual flow rate, but to tell the internal controller how fast the water is flowing.
- Page 29 PROGRAMMING THE BREWER (cont.) PROGRAMMING FUNCTIONS - LEVEL 2 (cont.) L/R BYPASS OZ/M This function allows the operator to view or to enter the actual flow rate coming out of the bypass nozzle for each side of the brewer. This is NOT used to control the actual flow rate, but to tell the internal controller how fast the water is flowing.
-
Page 30: Calibrate Flow
PROGRAMMING THE BREWER (cont.) PROGRAMMING FUNCTIONS - LEVEL 2 (cont.) CALIBRATE FLOW This function allows the operator to enter the actual flow rate of the sprayhead and the bypass for each side of the brewer by dispensing both separately for one minute. The volumes are then entered into the brewer. - Page 31 PROGRAMMING THE BREWER (cont.) PROGRAMMING FUNCTIONS - LEVEL 2 (cont.) CALIBRATE FLOW (Continued) Procedure to calibrate the bypass flow rate: 1. Place a container, accurately graduated and with a minimum capacity of 60 ounces, beneath the fun- nel. 2. Press and hold the right hidden button until the display reads SET LANGUAGE.
-
Page 32: Brew Counters
PROGRAMMING THE BREWER (cont.) PROGRAMMING FUNCTIONS - LEVEL 2 (cont.) BREW COUNTERS This function allows the operator to track the total num- ber of brew cycles completed, as well as the number of batches brewed using each of the brew buttons. There are four resettable counters, and one life counter that is not resettable. -
Page 33: Enable Ads
PROGRAMMING THE BREWER (cont.) PROGRAMMING FUNCTIONS - LEVEL 2 (cont.) ENABLE ADS This function allows the operator to choose whether or not to display an advertising message. An ad can be saved to the brewer by either writing the ad using the programming commands, or by entering the ad into the brewer using an AD CARD. -
Page 34: Enable Clean
PROGRAMMING THE BREWER (cont.) PROGRAMMING FUNCTIONS - LEVEL 2 (cont.) ENABLE ADS (Continued) ENABLE ADS DONE PRESSING DONE WHEN 2 LINES 16 CHARS NO IS FLASHING WILL DISABLE THIS FUNC- TION AND ADVANCE TO ENABLE CLEAN SCROL THRU ALPHA NEXT->NEXT LETTER WRITE TOP LINE? PRESSING NO WILL ADVANCE TO... - Page 35 PROGRAMMING THE BREWER (cont.) PROGRAMMING FUNCTIONS - LEVEL 2 (cont.) ENABL CLEAN This function allows the operator to enable the sanita- tion function and set the time before a cleaning alert will be displayed. Procedure for enabling clean: Range: 0.0 to 72.0 hrs 1.
-
Page 36: Enable Energy Saver
PROGRAMMING THE BREWER (cont.) PROGRAMMING FUNCTIONS - LEVEL 2 (cont.) ENABLE ENERGYSAVR This function allows the operator to enable the ENERGY SAVINGS mode function and set the idle time. Once the set idle time has expired, the operator can choose to have the heaters either turn off, or reduce the tank holding temp to 140°... - Page 37 PROGRAMMING THE BREWER (cont.) PROGRAMMING FUNCTIONS - LEVEL 2 (cont.) ENABLE FRESH TIMER This function allows the operator to enable the Freshness Alert and set the expiration time. The expiration time is the amount of time the product is allowed to sit in the server/dispenser before a fresh batch is brewed.
-
Page 38: Asset Number
PROGRAMMING THE BREWER (cont.) PROGRAMMING FUNCTIONS - LEVEL 2 (cont.) ASSET NUMBER This function allows the operator to enter the machine's asset number. This can be useful for tracking the usage or service of an individual machine within a group. Procedure to enter the asset number: 1. -
Page 39: Service Number
PROGRAMMING THE BREWER (cont.) PROGRAMMING FUNCTIONS - LEVEL 2 (cont.) SERVICE NUMBER This function allows the operator to enter in the tele- phone number to call if service is needed. The service number will be displayed anytime there is a fault mes- sage displayed (see Troubleshooting on page 46). -
Page 40: Test Switches
PROGRAMMING THE BREWER (cont.) PROGRAMMING FUNCTIONS - LEVEL 2 (cont.) SERVICE TOOLS This function allows the testing of individual components and the ability to check switches for proper function. This function also tests the funnel sensor coil’s frequency (diagnostic tool for troubleshooting purposes only). Procedure to test components and outputs: The following components can be individually tested: Left Brew Valve... - Page 41 PROGRAMMING THE BREWER (cont.) PROGRAMMING FUNCTIONS - LEVEL 2 (cont.) SERVICE TOOLS? PRESSING NO WILL ADVANCE TO FACTORY DEFAULTS TEST OUTPUTS? PRESSING NO WILL ADVANCE TO TEST SWITCHES <- <- BREW VALVE NEXT <- <- BYPASS VALVE NEXT <- <- FUNNEL LOCK NEXT BREW VALVE ->...
- Page 42 PROGRAMMING THE BREWER (cont.) PROGRAMMING FUNCTIONS - LEVEL 2 (cont.) Procedure to test switches: The following switches can be individually tested: <- <- Full Batch Full Batch -> -> <- <- Half Batch Half Batch -> -> <- <- Power Power ->...
- Page 43 PROGRAMMING THE BREWER (cont.) PROGRAMMING FUNCTIONS - LEVEL 2 (cont.) Procedure to test coil frequency: 1. Press and hold the right hidden button until the dis- play reads SET LANGUAGE. Press the right hidden button until the display reads SERVICE TOOLS. 2.
-
Page 44: Factory Defaults
PROGRAMMING THE BREWER (cont.) PROGRAMMING FUNCTIONS - LEVEL 2 (cont.) FACTORY DEFAULTS This function allows the operator to erase ALL of the previously entered recipes and ad messages. Factory-set default values will replace ALL previous settings. Procedure to set factory defaults: 1. - Page 45 PROGRAMMING THE BREWER (cont.) PROGRAMMING FUNCTIONS - LEVEL 2 (cont.) FACTORY DEFAULT VALUES Brew Lockout - Enabled Language - English Units - English BREW VOLUMES Half Batch – 192 OZ Full Batch – 384 OZ % BYPASS Half Batch – 0 % Full Batch –...
-
Page 46: Troubleshooting
A troubleshooting guide is provided to suggest probable causes and remedies for the most likely problems encountered. If the problem remains after exhausting the troubleshooting steps, contact the Bunn-O-Matic Technical Service Department. • Inspection, testing, and repair of electrical equipment should be performed only by qualified service person- nel. - Page 47 TROUBLESHOOTING (cont.) PROBLEM Temperature Too Low Heating Time Too Long Fill Time Too Long Temp Sensor Out Of Range, Check For Bad Connections Temp Sensor Out Of Range, Check Wire For Shorts Equipment will not operate PROBABLE CAUSE 1. Water temperature in the tank does not meet the ready tempera- ture.
- Page 48 TROUBLESHOOTING (cont.) PROBLEM Brew cycle will not start PROBABLE CAUSE 1. No water 2. No power or incorrect voltage to the brewer 3. ON/OFF switch 4. Brew switch 5. Brew valve 6. Control Board Page 48 REMEDY Check plumbing and shut-off valves Check for voltage across the termi- nals at the terminal block.
- Page 49 TROUBLESHOOTING (cont.) PROBLEM Automatic refill will not operate or display shows FILL TIME TOO LONG PROBABLE CAUSE 1. No water 2. Refill probe or Sensitivity set- ting 3. Refill valve Page 49 REMEDY Check plumbing and shut-off valves Remove the strainer and check for obstructions.
- Page 50 TROUBLESHOOTING (cont.) PROBLEM Automatic refill will not operate or display shows FILL TIME TOO LONG (Continued) PROBABLE CAUSE 4. Control Board 5. ON/OFF Switch Page 50 REMEDY Refill valve – Disconnect the brewer from the power source and remove wires from refill valve coil. Check for continuity across the terminals of the solenoid coil.
- Page 51 TROUBLESHOOTING (cont.) PROBLEM Water flows into tank continuously with power removed from brewer. PROBABLE CAUSE 1. Refill valve 2. Refill probe or sensitivity set- ting 3. Control Board Page 51 REMEDY Foreign material lodged in valve, holding it in open state. Check the sensitivity setting.
- Page 52 TROUBLESHOOTING (cont.) PROBLEM Water will not heat or display shows HEATING TIME TOO LONG. PROBABLE CAUSE 1. Limit Thermostat 2. Temperature probe 3. Tank heaters 4. Control Board Page 52 REMEDY Remove power from the brewer. Check for continuity through the limit thermostat.
- Page 53 TROUBLESHOOTING (cont.) PROBLEM No bypass water Spitting or unusual steaming from sprayhead or air vent. PROBABLE CAUSE 1. Bypass valve 1. Lime buildup 2. Temperature probe 3. Control Board Page 53 REMEDY Test the bypass valve. Refer to the test outputs procedures on page Inspect the probe and tank assembly for excessive lime deposits.
- Page 54 TROUBLESHOOTING (cont.) PROBLEM Inconsistent beverage level in server/dispenser PROBABLE CAUSE 1. Improper water pressure 2. Brew valve 3. Bypass valve 4. Lime buildup 5. Brew volume adjustment Page 54 REMEDY Check operating water pressure to the brewer. It must be between 20 and 90 psi (138 and 620 kPa).
- Page 55 2. Plumbing lines 3. Water supply 4. Tank heaters Page 55 REMEDY Repair or replace leaky valve BUNN paper filters should be used for proper extraction Check sprayhead The brew cycle should be started only with an empty server under the funnel.
- Page 56 2. Coffee 3. Sprayhead 4. Funnel Loading 5. Water temperature Page 56 REMEDY BUNN paper filters should be used for proper extraction A sufficient quantity of fresh drip or regular grind should be used for proper extraction. Bunn-O-Matic sprayhead should...
-
Page 57: Wiring Diagram
J2-1 J2-5 J2-10 J2-15 J2-20 J2-22 J16-1 J16-5 120/208 OR 120/240 VOLTS AC 50-60 Hz 3 PHASE - 1 PHASE 39972.0000B 07/07 ©2007 BUNN-O-MATIC CORPORATION TITAN DUAL LIMIT #1 LIMIT #2 LIMIT #3 CONTACTOR LEFT BYPASS RIGHT DISPENSE LEFT DISPENSE...
Need help?
Do you have a question about the Titan Dual and is the answer not in the manual?
Questions and answers