Table of Contents
Advertisement
Quick Links
Advertisement
Chapters
Table of Contents

Related Manuals for Samsung Electronics DVM Series


Summary of Contents for Samsung Electronics DVM Series
- Page 1 S A M S U N G D V M Air Conditioner SAMSUNG ELECTRONICS...
- Page 2 DB98-06890A(1) 2002.09.
- Page 4 S A M S U N G DV M Air Conditioner SAMSUNG ELECTRONICS...
- Page 5 Ι Ι Ι Ι Ι Ι Ι Ι Overview Indoor unit 1. DVM system series 1. Features 6. Refrigerant system diagram (Cooling only & heat pump) 1-1. What is DVM? 1-1. 1-way cassette type 1-2. Features of DVM 1-2. 4-way cassette type 6-1.
- Page 6 Ι Ι Λ Λ Outdoor unit Installation 1. Selection of outdoor units 1. Product 8. Piping and refnet (based on cooling load) joint selection 1-1. Preparation for installation 1-2. Deciding on where to install 8-1. Examples of using only the air conditioner 2.
-
Page 7: Table Of Contents
Ι Ι Overview 1. DVM system series 1-1. What is DVM? 1-2. Features of DVM 2. DVM line-up 2-1. Numbering system of model 2-2. Combination... -
Page 8: Dvm System Series
Ι . Overview 1. DVM system series 1-1. What is DVM? The DVM(Digital Variable Multi) air conditioning system is operated by a variable-capacity compressor and is accommodated by multiple evaporators (indoor units). It is touted as the next-generation modular system in the world of high-efficiency air conditioning. lt has undoubtedly changed the face of cooling associated with high-storied buildings. -
Page 9: Features Of Dvm
1-2. Features of DVM (1) Customized air conditioner 1) Up to 16 indoor units can be connected to one outdoor unit. 2) Indoor units can be combined by various methods, according to each room’s use and shape. 3) There are several indoor units which can be applied; 1-way cassette type, 4-way cassette type, Ceiling, Duct (Low silhouette, Built-in, High pressure), Wall-mounted and Floor standing type. - Page 10 Ι . Overview 1. DVM system series (3) Variable compressor The world’s first PWM(Pulse Width Modulation) compressor controls the cooling & heating capacity automatically, depending on the load. 1) Principle of the digital compressor Composition A solenoid valve is installed for compressor´s loading / unloading between the upper part of the fixed scroll and the suction pipe.
- Page 11 2) PWM (Pulse Width Modulation) valve PWM valve is the valve to take away the fixed scroll by lifting up through the difference of pressure after the digital scroll compress being connected to the outlet and inlet of suction. Therefore, the capacity of compressor is controlled automatically according to the operation status such as loading when the valve is closed or unloading when the valve is opened.
- Page 12 41,389 Comparison +21% +48% The results are based on Samsung Lab., therefore there may be differences according to the installation and the environment. Heat loads : 90,000 kcal/h in Korea Total area : 750m Running : 3 months in every summer and winter Running cost based on $0.072/Kwh...
- Page 13 (9) Space Saving The outdoor units connected with several indoor units do not require much space. 1) Conventional System 2) DVM System Ι...
-
Page 14: Dvm Line-Up
Ι . Overview 2. DVM line-up 2-1. Numbering system of model (1) Indoor unit Model 0 0 0 Semi-finished product Mode Power supply Cooling only (C/O) 208~230V, 60Hz Variable capacity free joint multi (DVM) Heat pump (H/P) Classification of product Capacity (x 1/10 kW, 3 digits) Refrigerant 1-way... - Page 15 (2) Outdoor unit Model 0 0 0 Semi-finished product Power supply Combination of indoor unit Variable capacity free 208~230V, 60Hz 1-way joint multi (DVM) Cassette 208~230V, 60Hz, 3ø 4-way type 460V, 60Hz, 3ø 2-way Exposed Low silhouette Mode Refrigerant / Discharge direction Duct type High pressure Discharge...
- Page 16 Ι . Overview 2. DVM line-up (3) Options Name Model Explanation Example Electronic MEV : Optional electronic expansion valve • MEV-14SAU expansion valve kit : Electronic expansion valve model(2 digits) • MEV-18SAU (Built-in type) : Manufacturer • MEV-24SAU : Version 1Way cassette : Area Electronic...
- Page 17 Name Model Explanation Example Front panel : Grille application(Front panel) • MGKH118IU0 : Type of indoor unit(K : 1Way cassette, G : 2Way cassette, C : 4Way cassette, B : Built-in duct) : H : Cooling only & heat pump, N : No use of wireless remote controller : Size(Mark the longer side, cm, 3 digits) : Color(G : gray, I : Ivory)
- Page 18 Ι . Overview 2. DVM line-up Name Model Explanation Example Interface module MIM : Optional interface module • MIM-B00U : Applicable location (A : indoor unit, B : outdoor unit, C : others) : Version : Area Controller MCM : Optional controller •...
- Page 19 Name Model Explanation Example Filter MF : Optional filter • MF-C1B0 : Classification of product : Specification of filter (0 : air filter 1 : Pure & deodorizing filter 2 : On-board electric dust collector 3 : Scroll electric dust collector) : Color(B : black G : green) : Version Water coil...
-
Page 20: Combination
Ι . Overview 2. DVM line-up 2-2. Combination (1) Outdoor unit 1) Cooling only Design Power supply Model Capacity(HP) Refrigerant 208~230V, 1ø, 60Hz RVMC050CBM0 208~230V, 3ø, 60Hz RVMC070FAM0 208~230V, 3ø, 60Hz RVMC100FAM0 The system enables the connection of indoor units with a total capacity of between 50 to 130% of that of the corresponding outdoor unit but where this capacity ratio exceeds 100% then the actual capacity of each indoor unit will fall a little short of its individual rated capacity when all the units are operated simultaneously. - Page 21 Max. connectible Total capacity of indoor Super Design Remark indoor units units (kW, ISO standard) cooler 7.2~18.8 10.5~27.3 14.0~36.4 The system enables the connection of indoor units with a total capacity of between 50 to 130% of that of the corresponding outdoor unit but where this capacity ratio exceeds 100% then the actual capacity of each indoor unit will fall a little short of its individual rated capacity when all the units are operated simultaneously.
- Page 22 Ι . Overview 2. DVM line-up 2) Heat pump Design Power supply Model Capacity(HP) Refrigerant 208~230V, 1ø, 60Hz RVMH050CBM0 208~230V, 3ø, 60Hz RVMH100FAM0 The system enables the connection of indoor units with a total capacity of between 50 to 130% of that of the corresponding outdoor unit but where this capacity ratio exceeds 100% then the actual capacity of each indoor unit will fall a little short of its individual rated capacity when all the units are operated simultaneously.
- Page 23 Max. connectible Total capacity of indoor Super Design Remark indoor units units (kW, ISO standard) cooler 7.2~18.8 14.0~36.4 The system enables the connection of indoor units with a total capacity of between 50 to 130% of that of the corresponding outdoor unit but where this capacity ratio exceeds 100% then the actual capacity of each indoor unit will fall a little short of its individual rated capacity when all the units are operated simultaneously.
- Page 24 Ι . Overview 2. DVM line-up (2) Indoor unit 2.0kW 3.2kW 4.0kW 5.2kW 6.0kW Design (7000Btu/h) (11000Btu/h) (13500Btu/h) (18000Btu/h) (20000Btu/h) 1-way cassette type AVMKC020CA0 AVMKC032CA0 AVMKC040CA0 AVMKH020CA0 AVMKH032CA0 AVMKH040CA0 4-way cassette type AVMCC052CA0 AVMCH052CA0 Duct type(Low silhouette) AVMDC052CA0 AVMDH052CA0 Duct type (Built-in) AVMBC020CA0 AVMBC032CA0 AVMBC040CA0...
- Page 25 7.2kW 8.2kW 8.3kW 10.5kW 12.8kW Design Remark (24000Btu/h) (28000Btu/h) (28000Btu/h) (36000Btu/h) (44000Btu/h) 1-way cassette type 4-way cassette type AVMCC072CA0 AVMCC105CA0 AVMCH072CA0 AVMCH105CA0 Duct type(Low silhouette) AVMDC072CA0 AVMDH072CA0 Duct type (Built-in) AVMBC072CA0 AVMBH072CA0 Duct type(High pressure) AVMHC105CA0 AVMHC128CA0 AVMHH105CA0 AVMHH128CA0 Wall-mounted type AVMWC072CA0 AVMWH072CA0 The design and capacity of indoor unit are subject to change without notice.
- Page 26 Ι Ι Ι Ι Control system 1. Remote controller 1-1. Wireless remote controller 1-2. Wired remote controller 1-3. Centralized controller 1-4. Function controller 2. Receiver & display unit (Duct type) 2-1. Concealed type 2-2. Standard type 3. Interface module 4. Installation 4-1.
-
Page 27: Remote Controller
ΙΙ . Control System 1. Remote controller 1-1. Wireless remote controller (1) Cooling only Operating mode selection button Operating mode Temperature adjustment buttons Automatic Cool Filter Reset button Fan speed adjustment button Air flow direction adjustment button On timer button Off timer button On/Off &... -
Page 28: Wired Remote Controller
1-2. Wired remote controller (1) Cooling only Operating mode Automatic Cool Temperature On/Off & Timer set/cancel button adjustment buttons Operating indicator Fan speed adjustment button On/Off timer button Air flow direction adjustment button Test operation button Filter Reset button Operating mode selection button (2) Heat pump Operating mode... -
Page 29: Centralized Controller
ΙΙ . Control System 1. Remote controller 1-3. Centralized controller Operating lamp All On button All Off button On/off indicators Individual On/Off button Index 1-4. Function controller Operating mode On/Off button Temperature adjustment buttons Fan speed adjustment button Indoor unit selection buttons Air flow direction adjustment button Test button Filter reset button... -
Page 30: Receiver & Display Unit (Duct Type)
2. Receiver & display unit (For Duct) 2-1. Concealed type (1) Cooling only Filter sign indicator Fan indicator Timer indicator Remote control sensor On/Off button (2) Heat pump Filter sign indicator Fan indicator Timer indicator Remote control sensor On/Off button(Blue) & Removing frost indicator(Red) The shape of receiver &... -
Page 31: Standard Type
ΙΙ . Control System 2. Receiver & display unit (For Duct) 2-2. Standard type (1) Cooling only Filter sign indicator Remote control sensor On/Off indicator Fan indicator On/Off button Timer indicator (2) Heat pump Removing frost indicator Filter sign indicator Remote control sensor On/Off indicator Fan indicator... -
Page 32: Interface Module
3. Interface module Group address display CN01 Indoor unit address display To outdoor unit PCB (DC 12V) To centralized controller / S-Net converter F1 F2 Interface module address setting (Each Interface module has its own address) From F1, F2 terminal in the outdoor unit ΙΙ... -
Page 33: Installation
ΙΙ . Control System 4. Installation 4-1. Wireless remote controller (1) Accessories Wireless remote Battery for M4x12 tapped Remote control Owner’s Installation controller(1) wireless remote screw(2) holder(1) instructions(1) manual(1) controller(2) (2) Installation Choose a position where: The signal from the remote controller will not be blocked (by a curtain for example) The remote controller is not exposed to direct sunlight or heat The wireless remote controller is at least one meter away from... -
Page 34: Wired Remote Controller
4-2. Wired remote controller (1) Accessories Wired Remote Cable-Tie(2) Cable Clamp M4x16 Indoor Unit Owner’s Installation Controller (1) Tapped Screw Power Drawing instructions(1) manual (1) Cable (1) (2) Installation 1) Open the wired remote controller by using two grooves on its top. - Page 35 ΙΙ . Control System 4. Installation (3) Setting up option switches Indoor unit PCB 1) Adjust K1 DIP switch(SW03) on the PCB to the “OFF” K1 K2 K3 K4 position. SW03 2) Turn the arrow of RMC rotary switch(SW01) to the SW01 appropriate position.
- Page 36 (4) Example of installing wired remote controller Individual control Means a wired remote controller controls only 1 indoor unit. In this case, the RMC address of the indoor unit should be the same with the address of wired remote controller. Indoor unit PCB K1 K2 K3 K4 Outdoor unit...
- Page 37 ΙΙ . Control System 4. Installation 4-3. Centralized controller (1) Accessories Centralized Cable-tie (2) Cable Clamp (5) M4x16 Tapped Owner’s Installation Controller (1) Screw (7) instructions(1) manual(1) If you would like to install the centralized controller, you must install the optional interface module in the outdoor unit.
- Page 38 (4) Assigning address Turn the arrow of rotary switch on the interface module to appropriate position. Interface modules controlled with the same centralized controller must have different addresses. (5) Setting up option switches Interface module rotary switch In case of installing centralized controller only Adjust K2 DIP switch(SW03) on the indoor unit PCB to the K1 K2 K3 K4 “OFF”...
- Page 39 ΙΙ . Control System 4. Installation In Case of Installing wired remote controller together 1) Adjust K2 DIP switch(SW03) on the indoor unit PCB to the K1 K2 K3 K4 “OFF” position. It means use of the centralized controller. SW03 The number of button on the centralized controller is decided by the RMC addresses of indoor units.
- Page 40 (6) Example of centralized controller & wired remote controller Installation of 1 centralized controller, 4 outdoor units, and 12 indoor units 6 indoor units connected to the outdoor unit 1 and 2 are controlled with their own wired remote controller and a centralized controller. 3 indoor units connected to the outdoor unit 3 are controlled as a group by a wired remote controller and a centralized controller.
-
Page 41: Centralized Controller
ΙΙ . Control System 4. Installation Level of centralized controller Adjust the DIP switch on the centralized controller PCB, if necessary. Refer to the table below. Switch Meaning The air conditioner is operated by a con- troller adjusted the last among the wired and Level 0 OFF OFF OFF OFF wireless remote controller, and centralized controller. -
Page 42: Function Controller
4-4. Function controller (1) Accessories Function Cable-tie(2) Cable clamp M4x16 Owner’s Installation controller (1) Tapped screw instructions(1) manual (1) (2) Installation 1) Disassemble the function controller by using a groove on its top. 2) Secure the rear cover of the function controller on the wall with two screws. - Page 43 ΙΙ . Control System 4. Installation (3) Wiring diagram Install the interface module, another optional accessory, in the outdoor unit which will be controlled by the centralized controller, then connect the function controller and the centralized controller to the interface module. Each outdoor unit connected to the same centralized controller must have its own interface module.
-
Page 44: Receiver & Display Unit - Concealed Type
4-5. Receiver & display unit - Concealed type (1) Accessories Receiver & STS 2S-2x10 2S-4x12 Tapped Owner’s Installation Wire kit Display Unit (1) Tapped Screw (4) Screw (2) instructions(1) manual(1) (Length:33ft.) (2) Installation 1) Remove the receiver & display unit cover by using the tab on its bottom. -
Page 45: Receiver & Display Unit - Standard Type
ΙΙ . Control System 4. Installation 4-6. Receiver & display unit - Standard type (1) Accessories Receiver & Cable-Tie(2) Cable Clamp M4x16 Owner’s Installation Wire kit display unit (1) Tapped Screw instructions(1) manual (1) (Length:33ft.) (2) Installation 1) Remove the receiver & display unit cover by using the tab on its bottom. -
Page 46: Interface Module
4-7. Interface module (1) Accessories Interface module Interface module Interface module Installation power cable (1) communication manual (1) cable (1) CN01 F1 F2 (2) Installation Attach the interface module to the left side of the electrical component box in outdoor unit, then connect the power and communication cable between the interface module and the outdoor;... - Page 47 ΙΙ . Control System 4. Installation (3) Wiring diagram Each outdoor unit connected to the same centralized controller has its own interface module. Distance between the centralized controller and the last interface module should be 1000 meters or less. Outdoor unit 1 Indoor unit 1 Indoor unit 2 Indoor unit 3...
-
Page 48: Assigning Address
5. Assigning address 5-1. Indoor unit 1) Before installing the indoor unit, assign an address to the indoor unit according to the air conditioning system plan. 2) The address of the indoor unit is assigned by adjusting MAIN(SW02) and RMC(SW01) rotary switches. -
Page 49: Outdoor Unit
ΙΙ . Control System 5. Assigning address 5-2. Outdoor unit Rotary switch Outdoor unit PCB You should display that how many indoor units are connected to the outdoor unit. Refer to the table below, then turn the arrow to appropriate position. Number of indoor Number of indoor Switch No. -
Page 50: Indoor Unit Pcb Option Code
6. Indoor unit PCB option code 6-1. PCB option code input method (example : 021E31142285) Be sure to input the option code suitable for the indoor unit by use of wireless remote controller after replacing the PCB of indoor unit. Follow to do the following 15 steps sequentially. - Page 51 ΙΙ . Control System 6. Indoor unit PCB option code Operation method Applicable button Indicating state Step 4 Method) Input the third digit of option code by pressing the temperature adjustment button (down). example) 021E31142285 Result) If 1 is displayed, go to the step 5. Step 5 Method) Input the fourth digit of option...
- Page 52 Operation method Applicable button Indicating state Step 7 Method) Input the sixth digit by pressing the Off timer button. example) 021E31142285 Result) If 1 displays, go to step 8. Step 8 Method) After completion up to step 7, pressing mode button. 1 ~ 7 steps are saved internally.
- Page 53 ΙΙ . Control System 6. Indoor unit PCB option code Operation method Applicable button Indicating state Step 10 Method) Input the ninth digit by pressing the temperature adjustment button (down). example) 021E31142285 Result) If 2 displays, go to step 11. Step 11 Method) Input the tenth digit by pressing...
- Page 54 Operation method Applicable button Indicating state Step 13 Method) Input the 12th digit by pressing the Off timer button. example) 021E31142285 Result) If 5 displays, go to step 14. Step 14 Error If the On/Off, Timer and Fan Method) indicator is flickering, the wrong Turn the remote controller toward option code is input.
-
Page 55: Option Code
ΙΙ . Control System 6. Indoor unit PCB option code 6-2. Option code Type Model SEG1 SEG2 SEG3 SEG4 SEG5 SEG6 SEG7 SEG8 SEG9 SEG10 SEG11 SEG12 Remark AVMKC020CA0 AVMKC032CA0 1-way AVMKC040CA0 Cassette AVMKH020CA0 type AVMKH032CA0 AVMKH040CA0 ABM1800B1 ABM2400B1 AVMCC052CA0 4-way AVMCC072CA0 Cassette... - Page 56 Type Model SEG1 SEG2 SEG3 SEG4 SEG5 SEG6 SEG7 SEG8 SEG9 SEG10 SEG11 SEG12 Remark AVMBC020CA0 AVMBC032CA0 AVMBC040CA0 AVMBC052CA0 Duct AVMBC072CA0 type AVMBH020CA0 (Built-in) AVMBH032CA0 AVMBH040CA0 AVMBH052CA0 AVMBH072CA0 AVMHC105CA0 Duct AVMHC128CA0 type (High AVMHH105CA0 pressure) AVMHH128CA0 AVMWC020CA0 AVMWC032CA0 AVMWC040CA0 AVMWC052CA0 Wall- AVMWC072CA0 mounted...
- Page 57 ΙΙ . Control System 7. S-Net Interface module PCB Rear of computer (Not supplied) Switch of converter slide Oudoor unit PCB Power Power Connector COM1 port 1) Download S-NET program to your PC, then execute Setup.exe to install the program. 2) If the installation is completed successfully, connect RS-485 converter to COM1 or COM2 port on your computer.
- Page 58 8. Integrating power distribution system ΙΙ...
- Page 59 ΙΙ . Control System 9. Building management system ΙΙ...
- Page 60 Ι Ι Ι Ι Ι Ι Indoor unit 1. Features 6. Refrigerant system diagram (Cooling only & heat pump) 1-1. 1-way cassette type 1-2. 4-way cassette type 6-1. Refrigerant system diagram 1-3. Duct type 6-2. Main parts status 1-4. Wall-mounted type 2.
-
Page 61: Indoor Unit
ΙΙΙ . Indoor unit 1. Features 1-1. 1-Way cassette type (1) Efficient cooling & stylish design This type sends cool air from the ceiling to one direction; it has an auto swing vane. The stylish design blends with any interior design. (2) Space saving Installation in the ceiling translates to more available space in the room. - Page 62 The long-life filter requires no maintenance for up to 2,000 hours. 2) Bio heat exchanger & air filter Samsung’s own heat exchanger and air filter prevent any penetration of fungi or bacteria into the system. Insulating material (Foam PU) 3) Double-insulated cabinet...
-
Page 63: 4-Way Cassette Type
ΙΙΙ . Indoor unit 1. Features 1-2. 4-Way cassette type (1) Powerful functions The 4-way cassette type air conditioner has all the features of the 1-way cassette type; compact design, long-life air filter, bio heat exchanger, lift-up drain pump, etc. (2) Higher &... - Page 64 (3) Features of 4-way cassette type 1) Fan speed adjustment Item Ceiling height 9~11.5ft. Fan speed can be adjusted 11.5ft. according to the ceiling height. 9ft. Max. installation ceiling height is 11.5ft. 2) Versatile airflow The direction of airflow can be selected to meet installation or room specifications.
-
Page 65: Duct Type
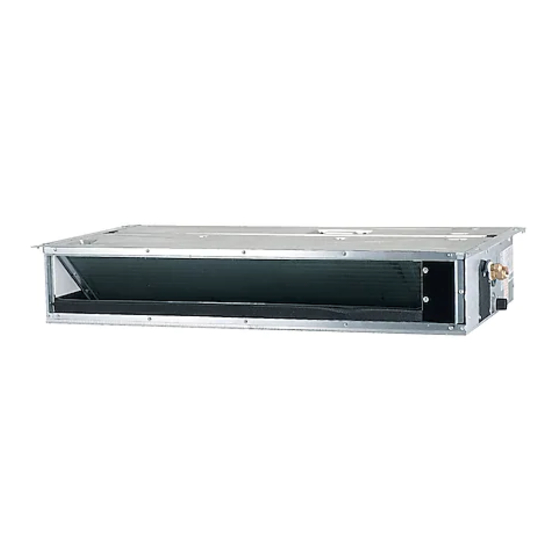
ΙΙΙ . Indoor unit 1. Features 1-3. Duct type (1) Economic installation Several diffusers branch off from an indoor unit, adjusting the room temperature, which makes many rooms to be air conditioned with only one indoor unit. Looks of installed Duct (Built-in type) (2) High external static pressure Adjustable external static pressure allows ducts from the unit to be used more extensively. - Page 66 (3) Features of Duct type 1) Application methods L-shaped area Y-shaped area Areas far apart 2) Way of air intake & Inserting air filter Air intake can be positioned either at the back or below the unit. Similarly, the air filter can be inserted either from the back or from the bottom of the unit.
-
Page 67: Wall-Mounted Type
1-4. Wall-mounted type (1) BIO-components Samsung air conditioners ensure cleaner cooling than any other air conditioner. The components of our air conditioners (including the filters) have been treated with our unique antibacterial formula, which prevent the proliferation of fungi and bacteria within the unit, helping to keep the unit clean, and to block odors from developing. - Page 68 Our new air conditioners are extremely compact Conventional and much lighter than previous models, making them extremely easy to handle and install. Additionally, with its stylish design, a Samsung air conditioner will be an attractive addition to any home or office. Volume 28% Down 4) Easily detachable and washable front grille It is easy to clean as the grille can be pulled apart and easy to replace as it just slides in.
-
Page 69: Specification
ΙΙΙ . Indoor unit 2. Specification 2-1. 1-way cassette type AVMKC020CA0 AVMKC032CA0 AVMKC040CA0 AVMKH020CA0 AVMKH032CA0 AVMKH040CA0 Model Power supply ø, V, Hz 1, 208~230, 60 Remark Cooling only Heat pump Performance Capacity Cooling Btu/h 7000 11000 13500 7000 11000 13500 Heating Btu/h 7500... -
Page 70: 4-Way Cassette Type
2-2. 4-way cassette type AVMCC052CA0 AVMCC072CA0 AVMCC105CA0 AVMCH052CA0 AVMCH072CA0 AVMCH105CA0 Model Power supply ø, V, Hz 1, 208~230, 60 Remark Cooling only Heat pump Performance Capacity Cooling Btu/h 18000 24000 36000 18000 24000 36000 10.5 10.5 Heating Btu/h 19000 26000 39000 11.4 Sound Level... -
Page 71: Duct Type (Low Silhouette)
ΙΙΙ . Indoor unit 2. Specification 2-3. Duct type (Low silhouette) AVMDC052CA0 AVMDC072CA0 AVMDH052CA0 AVMDH072CA0 Model Power supply ø, V, Hz 1, 208~230, 60 Remark Cooling only Heat pump Performance Capacity Cooling Btu/h 18000 24000 18000 24000 Heating Btu/h 19000 26000 Sound Level Cooling (High/Low) -
Page 72: Duct Type (Built-In)
2-4. Duct type (Built-in) AVMBC020CA0 AVMBC032CA0 AVMBC040CA0 AVMBC052CA0 AVMBC072CA0 Model Power supply ø, V, Hz 1, 208 ~ 230, 60 Remark Cooling only Performance Capacity Cooling Btu/h 7000 11000 13500 18000 24000 Heating Btu/h Sound Level Cooling (High/Low) 37/34 41/38 42/39 43/40 45/42... - Page 73 ΙΙΙ . Indoor unit 2. Specification AVMBH020CA0 AVMBH032CA0 AVMBH040CA0 AVMBH052CA0 AVMBH072CA0 Model Power supply ø, V, Hz 1, 208 ~ 230, 60 Remark Heat pump Performance Capacity Cooling Btu/h 7000 11000 13500 18000 24000 Heating Btu/h 7500 12000 14500 19000 26000 Sound Level Cooling (High/Low)
-
Page 74: Duct Type (High Pressure)
2-5. Duct type (High pressure) AVMHC105CA0 AVMHC128CA0 AVMHH105CA0 AVMHH128CA0 Model Power supply ø, V, Hz 1, 208 ~ 230, 60 Remark Cooling only Heat pump Performance Capacity Cooling Btu/h 36000 44000 36000 44000 10.5 12.8 10.5 12.8 Heating Btu/h 39000 47000 11.4 13.8... -
Page 75: Wall-Mounted Type
ΙΙΙ . Indoor unit 2. Specification 2-6. Wall-mounted type AVMWC020CA0 AVMWC032CA0 AVMWC040CA0 AVMWC052CA0 AVMWC072CA0 Model Power supply ø, V, Hz 1, 208 ~ 230, 60 Remark Cooling only Performance Capacity Cooling Btu/h 7000 11000 13500 18000 24000 Heating Btu/h Sound Level Cooling (High/Low) 29/28 34/30... - Page 76 AVMWH020CA0 AVMWH032CA0 AVMWH040CA0 AVMWH052CA0 AVMWH072CA0 Model Power supply ø, V, Hz 1, 208 ~ 230, 60 Remark Heat pump Performance Capacity Cooling Btu/h 7000 11000 13500 18000 24000 Heating Btu/h 7500 12000 14500 19000 26000 Sound Level Cooling (High/Low) 29/28 34/30 38/35 41/37...
-
Page 77: Functional Parts And Safety Devices
ΙΙΙ . Indoor unit 3. Functional parts and safety devices 3-1. 1-way cassette type AVMKC020CA0 AVMKC032CA0 AVMKC040CA0 Item Code Name AVMKH020CA0 AVMKH032CA0 AVMKH040CA0 PFS040WTVE PFS040WTVE PFS040WTVE model Fan motor output Safety Motor 334°F 334°F 334°F devices Safety thermostat Thermistor (heat exchanger inlet) 103AT (77°F=10kΩ) Temperature Thermistor (heat exchanger outlet) -
Page 78: Duct Type (Low Silhouette)
3-3. Duct type (Low silhouette) AVMDC052CA0 Item Code Name ADM1800B1 ADM2400B1 AVMDH052CA0 OSM956SAC OSM1304SAC OSM956SAC model Fan motor Safety output Motor devices 275°F 275°F 275°F Safety thermostat 194°F 194°F 194°F Thermistor (heat exchanger inlet) 103AT (77°F=10kΩ) Temperature Thermistor (heat exchanger outlet) 103AT (77°F=10kΩ) sensor ITAS... -
Page 79: Duct Type (Built-In)
ΙΙΙ . Indoor unit 3. Functional parts and safety devices 3-4. Duct type (Built-in) AVMBC020CA0 AVMBC032CA0 Item Code Name AVMBH020CA0 AVMBH032CA0 OSM404SAC OSM404SAC model Fan motor Safety output Motor devices 275°F 275°F Safety thermostat 194°F 194°F Thermistor (heat exchanger inlet) 103AT (77°F=10kΩ) Temperature Thermistor (heat exchanger outlet) -
Page 80: Wall-Mounted Type
3-6. Wall-mounted type AVMWC020CA0 AVMWC032CA0 AVMWC040CA0 Item Code Name AVMWH020CA0 AVMWH032CA0 AVMWH040CA0 YFNPG22-4 YFNPG22-4 YFNPG22-4 model Fan motor Safety output Motor devices 325°F 325°F 325°F Safety thermostat Thermistor (heat exchanger inlet) 103AT (77°F=10kΩ) Temperature Thermistor (heat exchanger outlet) 103AT (77°F=10kΩ) sensor Thermistor (indoor temperature) ITAS... -
Page 81: Capacity Table
ΙΙΙ . Indoor unit 4. Capacity table 4-1. Cooling TC : Total capacity Indoor temperature (ºF, WB) Outdoor Unit Size temperature (ºF, WB) Btu/h Btu/h Btu/h Btu/h Btu/h Btu/h Btu/h 49954 58952 70122 73845 78460 87526 96757 49954 58952 70122 73845 78460 87526... - Page 82 TC : Total capacity Indoor temperature (ºF, WB) Outdoor Unit Size temperature (ºF, WB) Btu/h Btu/h Btu/h Btu/h Btu/h Btu/h Btu/h 129880 153275 182316 191997 203997 227568 251567 129880 153275 182316 191997 203997 227568 251567 129880 153275 182316 191997 203997 227568 251567 129880...
- Page 83 ΙΙΙ . Indoor unit 4. Capacity table TC : Total capacity Indoor temperature (ºF, WB) Outdoor Unit Size temperature (ºF, WB) Btu/h Btu/h Btu/h Btu/h Btu/h Btu/h Btu/h 26226 30950 36814 38769 41192 45951 50797 26226 30950 36814 38769 41192 45951 50797 26226...
-
Page 84: Heating
4-2. Heating TC : Total capacity Indoor temperature (ºF, DB) Outdoor temperature (ºF) Unit Size Btu/h Btu/h Btu/h Btu/h Btu/h 4956 4881 4781 4730 4655 5556 5481 5426 5331 5256 6232 6082 5925 5857 5782 6758 6608 6394 6232 6082 7283 6983 6746... - Page 85 ΙΙΙ . Indoor unit 4. Capacity table TC : Total capacity Indoor temperature (ºF, DB) Outdoor temperature (ºF) Unit Size Btu/h Btu/h Btu/h Btu/h Btu/h 14417 14198 13908 13761 13543 16164 15946 15785 15509 15290 18130 17693 17236 17038 16819 19659 19222 18601...
- Page 86 TC : Total capacity Indoor temperature (ºF, DB) Outdoor temperature (ºF) Unit Size Btu/h Btu/h Btu/h Btu/h Btu/h 31086 30615 29989 29673 29202 34854 34383 34037 33441 32970 39093 38151 37164 36738 36267 42389 41447 40108 39093 38151 45686 43802 42316 41447 40505...
-
Page 87: Dimension
ΙΙΙ . Indoor unit 5. Dimension 5-1. 1-way cassette type Unit : mm/inch Name Description Liquid pipe connection ø6.35(1/4”) Nipple Gas pipe connection ø12.70(1/2”) Flare Drain pipe connection OD29(1 1/8”) ID25(1”) Power supply connection Air discharge grille Air suction grille Check the position of remote control sensor and indicators before installing the unit. -
Page 88: 4-Way Cassette Type
5-2. 4-way cassette type (1) 5.2kW ~ 7.2kW Unit : mm/inch 860~890/33 ~35 (Ceiling opening) 950/37 699/27 (Suspension position) 417/16 A view 405/16 55/2 55/2 840/33 290/11 8-M4 Hole 25/1 2x130/5 =260/10 25/1 55/2 55/2 840/33 (prepared hole) 25/1 293/11 256/10 Branch duct 271/10... - Page 89 ΙΙΙ . Indoor unit 5. Dimension (2) 10.5kW Unit : mm/inch 860~890/33 ~35 (Ceiling opening) 950/37 699/27 (Suspension position) 417/16 405/16 A view 10-M4 Hole 55/2 55/2 840/33 (prepared hole) 55/2 55/2 840/33 290/11 2x130/5 =260/10 25/1 25/1 293/11 256/10 Suspension bolt 271/10 Branch duct...
-
Page 90: Duct Type (Low Silhouette)
5-3. Duct type (Low silhouette) Unit : mm/inch Name Description Liquid pipe connection ø9.52(3/8”) Flare Gas pipe connection ø15.88(5/8”) Flare If you want to install optional parts, refer to an appropriate installation manual. ΙΙΙ... -
Page 91: Duct Type (Built-In)
ΙΙΙ . Indoor unit 5. Dimension 5-4. Duct type (Built-in) (1) 2.0kW ~ 4.0kW Unit : mm/inch Name Description Liquid pipe connection ø6.35(1/4”) Flare Gas pipe connection ø12.70(1/2”) Flare Drain pipe connection OD29(1 1/8”) ID25(1”)(without drain pump) Interunit wiring port Power wiring port Drain pipe connection OD29(1 1/8”) ID25(1”)(without drain pump) - Page 92 (2) 5.2kW ~ 7.2kW Unit : mm/inch Name Description Liquid pipe connection ø9.52(3/8”) Flare Gas pipe connection ø15.88(5/8”) Flare Drain pipe connection OD29(1 1/8”) ID25(1”)(without drain pump) Interunit wiring port Power wiring port Drain pipe connection OD29(1 1/8”) ID25(1”)(without drain pump) Air filter Hook For M8~M10...
- Page 93 ΙΙΙ . Indoor unit 5. Dimension 5-5. Duct type (High pressure) Unit : mm/inch Name Description Liquid pipe connection ø9.52(3/8”) Flare Gas pipe connection ø19.05(3/4”) Flare Drain pipe connection OD27.2/1 (1/16”) ID21.6 (7/8”) [without drain pump] Drain pipe connection OD29/1 (1/8”) ID21 (13/16”) [without drain pump] Power supply connection Air discharge flange...
- Page 94 5-6. Wall-mounted type (1) 2.0kW ~ 4.0kW Unit : mm/inch If you want to install optional parts, refer to an appropriate installation manual. ΙΙΙ...
- Page 95 ΙΙΙ . Indoor unit 5. Dimension (2) 5.2kW ~ 7.2kW Unit : mm/inch If you want to install optional parts, refer to an appropriate installation manual. ΙΙΙ...
-
Page 96: Wireless Remote Controller / Receiver & Display Unit
5-7. Wireless remote controller / Receiver & display unit (1) Wireless remote controller Unit : mm/inch 25 1 ΙΙΙ... - Page 97 ΙΙΙ . Indoor unit 5. Dimension (2) Display unit 1) 1-Way cassette type Cooling only Remote control sensor Timer indicator Fan indicator On/off indicator Filter clean indicator Heat pump Remote control sensor Timer indicator Fan indicator On/off(Green) & Defrost Filter clean indicator cycle(Red) indicator Both cooling only models and heat pump models use the same panel.
- Page 98 2) 4-Way cassette type Cooling only Timer indicator On/off button Remote control sensor Fan indicator On/off indicator Defrost cycle indicator Filter clean indicator (Not operated) Heat pump Timer indicator On/off button Remote control sensor Fan indicator On/off indicator Defrost cycle indicator Filter clean indicator Both cooling only models and heat pump models use the same panel.
- Page 99 ΙΙΙ . Indoor unit 5. Dimension 3) Wall-mounted type 2.0kW ~ 4.0kW - Cooling only Timer indicator Remote control sensor On/off indicator Filter clean indicator On/off button Fan indicator - Heat pump Timer indicator Remote control sensor On/off(Green) & Defrost Filter clean indicator cycle(Red) indicator On/off button...
- Page 100 5.2kW ~ 7.2kW - Cooling only On/Off indicator Filter clean indicator Fan indicator Timer indicator - Heat pump Defrost cycle indicator On/Off indicator Filter clean indicator Fan indicator Timer indicator ΙΙΙ...
- Page 101 ΙΙΙ . Indoor unit 5. Dimension (3) Receiver 1) Concealed type Unit : mm/inch 80/3 60/2 8 2) Standard type Unit : mm/inch ΙΙΙ...
- Page 102 5-8. Wired remote controller Unit : mm/inch 110/4 ΙΙΙ...
- Page 103 ΙΙΙ . Indoor unit 5. Dimension 5-9. Centralized controller Unit : mm/inch 55.9/2 16 110/4 5-10. Function controller Unit : mm/inch 110/4 ΙΙΙ...
- Page 104 5-11. Electronic expansion valve kit (Distributor kit type) Unit : mm/inch 105 / 4 120 / 4 190 / 7 549 / 21 333 / 13 500 / 19 323 / 12 458 / 18 313 / 12 403 / 15 97/3 202 / 7 500/19...
- Page 105 ΙΙΙ . Indoor unit 6. Refrigerant system diagram (Cooling only & heat pump) 6-1. Refrigerant system diagram electronic expansion valve kit temperature sensor motor strainer strainer heat exchanger temperature sensor temperature sensor 6-2. Main parts status (1) Temperature sensor (EIS, Evaporator Inlet Sensor) Used to measure the refrigerant temperature at the inlet of heat exchanger which is used to control the electronic expansion valve.
- Page 106 7. Electric circuit diagram 7-1. 1-way cassette type (1) Cooling only (AVMKC ) ΙΙΙ...
- Page 107 ΙΙΙ . Indoor unit 7. Electric circuit diagram (2) Heat pump (AVMKH ) ΙΙΙ...
- Page 108 7-2. 4-way cassette type (1) Cooling only (AVMCC ) ΙΙΙ...
- Page 109 ΙΙΙ . Indoor unit 7. Electric circuit diagram (2) Heat pump (AVMCH ) ΙΙΙ...
- Page 110 7-3. Duct type (1) Cooling only (AVMDC / AVMBC / AVMHC ) ΙΙΙ...
- Page 111 ΙΙΙ . Indoor unit 7. Electric circuit diagram (2) Heat pump (AVMDH / AVMBH / AVMHH ) ΙΙΙ...
- Page 112 7-4. Wall-mounted type (1) Cooling only (AVMWC ) ΙΙΙ...
- Page 113 ΙΙΙ . Indoor unit 7. Electric circuit diagram (2) Heat pump (AVMWH ) ΙΙΙ...
- Page 114 8. Noise level 8-1. Overall 1-way cassette type 4-way cassette type Duct type(Low silhouette) Duct Duct Microphone Microphone Microphone 208 - 230V~ / 60Hz 208 - 230V~ / 60Hz 208 - 230V~ / 60Hz Model Model Model High High High 32.0 29.0 32.0...
- Page 115 ΙΙΙ . Indoor unit 8. Noise level 8-2. Octave band level (1) 1-way cassette type 70.0 NC-65 60.0 NC-60 50.0 NC-55 NC-50 40.0 NC-45 NC-40 30.0 NC-35 NC-30 20.0 NC-25 NC-20 High 10.0 NC-15 1000 2000 4000 8000 Octave band center frequency(Hz) 70.0 NC-65 60.0...
- Page 116 70.0 NC-65 60.0 NC-60 50.0 NC-55 NC-50 40.0 NC-45 NC-40 30.0 NC-35 NC-30 20.0 NC-25 NC-20 High 10.0 NC-15 1000 2000 4000 8000 Octave band center frequency(Hz) ΙΙΙ...
- Page 117 ΙΙΙ . Indoor unit 8. Noise level (2) 4-way cassette type 70.0 NC-65 60.0 NC-60 50.0 NC-55 NC-50 40.0 NC-45 NC-40 30.0 NC-35 NC-30 20.0 NC-25 NC-20 High 10.0 NC-15 1000 2000 4000 8000 Octave band center frequency(Hz) 70.0 NC-65 60.0 NC-60 50.0...
- Page 118 70.0 NC-65 60.0 NC-60 50.0 NC-55 NC-50 40.0 NC-45 NC-40 30.0 NC-35 NC-30 20.0 NC-25 NC-20 High 10.0 NC-15 1000 2000 4000 8000 Octave band center frequency(Hz) ΙΙΙ...
- Page 119 ΙΙΙ . Indoor unit 8. Noise level (3) Duct type (Low silhouette) 70.0 NC-65 60.0 NC-60 50.0 NC-55 NC-50 40.0 NC-45 NC-40 30.0 NC-35 NC-30 20.0 NC-25 NC-20 High 10.0 NC-15 1000 2000 4000 8000 Octave band center frequency(Hz) 70.0 NC-65 60.0 NC-60...
- Page 120 (4) Duct type (Built-in) 70.0 NC-65 60.0 NC-60 50.0 NC-55 NC-50 40.0 NC-45 NC-40 30.0 NC-35 NC-30 20.0 NC-25 NC-20 High 10.0 NC-15 1000 2000 4000 8000 Octave band center frequency(Hz) 70.0 NC-65 60.0 NC-60 50.0 NC-55 NC-50 40.0 NC-45 NC-40 30.0 NC-35...
- Page 121 ΙΙΙ . Indoor unit 8. Noise level 70.0 NC-65 60.0 NC-60 50.0 NC-55 NC-50 40.0 NC-45 NC-40 30.0 NC-35 NC-30 20.0 NC-25 NC-20 High 10.0 NC-15 1000 2000 4000 8000 Octave band center frequency(Hz) 70.0 NC-65 60.0 NC-60 50.0 NC-55 NC-50 40.0 NC-45...
- Page 122 70.0 NC-65 60.0 NC-60 50.0 NC-55 NC-50 40.0 NC-45 NC-40 30.0 NC-35 NC-30 20.0 NC-25 NC-20 High 10.0 NC-15 1000 2000 4000 8000 Octave band center frequency(Hz) ΙΙΙ...
- Page 123 ΙΙΙ . Indoor unit 8. Noise level (5) Duct type (High pressure) 70.0 NC-65 60.0 NC-60 50.0 NC-55 NC-50 40.0 NC-45 NC-40 30.0 NC-35 NC-30 20.0 NC-25 NC-20 High 10.0 NC-15 1000 2000 4000 8000 Octave band center frequency(Hz) 70.0 NC-65 60.0 NC-60...
- Page 124 (6) Wall-mounted type 70.0 NC-65 60.0 NC-60 50.0 NC-55 NC-50 40.0 NC-45 NC-40 30.0 NC-35 NC-30 20.0 NC-25 NC-20 High 10.0 NC-15 1000 2000 4000 8000 Octave band center frequency(Hz) 70.0 NC-65 60.0 NC-60 50.0 NC-55 NC-50 40.0 NC-45 NC-40 30.0 NC-35 NC-30...
- Page 125 ΙΙΙ . Indoor unit 8. Noise level 70.0 NC-65 60.0 NC-60 50.0 NC-55 NC-50 40.0 NC-45 NC-40 30.0 NC-35 NC-30 20.0 NC-25 NC-20 High 10.0 NC-15 1000 2000 4000 8000 Octave band center frequency(Hz) 70.0 NC-65 60.0 NC-60 50.0 NC-55 NC-50 40.0 NC-45...
- Page 126 70.0 NC-65 60.0 NC-60 50.0 NC-55 NC-50 40.0 NC-45 NC-40 30.0 NC-35 NC-30 20.0 NC-25 NC-20 High 10.0 NC-15 1000 2000 4000 8000 Octave band center frequency(Hz) ΙΙΙ...
- Page 127 ΙΙΙ . Indoor unit 9. Velocity of air flow & temperature distribution 9-1. 1-way cassette type (1) AVMKH040 1) Velocity of air flow Ceiling 4.5’ 6.6ft/s 3’ 4.5ft/s 3ft/s 1.5’ Floor 1.5’ 3’ 4.5’ 6’ 7.5’ 9’ 10.5’ 12’ 13.5’ 2) Heating temperature distribution Ceiling 95 F...
- Page 128 9-2. 4-way cassette type (1) AVMCH072 1) Velocity of air flow Ceiling 4.5ft/s 4.5’ 3ft/s 3’ 1.5ft/s 1.5’ Floor 1.5’ 3’ 4.5’ 6’ 7.5’ 9’ 10.5’ 12’ 13.5’ 15’ 2) Heating temperature distribution Ceiling 4.5’ 3’ 1.5’ Floor 1.5’ 3’ 4.5’...
- Page 129 ΙΙΙ . Indoor unit 9. Velocity of air flow & temperature distribution (2) AVMCH105 1) Velocity of air flow Ceiling 6ft/s 4.5’ 4.5ft/s 3’ 3ft/s 1.5ft/s 1.5’ Floor 1.5’ 3’ 4.5’ 6’ 7.5’ 9’ 10.5’ 12’ 13.5’ 15’ 2) Heating temperature distribution Ceiling 4.5’...
- Page 130 9-3. Wall-mounted type (1) AVMWH040 1) Velocity of air flow Ceiling 4.5’ 4.5ft/s 3’ 3ft/s 1.5ft/s 1.5’ Floor 1.5’ 3’ 4.5’ 6’ 7.5’ 2) Heating temperature distribution Ceiling 4.5’ 3’ 1.5’ Floor 1.5’ 3’ 4.5’ 6’ 7.5’ The standard ceiling height is 8ft. and those values are tested at the standard height. ΙΙΙ...
- Page 131 ΙΙΙ . Indoor unit 9. Velocity of air flow & temperature distribution (2) AVMWH072 1) Velocity of air flow Ceiling 4.5’ 6ft/s 4.5ft/s 3’ 3ft/s 1.5ft/s 1.5’ Floor 1.5’ 3’ 4.5’ 6’ 7.5’ 2) Heating temperature distribution Ceiling 4.5’ 3’ Floor 1.5’...
- Page 132 10. Fan specifications 10-1. Duct type (Low silhouette) 0.55 0.30 0.51 Do not operate 0.47 Do not 0.28 0.43 operate TURBO 0.39 TURBO 0.24 0.35 0.30 Normal Normal 0.20 0.28 0.24 Do not operate 0.16 0.20 0.16 Do not operate 0.12 0.12 Air flow (CFM)
- Page 133 ΙΙΙ . Indoor unit 10. Fan specifications 0.47 0.47 0.43 0.43 Do not operate 0.39 0.39 TURBO Do not operate 0.35 0.35 TURBO 0.31 0.31 0.28 0.28 0.24 0.24 0.20 0.20 0.16 0.16 0.12 0.12 0.08 0.08 0.04 0.04 Air flow (CFM) Air flow (CFM) 0.47 0.43...
- Page 134 10-3. Duct type (High pressure) TURBO TURBO 1060 1250 1400 1060 1250 1400 Air flow (CFM) Air flow (CFM) ΙΙΙ...
- Page 135 ΙΙΙ . Indoor unit 11. Panel 11-1. 1-way cassette type (Model : MGKH118IU0) 11-2. 4-way cassette type (Model : MGCH095IU0) ΙΙΙ...
- Page 136 12. Electronic expansion valve kit 12-1. Built-in type Model Capacity Remark MEV-14SAU 2.0kW ~ 4.0kW MEV-18SAU 5.2kW ~ 8.3kW MEV-24SAU 10.5kW 12-2. Distributor kit type 14SA 18SA Item Remark MXD-14K300AU MXD-14K218AU MXD-18K214AU MXD-18K300AU MXD-14K200AU MXD-14K118AU MXD-18K200AU An electronic expansion valve can be applied to 1~3 indoor units. If you want to install more indoor units, separate it properly.
- Page 137 ΙΙΙ . Indoor unit 13. Options Mandatory items Panel Electronic expansion valve kit Item Remote Built-in Distributor controller type kit type 1-way cassette type Integrated 4-way cassette type Integrated Integrated Low silhouette Integrated Integrated Duct Built-in type Integrated Integrated High pressure Integrated Wall-mounted type For specifications of panel and electronic expansion valve, refer to pages 76 and 77 at this chapter.
- Page 138 Optional items Drain pump Wireless Receiver & Receiver & Receiver & Wired remote Fresh air display unit Item display unit remote display controller intake (Standard (Concealed controller unit type) type) wire Integrated MR-AC01U MWR-AH01U 1-way cassette type Integrated MR-AH01U MWR-AH01U Integrated MR-AC01U MWR-AH01U...
- Page 139 Outdoor unit 1. Selection of outdoor units (based on cooling load) 2. Specification 3. Functional parts and safety devices 4. Capacity table 4-1. Cooling 4-2. Heating 5. Dimension 5-1. Upward (2-FAN) 5-2. Onward 5-3. Upward (1-FAN) 6. Refrigerant system diagram 6-1.
- Page 140 Ι Λ . Outdoor unit 1. Unit selection (based on cooling load) 1-1. Indoor unit selection Select the indoor unit based upon cooling load and unit capacity. (The indoor unit capacity should larger than the load.) Indoor units can be of different capacities, however total capacity must be checked against the outdoor unit capacity table.
- Page 141 1-3. Real function data (1) Select the exact capacity according to outdoor unit model and combination rate using outdoor unit capacity table. According to given indoor and outdoor temperature, find outdoor unit capacity and power input using the table. Each indoor unit capacity (power input) is calculated as follow. IUC=OUC x INX/TNX IUC: Each indoor unit capacity (power input) OUC: Outdoor unit capacity (power input)
-
Page 142: Specification
Ι Λ . Outdoor unit 2. Specification Model RVMC050CBM0 RVMC070FAM0 RVMC100FAM0 RVMH050CBM0 RVMH100FAM0 ø, V, Hz 1, 208~230, 60 3, 208~230, 60 3, 208~230, 60 1, 208~230, 60 3, 208~230, 60 Power supply Cooling only Heat pump Remark Performance 50000(7000~50000) 76000(7000~76000) 95500(7000~95500) 50000(7000~50000) -
Page 143: Functional Parts And Safety Devices
3. Functional parts and safety devices Item Code Name RVMC050CBM0 RVMC070FAM0 RVMC100FAM0 ZRD49KC-PFV ZRD72KC-TF5 ZRDU13MC-TF5 Motor output 5.5kW + 4.3kW 3.7kW 5.5kW open temp. Compressor 248°F 347°F 347°F/320°F Compressor safety OLP trip current 110A 110A/80A Crank case heater model OSM1076SRC OSM4508SRC Fan motor output... - Page 144 Ι Λ . Outdoor unit 3. Functional parts and safety devices Item Code Name RVMH050CBM0 RVMH100FAM0 ZRD49KC-PFV ZRDU13MC-TF5 Motor output 5.5kW + 4.3kW 3.7kW open temp. 248°F 311°F Compressor Compressor safety OLP trip current Crank case heater model OSME4508SRC Fan motor output 128W + 128W 450W...
-
Page 145: Capacity Table
4. Capacity table 4-1. Cooling TC : Total capacity, PI : Power input Indoor temperature (ºF, WB) : DB is 80ºF Combination, Outdoor %(Capacity temperature index) (ºF, DB) Btu/h Btu/h Btu/h Btu/h Btu/h Btu/h Btu/h 43550 47014 50276 53538 55022 58981 59476 43550... - Page 146 Ι Λ . Outdoor unit 4. Capacity table TC : Total capacity, PI : Power input Indoor temperature (ºF, WB) : DB is 80ºF Combination, Outdoor %(Capacity temperature index) (ºF, DB) Btu/h Btu/h Btu/h Btu/h Btu/h Btu/h Btu/h 30485 2.16 32910 2.25 35193...
- Page 147 TC : Total capacity, PI : Power input Indoor temperature (ºF, WB) : DB is 80ºF Combination, Outdoor %(Capacity temperature index) (ºF, DB) Btu/h Btu/h Btu/h Btu/h Btu/h Btu/h Btu/h 60069 64847 69346 73845 75893 81354 82036 60069 64847 69346 73845 75893 81354...
- Page 148 Ι Λ . Outdoor unit 4. Capacity table TC : Total capacity, PI : Power input Indoor temperature (ºF, WB) : DB is 80ºF Combination, Outdoor %(Capacity temperature index) (ºF, DB) Btu/h Btu/h Btu/h Btu/h Btu/h Btu/h Btu/h 42048 3.31 45393 3.45 48542...
- Page 149 TC : Total capacity, PI : Power input Indoor temperature (ºF, WB) : DB is 80ºF Combination, Outdoor %(Capacity temperature index) (ºF, DB) Btu/h Btu/h Btu/h Btu/h Btu/h Btu/h Btu/h 84096 90786 97084 103383 106250 113895 114851 84096 90786 97084 103383 106250 113895...
- Page 150 Ι Λ . Outdoor unit 4. Capacity table TC : Total capacity, PI : Power input Indoor temperature (ºF, WB) : DB is 80ºF Combination, Outdoor %(Capacity temperature index) (ºF, DB) Btu/h Btu/h Btu/h Btu/h Btu/h Btu/h Btu/h 58867 5.39 63550 5.62 67959...
-
Page 151: Heating
4-2. Heating TC : Total capacity, PI : Power input Indoor temperature (ºF, WB) : DB is 70ºF Combination, Outdoor temperature %(Capacity index) ºF, DB ºF, WB Btu/h Btu/h Btu/h Btu/h Btu/h Btu/h 36041 35495 34770 34403 33857 33857 40410 39864 39463 38772... - Page 152 Ι Λ . Outdoor unit 4. Capacity table TC : Total capacity, PI : Power input Indoor temperature (ºF, WB) : DB is 70ºF Combination, Outdoor temperature %(Capacity index) ºF, DB ºF, WB Btu/h Btu/h Btu/h Btu/h Btu/h Btu/h 70956 69881 68453 67731...
-
Page 153: Dimension
5. Dimension 5-1. Upward (2-FAN) Unit : mm/inch Slot Anchor bolt hole 920/ (Anchor bolt hole pitch) 1160/ 45 16 249/ 9 16 667/ Name Description Discharge gas pipe connection hole ø12.7(1/2”) Brazing connection Suction gas pipe connection hole ø25.4(1”) Brazing connection Power wiring port 2-ø22(3/4”) Power wiring port... -
Page 154: Onward
Ι Λ . Outdoor unit 5. Dimension 5-2. Onward Unit : mm/inch - dia.hole 800/ (pitch of foundation bolt hole) 3 16 932/ 36 16 Communication wire inlet Power wire inlet 118/ 202/ 7 16 41/ 8 750/ 440/ 17 16 275/ 10 16 Name... -
Page 155: Upward (1-Fan)
5-3. Upward (1-FAN) Unit : mm/inch foundation bolt hole 990/39 654/25 (pitch of foundation bolt hole) 944/37 16 114/4 16 60/2 16 70/2 16 70/2 16 136/5 16 122/4 16 827/32 16 Name Description Liquid pipe connection port ø12.7(1/2”) Brazing pipe Gas pipe connection port ø28.6(1 2/16”) Brazing pipe Foundation bolt hole... -
Page 156: Refrigerant System Diagram
Ι Λ . Outdoor unit 6. Refrigerant system diagram 6-1. Cooling only 050/070 motor motor super cooler solenoid valve (HGBV) capillary tube temperature sensor temperature sensor high pressure switch heat exchanger solenoid valve (PWM) digital scroll temperature com- sensor pressor solenoid solenoid receiver... - Page 157 motor solenoid valve (HGBV) capillary tube temperature sensor high pressure switch high pressure sensor heat exchanger solenoid valve temperature Oil separator (PWM) sensor cond out sensor temper- ature sensor digital fixed scroll scroll com- com- pressor pressor receiver solenoid valve (LBV) solenoid valve (VBV) capillary...
- Page 158 Ι Λ . Outdoor unit 6. Refrigerant system diagram (3) Main parts 1) Digital scroll compressor The variable capacity compressor shall control the unit capacity from 10% to 100%, utilizing 19 separate capacity steps. 2) Accumulator This shall prevent the return of liquid refrigerant to the compressor. 3) Liquid receiver This shall reduce the unit noise level, and also shall allow control of the flow of high pressure liquid refrigerant to the individual indoor units.
-
Page 159: Heat Pump
6-2. Heat pump motor motor solenoid valve (HGBV) capillary tube temperature high pressure sensor temperature switch sensor high pressure 4-way sensor valve (4-W/V) heat exchanger electronic expansion valve(EEV) filter cond out sensor solenoid valve digital (PWM) check valve scroll (C/V) com- temperature sensor... - Page 160 Ι Λ . Outdoor unit 6. Refrigerant system diagram motor solenoid valve (HGBV) capillary tube temperature high pressure sensor high pressure switch sensor 4-way valve (4-W/V) heat exchanger electronic expansion valve(EEV) oil separator filter temperature sensor cond out sensor solenoid temper- ature valve...
- Page 161 (3) Main parts 1) Digital scroll compressor The variable capacity compressor shall control the unit capacity from 10% to 100%, utilizing 19 separate capacity steps. 2) Accumulator This shall prevent the return of liquid refrigerant to the compressor. 3) Liquid receiver This shall reduce the unit noise level, and also shall allow control of the flow of high pressure liquid refrigerant to the individual indoor units.
- Page 162 Ι Λ . Outdoor unit 6. Refrigerant system diagram 13) 4 Way valve (4-W/V) This shall control the direction of the refrigerant flow, allowing operation in both cooling and heat pump mode. 14) Electronic expansion valve (EEV) This shall control the flow of refrigerant in the heat pump mode. The valve shall sense the suction line temperature and pressure and adjust accordingly for optimum performance.
-
Page 163: Electric Circuit Diagram
7. Electric circuit diagram 7-1. Cooling only NOT USED USED Ι Λ... - Page 164 Ι Λ . Outdoor unit 7. Electric circuit diagram Ι Λ...
- Page 165 Ι Λ...
-
Page 166: Heat Pump
Ι Λ . Outdoor unit 7. Electric circuit diagram 7-2. Heat pump Ι Λ... - Page 167 Ι Λ...
-
Page 168: Considerations For Outdoor Unit Selection
Ι Λ . Outdoor unit 8. Considerations for outdoor unit selection 8-1. Capacity change dependant on refrigerant piping length (1) Cooling capacity change 1) 5 ~ 7 HP 95.0% 94.0% 92.5% 91.0% 89.5% 88.0% 86.5% 97.0% 98.5% 100% Height difference (ft.) 100% 91.0% 97.0%... - Page 169 (2) Heating capacity change 1) 5 ~ 7 HP Height difference (ft.) Piping length (ft.) 2) 8 ~ 10 HP 96.0% 95.0% 94.0% 93.0% 92.0% 91.0% 97.0% 98.0% 99.0% 100% Height difference (ft.) 98.0% 94.0% 92.0% 100% 96.0% 91.0% -120 270 300 Piping length (ft.) Refrigerant piping length and performance range correction following the height difference...
-
Page 170: Operating Restrictions
Ι Λ . Outdoor unit 8. Considerations for outdoor unit selection 8-2. Operating restrictions (1) Cooling (2) Heating 129℉ 64℉ Only for the Outdoor Outdoor Middle East temperature (DB) temperature (WB) 109℉ Operating Envelope Operating Envelope 14℉ Cold-oriented type 23℉ 23℉... - Page 171 9. Noise level 80.0 70.0 NC-65 60.0 NC-60 50.0 NC-55 NC-50 40.0 NC-45 NC-40 30.0 NC-35 NC-30 20.0 NC-25 NC-20 Front of unit 10.0 Back of unit NC-15 1000 2000 4000 8000 Octave band center frequency(Hz) 80.0 70.0 NC-65 60.0 NC-60 50.0 NC-55...
- Page 172 Ι Λ . Outdoor unit 9. Noise level 80.0 70.0 NC-65 60.0 NC-60 50.0 NC-55 NC-50 40.0 NC-45 NC-40 30.0 NC-35 NC-30 20.0 NC-25 NC-20 Front of unit 10.0 Back of unit NC-15 1000 2000 4000 8000 Octave band center frequency(Hz) Ι...
- Page 173 10. Options Optional Items Capacity Unit type Discharge Interface Centralized Function Refnet (HP) duct module controller controller joint MDF-45AU MIM-B00U MCM-A200U MCM-A100U (2 FAN) MXJ-0906AU MDF-46AU MXJ-1206AU MIM-B00U MCM-A200U MCM-A100U (2 FAN) MXJ-2212AU MXJ-3112AU 10.0 MIM-B00U MCM-A200U MCM-A100U (1 FAN) Two fan units require two discharge ducts.
- Page 174 Installation 1. Product 7. Wiring 1-1. Preparation for installation 7-1. Overall system configuration 1-2. Deciding on where to install 7-2. Cable sizing for outdoor unit the air conditioner 7-3. Interconnect wire sizing 1-3. Space requirements for 7-4. Wiring diagram the air conditioner 7-5.
-
Page 175: Product
. Installation 1. Product 1-1. Preparation for installation When deciding on the location of the outdoor unit, the following restrictions must be taken into account. (1) General Do NOT install the air conditioner in a location where it will come into contact with the following elements: Combustible gases Saline air Machine oil... -
Page 176: Deciding On Where To Install The Air Conditioner
1-2. Deciding on where to install the air conditioner (1) Indoor unit There must be no obstacles near the air inlet and outlet. Install the indoor unit on a wall or ceiling that will support the weight. Maintain sufficient clearance around the indoor unit. Make sure that the water dripping from the drain hose drains away correctly and safely. -
Page 177: Space Requirements For The Air Conditioner
. Installation 1. Product 1-3. Space requirements for the air conditioner (1) Indoor unit 1) 1-way cassette type 2) 4-way cassette type 3) Duct type (Low silhouette) You must have 1/4” or more space between the ceiling and the bottom of indoor unit. Otherwise, the noise from the vibration of indoor unit may bother the user. - Page 178 4) Duct type (Built-in) You must have 1/4” or more space between the ceiling and the bottom of indoor unit. Otherwise, the noise from the vibration of indoor unit may bother the user. 5) Duct type (High pressure) You must have 1/4” or more space between the ceiling and the bottom of indoor unit.
- Page 179 . Installation 1. Product (2) Outdoor unit 1) Onward Strong wind Roof top 24” or more 20” or more Space for piping 20” or more and wining Space for piping 12” or more and wining 12” or more 12” or more The air inlet faces toward the wall.
- Page 180 3) Upward (8.0HP or more) The outdoor unit is placed higher than the outdoor wall. a. Installation for 1 line Unit : inch 32 or less Front 4 or 8 or 8 or 8 or 8 or more more more more more b.
- Page 181 . Installation 1. Product When the outdoor unit is placed lower than the outdoor wall. a. The case of installing gallery - Keep the intake fan speed under 5ft./s from the gallery. - Make the height of discharge duct (HD) be H-h. Unit : inch Discharge duct 40 or more...
-
Page 182: 1-Way Cassette Type
1-4. Accessories (1) 1-way cassette type Pattern sheet Flexible hose Insulation Installation Rubber (8) drain hose (1) manual (1) (2) 4-way cassette type Pattern sheet Insulation Insulation (2) Insulation Insulation pipe Insulation cover drain (1) cover band (1) drain hose (2) Installation Cable-tie (5) Flexible hose... -
Page 183: Duct Type (Built-In)
. Installation 1. Product (4) Duct type (Built-in) Pattern sheet Insulation Insulation (2) Insulation Insulation pipe Insulation cover drain (1) cover band (1) drain hose (2) Cable-tie (5) Flexible hose Insulation Owner’s Installation drain sub (1) Instructions (1) manual (1) (5) Duct type (High pressure) Pattern sheet Insulation A... - Page 184 1-5. Installation (1) Indoor unit (Example; 4-way cassette type) 1) Place the pattern sheet on the ceiling at the spot where you want to install the indoor unit. Since the diagram is made of paper, it may shrink or stretch slightly due to temperature or humidity.
- Page 185 . Installation 1. Product (2) Outdoor unit The outdoor unit must be installed on a rigid and stable base to avoid any increase in noise level and vibration, particularly if the outdoor unit is to be installed in a location exposed to strong winds. 1) Fix the outdoor unit with anchor bolts.
- Page 186 2. Panel 2-1. 1-way cassette type (1) Accessories M4x12 M5x16 bolt (4) tapped screw Wireless remote Battery (2) STS 2S-2x10 Remote control Owner’s Installation controller (1) tapped screw holder (1) instructions (1) manual (1) (2) Installation 1) Open the front grille by pushing tabs on the grille. 2) Remove safety clips to open the grille completely.
- Page 187 . Installation 2. Panel 4) Install the air vane. 4-1 Affix the RHS of the vane to the indoor unit. 4-2 Affix the other side of the vane. IMPORTANT If the direction is incorrect, the blade will not be insert easily. The right hand side has a small rectangular groove.
- Page 188 2-2. 4-way cassette type (1) Accessories Wireless remote Battery (2) Remote control Owner’s Owner’s controller (1) holder (1) instructions (1) instructions (1) 4x12 Tapped Bolt (4) Air blocking kit (1) screw (2) Must be separately purchased (2) Installation 1) Open the electrical component box cover by removing the screws. Hook and Eye 2) Install the panel using two hooks on the both sides of the indoor unit.
- Page 189 . Installation 2. Panel 2-3. Duct type (Built-in) (1) Accessories Tapped screw Fixing bracket (1 or 2) (2) Installation 1) Separate the front grille from the panel. 1-1 Push the front grille tabs left & right and then open it. 1-2 Take out the safety clip at the both sides of front grille and remove the front grille.
- Page 190 3) Attach the panel to the indoor unit, then push it to the right or left to secure the panel. Narrow side of hole on the panel must be inserted between the screw and the indoor unit. 4) Adjust the location of panel so that there is no gap between the panel and ceiling, then tighten the screw completely.
-
Page 191: Connecting The Indoor Unit Refrigerant Pipe
. Installation 3. Connecting the indoor unit refrigerant pipe There are two refrigerant pipes of differing diameters: Refrigerant oil A smaller one for the liquid refrigerant A larger one for the suction gas refrigerant The inside of copper pipe must be clean & has no dust. 1) Remove the pinch pipe on the pipes and connect the assembly pipes to each pipe, tightening the nuts, first manually and then wrenches applying the following torque. - Page 192 Cutting/Flaring the Pipes 1) Make sure that you have the required tools available (pipe cutter, reamer, flaring tool and pipe holder). 2) If you wish to shorten the pipes, cut it with a pipe cutter, taking care to ensure that the cut edge remains at a 90° angle with the side of the pipe.
-
Page 193: Drain Hose Installation
. Installation 4. Drain hose installation (Example;4-way cassette type) Care must be taken when installing the drain hose for the indoor unit to ensure that any condensate water is correctly drained outside. Drain hose 1) Insert the flexible hose to the drain hose port. port Attach the drain hose to the drain hose port with an adhesive for PVC and tape to prevent water leaks, then... - Page 194 If a common drain line is installed, refer to the figure below. Drain clamp Air ventilation Concentrated drain hose Testing the drainage You should test the drainage after completing the installation. Prepare about 4 pints of water. 1) Remove two screws on the water supply intake cover and pull out the cover.
-
Page 195: Accessories
. Installation 5. Drain pump installation-optional (Example;Low-silhouette duct type) 5-1. Accessories Drain pump & M4x12 Cable-tie (2) Cable clamp Float switch (1) Tapped screw 5-2. Installation (1) Connect the wiring to the electrical component box as shown. Connect the drain pump cable to yellow terminal(CN74) and the float switch to black terminal(CN51). -
Page 196: Electronic Expansion Valve Kit
6. Electronic expansion valve kit 6-1. Built-in type (Example;1-way cassette type) (1) Connect a strainer to the "IN" pipe and fix it. (2) Fix the electronic expansion valve kit with 2 screws(TH4x12) as shown at the figure. (3) Connect the "OUT" pipe to the liquid refrigerant pipe. (4) Insulate the connection piping. -
Page 197: Distributor Kit Type
. Installation 6. Electronic expansion valve kit 6-2. Distributor kit type (1) Preparation for installation Unit : inch 105 / 4 120 / 4 190 / 7 549 / 21 333 / 13 500 / 19 323 / 12 458 / 18 313 / 12 403 / 15 97/3... - Page 198 (2) Electronic expansion valve kit installation 1) Connection of refrigerant piping & Installation Decide an installation place that can support the electronic expansion valve kit. Connect the “IN” refrigerant pipe to the outdoor unit. Connect the “OUT” refrigerant pipe to each indoor unit (A, B and C).
- Page 199 . Installation 6. Electronic expansion valve kit 2) Wiring & Assigning address Room A Room B Another distributor kit Outdoor unit Room C Connect the AC power cable and communication cable from the outdoor unit to terminal, then connect the cable to another electronic expansion valve kit. Connect the AC power cable and communication cable to each indoor unit (A, B and C).
- Page 200 3) Function of Display The numbers which is displayed on left are the status of indoor unit checking status through communication with same outdoor unit. (If it indicates 1, 3 and 7, that means the ADDRESS of indoor unit is set to 1, 3 and 7.) The numbers which is displayed on right indicate the ADDRESS of SW51, SW52 and SW53 in sequential.
-
Page 201: Wiring
. Installation 7. Wiring Caution All wiring and parts must be rated for load and duty. For details of wiring, refer to the circuit diagram attached onto the outdoor unit. The electrical work shall be performed by a qualified electrician. The circuit diagram for wiring shows only the concept and so the details for actual work is not described. -
Page 202: Cable Sizing For Outdoor Unit
7-2. Cable sizing for outdoor unit Power Supply Commu- nication 3 Phase Single Phase Earth Outdoor unit Cable Cable Power Max/Min Power Power Max/Min Power (HOS-RN- MCCB Cable Length MCCB F, 2wires) Supply Supply Cable 208- 2.0mm 253/187 230V~ CV, 3Wire /60Hz 4.0mm HOS-RN-F,... -
Page 203: Interconnect Wire Sizing
. Installation 7. Wiring 7-3. Interconnect wire sizing Power supply (1 phase) Communication cable Home server Earth wire (VCTF, 2wires) (VCTF, 2wires) Power supply Max/Min (V) Power cable 220V / 60Hz 2.0mm 1.6mm ± 10% 0.75~1.25mm 0.75~1.25mm 220-240V/50Hz (CV, 2wires) (IV, 1wire) 208-230V/60Hz The power supply cable shall be connected to the power supply terminal and shall be fixed with clamp as in the following figure. -
Page 204: Interconnect Wiring Diagram
7-5. Interconnect wiring diagram Indoor unit 1 Indoor unit 2 Indoor unit 3 Outdoor unit 2.5HP Outdoor unit - Max. length of communication cable : 360ft. - Whole length of cable : 720ft. - Allowable branches : 10 The communication cable shall be wired as follows: When the communication cable exceeds the maximum length, the operation of air conditioner may be impossible due to the trouble of communication interference between indoor and outdoor unit. -
Page 205: Communication Cable Connections
. Installation 7. Wiring 7-7. Communication cable connections (1) Correct connections Outdoor unit Indoor unit Wired remote controller... - Page 206 (2) Incorrect connection wiring 1) Star wiring connection to some of the indoor units Outdoor unit Indoor unit Wired remote controller...
- Page 207 . Installation 7. Wiring 2) Star wiring connection to every indoor units Outdoor unit Indoor unit Wired remote controller...
- Page 208 3) Reversed wiring between indoor and outdoor units Outdoor unit Indoor unit Wired remote controller Reversed...
- Page 209 . Installation 7. Wiring 4) Disconnect between indoor and outdoor units Outdoor unit Indoor unit Wired remote controller Disconnect...
- Page 210 5) Reverse wiring between indoor units Outdoor unit Indoor unit Wired remote controller Reverse...
- Page 211 . Installation 7. Wiring 6) Disconnect between indoor units Outdoor unit Indoor unit Wired remote controller Disconnect...
-
Page 212: Piping And Refnet Joint Selection
8. Piping and refnet joint selection 8-1. Examples of using only Refnet joint (during eight rooms installation) Outdoor unit 8-2. Examples of using both Refnet joint and distributor kit (during eight rooms installation) Outdoor unit Distributor kit... -
Page 213: Limitation When Piping Is Installed By Using Only Refnet Joint
. Installation 8. Piping and refnet joint selection 8-3. Limitation when piping is installed by using only Refnet joint (during six rooms installation) Outdoor unit Outdoor unit 5.0HP 6.0HP 7.0/7.5HP 8.0/10.0HP Item Actual length Max. Distance of the ex) In case of 10 horse power a+b+c+d+e+f ≤ 300ft. (ft.) allowable remotest indoor unit... -
Page 214: Requirement When Piping Is Installed Using Simultaneously Both Refnet Joint And Contributor Kit
8-4. Requirement when piping is installed using simultaneously both refnet joint and contributor kit (during six rooms installation) Outdoor unit Distributor kit Outdoor unit 5.0HP 6.0HP 7.0/7.5HP 8.0/10.0HP Item Actual length Max. Distance of the ex) In case of 10 horse power a+b+c+d+j ≤ 300ft. (ft.) allowable remotest indoor unit... -
Page 215: Pipe Selection
. Installation 8. Piping and refnet joint selection 8-5. Pipe selection Capacity of outdoor unit 5.0HP 6.0HP 7.0/7.5HP 8.0/10.0HP Outdoor unit ~ The first refnet joint piping Liquid Pipe ø3/8” X t0.8 ø1/2” X t0.8 Piping size Gas Pipe ø3/4” X t1.2 ø7/8”... - Page 216 Equivalent length calculation method equivalent length = actual pipe length + number of elbows + number of elbows X equivalent length of each elbows + number of oil traps X equivalent length of each oil trap Type Elbow Oil Trap Piping diameter 3/8”...
-
Page 217: Refnet Joint Selection
. Installation 8. Piping and refnet joint selection 8-6. Refnet joint selection (1) Selection method of first refnet joint from the outdoor unit The first refnet joint (joint A) from the outdoor unit shall be selected according to the outdoor unit model. Length (inch) Diameter (inch) Refnet joint model... -
Page 218: Charge/Recovery Of Refrigerant
9. Charge/recovery of refrigerant 9-1. Refrigerant charging (1) Outdoor unit is pre charged with refrigerant but additional refrigerant will be required. (2) After completion of evacuation, use the following instructions to charge the refrigerant into the service port. 1) Check whether the shut offs liquid and suction line are completely closed. 2) Fill the specified amount of refrigerant into liquid shut off valve service port with the compressor stopped. -
Page 219: Additional Refrigerant Amount Calculation Method
. Installation 9. Charge/recovery of refrigerant 9-2. Additional refrigerant amount calculation method (1) The amount of refrigerant filled in the outdoor when the product is delivered (on the base of piping 30ft.) (2) Additional amount of refrigerant as per the pipe diameter and length (liquid pipe based) 1/2( 1/2(... - Page 220 9-3. Recovery of refrigerant (1) Close the service valve of liquid side and then press the refrigerant recovery button on outdoor PCB (2) When the low pressure is getting low enough, close the service valve and press the refrigerant recovery button again or press key 3. Pressing the button stops the compressor.
-
Page 221: Testing Operation
. Installation 10. Testing operation Cautions for operation Put the power 6 hours before initial operation so that the crank case heater may warm the compressor. When restarting the unit after main power off, start the operation 2 and half hours after power on. If the heater is not on, the operation can not be started for 2 hours after power on for the protection of compressor. - Page 222 (8) If the preheating of compressor is completed, and communication is occurring between the indoor units connected. It is normal for the address on the right to be shown matching on left hand display. (9) Check through the PC connected with outdoor unit whether the data is correct from temperature sensor and electronic expansion valve.
- Page 223 . Installation 10. Testing operation KEY functions (1) Display Dis 1 Dis 2 SEG1 SEG2 SEG3 SEG4 (2) Key Display mode Check mode Reset (3) Description of KEY functions Key 1 Key 2 Key 3 Key 4 SEG 3, 4 display SEG 3, 4 display SEG 3, 4 display SEG 3, 4 display...
- Page 224 (4) VIEW mode According to the number of pushes on KEY 4, displays the proper data, and if the model contains no content to display, display only the number of pushes on SEG 1. 4-1 Input 1 time: Displays the data of high pressure (displays down to three decimal places) Ex.) In the case of the high pressure is 21.2kg/cm SEG 1: 1 flickers SEG 2, 3, 4: each of them, displays 2, 1, 2...
-
Page 225: Cautions For Refrigerant Leaks
. Installation 11. Cautions for refrigerant leaks 11-1. Introduction The DVM system, like most other air conditioning systems, uses R-22 as its refrigerant. R-22 itself is an entirely safe non-toxic, non-combustible refrigerant but care must nevertheless be taken to ensure that the air conditioning facilities are installed in a room which is sufficiently large to avoid a *dangerous concentration of refrigerant gas in the unlikely event of a serious leak in the system. - Page 226 11-2. Procedure for checking dangerous Concentration Check the dangerous concentration in accordance with steps 1~4 below and take whatever action is necessary. (1) Calculate the amount of refrigerant(lbs) charged to each system separately. (Amount of refrigerant in a Total amount of refrigerant(lbs) (Additional charging amount) = single indoor unit system) in the system...
- Page 227 . Installation 11. Cautions for refrigerant leaks 3) Where there is a gas leak detection alarm device linked to a mechanical ventilator in the smallest room then the next smallest room will become the measurement target. Outdoor unit Ventilator Indoor unit Smallest Second smallest room...
- Page 228 (4) Dealing with situations where the result exceeds the dangerous concentration level. Where the installation of a facility results in a concentration in excess of the dangerous concentration level then it may be necessary to revise the system design to some extent or else take one of the fol- lowing courses of action: <Action 1>...
Need help?
Do you have a question about the Electronics DVM Series and is the answer not in the manual?
Questions and answers