Robert Juliat ARTHUR 1014 Manual
800w led followspot
Hide thumbs
Also See for ARTHUR 1014:
- Manual (41 pages) ,
- Quick start manual (4 pages) ,
- Manual (41 pages)
Table of Contents
Advertisement
Quick Links
FOLLOWSPOT
Model
Standard
North American
5.5° – 15°
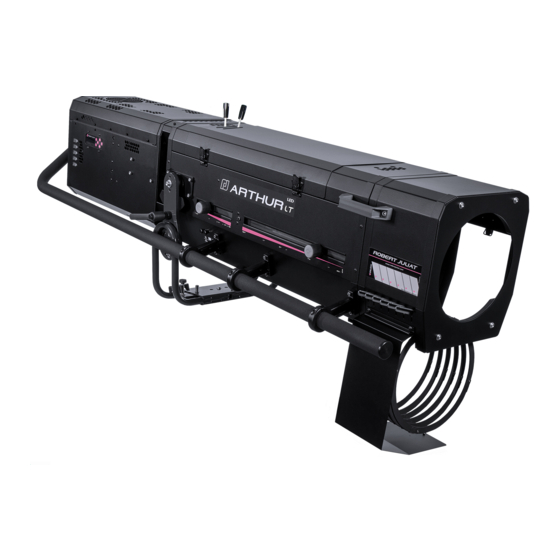
ARTHUR 1014
ARTHUR 1014C
800W LED FOLLOWSPOT
V1
VALIDATION : 08/10/20
DN41195800
Robert Juliat S.A.S. 32, rue de Beaumont, F 60530 Fresnoy-en-Thelle - phone : +33 (0)3 44 26 51 89 - fax : +33 (0)3 44 26 90 79 - info@robertjuliat.fr
www.robertjuliat.com
Advertisement
Table of Contents

Subscribe to Our Youtube Channel
Related Manuals for Robert Juliat ARTHUR 1014


Summary of Contents for Robert Juliat ARTHUR 1014
- Page 1 ARTHUR 1014C 800W LED FOLLOWSPOT VALIDATION : 08/10/20 DN41195800 Robert Juliat S.A.S. 32, rue de Beaumont, F 60530 Fresnoy-en-Thelle - phone : +33 (0)3 44 26 51 89 - fax : +33 (0)3 44 26 90 79 - info@robertjuliat.fr www.robertjuliat.com...
-
Page 2: Table Of Contents
6.3 Electronic thermal management system ................................................34 6.4 Firmware update ........................................................35 6.5 Factory defaults ........................................................35 Robert Juliat reserve the right to change or alter any of the items detailed on this page, to increase or improve manufacturing techniques without prior notice. -
Page 3: User's Instructions
1 User’s instructions GENERAL INSTRUCTIONS Not for residential use. These fixtures must only be serviced by a qualified technician. In addition to the instructions indicated on this page, relevant health and safety requirements of the appropriate EU Directives must be adhered to at all times. This fixture is in compliance with section 17 - Lighting appliance for theatre stages, television, cinema and photograph studios. -
Page 4: Presentation
Presentation Functions Functions Yoke 12. Local display Tilt locking handle 13. Keypad Side operating handle 14. Identification plate Iris control 15. Data connectors (OUT and IN) Dimming control 16. Power connectors (IN and OUT) Colour changer 17. Power switch (thermal breaker) Focus adjustment 18. -
Page 5: Identification Label
Identification label Description 1. MOD. : Model 19 15 16 2. VERS. : Version 3. U : Nominal voltage input (V) 4. I : Nominal intensity (A) 5. P : Maximum power input (W) 6. IP : International Protection Rating 7. -
Page 6: Accessories
2.4 Accessories Reference Description Monopod stand for overhead followspot GT4000 Tripod stand with safety chain - SWL: 130 Kg - max. height: 1030 mm GT4000S Tripod stand without safety chain - SWL: 130 Kg - max. height: 1030 mm T4000 Followspot mount for Ø50 mm pipe (suspension or overhead) - SWL= 100 Kg VD120 120x120mm frosted glass... -
Page 7: Set-Up
Set-up 3.1 Mechanics 3.1.1 Operating positions 3.1.2 Minimum distance between a flammable material and the lighting unit 1,3 m / 4.3 ft 5°C 40°C 3.1.3 Instructions for use Minimum : Maximum : 40°F 104°F IP20 - Indoor use only 3.1.4 Handling Overhead view 3.1.5 Lifting Lifting rings... -
Page 8: Yoke Adjustment
Place one of the stand legs towards the front to support the maximum tilt position. 3.1.7 Stand set-up The unit must be installed only on a Robert Juliat compatible stand / head : Monopod stand for overhead followspot GT4000 Tripod stand with safety chain - SWL: 130 Kg - max. height: 1030 mm GT4000S Tripod stand without safety chain - SWL: 130 Kg - max. -
Page 9: Electrical Information
3.2 Electrical information 3.2.1 LED source Never touch or scratch the LED surface. Cf. 6.1.4 LED cleaning procedure if cleaning is necessary. 3.2.2 Power supply Power supply Voltage Frequency Input power Connectors Neutrik powerCON TRUE1 TOP 4,3 A / 960 W @ 230V 100 T 240 V 50-60 Hz 8,7 A / 1030 W @ 120V... -
Page 10: Data
Power ON 3.3 DATA 3.3.1 DMX 512-A / RDM Protocol Input connector Output connector USITT DMX 512-A XLR 5-pin XLR 5-pin DATA connectors PIN # Description Shielding Foil & Braided Shield DMX (-) conductor of 1 twisted pair DMX (+) conductor of 1 twisted pair Not used... -
Page 11: Art-Net / Sacn
3.3.2 Art-Net / sACN • With external switch Protocol Input connector Output connector Art-Net RJ45 #1 or #2 sACN Daisy chain: Art-Net sACN Network switch* (*) A 1000 base-T switch that supports IGMP (Internet Group Management Protocol) is necessary if the unit is connected to a network switch to control multiple devices. -
Page 12: Accessories
Accessories 3.4.1 Full closing iris cassette 3.4.2 Colour changer unit - boomerang Dimensions Cf. 4.8.1 EN - 10 -... -
Page 13: Colour Changer Unit - Push-Pull
3.4.3 Colour changer unit - push-pull Dimensions Cf. 4.8.1 3.4.4 Gobo holder 'A' size gobo Dimensions Cf. 4.7.1 EN - 11 -... -
Page 14: Frosted / Correction Filter (Option)
3.4.5 Frosted / Correction filter (option) Dimensions: Cf. 4.9.1 3.4.6 Internal glass holder 120 x 120 mm (option) EN - 12 -... -
Page 15: Stands (Option)
3.4.7 Stands (option) • GT4000 Series : Please refer to the relevant stand technical files for further details. Stand set-up, refer to Cf. 3.1.7. 3.4.8 Telrad followspot sight (option) Followspot sight guide available @ www.robertjuliat.com/followspots/ Accessories Caution: - Do not install the followspot sight on the lamp house to avoid blocking the ventilation vents. - Secure the sight with a suitable safety cable. -
Page 16: Flight-Case (Option)
3.4.10 Flight-case (option) GT4000 stand compartment Inner side view Accessories GT4000 stand compartment compartment Inner overhead view EN - 14 -... -
Page 17: Operations
4 Operations 4.1 Light intensity 4.1.1 Range 100% 4.1.2 Control Remotely with DMX512-A protocol Locally via dimming control handle Locally via Standalone mode Art-Net / sACN DMX512-A T selection in DATA MODE / PROTOCOL / STANDALONE HTP mode (Highest Takes Precedence): Light output is the highest value of DMX512 command or local control 4.1.3 Parameters 4.1.3.1 Dimming resolution - DMX only... -
Page 18: Master Control
4.1.3.3 Master control T DMX Mode 5 / 6 In order to supervise the operator from the console, master control DMX channel can be used. This channel limits the maximum value of the dimmer shutter. By using this function, it is possible to obtain synchronised fades with several spots or to give intensity limits (minimum and maximum) to the operator . -
Page 19: Strobe
4.2 Strobe 4.2.1 Range Strobe duration 255 = 20ms 0 = OFF 1 = 1ms Strobe speed 0 = 0.1Hz 255 = 10Hz 4.2.2 Control DMX512-A Remotely with DMX512-A / Art-Net / sACN protocols Mode 3 – 4 – 5 – 6 4.3 Response time 4.3.1 Range X ms... -
Page 20: Range
4.4 Beam size adjustment 4.4.1 Range Beam angle Field angle Model Angles Minimum angle Maximum angle Beam angle 5.4° 13.2° ARTHUR 1014 Field angle 5.8° 13.6° 4.4.2 Control ZOOM FOCUS ZOOM FOCUS EN - 18 -... -
Page 21: Pan / Tilt
4.5 Pan / Tilt 4.5.1 Range Function Range 0 T 360° TILT Yoke position #1 Yoke 61° position #5 30° with tilt stopper 44° without tilt stopper 4.5.2 Control Unlock Lock EN - 19 -... -
Page 22: Iris
4.6 Iris 4.6.1 Range • Irising 100% 4.6.2 Control 4.7 Gobo 4.7.1 Range Type Standard gobo - A size Ø100 mm Ø72 mm • Metal Dimensions Maximum • Glass image size Installation Cf. section: 3.4.4 4.7.2 Control EN - 20 -... -
Page 23: Colour
4.8 Colour 4.8.1 Range Type Coloured gel filter Ø270 mm Dimension Cf. section: 3.4.2 & section 3.4.3 Installation Place dark colours towards the front end. 4.8.2 Control Push / Pull Unlock = release colours Colour engaged EN - 21 -... -
Page 24: Frost And Correction Filters
4.9 Frost and correction filters 4.9.1 Range Type Frost or Correction filter Ø120 mm Dimension Installation Cf. section: 3.4.6 4.9.2 Control Frost glass Spare filter EN - 22 -... -
Page 25: Controls And Parameters
5 Controls and parameters 5.1 Local display and controls 5.1.1 Display Function Exit the current menu option and/or go back Enter the current menu option and/or valid Scroll through menus and/or Increase data value Scroll through menus and/or Decrease data value Scroll through menus and/or Increase data value Scroll through menus and/or Decrease data value 5.1.2 Home screen... -
Page 26: Menu
5.1.3 Menu DATA FACTORY STATUS SETUP MODE DEFAULT Reset to factory settings. PROTOCOL SYSTEM ID DISPLAY • DMX • SERIAL NUMBER • INTENSITY • RDM • SOFTWARE VERSION • AUTO OFF • WDMX • DEVICE COUNTER • ARTNET • MAC ADDRESS •... -
Page 27: Parameters
5.1.4 Parameters 5.1.4.1 Intensity T Selection in SETUP / DISPLAY / INTENSITY menu Display Mode Description SETUP DISPLAY INTENSITY Adjust the intensity of the screen Intensity : 6 Intensity press OK To change value, press buttons : to validate Intensity Auto OFF 5.1.4.2 Auto-OFF T Selection in SETUP / DISPLAY / AUTO OFF menu... -
Page 28: Dmx512 - A Remote Control
5.2 DMX512 - A remote control 5.2.1 Protocol: E1.11 – 2008, USITT DMX512-A 5.2.2 Configuration: DATA MODE Data Mode Protocol Press OK DATA MODE Press OK PROTOCOL STATUS SETUP FAC PERSONALITY DMX ADDI to enter to validate DATA MODE Caution: Activate DMX in protocol mode beforehand. -
Page 29: Dmx Chart
5.2.4 DMX chart: Mode 1: Mode 2: Mode 3: Mode 4: Mode 5: Mode 6: DMX address Dimmer8B Dimmer16B Profile8B Profile16b Followspot8b Followspot16b Dimmer Dimmer Dimmer Dimmer Dimmer Dimmer Dimmer fine Strobe duration Dimmer fine Master Dimmer fine Strobe speed Strobe duration Strobe duration Master... -
Page 30: Rdm Remote Control
Product Category PRODUCT_CATEGORY_FIXTURE_FIXED Software Version_ID DMX512 Footprint DMX Personality 1 To X Start Address Sub Device Sensor Count PRODUCT_DETAIL_ID_LIST PRODUCT_DETAIL_LED DEVICE_MODEL_DESCRIPTION ARTHUR MANUFACTURER_LABEL Robert Juliat DEVICE_LABEL 800W LED FOLLOWSPOT FACTORY_DEFAULTS SOFTWARE_VERSION_LABEL BOOT_SOFTWARE_VERSION_LABEL DMX512 Setup DMX512_PERSONALITY DMX512_PERSONALITY_DESCRIPTION DMX512_STARTING_ADDRESS SLOT_INFO SLOT_DESCRIPTION DEFAULT_SLOT_VALUE... -
Page 31: Art-Net Remote Control
5.4 Art-Net remote control Artistic Licence Art-Net v3. 5.4.1 Protocol: For more information about Art-Net protocol: http://art-net.org.uk/ (*) Caution: 5.4.2 Configuration: Activate Art-Net in protocol mode beforehand. DATA MODE Data Mode Protocol Press OK DATA MODE Press OK Press OK STATUS SETUP PROTOCOL... -
Page 32: Sacn Remote Control
5.5 sACN remote control ANSI E1.31 – 2009 sACN (Streaming-ACN) 5.5.1 Protocol: 5.5.2 Configuration: (*) Caution: Activate sACN in protocol mode beforehand. DATA MODE Data Mode Protocol Press OK DATA MODE STATUS SETUP Press OK PROTOCOL PERSONALITY DMX ADDI Press OK to enter to validate to validate... -
Page 33: Fan Cooling Modes
5.6 Fan cooling modes 5.6.1 Range Modes Silent Normal Full Cooling < 35 dB(A) < 37 dB(A) < 39 dB(A) Ambiant temperature: 30°C 100% Brightness 5.6.2 Control DMX512-A Remotely by DMX512-A Locally T selection in Mode 3 – 4 – 5 – 6 SETUP / COOLING EN - 31 -... -
Page 34: Local Potentiometer
5.7 Local potentiometer T selection in SETUP / LOCAL POTENTIOMETER Function Parameters Description Setup Disable SETUP LOCAL POT SETUP LOCAL POT SETUP Setup Enable Disable SETUP ROTATION CALIBRATION Press OK to validate Enable Rotation Normal (CW): Clockwise SETUP LOCAL POT SETUP LOCAL POT ROTATION... -
Page 35: Service
6 Service 6.1 Preventive maintenance 6.1.1 Frequency General maintenance should be performed at least once a year or more frequently if the equipment is operated in adverse conditions (smoke, heat, humidity, touring, etc.). 6.1.2 General cleaning Remove dust from the unit. Front glasses can be cleaned with solutions containing alcohol. -
Page 36: Analysis
Removing the LED housing cover: 1 T 2 Remove the 10 screws: Removing the LED module: 1 T 2 T 3 LED module Aspheric lens holder After removing the 4 screws (step #1), push forward the LED protection unit (step #2). 6.2 Analysis In case of problem, contact RJ distributor with the following information: •... -
Page 37: Firmware Update
6.4 Firmware update 1. Firmware available on www.robertjuliat.com/followspots/Arthur 2. Download and unzip the file Switch on Arthur and config IP address (DATAMODE>IP-CONF): a. DHCP = OFF b. ADDRESS = AAA.BBB.CCC.XXX c. MASK = 255.0.0.0 d. Exit to main menu to validate modifications IP configuration available on Home screen view: Link status : NOK DHCP : OFF 192.168.000.013...
Need help?
Do you have a question about the ARTHUR 1014 and is the answer not in the manual?
Questions and answers