
Related Manuals for Thermo King E-200 Series


Summary of Contents for Thermo King E-200 Series
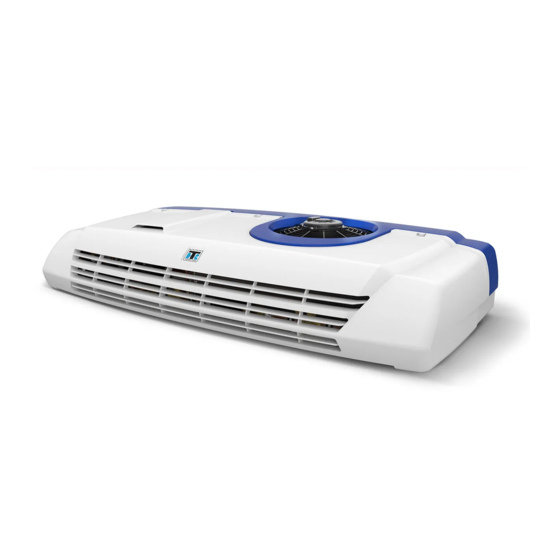
- Page 1 Installation Manual Vehicle Powered Truck Edition E-200 Series Single Temperature Systems Revision B T T K K 5 5 6 6 8 8 8 8 1 1 - - 1 1 8 8 - - I I M M - - E E N N...
- Page 2 Introduction This manual was written to assist with the general installation of Thermo King® components onto trucks designed and built for refrigerated applications. The T T h h e e r r m m o o K K i i n n g g I I n n s s t t a a l l l l a a t t i i o o n n S S t t a a n n d d a a r r d d s s a a n n d d P P r r o o c c e e d d u u r r e e s s G G u u i i d d e e (TK 56430) provides more detailed information that must be followed to safely and properly complete the entire installation.
-
Page 3: Table Of Contents
Table of Contents S S a a f f e e t t y y P P r r e e c c a a u u t t i i o o n n s s ................................5 5 Danger, Warning, Caution, and Notice . -
Page 4: S S T T A A N N D D B B Y Y R R E E C C E E P P T T A A C C L L E E B B O O X X I I N N S S T T A A L L L L A A T T I I O O N N ( ( M M O O D D E E L L S S 2 2 0 0 A A N N D D 5 5 0 0 O O N N L L Y
T T a a b b l l e e o o f f C C o o n n t t e e n n t t s s Concept ..................26 Parts Required before Starting Installation . -
Page 5: Danger, Warning, Caution, And Notice
Safety Precautions Danger, Warning, Caution, and Notice Thermo King® recommends that all service be performed by a Thermo King dealer and to be aware of several general safety practices. Safety advisories appear throughout this manual as required. Your personal safety and the proper operation of this unit depend upon the strict observance of these precautions. -
Page 6: Overview
While basic mechanics tools and refrigeration service equipment are a necessity, there are also special tools that are required when installing Thermo King Vehicle Powered Truck Units. Using these tools will assure the installation is done correctly. Many of these are available from Thermo King. -
Page 7: Required Support Materials
R R e e q q u u i i r r e e d d T T o o o o l l s s RCS481-1 WinTrac Software (latest version must always be used) Required Support Materials Please have the following support material in hand prior to starting your installation as it is listed as reference throughout this manual: 1. -
Page 8: Recommended Best Practice
Alternator Amperage Test Recommended Best Practice Before install of the E-200 it is recommended to get a baseline of the amp draw being consumed by the vehicle. Using an amp clamp on the alternator output wire measure the amp draw: 1. -
Page 9: Unpacking The Unit
Unpacking and Inspecting the Unit Unpacking the Unit 1. Open the packaging. 2. Find the unit documentation. 3. Verify that the packaging contains all the accessories indicated on the list attached with the documentation. 4. Check that the hose length is correct before starting the installation. Checking can be carried out by consulting the “Packing List”... -
Page 10: Auto Start Hard Stop / Disable Connector
U U n n p p a a c c k k i i n n g g a a n n d d I I n n s s p p e e c c t t i i n n g g t t h h e e U U n n i i t t Auto Start Hard Stop / Disable Connector D D A A N N G G E E R R H H a a z z a a r r d d o o u u s s V V o o l l t t a a g g e e ! ! -
Page 11: Cover And Fan Housing Removal (All Models)
Preparing Condenser for Installation Cover and Fan Housing Removal (All Models) To access the unit mounting holes: 1. Remove plastic condenser cover. 2. Remove the fan housing assembly. (Remove the fan connector). 3. Remove “Power Off Device” Connector and Electric Box Cover. 4. -
Page 12: Fan Housing Modifications (Nosemount Installations Only)
P P r r e e p p a a r r i i n n g g C C o o n n d d e e n n s s e e r r f f o o r r I I n n s s t t a a l l l l a a t t i i o o n n Fan Housing Modifications (Nosemount Installations Only) Turn fan housing over and use a hand saw to trim the area shown for refrigeration hose clearance. -
Page 13: Condenser Installation
Condenser Installation I I m m p p o o r r t t a a n n t t : : See Section 4 - Unit Installation Standards and Procedures in the Thermo King Vehicle Powered Truck Installation Standards and Procedures Guide (TK 56430). THESE PROCEDURES MUST BE FOLLOWED! N N o o t t e e : : Nose mount and roof top condenser mounting and access hole dimensions can be found at the back of this manual. -
Page 14: Roof Mounted
Roof Mounted I I m m p p o o r r t t a a n n t t : : See Section 4 - Unit Installation Standards and Procedures in the Thermo King Vehicle Powered Truck Installation Standards and Procedures Guide (TK 56430). THESE PROCEDURES MUST BE FOLLOWED! 1. -
Page 15: Front Mounted
Front Mounted I I m m p p o o r r t t a a n n t t : : See Section 4 - Unit Installation Standards and Procedures in the Thermo King Vehicle Powered Truck Installation Standards and Procedures Guide (TK 56430). THESE PROCEDURES MUST BE FOLLOWED! 1. -
Page 16: Installing The Evaporator
Installing the Evaporator I I m m p p o o r r t t a a n n t t : : See Section 4 - Unit Installation Standards and Procedures in the Thermo King Vehicle Powered Truck Installation Standards and Procedures Guide (TK 56430). THESE PROCEDURES MUST BE FOLLOWED! 1. - Page 17 Refrigerant Hose Connections I I m m p p o o r r t t a a n n t t : : See Section 6 - Refrigerant Hose and Fittings Standards in the Thermo King Vehicle Powered Truck Installation Standards and Procedures Guide (TK 56430). THESE PROCEDURES MUST BE FOLLOWED! Figure 5.
- Page 18 I I m m p p o o r r t t a a n n t t : : See Section 10 - System Evacuation Procedures and Section 12 - System Charging Procedures in the Thermo King Vehicle Powered Truck Installation Standards and Procedures Guide (TK 56430). THESE PROCEDURES MUST BE FOLLOWED! Figure 6.
- Page 19 Wiring Connections I I m m p p o o r r t t a a n n t t : : See Section 7 - Electrical Standards in the Thermo King Vehicle Powered Truck Installation Standards and Procedures Guide (TK 56430). THESE PROCEDURES MUST BE FOLLOWED!
- Page 20 3. Mount the base of the mounting bracket in the chosen location. Use screws ( ( C C ) ) , rubber mat ( ( D D ) ) and metal plate ( ( E E ) ) , which are supplied by Thermo King, as indicated in the drawing.
-
Page 21: I I N N S S T T A A L L L L I I N N G G T T H H E E I I N N - - C C A A B B C C O O N N T T R R O O L L L L E E R
I I n n s s t t a a l l l l i i n n g g t t h h e e I I n n - - C C a a b b C C o o n n t t r r o o l l l l e e r r Optional Internal DIN Adaptor 1. - Page 22 Battery Connections I I m m p p o o r r t t a a n n t t : : See Section 7 - Electrical Standards in the Thermo King Vehicle Powered Truck Installation Standards and Procedures Guide (TK 56430). THESE PROCEDURES MUST BE FOLLOWED! N N o o t t e e : : If the vehicle is equipped with a battery disconnect switch, always wire the unit after the switch.
- Page 23 Connecting to Third Party Holdover Battery Option This option uses an auxiliary battery provided by your vehicle manufacturer. It allows the user to maintain the temperature control of the compartment for a certain period when there is no alternator or stand-by power sources available.
-
Page 24: C C O O N N N N E E C C T T I I N N G G T T O O T T H H I I R R D D P P A A R R T T Y Y H H O O L L D D O O V V E E R R B B A A T T T T E E R R Y Y O O P P T T I I O O N
C C o o n n n n e e c c t t i i n n g g t t o o T T h h i i r r d d P P a a r r t t y y H H o o l l d d o o v v e e r r B B a a t t t t e e r r y y O O p p t t i i o o n n Hold-over Option Installation Guidelines N N O O T T I I C C E E E E q q u u i i p p m m e e n n t t D D a a m m a a g g e e ! ! - Page 25 C C o o n n n n e e c c t t i i n n g g t t o o T T h h i i r r d d P P a a r r t t y y H H o o l l d d o o v v e e r r B B a a t t t t e e r r y y O O p p t t i i o o n n TK 56881-18-IM-EN...
-
Page 26: Concept
Start/Stop Functionality I I m m p p o o r r t t a a n n t t : : The presented proposal does not cover all the diversity of vehicle manufacturer implementations. An adaptation to each application will be required. A carefully revision of your vehicle documentation is advised. -
Page 27: Parts Required Before Starting Installation
S S t t a a r r t t / / S S t t o o p p F F u u n n c c t t i i o o n n a a l l i i t t y y Vehicle Battery Fuse (150 A) Ignition Switch... -
Page 28: Installation Guidelines
S S t t a a r r t t / / S S t t o o p p F F u u n n c c t t i i o o n n a a l l i i t t y y Description: TK Service Parts Number: Seal Cable Yellow - Outside Diameter 1.8-2.4mm... - Page 29 S S t t a a r r t t / / S S t t o o p p F F u u n n c c t t i i o o n n a a l l i i t t y y TK 56881-18-IM-EN...
-
Page 30: Concept
Increased Idle Speed Setup I I m m p p o o r r t t a a n n t t : : The presented proposal does not cover all the diversity of vehicle manufacturer implementations. An adaptation to each application will be required. A careful review of your vehicle documentation is advised. The IIS signal has been implemented as a low-side transistor - this means that, when the signal is active, the associated pin XG3-H1 is internally grounded (conducting condition). -
Page 31: Parts Required Before Starting Installation
I I n n c c r r e e a a s s e e d d I I d d l l e e S S p p e e e e d d S S e e t t u u p p Vehicle Battery Fuse (150 A) Ignition Switch... -
Page 32: Installation Guidelines
I I n n c c r r e e a a s s e e d d I I d d l l e e S S p p e e e e d d S S e e t t u u p p Description: TK Service Parts Number: Seal Cable Yellow - Outside Diameter 1.8-2.4mm... - Page 33 I I n n c c r r e e a a s s e e d d I I d d l l e e S S p p e e e e d d S S e e t t u u p p TK 56881-18-IM-EN...
- Page 34 Only) I I m m p p o o r r t t a a n n t t : : See Section 7 - Electrical Standards in the Thermo King Vehicle Powered Truck Installation Standards and Procedures Guide (TK 56430). THESE PROCEDURES MUST BE FOLLOWED! Figure 10.
-
Page 35: Es-100N/Es150
Evaporator Drain Hose Installation I I m m p p o o r r t t a a n n t t : : See Section 8 - Evaporator Drain Hose Standards in the Thermo King Vehicle Powered Truck Installation Standards and Procedures Guide (TK 56430). - Page 36 E E v v a a p p o o r r a a t t o o r r D D r r a a i i n n H H o o s s e e I I n n s s t t a a l l l l a a t t i i o o n n Figure 12.
- Page 37 I I m m p p o o r r t t a a n n t t : : BEFORE COMPLETING THE INSTALLATION, YOU MUST PERFORM THE FOLLOWING PROCEDURES IN ACCORDANCE WITH THE THERMO KING INSTALLATION STANDARDS AND PROCEDURES GUIDE (TK 56430): •...
- Page 38 Suction Pressure Regulator (SPR) Adjustment Procedures - MAX I I m m p p o o r r t t a a n n t t : : Using the absence of bubbles in the sight glass as an indicator of correct refrigerant charge can be misleading, Y Y O O U U M M U U S S T T refrigerate the box to 0-5ºC (32-41ºF) to get a more precise indication from the sight glass.
- Page 39 Discharge Pressure Regulator (DPR) Adjustment Procedures - MAX W W A A R R N N I I N N G G E E q q u u i i p p m m e e n n t t D D a a m m a a g g e e ! ! L L o o w w e e r r s s e e t t t t i i n n g g s s c c a a n n b b e e s s e e l l e e c c t t e e d d b b a a s s e e d d o o n n l l o o c c a a l l p p r r e e f f e e r r e e n n c c e e s s t t o o o o p p t t i i m m i i z z e e h h e e a a t t i i n n g g o o p p e e r r a a t t i i o o n n .
- Page 40 Compressor Oil Amounts and Type I I m m p p o o r r t t a a n n t t : : Using the absence of bubbles in the sight glass as an indicator of correct refrigerant charge can be misleading, Y Y O O U U M M U U S S T T refrigerate the box to 0-5ºC (32-41ºF) to get a more precise indication from the sight glass.
- Page 41 I I m m p p o o r r t t a a n n t t : : Failure to add the proper amount of refrigerant will result in decreased system performance. Refer to the Thermo King Vehicle Powered Truck Installation Standards and Procedures Guide (TK 56430) for information on proper system charging procedures.
- Page 42 Checking the Installation • All holes should be sealed with silicone or foam. • Check with a sheet of paper that the fans blow in the right direction. • The drain circuit should be slanted on all evaporators and the moisture trap should be installed. •...
- Page 43 N N o o t t e e : : Paper Templates are available to assist in the installation of the Condenser and Evaporator. These Templates provide the installer with a footprint of the component and provide the correct mounting and access hole locations. Contact your Thermo King dealer for details. Figure 13. Condenser Nose Mounting/Access Hole Locations Shown Figure 14.
-
Page 44: C C O O N N D D E E N N S S E E R R A A N N D D E E V V A A P P O O R R A A T T O O R R D D I I M M E E N N S S I I O O N N S
C C o o n n d d e e n n s s e e r r a a n n d d E E v v a a p p o o r r a a t t o o r r D D i i m m e e n n s s i i o o n n s s Figure 15. - Page 45 Standby Power Plug Wiring Black or Brown Black or Brown 20A 250V 20A 250V White or Blue White or Blue NEMA L5-20P NEMA L6-20P Green or Green/Yellow Green or Green/Yellow 230V/1PH 115V/1PH RCS1714-1 TK 56881-18-IM-EN...
- Page 46 N N o o t t e e s s TK 56881-18-IM-EN...
- Page 47 N N o o t t e e s s TK 56881-18-IM-EN...
- Page 48 1938. For more information, visit www.thermoking.com or www.tranetechnologies.com. Thermo King has a policy of continuous product and product data improvements and reserves the right to change design and specifications without notice. We are committed to using environmentally conscious print practices.
Need help?
Do you have a question about the E-200 Series and is the answer not in the manual?
Questions and answers