Advertisement
Quick Links
Operation Manual
Mini Incubator
51073, 51269
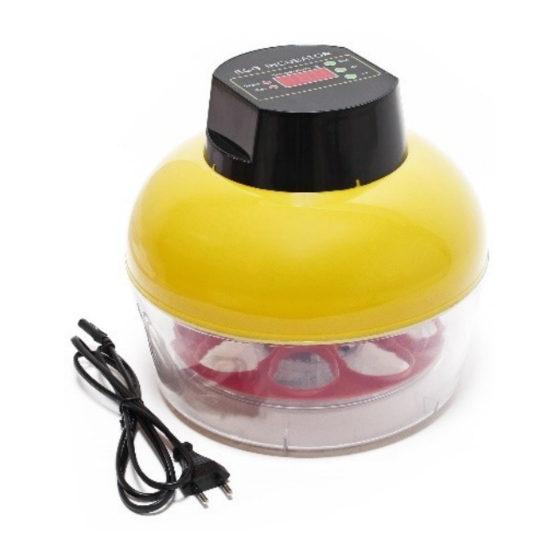
Similar to image, may vary depending on model
Read and follow the operating instructions and safety information before use.
Technical changes reserved!
Due to further developments, illustrations, functioning steps and technical data can differ slightly.
Advertisement

Related Manuals for WilTec 51073


Summary of Contents for WilTec 51073
- Page 1 Operation Manual Mini Incubator 51073, 51269 Similar to image, may vary depending on model Read and follow the operating instructions and safety information before use. Technical changes reserved! Due to further developments, illustrations, functioning steps and technical data can differ slightly.
- Page 2 All rights reserved. The WilTec Wildanger Technik GmbH cannot be held accountable for any possible mistakes in this operating manual, nor in the diagrams and figures shown.
-
Page 3: Safety Notes
Accuracy of the humidity sensor ±3 % RH Functions Adjustable temperature control Temperature display Automatic turning mechanism Turning/breeding display only concerning 51269: Hygrometer to determine the humidity Humidity display © by WilTec Wildanger Technik GmbH Item 51073, 51269 Page 3 http://www.WilTec.de http://www.aoyue.eu 2020-1 http://www.teichtip.de... - Page 4 Important notice on the parameters: Regarding the term “internal temperature” (“internal”), do not confuse “internal temperature” (inside the egg) with “internal incubator temperature.” The internal tem - © by WilTec Wildanger Technik GmbH Item 51073, 51269 Page 4 http://www.WilTec.de...
- Page 5 Chicken eggs: Day 1–18: 50–55 % air humidity From day 19: 70–75 % air humidity Quail eggs: Day 1–14: 55 % air humidity From day 15: 75 % air humidity © by WilTec Wildanger Technik GmbH Item 51073, 51269 Page 5 http://www.WilTec.de http://www.aoyue.eu 2020-1 http://www.teichtip.de...
- Page 6 Note: Most chicks do not cope with a complete collapse of the climate. © by WilTec Wildanger Technik GmbH Item 51073, 51269 Page 6 http://www.WilTec.de...
- Page 7 If the incubator works without any problem, and you are accustomed with the functions, un - • plug the incubator and clean it from the inside and the outside with a suitable disinfectant. © by WilTec Wildanger Technik GmbH Item 51073, 51269 Page 7 http://www.WilTec.de...
- Page 8 If the chicks have hatched, you need to ensure they cannot drown, whereas chicks still breed - • ing need to hatch. Display, function buttons, and basic settings (incubator 51073) © by WilTec Wildanger Technik GmbH Item 51073, 51269 Page 8 http://www.WilTec.de...
- Page 9 (“work”) or adjustment settings are being made (“set“). The display shows the temperature in degrees Celsius. Explanation of the Function Buttons (incubator 51073) The incubator has three buttons, which are required for the operation of the incubator. The buttons and their possible combinations will be explained in the following paragraph.
- Page 10 “+” and “-”: Holding both pushed at the same time for a longer duration (approx. 8 sec) resets the incubator back to factory settings, there will be a peep sound © by WilTec Wildanger Technik GmbH Item 51073, 51269 Page 10 http://www.WilTec.de...
- Page 11 Hold the “set” button: You will go to the menu to calibrate the basic parameters (see table 3). By pushing the “set” button, you can go through the individual parameters. © by WilTec Wildanger Technik GmbH Item 51073, 51269 Page 11 http://www.WilTec.de http://www.aoyue.eu 2020-1 http://www.teichtip.de...
- Page 12 3. “Set” and “–”: Pushing both at the same time will open the menu for the turning adjust- ments The display will show the individual parameter, shown in a number-letter combination (parameter ID). © by WilTec Wildanger Technik GmbH Item 51073, 51269 Page 12 http://www.WilTec.de http://www.aoyue.eu 2020-1 http://www.teichtip.de...
- Page 13 Table 5: Adjustment of the turning via the “set” and “–” buttons 4. “+” and “–”: Holding both pushed for a longer duration (approx. 8 seconds) will reset the incubator back to factory settings, there will be a peeping sound © by WilTec Wildanger Technik GmbH Item 51073, 51269 Page 13 http://www.WilTec.de...
- Page 14 Chicks with Use wire inlay or cover the slippery/ Brooding inlay too slippery/ smooth straddled legs smooth ground with e. g. sackcloth © by WilTec Wildanger Technik GmbH Item 51073, 51269 Page 14 http://www.WilTec.de http://www.aoyue.eu 2020-1 http://www.teichtip.de...
- Page 15 When turning the incubator on, the (a) Short circuit due to entered hu- (a) Incubator needs to be replaced fuse blows every midity time © by WilTec Wildanger Technik GmbH Item 51073, 51269 Page 15 http://www.WilTec.de http://www.aoyue.eu 2020-1 http://www.teichtip.de...
-
Page 16: Disposal Regulations
All WilTec electric devices that fall under the WEEE regulations are labelled with the crossed-out wheeled waste bin logo. This logo indicates that this electric equipment must not be disposed with do- mestic waste.
Need help?
Do you have a question about the 51073 and is the answer not in the manual?
Questions and answers