Table of Contents
Advertisement
Item# 1004 662 155/1004 649 550/1004 649 549/ 1004 547 739
Model #A106003600
USE AND CARE GUIDE
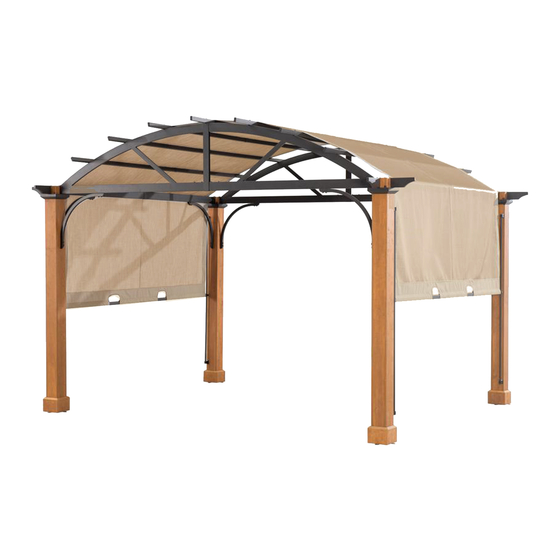
10X12 LONGFORD PERGOLA
Questions, problems, missing parts? Before returning to the store,
call Hampton Bay Customer Service
8 a.m. - 7 p.m., EST, Monday-Friday, 9 a.m. - 6 p.m., EST, Saturday
1-855-HD-HAMPTON
HAMPTONBAY.COM
THANK YOU
We appreciate the trust and confidence you have placed in Hampton Bay through the purchase of this Pergola. We strive to
continually create quality products designed to enhance your home. Visit us online to see our full line of products available for your
home improvement needs. Thank you for choosing Hampton Bay!
Advertisement
Table of Contents

Related Manuals for HAMPTON BAY LONGFORD A106003600


Summary of Contents for HAMPTON BAY LONGFORD A106003600
- Page 1 THANK YOU We appreciate the trust and confidence you have placed in Hampton Bay through the purchase of this Pergola. We strive to continually create quality products designed to enhance your home. Visit us online to see our full line of products available for your...
- Page 2 Table of Contents Table of Contents ............2 Pre-Assembly ..............3 Safety Information ............2 Planning Assembly ............ 4 Warranty ................. 2 Hardware Included ............. 4 What is Covered ............2 Package Contents ............5 What is Not Covered ..........2 Assembly ...............
- Page 3 Pre-Assembly TOOLS NEEDED Provided in hardware pack IMPORTANT Requires at least 2 persons for the installation work. Approximate installation time:2~3 hours. HAMPTONBAY.COM Please contact 1-855-HD-HAMPTON for further assistance.
- Page 4 Pre-Assembly (continued) PLANNING ASSEMBLY Before beginning assembly of this product, make sure all parts are present. Compare parts with the Hardware Included and Package Contents lists. If any part is missing or damaged, do not attempt to assemble the product. Contact customer service for replacement parts.
- Page 5 Pre-Assembly (continued) PACKAGE CONTENTS HAMPTONBAY.COM Please contact 1-855-HD-HAMPTON for further assistance.
- Page 6 Pre-Assembly (continued) Part Part Number Description Quantity P000200217 Post P006100082 Base Cover P000100135 Base P000300031 Cover P005000197 Arc Support P000400490 Right Curved Frame P000400491 Left Curved Frame P000400488 Right Beam P000400489 Left Beam P005600116 Decorative Profile P000600665 Right Cross Beam P000600666 Left Cross Beam P000500563...
- Page 7 Assembly (continued) Attaching the Base Attach the Base (C) to the Post (01) using screws (HH). It is suggested to pre-drill holes for easier installation of the base. NOTE: The end of the posts are labeled TOP and BOTTOM Bottom HAMPTONBAY.COM Please contact 1-855-HD-HAMPTON for further assistance.
- Page 8 Assembly (continued) Attaching the Covers Insert the Cover (D) into the top of the Post (01), but don’t assemble. NOTE: To avoid destroying the finish, do not put the parts on the ground directly. Bottom HAMPTONBAY.COM Please contact 1-855-HD-HAMPTON for further assistance.
- Page 9 Assembly (continued) Connecting the Beams and Connector Connect the Beams (G1&G2) with the Connector (N) using bolts (MM) and flat washers (KK). NOTE: To avoid destroying the finish, do not put the parts on the ground directly. HAMPTONBAY.COM Please contact 1-855-HD-HAMPTON for further assistance.
- Page 10 Assembly (continued) Connecting the Curved Frames and Connector Connect the Curved frames (F1&F2) with the Connector (N) using bolts (FF&GG) and flat washers (KK). NOTE: To avoid destroying the finish, do not put the parts on the ground directly. HAMPTONBAY.COM Please contact 1-855-HD-HAMPTON for further assistance.
- Page 11 Assembly (continued) Connecting the Curved Frames and Posts Attach the Curved frames (F1&F2) with the Post (01) using screws (AA) and flat washers (KK). NOTE: Pay close attention to the hole placement to ensure proper assemble. Also pay attention to the direction of the curved frames. Wrong Correct Curved frame direction...
- Page 12 Assembly (continued) Attaching the Beams Attach the beams (G1&G2) to the post (01) using screws (AA) and flat washers (KK). NOTE: Ensure post is oriented properly before installing beams, inside of posts must have holes for canopy guide tube. HAMPTONBAY.COM Please contact 1-855-HD-HAMPTON for further assistance.
- Page 13 Assembly (continued) Attaching the Decorative Profile Attach the decorative profiles (H) to the post (01) using screw (AA) and washer (KK). Attach the Cover (D) to the post (01) using screw (HH). It is recommended to predrill holes to install the Cover (D). NOTE: To avoid destroying the finish, do not put the parts on the ground directly.
- Page 14 Assembly (continued) Attaching the Arc Support Attach the arc support (E) to the curved frames (F1&F2), beams (G1&G2) and post (01) using bolts (EE), screws (BB) and flat washers (KK). NOTE: To avoid destroying the finish, do not put the parts on the ground directly. Make sure the angle between the curved frame and post is 90°when attaching the Support, triangular rule can be used if necessary.
- Page 15 Assembly (continued) Connecting the Cross beam Connect the cross beam (I1&I2) with cross beam connector (I3) using bolts (MM) and flat washers (KK). NOTE: To avoid destroying the finish, do not put the parts on the ground directly. HAMPTONBAY.COM Please contact 1-855-HD-HAMPTON for further assistance.
- Page 16 Assembly (continued) Attaching the Cross Beams Attach the cross beams (I1&I2) and curved frames (F1&F2) using bolts (II) and flat washers (KK). NOTE: To avoid destroying the finish, do not put the parts on the ground directly. HAMPTONBAY.COM Please contact 1-855-HD-HAMPTON for further assistance.
- Page 17 Assembly (continued) Connecting the Canopy Tube Connect the canopy tube 1 (L1) with the canopy tube 2 (L2) using bolt (JJ) and flat washer (KK). NOTE: To avoid destroying the finish, do not put the parts on the ground directly.
- Page 18 Assembly (continued) Covering the Canopy Cover the canopy (M) on the pergola. NOTE: To avoid destroying the finish, do not put the parts on the ground directly. HAMPTONBAY.COM Please contact 1-855-HD-HAMPTON for further assistance.
- Page 19 Assembly (continued) Inserting the Canopy Tube Insert the canopy tubes (L1&L2) into the canopy (M). NOTE: To avoid destroying the finish, do not put the parts on the ground directly. HAMPTONBAY.COM Please contact 1-855-HD-HAMPTON for further assistance.
- Page 20 Assembly (continued) Inserting the Guide Tube Insert the Guide tube (J) into the Canopy tubes (L1&L2). Then connect the Guide tube (J) and Guide tube connector (K) with Post (01) using screws (CC). Then secure the guide tube connect (K) to the post (01) using screw (HH). For easier installation it is recommended to predrill holes for screw bolt (HH) to make the Guide tube connector (K) level.
- Page 21 Assembly (continued) Securing the pergola Secure the pergola on the ground with stakes (LL) It is recommended for anchoring on wood or concrete surface for more stability using setscrew (Purchased separately). NOTE: To avoid destroying the finish, do not put the parts on the ground directly.
- Page 22 Assembly (continued) Attaching the Base Cover Attach the base cover (02) and post (01) using screws (DD). NOTE: To avoid destroying the finish, do not put the parts on the ground directly. HAMPTONBAY.COM Please contact 1-855-HD-HAMPTON for further assistance.
- Page 23 Assembly (continued) Apply the stickers on the pre-drill holes Apply the stickers (NN) to cover the pre-drill holes on the Posts (01) if you choose, but not required. NOTE: To avoid destroying the finish, do not put the parts on the ground directly.
- Page 24 Care and Cleaning □ Steel components for this gazebo are treated with rust inhibiting paint that protects it from rusting. However, due to the nature of steel, surface oxidation (rusting) will occur if these protective coatings are scratched. This is not a defect and thus not covered by the warranty.
- Page 25 Questions, problems, missing parts? Before returning to the store, call Hampton Bay Customer Service 8 a.m. - 7 p.m., EST, Monday-Friday, 9 a.m. - 6 p.m., EST, Saturday 1-855-HD-HAMPTON HAMPTONBAY.COM Retain this manual for future use.
Need help?
Do you have a question about the LONGFORD A106003600 and is the answer not in the manual?
Questions and answers
Do the bolts on the 7 cross bars on top go up or down? Up looks nicer from underneath but it looks like the sling will rub on the bolts. Also, this is no longer on the Bill app!
We need a replacement clip to connect canopy bars and I don’t see one listed. How do we get a new one?
Replacement canopy