Table of Contents
Advertisement
Advertisement
Table of Contents

Subscribe to Our Youtube Channel
Related Manuals for SunSynk Life3.5Hyb02


Summary of Contents for SunSynk Life3.5Hyb02
- Page 1 LIFELYNK ALL-IN-ONE HYBRID INVERTER INSTALLER MANUAL Global Tech China Ltd, 3 Floor, Wai Yip Industrial Building. 171 Wai Yip Street, Kwun Tong, Kowloon, Hong Kong. Tel: +852 2884 4318 Fax: +8522884 4816 www.sunsynk.com / sales@globaltech-china.com www.globaltechhk.com Version 8.0 (07/19/2021)
-
Page 2: Table Of Contents
INDEX 1. SAFETY ......................... 4 1.1. G ................4 ENERAL AFETY NFORMATION 1.2. S ......................4 YMBOLS 1.3. S ................... 5 AFETY NSTRUCTIONS 1.4. D ....................5 ISPOSAL EMARKS 2. PRODUCT INTRODUCTION ................. 6 3. TECHNICAL SPECIFICATION ................7 4. INSTALLATION ..................... 9 4.1. - Page 3 6.1. S ..............30 TARTUP HUTDOWN ROCEDURE 6.2. I ..........30 NFORMATION FOR OMMISSIONING THE NVERTER 6.3. GFDI F ......................31 AULT 7. MAINTENANCE ....................31 APENDIX A ........................ 32...
-
Page 4: Safety
SAFETY 1. SAFETY 1.1. General Safety Information This device should only be used in accordance o instructions within this manual and in compliance with local, regional and national laws and regulations. Only allow this device to be installed, operated, maintained, repaired by other persons who have also read and understood this manual. -
Page 5: Safety Instructions
1.3. Safety Instructions WARNING HIGH LIFE RISK DUE TO FIRE OR ELECTROCUTION. The Sunsynk Lifelynk Hybrid Inverter can only be installed by a qualified licensed electrical contractor. This is not a DIY product. Be sure to read this manual thoroughly before installation. -
Page 6: Product Introduction
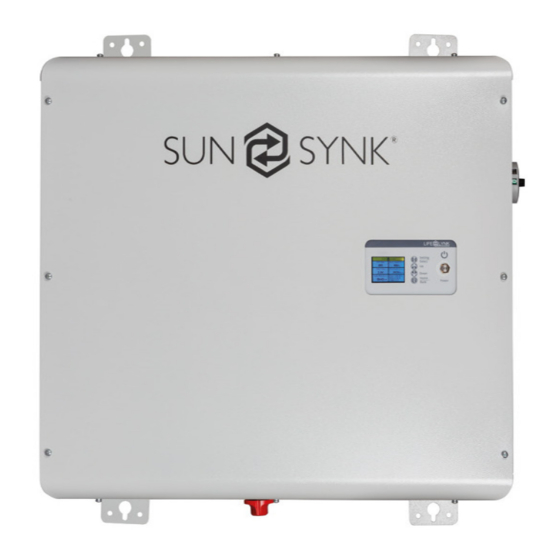
PRODUCT INTRODUCTION 2. PRODUCT INTRODUCTION The Sunsynk Lifelynk Hybrid Inverter is a highly efficient power management tool that allows the user to hit those ‘parity’ targets by managing power-flow from multiple sources such as solar, mains power (grid) and generators, and then effectively storing and releasing power as and when utilities require. -
Page 7: Technical Specification
Bi-directional inverter that can rapidly charge its internal batteries in just one hour; Generator Autorestart feature. Model Life3.5Hyb02 PV Input data Max. PV Input Voltage 500V Max. PV Current Max. PV Isc AC Output / Input Data... - Page 8 Standalone Data 3600W Nominal Output Power 230VAC Nominal Output AC Voltage 50Hz Nominal AC Frequency Battery Data 40V ~ 59V Battery Voltage Range Max. Charging and Discharging Current Lithium-ion Battery Type 576Wh Power of Each Battery Number of Batteries IP20 Ingress Protection Class I Protective Class...
-
Page 9: Installation
INSTALLATION 4. INSTALLATION 4.1. Selecting the Mounting Area DO NOT install the inverter in the following areas: Areas with high salt content, such as the marine environment. It will deteriorate the metal parts and possibly lead to water/dampness penetrating the unit. Areas filled with mineral oil or containing splashed oil or steam such as found in ... -
Page 10: Mounting The Inverter
ALSO CONSIDER: Installing the indoor unit, outdoor unit, power supply cable, transmission cable, and remote control cable at least 1 metre away from any television or radio receiver. This will prevent TV reception interference or radio noise. This will prevent radio signal interference from external units that might interfere with the Wi-Fi or GSM monitoring. -
Page 11: Connecting The Batteries
4.3. Connecting the Batteries Before mounting the inverter on the wall, it is better to install the batteries using the fixings supplied with the product like in the figures below. A minimum battery cable size of 35mm diameter is recommended. The Lifelynk uses a set of batteries that provide 2880Wh of energy. - Page 12 For safe operation and compliance, an individual DC overcurrent protector or disconnection device is required for the connection of the battery and the inverter. Users are recommended to utilise a suitable fuse and DC isolator (see next page). In some applications, switching devices may not be required, but overcurrent protectors must be used.
-
Page 14: Connecting To The Mains / Grid
4.4. Connecting to the Mains / Grid 1. Connect the Lyfelynk Hybrid Inverter to the electrical grid via the "Grid" ports, using a suitable RCD and a 20 A fuse on the consumer board. 2. Now, using a 4 mm cable, connect only the essential loads to the "Load" ports (Output) to a secondary consumer board, considering the maximum limit of 3.6 kW. -
Page 15: Wiring The Pv Panels
4.7. CT Coil and Load Power Settings The CT coil is one of the most important parts of the Sunsynk Parity inverter. This device reduces the power of the inverter to prevent feeding power to the grid. This is also known as "Zero Export". - Page 16 You can access the CT Coil Screen directly from the Home Screen.
-
Page 17: Operation
OPERATION 5. OPERATION 5.1. System Flow... -
Page 18: Switching On/Off
5.2. Switching ON/OFF Once the inverter has been correctly installed and the batteries are connected, press the on/off button (located on the front of the case) to turn on the system. When the system is connected without a battery but connected with either PV or grid and the on/off button is switched off, the LCD will still light up (display will show off). -
Page 19: Home Settings
5.4. Home Settings What this page displays? Basic Setting Icon System Logger Icon Fault Codes Icon Advanced Settings Icon What you can do from this page You can navigate through the function by clicking on each icon... -
Page 20: Basic Settings
5.5. Basic Settings What this page displays? Time Date Child Lock Backlight Always On/Off What you can do from this page Set the system’s time Set the system’s date Set child lock code (default is 0000) Set backlight always on After changing the settings, do not forget to click Save Settings. -
Page 21: System Logger
5.6. System Logger Solar Production Grid Production What this page displays? Solar Production Icon Grid Production Icon What you can check in this page Daily solar power produced Monthly solar power produced Yearly solar power produced Total solar power produced Daily grid power used Monthly grid power used Yearly grid power used... -
Page 22: Advance Settings
5.7. Advance Settings What this page displays? Grid Settings Page Icon System Settings Page Icon Inverter Settings Page Icon Battery Settings Page Icon What you can do from this page You can access the Grid, System, Inverter, and Battery setting pages. -
Page 23: Grid Settings
5.7.1 Grid Settings What this page displays? Maximum Grid Voltage Allowed Minimum Grid Voltage Allowed Maximum Grid Frequency Minimum Grid Frequency What you can do from this page You can set these limits. But, remember that these values need to be in accordance to your local grid conditions. -
Page 24: Battery Settings
5.7.2 Battery Settings What this page displays? Low Battery Reboot Voltage Maximum Charge Current Charge from the Mains Float Charge Voltage What you can do from this page The battery setting page set a Low Voltage Cut-Off for the batteries. Before setting this, please refer to the battery characteristics. -
Page 25: System Settings
5.7.3 System Settings What this page displays? Max Inverter Power Limiter UPS Mode Solar Mode Use System Timer What you can do from this page Set the maximum discharge current from the batteries Set the maximum inverter power - please refer to the number of batteries and type of batteries being used Set Time of Use Controller –... -
Page 26: System Controller
5.8. System Controller What this page displays? Start Time Stop Time System to Charge System to Discharge What you can do from this page This is the heart of the system. From here, you can select a time when you would like the batteries to charge from the AC rather than from the solar. -
Page 27: Using A Generator
The generator can be controlled via a relay, which is a set of dry contacts. The current on these contacts is limited to 1 A / 12 V approximately. A simple reference circuit to auto-start generators on a boat is shown in the figure below. Sunsynk will release a new OS E406 with better Gen control. -
Page 28: Fault Codes
Solutions Inverter work mode changed Working Mode Change 1. Reset the inverter. 2. Seek help from Sunsynk. AC Slide over current fault. 1. Check if the backup load power is AC over current fault or hardware within the range of the inverter. - Page 29 PV isolation resistance is too low 1. Check if the connection of PV panels and inverter are firmly DC insulation impedance failure connected. 2. Check if the earth bond cable on inverters is connected to the ground. 1. Please wait 5 minutes to see if it The bus bar is unbalanced returns to normal.
-
Page 30: Commissioning
COMMISSIONING 6. COMMISSIONING 6.1. Startup / Shutdown Procedure The inverter must be installed by a qualified / licensed electrical engineer in accordance to the countries wiring regulations. Only after the engineer has completed the Earth Bond, RCD, and Earth Leakage Tests, check the solar panel Voc voltage (Must not exceed 480V) and check the battery voltage. -
Page 31: Gfdi Fault
This is the heart of the Ensure See section 4.14 system this controller familiar with this, if you everything fully understand the controller you will fully appreciate capabilities of there inverter This is for paralleling If paralleling inverters If using a wind turbine systems, wind in 3 Phase check you... -
Page 32: Apendix A
2) Be of the type specified in the inverter manufacturer’s instructions or as labelled on the inverter. We recommend the use of an RCD on all circuits and sub circuits connected to the Sunsynk inverter. Residual current breaker with overcurrent protection (RCBO). - Page 33 Kowloon, Hong Kong. Tel. HK +852 2884 4318 Fax: +852 2884 4816 Tel. UK +44 151 528 9945 Tel. SA +27 1108 39837 sales@globaltech-china.com Audio Training manuals on Apple Pod Cast and Spotify Full training support, manuals and videos on www.sunsynk.com...
Need help?
Do you have a question about the Life3.5Hyb02 and is the answer not in the manual?
Questions and answers