Table of Contents
Advertisement
Quick Links
Komet Dental
Gebr. Brasseler GmbH & Co. KG
Trophagener Weg 25
32657 Lemgo · Germany
Telefon +49 (0) 5261 701-0
Telefax +49 (0) 5261 701-289
.
info@kometdental.de
www.kometdental.de
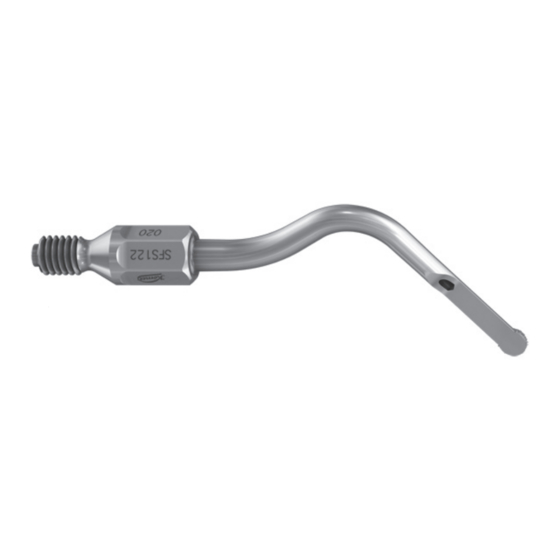
Schallspitzen SFS120/121/122
© Gebr. Brasseler GmbH & Co. KG
310456 - Rev 2017-07
é è ê í ë
∆
Kieferchirurgie, Oral surgery, Chirurgie maxillo-faciale,
Cirugía maxilofacial, Chirurgia maxillo-facciale
rostfreier Stahl – stainless steel – acier inoxydable – acero inoxidable – acero inossidabile
SFS120.000.020
SFS120.000.030
max.
10 N
Abb./Fig. 1
Abb./Fig. 2
é
Schallspitzen für die chirurgische Kronenverlängerung nach Dr. Thomas Schwenk, Dr. Marcus Striegel
1. Indikation
Das Einsatzgebiet der Komet Schallspitzen SFS120, SFS121 und SFS122 nach Dr. Thomas Schwenk und Dr.
Marcus Striegel ist die oszillierende Knochenbearbeitung im Rahmen einer minimalinvasiven chirurgischen
Kronenverlängerung. Mit der Schallspitze lässt sich eine kontrollierte Osteoplastik des labialen Knochens
durchführen, ohne hierbei den Zahn oder die angrenzenden Weichteile zu traumatisieren. Es wird der Knochen soweit
abgetragen, bis die zu Behandlungsbeginn gemessene biologische Breite wieder feststellbar ist. Die Schallspitzen
dürfen ausschließlich von Zahnärzten und medizinischem Personal verwendet werden, die in den entsprechenden
Bereichen der dentalen Chirurgie hinreichend geschult sind.
2. Kontraindikationen
Generelle Kontraindikationen im Rahmen der dentalen Chirurgie müssen berücksichtigt werden. Ebenso müssen
alle bestehenden Kontraindikationen in der Mund-, Kiefer- und Gesichtschirurgie (z. B. Implantation, Kieferchirurgie)
Beachtung finden.
3. Warnhinweise
Schallspitzen sind mit aller Sorgfalt anzuwenden und unterliegen einer limitierten Lebensdauer.
Achtung:
- Frakturgefahr! Beim Einsatz von Schallspitzen ist mit spontan auftretenden und frühzeitigen Frakturen zu rechnen,
welche sich nicht ankündigen. Um die Frakturgefahr zu reduzieren, ist die vorgeschriebene Leistungsstufe einzuhalten
(siehe Anwendungshinweise) und es sind alle Einsatzhinweise zu beachten. Des weiteren die Instrumente niemals
verkanten oder als Hebel benutzen. Übermäßigen Anpressdruck vermeiden. Da geringfügige Beschädigungen durch
mechanische Einflüsse Frakturen auslösen können, die Schallspitzen mit äußerster Vorsicht verwenden.
- Verschluckungsgefahr! Sollte es zum Bruch der Schallspitze kommen, besteht Verschluckungsgefahr. Dieser ist
durch geeignete Maßnahmen entgegenzuwirken.
- Frühzeitiger Verschleiß! Beim Bearbeiten von Zahnhartsubstanz kann es zur Abnutzung der Diamantierung
kommen. Auch übermäßiger Anpressdruck kann zu Schäden an Arbeitsteil oder Diamantierung führen. Daher sind
die Instrumente nach jedem Einsatz auf Abnutzungserscheinungen oder Beschädigungen zu überprüfen und ggf.
auszutauschen.
- Erhöhte Wärmeentwicklung! Durch zu hohen Anpressdruck und/oder abgenutzte oder gestumpfte Instrumente kann
es zu schädigender Wärmeentwicklung kommen, wodurch das Risiko einer thermalen Nekrose (Gewebeschäden)
erhöht wird. Deshalb sind übermäßiger Anpressdruck zu vermeiden und beschädigte Schallspitzen (Formänderung,
korrodierte Oberflächen, freie Stellen oder defektes Gewinde etc.) sind auszutauschen.
- Erhöhte Schwingung: Bitte beachten Sie, dass Schallspitzen dieser Indikation abhängig von der gewählten
Leistungsstufe stärker schwingen können als 200 µm. Die erhöhten Schwingungen stellen keinen sicherheitsrelevanten
Aspekt dar, solange die in Punkt 5 (Anwendungshinweise) genannten Leistungseinstellungen beachtet und zudem der
Grenzwert der Luftzufuhr des verwendeten und freigegebenen Antriebs eingehalten werden.
Bei den Schallspitzen handelt es sich um Medizinprodukte nach den zutreffenden nationalen gesetzlichen
Bestimmungen. Nach diesen Bestimmungen sind sie nur für die beschriebene Anwendung unter Beachtung
der geltenden Arbeitsschutzbestimmungen, der geltenden Unfallverhütungsmaßnahmen und von fachkundigen
Anwendern zu benutzen. Die Bestimmungen legen darüber hinaus fest, dass nur fehlerfreie Arbeitsmittel benutzt
werden dürfen, auf ihren Verwendungszweck zu achten ist, der Patient und Dritte vor Gefahren zu schützen sind und
eine Kontamination durch das Produkt ausgeschlossen ist.
Sicherheitstechnische Kontrolle
Es kann vorkommen, dass infolge Dauerbeanspruchung oder durch Beschädigung (Herunterfallen auf den Fußboden
oder mechanische Veränderung der ursprünglichen Form) ein Bruch entstehen kann. Deshalb sind die Spitzen vor
jeder Anwendung mit leichtem Druck durch Daumen und Zeigefinger auf ihre Betriebssicherheit zu prüfen (Abb. 1).
Als zusätzliche Sicherheit sind die Spitzen mit ca. 10N (1 kg) mechanisch ohne Funktion zu belasten (Abb. 2). Zum
Prüfen, Einsetzen und Herausnehmen Handschuhe verwenden, da sonst Verletzungs- und Infektionsgefahr besteht.
Wir empfehlen, die Spitzen regelmäßig auszutauschen.
4. Sachgemäßer Einsatz
Unsteril gelieferte Schallspitzen sind vor dem erstmaligen Gebrauch aufzubereiten.
Die Komet Schallspitzen SFS120, SFS121 und SFS122 sind in Verbindung mit den folgenden Antrieben einsetzbar:
- im Komet Schallhandstück SF1LM, SF1LS
- im SONICflex™ Schallhandstück der Fa. KaVo Serie 2003N/L/X/LX
Die genannten Schallhandstücke – ausgenommen SF1LS – verfügen über eine MULTIfl ex™ Kupplung. Zum Einsetzen
bzw. Lösen der Schallspitzen bzw. Kühladapter wird der Spitzenwechsler mit Drehmoment SF1975 verwendet
(Abb. 4). Bei Verwendung des Spitzenwechslers die Spitze immer in Richtung des Halbradius ausgerichtet einsetzen
(Abb. 3). Die gewünschte Spitze mit dem genannten Spitzenwechsler rechtsdrehend in das Handstück einschrauben.
Zum Lösen der Spitze Spitzenwechsler auf die Spitze aufsetzen und linksdrehend herausschrauben.
Hinweis: Hierzu bitte die Hinweise in der Gebrauchsanweisung der Schallhandstücke beachten.
5. Anwendungshinweise
Bei der Verwendung der Schallspitzen in Verbindung mit den freigegebenen Antrieben sind die zugelassenen
Leistungsseinstellungen (Leistungsstufen) einzuhalten. Sowohl im Komet Schallhandstück SF1LM/LS als auch beim
KaVo SONICflex™ 2003 sind die Leistungsstufen 1 oder 2 anwendbar. Die Verwendung der Leistungsstufe 3 ist aus
Sicherheitsgründen nicht erlaubt. Bei beiden Antrieben wird die Leistungsstufe über den Regulierring eingestellt.
Hierzu bitte die Hinweise in der Gebrauchsanweisung der Schallantriebe beachten. Die Schallspitzen haben ihre
höchste Effektivität bei geringer Anpresskraft. Bei zu hoher Anpresskraft können negative Folgeerscheinungen
auftreten (siehe 3. Warnhinweise). Da diese Schallspitzen auch bei bestimmungsgemäßem Gebrauch unangekündigt
frakturieren können, sollten bei der Operation stets zwei Schallspitzen eingeplant werden, d. h. eine als Reserve
vorgehalten werden, so dass der geplante Eingriff im Falle einer Fraktur zu Ende geführt werden kann. Hinweis zur
Einsatzhaltung der Schallspitze: die Seite mit der Kühlbohrung (glatte Seite) zeigt zum Zahn hin.
Kühlung:
Die Kühlung der chirurgischen Schallspitzen erfolgt über eine externe Zuführung von medizinisch geeigneten
Flüssigkeiten von mind. 50 ml/min. Es ist darauf zu achten, dass die Wasserzufuhr der zahnärztlichen
Behandlungseinheit abgeschaltet wird. Die sorgsame und kontinuierliche Kühlung des Operationsfeldes ist unbedingt
sicherzustellen. Dies wird mittels des Kühladapters SF1979 erreicht. Der Kühladapter wird in das Schallhandstück
eingeschraubt. In den Kühladapter wird dann die Schallspitze eingeschraubt. Der Schlauch der Kühlmittelzuführung
wird auf das kleine Röhrchen des Kühladapters gesteckt. Als hilfreiches Zubehör steht der Montageschlüssel 566 zur
Verfügung, mit dem die Demontage der Schallspitze vom Kühladapter ermöglicht wird. Eine kontrollierte Zuführung
des Kühlmittels an das OP-Feld über einen geeigneten Chirurgiemotor, z. B. den KaVo INTRAsurg 1000 für eine
oszillierende Bearbeitung, ist vorzuziehen. Am Markt erhältliche manuelle Kompressionssysteme sorgen für einen
druckgestützten Transport der Kühlflüssigkeit:
- System OMNIA; manuelle Zuführung sterilen Kühlmediums mittels Kompressionstasche; Bezugsmöglichkeit in
Deutschland: Implantis Disposable Medical Devices, www.implantis.eu.
Deutschland: Tel. (0180) 5 90 75 90, Fax (00800) 05 05 51 23
Österreich: Tel. (0049180) 5 90 75 90, Fax (00800) 05 05 51 23
Art. H2200 Manuelles Kühlsystem mit Kompressionstasche (Omnia Nr. 30.E0008.00); Art. H2204 Manuelles
Kühlsystem mit Flussregulation, zum Fixieren am Handstück (Omnia Nr. 32F0157); www.omniasrl.com.
6. Wartungs- und Pflegehinweise
Schallspitzen und Kühladapter direkt nach der Anwendung am Patienten in den mit einem geeigneten Reinigungs-/
Desinfektionsmittel (z. B. Komet DC1) befüllten Fräsator geben. Das Einlegen verhindert das Antrocknen von
Rückständen (Proteinfixierung). Schallspitzen und Kühladapter beim Einlegen schräg halten, um das Eindringen
der Flüssigkeit in die Hohlräume zu gewährleisten. Es wird empfohlen, die Wiederaufbereitung der Instrumente
spätestens eine Stunde nach Anwendung vorzunehmen. Der Transport der Instrumente zum Aufbereitungsort sollte
im Fräsator erfolgen.
7. Aufbereitung
Unsteril gelieferte Schallspitzen sind vor dem erstmaligen Gebrauch aufzubereiten.
è
Sonic tips for surgical crown extensions according to Dr. Thomas Schwenk and Dr. Marcus Striegel
1. Indication
Developed in close collaboration with Drs. Thomas Schwenk and Marcus Striegel, the Komet sonic tips SFS120,
SFS121 and SFS122 are intended for oscillating work on bones within the course of a minimally invasive surgical bone
extension. These sonic tips allow the realization of a controlled osteoplasty of the labial bone without traumatizing
the tooth or the adjacent soft tissue. The bone is stripped until the biological width measured at the beginning of the
treatment is apparent once again. The sonic tips may only be used by dentists and medical personnel suffi ciently
trained in the relevant fi elds of dental surgery.
2. Contra-indications
When a patient is considered for treatment, all general contraindications for dental surgery must be taken into
account. All commonly known contraindications in oral maxillo facial surgery (e.g. implantation, jaw surgery) also have
to be considered.
3. Warnings
The useful life of the sonic tips is limited. They therefore have to be used with the utmost care.
Attention:
- Risk of fracture! The sonic tips may fracture unexpectedly and without warning. In order to reduce the risk of fracture,
make sure to stick to the correct power setting (see instructions for use) and observe all recommendations for use.
Never allow the instruments to jam. Do not use instruments for leverage. Avoid excessive contact pressure. Use sonic
tips with the utmost care as even minor mechanical damage can provoke the fracture of the instruments.
- Risk of ingestion! Fracture of the sonic tip leads to the risk of the tip being accidentally swallowed. Take all
appropriate steps to prevent this.
- Premature wear! Work on hard dental substance can cause wear of the diamond coating. Likewise, excessive contact
pressure can lead to damage to the working part or the diamond coating. Inspect instruments after every use for signs
of wear or damage. Exchange if necessary.
- Excessive heat generation! Excessive contact pressure and/or worn or blunt instruments can cause hazardous heat
generation which increases the risk of thermal necrosis (damage to tissue). Excessive contact pressure therefore has
to be avoided. Damaged sonic tips (changed shape, corroded surfaces, void spots or defect thread etc.) have to be
replaced.
- Increased oscillation: Please note that, depending on the chosen power level, the oscillation of sonic tips intended for
this indication might exceed 200 µm. The increased oscillations do not affect the safety of the tips, provided that the
power settings indicated in paragraph 5 (Recommendations for use) are observed and the threshold value regarding
the air supply of the authorized power system used are observed.
The sonic tips are medical devices and as such subject to the applicable legal provisions of the relevant country. In
compliance with such regulations, the sonic tips may only be used by properly qualifi ed operators within the scope of
the indicated application and according the valid industrial Health & Safety regulations and observing the valid rules
for accident prevention. The provisions further stipulate that all equipment used must be free of defects and suitable
for the intended application. Furthermore, the patient and third persons must be protected from hazards. Possible
contamination caused by the product must be ruled out.
Safety control
Fracture may occur due to the tips being subjected to continuous or sudden stress (for example if the tips are dropped
on the fl oor or through a mechanical change of the original shape). Check the tips prior to each use to make sure they
are safe to use. To do this, apply slight pressure with your thumb and index fi nger (fi g. 1). For additional safety, load
the tips mechanically with approx. 10N (1 kg), without function (fi g. 2). Always wear protective gloves when checking,
inserting or removing the sonic tips to avoid risks of injury and infection. We recommend that the tips be exchanged
regularly.
4. Appropriate use
Those sonic tips that are supplied non-sterile have to be prepared prior to first use. The sonic tips SFS120, SFS121
and SFS122 made by Komet can be used:
- In the Komet sonic hand piece SF1LM, SF1LS
- In the SONICfl ex™ hand piece made by the co. KaVo Series 2003N/L/X/LX
The above listed sonic hand pieces - except the SF1LS - are provided with a MULTIfl ex™ coupling. The tip changer with
torque SF1975 is used for inserting and removing the sonic tips or cooling adapter (fig. 4). When using the tip changer,
make sure that the tip always faces towards the semi-radius (fig. 3). Screw the chosen sonic tip into the hand piece
with the mentioned tip changer, turning the tool in a clockwise direction. To remove the tip, place tip changer on the tip
and turn anticlockwise. Note: Please observe the directions in the instructions supplied with your sonic hand piece.
5. Recommendations for use
The sonic tips may only be used with the authorised power systems and permitted power settings. The power settings
1 and 2 may be used. This applies to both the Komet sonic hand piece SF1LM/LS and the KaVo SONICfl ex™ 2003. The
use of power setting 3 is prohibited for safety reasons. The power setting is regulated by means of a regulating ring.
Please observe the recommendations in the instructions for use provided with the sonic hand pieces. The sonic tips
are at their most eff ective when used with low contact pressure. Excessive contact pressure may lead to undesirable
eff ects (see section 3 "warnings"). Given that these sonic tips may fracture without warning even when used according
to instruction and their designated use, always plan two sonic tips for the operation, i.e. always have a reserve at hand
so that the planned operation can still be fi nished even if one tip has broken. To ensure proper position of the sonic
tips during use, make sure that the smooth side with the cooling orifi ce faces towards the tooth.
Cooling:
The surgical sonic tips are cooled with at least 50 ml/min of an externally fed, sterile cooling liquid. Make sure to turn
off the water supply of the dental treatment unit. It is absolutely essential to thoroughly and continuously irrigate the
site at all times during the operation. This can be ensured by means of the cooling adapter SF1979. One end of the
cooling adapter is screwed into the sonic hand piece and the sonic tip is screwed into the other end of the cooling
adapter. The fl exible tube supplying the cooling agent is placed onto the small tube of the cooling adapter. The sonic
tip can be removed from the cooling adapter by means of the mounting wrench 566. Controlled supply of the cooling
agent by means of a suitable surgical power system is preferable, for example with the KaVo INTRAsurg 1000 for
oscillating work. There are various compression systems available on the market that ensure pressure supported
transport of the cooling agent.
- OMNIA system; manual supply of a sterile cooling agent by means of a compression pouch;
Article no. H2200 Manual cooling system with compression pouch (Omnia no. 30E0008.00), article no. H2204 Manual
cooling system with fl ux control, to be attached to the hand piece (Omnia no. 32F0157). For further information, visit
www.omniasrl.com.
6. Maintenance/care
Place sonic tips in a cleaning/disinfection tank (Fräsator) fi lled with a suitable detergent/disinfectant (e.g. Komet
DC1) immediately after use in the mouth to prevent drying of residues on the instruments (protein fi xation). Hold sonic
tips at an angle when placing them into the liquid to ensure that all hollow spaces are reached. It is recommended
to reprocess the instruments within one hour of use at the very latest. The instruments should be in the cleaning/
disinfection tank (Fräsator) when transported to the site where the reprocessing is to take place.
7. Reprocessing
The tips are supplied non-sterile and have to be prepared prior to first use.
Manual pre-cleaning (prior to manual and mechanical reprocessing):
1. Remove sonic tip and cooling adapter from cleaning/disinfection tank (Fräsator) immediately before reprocessing.
2. Separate the sonic tip from the cooling adapter before the start of the cleaning process with the tip changer
ê
Insert sonique pour les élongations coronaires selon le Dr. Thomas Schwenk, Dr. Marcus Striegel
1. Indication
Le domaine d'application des inserts soniques Komet SFS120, SFS121 et SFS122 selon le Dr. Thomas Schwenk et
Dr. Marcus Striegel est le traitement oscillatoire de l'os dans le cadre d'une élongation coronaire peu invasive. L'insert
sonique permet d'eff ectuer une ostéoplastie contrôlée de l'os labial, sans traumatiser la dent ou les tissus mous. L'os
est abrasé jusqu'à ce que la largeur biologique mesurée au début du traitement soit à nouveau atteinte. Les inserts
soniques ne doivent être utilisés que par des dentistes ou un personnel médical suffi samment formé aux domaines
correspondants de la chirurgie dentaire.
2. Contre-indications
Il faut considérer toutes les contre-indications générales de la chirurgie dentaire. Il faut également tenir compte de
toutes les contre-indications de la chirurgie maxillo-faciale (par exemple implantologie, chirurgie maxillaire).
3. Avertissements
La longévité des inserts soniques est limitée. Il faut donc les utiliser avec une grande prudence.
Attention:
- Risque de fracture ! Il faut s'attendre à la fracture spontanée et prématurée des inserts sans signe avant-coureur.
Pour réduire le risque de fracture, veiller à observer le niveau de puissance prescrit (voir recommandations
d'utilisation) et respecter toutes les instructions. Eviter que les instruments ne se coincent ou ne fassent levier. Eviter
les pressions trop importantes. Même un dommage minime causé par des facteurs mécaniques peut conduire à la
fracture des inserts. Il faut donc utiliser les inserts soniques avec une grande précaution.
- Risque d'ingestion ! La fracture des inserts soniques peut entraîner un risque d'ingestion. Veiller à prendre des
mesures appropriées pour éviter toute ingestion.
- Usure prématurée! Lors de l'abrasion des matériaux osseux durs il peut se présenter une usure de la couche
diamantée. Eviter les pressions trop importantes. Risque d'endommager la partie travaillante ou la couche diamantée.
Après chaque utilisation, il faut vérifi er l'état des inserts, et en cas d'usure ou d'endommagement, remplacer l'insert.
- Echauff ement trop important ! Les pressions trop importantes et/ou les instruments usés ou émoussés peuvent
310456_0717_GA_steri_SchallspChirKron_SFS120.indd 1
Strahlensterilisiert (Sterile Instrumente sind auf dem
≠
Verpackungsetikett entsprechend gekennzeichnet),
Sterilized using irradiation (Sterile instruments are
marked as such on the label of the packaging), Stéri-
lisation par irradiation (Les instruments stériles sont
marqués comme tels sur l'étiquette de l'emballage),
Esterilización por radiación (Los instrumentos esté-
riles son marcados como tales sobre la etiqueta del
embalaje), Sterilizzazione per mezzo di radiazione (Gli
strumenti sterili sono marcati come tali sull'etichetta
dell'imballaggio)
SFS121.000.020
SFS121.000.030
Abb./Fig. 3
Gebrauchsanweisung
Bitte unbedingt beachten und für späteren
Gebrauch gut aufbewahren.
Instructions for use
Please read carefully and retain for
future reference.
Conseils d'utilisation
A respecter scrupuleusement et garder
cette copie pour une utilisation ultérieure.
:
Verwendbar bis (nur zutreff end bei sterilen
Instrumenten), Use by (only applies to sterile
instruments), A utilisier avant le (ne s'applique qu'aux
instruments stériles), Fecha de caducidad (se aplica
solamente a instrumentos estériles), Data di scadenza
(riguarda soltanto strumenti sterili)
SFS122.000.020
SFS122.000.030
Abb./Fig. 4
Manuelle Vorreinigung (vor maschineller und manueller Aufbereitung):
1. Schallspitze mit Kühladapter unmittelbar vor der Aufbereitung aus dem Fräsator nehmen.
2. Schallspitze und Kühladapter vor Beginn des Reinigungsvorgangs immer mit Hilfe eines Spitzenwechslers oder
Montageschlüssels voneinander trennen, um eine Aufbereitung beider Produkte zu gewährleisten.
Oberflächenverschmutzungen gründlich unter fließendem Wasser abspülen. Eventuell anhaftende Verschmutzungen
unter Flüssigkeitsniveau und ständigem Drehen von Schallspitze bzw. Kühladapter mit einer Nylonbürste vollständig
entfernen und anschließend unter fließendem Wasser abspülen.
3. Kühlbohrungen mit dem Düsenreiniger (Zubehör des Schallhandstückes) durchstechen. Sind die Kühlbohrungen
nicht durchgängig, Instrument austauschen.
Maschinelle Aufbereitung (validiert):
1. Schallspitze bzw. Kühladapter gründlich unter fließendem Wasser abspülen, damit keine Rückstände des
Reinigungs-/Desinfektionsmittels in das RDG gelangen.
2. Die auf der Injektorleiste des Reinigungs- und Desinfektionsgerätes befindliche Düse herausschrauben bzw.
ziehen. Spüladapter SF1978 mit der Seite, an der sich das Außengewinde befindet, in die Silikonaufnahme der
Injektorleiste schrauben bzw. stecken. Nun die Schallspitze in das oben befindliche Innengewinde schrauben.
Wurde der Kühladapter SF1979 verwendet, wird dieser wie folgt aufbereitet: Nach Entfernung der Düse von der
Injektorleiste des RDG den Spüladapter SF1977 mit der Seite, an der sich das große Außengewinde befindet, in die
Silikonaufnahme der Injektorleiste schrauben. Anschließend den Kühladapter auf das oben befindliche Außengewinde
schrauben. Dabei die Hinweise in den Gebrauchsanweisungen der Spüladapter beachten.
3. Prozesschemikalie gemäß Angaben auf Produktetikett und Angaben des RDG-Herstellers in das Gerät geben.
4. Start des Vario TD-Programms inkl. thermischer Desinfektion. Die thermische Desinfektion erfolgt unter
Berücksichtigung des A0-Wertes und der nationalen Bestimmungen (prEN/ISO 15883).
5. Nach Programmablauf Schallspitze bzw. Kühladapter aus dem RDG entnehmen und trocknen (gemäß KRINKO-
Empfehlung vorzugsweise mit Druckluft). Für die Innentrocknung die Druckluftpistole so nah an die Kühlbohrung
führen, dass ausreichend Luft durch die Schallspitze strömt.
6. Sichtprüfung auf Unversehrtheit und Sauberkeit. Sind nach der maschinellen Aufbereitung noch sichtbare
Restkontaminationen auf der Schallspitze oder dem Kühladapter zu erkennen, Reinigung und Desinfektion
wiederholen, bis keine Kontamination mehr sichtbar ist.
Manuelle Aufbereitung (alternativ):
1. Die Schallspitze bzw. Kühladapter auf eine 10 ml Spritze + Kanüle stecken und mit Reinigungs- und
Desinfektionsmittel durchspülen. Falls noch sichtbare Restkontaminationen aus den Bohrungen austreten, erneut mit
Reinigungs- und Desinfektionsmittel durchspülen.
2. Oberflächenverschmutzungen gründlich unter fließendem Wasser abspülen. Eventuell anhaftende
Verschmutzungen unter Flüssigkeitsniveau und ständigem Drehen von Schallspitze bzw. Kühladapter mit einer
Nylonbürste entfernen und anschließend unter fließendem Wasser abspülen.
3. Schallspitze bzw. Kühladapter gründlich unter fließendem Wasser abspülen.
4. Sichtprüfung auf Sauberkeit. Sind sichtbare Restkontaminationen zu erkennen, Reinigung wiederholen, bis keine
sichtbaren Restkontaminationen mehr erkennbar sind.
5. Schallspitze bzw. Kühladapter in einem geeigneten Ständer (z. B. Komet 9952) in das mit Reinigungs- und
Desinfektionsmittel befüllte Ultraschallgerät bzw. Instrumentenbad geben.
6. Zur chemischen Desinfektion im Ultraschall- bzw. Instrumentenbad Herstellerangaben zu Konzentration und
Einwirkzeit beachten. Die Einwirkzeit beginnt erst, wenn die letzte Spitze in das Bad gegeben worden ist und darf
keinesfalls unterschritten werden. Achtung: 45°C nicht überschreiten (Gefahr der Eiweißgerinnung)!
7. Schallspitze bzw. Kühladapter nach Ablauf der Einwirkzeit gründlich mit geeignetem Wasser (zur Vermeidung
von Rückständen möglichst mit voll entsalztem [VE] Wasser) abspülen. Dabei die Bohrung der Schallspitze mit
mindestens 10 ml VE Wasser mit Hilfe einer Kanüle gründlich durchspülen um zu verhindern, dass Reinigungsmittel
in der Kühlbohrung verbleibt.
8. Schallspitze trocknen (gemäß KRINKO-Empfehlung vorzugsweise mit Druckluft). Für die Innentrocknung die
Druckluftpistole so nah an die Kühlbohrung führen, dass ausreichend Luft durch die Schallspitze strömt.
9. Sichtprüfung auf Unversehrtheit und Sauberkeit. Sind auf der Schallspitze sichtbare Restkontaminationen
zu erkennen, Reinigung und chemische Desinfektion wiederholen, bis keine sichtbaren Kontaminationen mehr
vorhanden sind.
Gemäß Empfehlung der Kommission für Krankenhaushygiene und Infektionsprävention (KRINKO) des Robert Koch-
Instituts (RKI) erfolgt die Aufbereitung bevorzugt maschinell. Informationen zur Wiederaufbereitung von Schallspitzen
nach DIN EN ISO 17664, diese Gebrauchsanweisung und weitergehende Informationen stehen unter
www.kometdental.de zum Download bereit oder können beim Hersteller Gebr. Brasseler angefordert werden.
Sterilisation im Autoklav:
Es ist eine für diese Kritisch B eingeordneten Schallspitzen, deren Zubehör und das Sterilisationsverfahren geeignete
Verpackung zu wählen.
Einzelverpackung: Die Verpackung muss groß genug sein, dass die Versiegelung nicht unter Spannung steht. Im
geeigneten Instrumentenständer: Schallspitze einstecken (z. B. 9952). Der Instrumentenständer ist in eine geeignete
Sterilisationsverpackung einzuschweißen.
Für diesen Vorgang sind folgende Vorgaben einzuhalten: Dampfsterilisation im Vakuumverfahren bei 134°C in einem
Gerät nach DIN EN 13060; validierte Prozesse.
- fraktioniertes Vorvakuum (Typ B)
- Sterilisationstemperatur: 134°C
- Haltezeit: mind. 5 Minuten (Vollzyklus)
- Trocknungszeit: mind. 10 Minuten
Um Fleckenbildung und Korrosion zu vermeiden, muss der Dampf frei von Inhaltsstoffen sein. Die empfohlenen
Grenzwerte der Inhaltsstoffe für Speisewasser und Dampfkondensat sind festgelegt durch DIN EN 13060. Bei der
Sterilisation von mehreren Instrumenten darf die Maximalbeladung des Sterilisators nicht überschritten werden. Die
Angaben des Geräteherstellers sind zu beachten.
Grundsätzliche Anmerkung:
Beachten Sie die in Ihrem Land gültigen rechtlichen Bestimmungen zur Wiederaufbereitung von Medizinprodukten
(z. B. www.rki.de). Seitens des Herstellers ist sichergestellt, dass die oben angeführten Aufbereitungsverfahren für
die Aufbereitung der genannten Instrumentengruppe zu dessen Wiederverwendung geeignet sind. Der Aufbereiter
ist dafür verantwortlich, dass die tatsächlich durchgeführte Wiederaufbereitung mit verwendeter Ausstattung,
Materialien und Personal in der Wiederaufbereitungseinrichtung die gewünschten Ergebnisse erzielt. Dafür sind
normalerweise routinemäßige Kontrollen der validierten maschinellen Aufbereitungsverfahren erforderlich. Ebenso
sollte jede Abweichung von den hier angeführten Verfahren sorgfältig durch den Aufbereiter auf ihre Wirksamkeit und
mögliche nachteilige Folgen ausgewertet werden.
Zubehör:
Komet Spitzenwechsler SF1975
Komet Kühladapter SF1979 + Montageschlüssel 566 (im Set 4602)
Für die Aufbereitung im Miele RDG: Komet Spüladapter SF1978/L für Komet Schallspitzen und Komet Spüladapter
SF1977/L für Komet Kühladapter SF1979. Stericassette 9952.
8. Lagerung
Steril verpackte Instrumente in der Originalverpackung vor Licht und Hitze schützen, trocken und sauber lagern.
Nicht im gleichen Raum mit Lösungsmitteln und Chemikalien aufbewahren.
9. Sicherheit und Haftung
Die Instrumente dürfen nur für den angegebenen Verwendungszweck eingesetzt werden. Bei Missachtung dieser
Sicherheitshinweise kann es zur Schädigung des Antriebs oder zu Verletzungen kommen.
Der Anwender ist verpflichtet, die Produkte eigenverantwortlich vor deren Einsatz auf die Eignung und die
Verwendungsmöglichkeit für die vorgesehenen Zwecke zu prüfen. Ein Mitverschulden des Anwenders führt bei
verursachten Schäden zur Minderung oder gänzlichem Ausschluss der Haftung von Gebr. Brasseler. Dies ist
insbesondere bei Nichtbeachtung der Gebrauchsanweisung oder Warnungen oder bei versehentlichem Fehlgebrauch
durch den Anwender der Fall.
to ensure proper reprocessing of both components. Remove surface contamination thoroughly under running water.
Completely remove stubborn contamination with a nylon brush below water level, turning the sonic tip/cooling
adapter constantly. Rinse off sonic tip/cooling adapter thoroughly under running water.
3. Check the patency of the cooling passage by guiding the nozzle cleaner (accessory of the sonic hand piece) through
the passage. Replace instrument if the passage is obstructed.
Mechanical reprocessing (validated):
1. Rinse sonic tip/cooling adapter thoroughly under running water to prevent any residues of the detergent/
disinfectant from getting into the washer/disinfector.
2. Unscrew the nozzle on the injector bar of the washer/disinfector or pull it out. Then screw or push the external
thread of the rinse adapter SF1978 in the silicon holders on the injector bar. Now screw the sonic tip in the internal
thread at the top of the rinse adapter. When using the rinse adapter SF1979, proceed as follows: Unscrew the nozzle
on the injector bar of the washer/disinfector. Then screw the large external thread of the rinse adapter SF1977 in the
silicon holders on the injector bar. Now screw the cooling adapter in the external thread at the top of the rinse adapter.
Observe the directions in the instructions for use provided with the rinse adapter.
3. Put chemical detergent into the washer/disinfector, following the indications on the label and the instructions of the
manufacturer of the washer/disinfector.
4. Start the Vario TD programme including thermal disinfection. Thermal disinfection takes place allowing for the A0
value and observing national provisions (prEN/ISO 15883).
5. On completion of the cycle remove sonic tip/cooling adapter from the washer/disinfector and dry (preferably with
compressed air as recommended by the Commission for Hospital Hygiene and Infectious Disease Prevention of the
Robert Koch Institute). When drying the inside of the instruments, please make sure to hold the compressed air gun
close to the cooling passage, in order to guarantee that suffi cient air fl ows through the sonic tip.
6. Visual examination to ensure that the instrument is clean and undamaged. If after mechanical reprocessing there
are still visible residues of contamination, repeat the cleaning and disinfecting process until no visible contamination
is left.
Manual reprocessing (alternative):
1. Place sonic tip/cooling adapter onto a 10 ml syringe and rinse with detergent/disinfectant. In case of visible
contamination emerging from the perforations, rinse again with detergent/disinfectant.
2. Remove surface contamination thoroughly under running water.
Completely remove stubborn contamination with a nylon brush below water level, turning the sonic tip/cooling
adapter constantly. Rinse off sonic tip/cooling adapter thoroughly under running water.
3. Rinse sonic tip/cooling adapter thoroughly with running water.
4. Visual examination to ensure that the instrument is clean. If there are still visible residues of contamination, repeat
the cleaning process until no visible contamination is left.
5. Place sonic tip/cooling adapter in a suitable container (e.g. Komet 9952) into the ultra sonic device or instrument
bath fi lled with detergent/disinfectant.
6. During chemical disinfection in the ultrasonic device or instrument bath, observe the instructions of the
manufacturer regarding concentration and immersion time. Be sure to observe the full correct immersion time which
does not start until the last tip has been immersed. Attention: do not exceed 45°C (risk of protein coagulation)!
7. On completion of the immersion time, rinse sonic tip/cooling adapter thoroughly with suitable water (preferably
with demineralised water to avoid residues of lime). Rinse the perforation of the sonic tip with at least 10 ml of
demineralised water by means of a cannula, to ensure that no residues of the detergent are left in the cooling passage.
8. Dry sonic tip (preferably with compressed air as recommended by the Commission for Hospital Hygiene and
Infectious Disease Prevention of the Robert Koch Institute). When drying the inside of the instruments, please make
sure to hold the compressed air gun close to the cooling passage, in order to guarantee that suffi cient air fl ows through
the sonic tip.
9. Visual examination to ensure that the instrument is clean and undamaged. If there are still visible residues of
contamination, repeat the cleaning and chemical disinfecting process until no visible contamination is left.
According to the recommendations of the Commission for Hospital Hygiene and Infectious Disease Prevention of the
Robert Koch Institute, reprocessing should preferably be carried out mechanically. Information on the reprocessing
of instruments in compliance with the standard DIN EN ISO 17664 these instructions for use and more detailed
information can be downloaded from our website www.kometdental.de or requested directly from the manufacturer
Gebr. Brasseler.
Sterilisation in the autoclave:
Make sure that the packaging is suitable for sonic tips classed as risk group critical B, their accessories and the
chosen method of sterilisation. Single pack: The packaging must be large enough to ensure that there is no pressure
on the seal. In the sterilisation container: Place sonic tips into a suitable sterilisation container (e.g. ref. 9952). For
sterilisation, the container has to be sealed in suitable packaging.
For this procedure, the following instructions have to be observed: Steam sterilisation using a vacuum process at
134°C in a device that complies with the provisions of DIN EN 13060; with validated processes.
- Fractionated pre-vacuum (type B)
- Sterilisation temperature: 134°C
- Hold time: at least 5 minutes (full cycle)
- Drying time: at least 10 minutes
In order to prevent staining and corrosion, the steam must be free of particles. The recommended limits for particle
contents in feed water and condensed steam are defi ned by standard DIN EN 13060. Make sure not to exceed
the maximum capacity of the sterilizer when sterilizing several instruments. Follow the instructions of the device
manufacturer.
Universally valid notes:
Observe the legal provisions regarding the reprocessing of medical products valid in your country (e.g.
www.rki.de). The manufacturer confi rms that the above detailed reprocessing methods are suitable for preparing the
above named instrument group to enable their reuse. The person carrying out the reprocessing is responsible for
ensuring that the applied method is carried out with appropriate equipment, materials and trained personnel at the
reprocessing site and that it actually achieves the desired result. To guarantee this, routine controls of the validated
mechanical preparation methods are necessary. Any deviation from the above detailed process must be carefully
checked by the operator to ensure eff ectiveness and to avoid possible adverse consequences.
Accessories:
Komet tip changer SF1975
Komet cooling adapter SF1979 + mounting wrench 566 (in the set 4602)
For preparation in the Miele washer/disinfector: Komet rinse adapter SF1978/L for Komet sonic tips and Komet
rinsing adapter SF1977/L for Komet cooling adapter SF1979. Sterilisation container 9952.
8. Storage
Store sterile packed instruments in their original packaging, away from light and heat in a clean and dry environment.
Do not store in the same room as chemicals or solvents.
9. Safety and liability
The instruments should only be used for the intended application. Nonobservance of these safety recommendations
may lead to damage of the hand piece or injury.
It is the responsibility of the user to check the products prior to use to ensure that they are suited for the intended
purpose. In case of contributory negligence by the user, Gebr. Brasseler partially or totally declines liability for all
resulting damages, particularly due to non-observance of our recommendations for use or warnings as well as
inadvertent misuse by the user.
provoquer un échauff ement plus élevé entraînant une nécrose thermique (endommagement des tissus). C'est pourquoi
il faut éviter les pressions de travail trop importantes et remplacer les inserts endommagés (inserts tordus, surfaces
corrodées, zones non-diamantées, fi letage défectueux, etc.). En tant que produits médicaux, les inserts soniques sont
soumis aux prescriptions en vigueur dans le pays respectif.
- Oscillation augmentée : Veuillez noter qu'en fonction du niveau de puissance choisi, l'oscillation des inserts soniques
prévus pour cette indication pourrait dépasser 200 µm. Les oscillations augmentées n'ont aucune infl uence sur la
sécurité, à condition que les niveaux de puissance indiqués dans le paragraphe 5 (Conseils d'utilisation) et la valeur
limite de la ventilation de la pièce-à-main autorisée soient respectés.
Les inserts soniques doivent être utilisés uniquement selon l'application décrite et par des utilisateurs qualifi és.
Veiller à respecter les consignes de sécurité et de santé du code du travail en vigueur ainsi que les recommandations
concernant la prévention des accidents. Les consignes imposent que l'utilisateur s'assure du parfait état de
fonctionnement de l'équipement utilisé et de la compatibilité avec l'application prévue. En plus, la santé du patient et
des tiers doit être protégée et toute contamination causée par le produit doit être exclue.
Contrôle de sécurité
Les inserts peuvent se fracturer s'ils subissent une pression continue ou un endommagement (p. ex. une chute ou une
déformation mécanique de la forme d'origine). C'est pourquoi il faut contrôler le bon fonctionnement des inserts avant
chaque utilisation en appuyant légèrement avec le pouce et l'index (fi g. 1). Comme mesure de sécurité supplémentaire,
il faut charger mécaniquement les inserts avec env. 10N (1 kg) sans fonction
(fi g. 2). Veiller à porter des gants de protection appropriés lors du contrôle, de l'insertion et du retrait des inserts –
Risque de blessure et d'infection. Nous recommandons de changer les inserts régulièrement.
4. Utilisation appropriée
Tous les inserts livrés non stériles doivent être nettoyés, désinfectés et stérilisés avant la toute première utilisation. Les
inserts soniques Komet SFS120, SFS121 et SFS122 s'utilisent :
- Sur la pièce-à-main sonique SF1LM, SF1LS de Komet
- Sur la pièce-à-main SONICfl ex™ de KaVo, série 2003N/L/X/LX
Les pièces-à-main soniques au-dessus mentionnées - à l'exception de la SF1LS - sont dotées d'un raccord MULTIfl ex™.
Instrucciones de empleo
Leer detenidamente y guardar este ejemplar
para uso más tarde.
Istruzioni d'uso
Si prega di leggere attentamente e conservare
per un'eventuale consultazione.
°
Bei beschädigter Verpackung nicht verwenden
(nur zutreff end bei sterilen Instrumenten),
Do not use in case of damaged packaging
(only applies to sterile instruments),
Ne pas utiliser si l'emballage est endommagé
(ne s'applique qu'aux instruments stériles),
No utilizar si el embalaje está dañado
(se aplica solamente a instrumentos estériles),
Non utilizzare se l'imballo è danneggiato
(riguarda soltanto strumenti sterili)
17.08.17 12:15
Advertisement
Table of Contents

Related Manuals for Komet SFS120


Summary of Contents for Komet SFS120
- Page 1 1 and 2 may be used. This applies to both the Komet sonic hand piece SF1LM/LS and the KaVo SONICfl ex™ 2003. The For this procedure, the following instructions have to be observed: Steam sterilisation using a vacuum process at use of power setting 3 is prohibited for safety reasons.
- Page 2 Retirar completamente los residuos adheridos de la punta sónica/ El campo de aplicación de las puntas sónicas de Komet tipo SFS120, SFS121 y SFS122 según Dr. Thomas Schwenk el adaptador de refrigeración sumergidos con el cepillo de nylon, girando la punta/el adaptador continuamente y y Dr.
Need help?
Do you have a question about the SFS120 and is the answer not in the manual?
Questions and answers