Table of Contents
Advertisement
Quick Links
Manufacturer:
Gebr. Brasseler GmbH & Co. KG
Trophagener Weg 25
32657 Lemgo · Germany
Sonic tips for inserting (SF12 CEM-Tip)
© 07/2013, Gebr. Brasseler GmbH & Co. KG
310239 - Rev 07/2013
ö ê í
¿
Order number
Numéro d'ordre
Número de pedido
å
Cavity preparation
Préparation cavitaire
Preparación de cavidades,
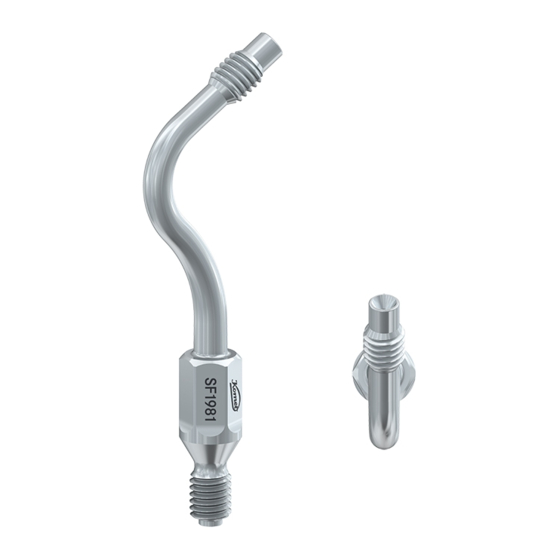
SF1981
Stainless Steel
Acier inoxydable
Acero inoxidable
Fig. 1
Fig. 2
ö
Sonic instruments for inserting inlays, onlays and veneers
1. Indication
The sonic tip SF12 (CEM tip) for inserting ceramic inlays, onlays and veneers as well as inlays and partial
crowns made of metal alloys is intended for the accurate fitting (by vibration) of the above listed restorations, in
connection with the tip holder SF1981. Thanks to the sonic movement of the polymer tops, the fixation material
(cement or composite) is transported into all areas of the preparation, thus ensuring a perfect fit and an optimum
marginal seal.
2. Contra-indications
There are no known contra-indications.
3. Warnings
The CEM tips (ref. SF12) are designed for single use and cannot be reprocessed or re-sterilised. The reuse of
these disposable products poses a risk of infection. A safe, risk-free reuse can therefore not be guaranteed. The
tip holder SF1981 is reusable and therefore suitable for reprocessing and re-sterilisation. The useful life of sonic
tips is limited. They therefore have to be used with the utmost care.
Attention:
- Risk of fracture! Spontaneous and premature fracture must be expected. The sonic tips may fracture
unexpectedly and without warning. In order to reduce the risk of fracture, make sure to stick to the correct power
setting (see instructions for use) and observe all recommendations for use. Never allow the instruments to jam.
Do not use instruments for leverage. Avoid excessive contact pressure. Use sonic tips with the utmost care as
even minor mechanical damage can provoke the fracture of the instruments.
- Risk of ingestion! Fracture of the sonic tip leads to the risk of the tip being accidentally swallowed. Take all
appropriate steps to prevent this.
- Avoid excessive contact pressure as this might damage the working part.
- Excessive heat generation! Excessive contact pressure and applying the CEM tip at the edge of the restoration
can cause hazardous heat generation which might damage the tip. Excessive contact pressure therefore has to
be avoided. Damaged sonic tips (changed shape, corroded surfaces or defect thread etc.) have to be replaced.
Only use CEM tips and tip holders in perfect condition.
- Undesirable detaching of the polymer tops: Prior to use, make sure that the polymer tops are firmly in place (see
point 4). Risk of ingestion!
Incorrect use can lead to the above detailed undesirable effects as well as to injury to the user, the patient or
third persons.
Safety control:
Damage to the tips might lead to their fracture (for example if the tips are dropped on the floor or through a
mechanical change of the original shape). Check the tips prior to each use to make sure they are safe to use. To
do this, apply slight pressure with your thumb and index finger. For additional safety, load the tips mechanically
with approx. 10N (1 kg), without function. Always wear protective gloves when checking, inserting or removing
the sonic tips to avoid risks of injury and infection. We recommend that the tip holder SF1981 be exchanged
regularly.
4. Appropriate use
The tip holder and CEM tips are supplied in non-sterile condition. Therefore, they have to be cleaned, disinfected
and sterilized prior to first use. The combination of the tip holder and CEM tip can be used
- in the Komet sonic hand piece SF1LM
- in the SONICflex
hand piece made by the co. KaVo (Series 2000N/L/LX or series 2003N/L/X/LX)
®
- in scalers made by co. W&H (i.e. Series Synea
- in the SIROAIR L provided by co. Sirona
Insertion of the tip holder and CEM tip
- Screw the tip holder into the hand piece with a suitable tip changer (i.e. Komet tip changer SF1975, fig. 1) in
clockwise direction.
- Next, screw the CEM tip onto the tip holder and then tighten by a quarter of a turn or half a turn with the
mounting wrench 566. Avoid overtightening as this might cause damage to the thread of the CEM tip. Prior to
use, ensure a tight, secure fit of the CEM tip on the tip holder.
Removal of the CEM tip and the tip holder
- After use, loosen the CEM tip with the mounting wrench 566 in anticlockwise direction first, then unscrew
manually. The tip holder remains in the sonic hand piece. Discard CEM tip.
- To remove the tip holder, place the tip changer SF1975 on the tip holder and unscrew in anticlockwise direction.
Note: Please observe the directions regarding the use of the tip changer in the instructions supplied with your
sonic hand piece.
5. Recommendations for use
Attention! The coolant supply of the dental unit has to be turned off prior to start-up!
The surfaces of the restoration and the cavity must be preconditioned according to the instructions provided
by the manufacturer of the fixation cement or composite. After lubricating the cavity walls and the floor of the
preparation (and the surfaces of the inlay or onlay, if applicable), press the restoration gently into the cavity.
Place the CEM tip in axial direction onto the centre of the restoration. Fix the restoration in the cavity by vibration
for approx. 3 seconds. In order to avoid possible jamming of the restoration and to prevent an excessive rise of
the occlusal surface, apply the sonic tip at several places and start vibration. Any excessive cement that might
emerge can be removed carefully with a fine brush or a manual instrument. Once the cement or composite have
cured, continue the treatment as described by the manufacturer.
All power systems with adjustable power settings have to be set to level 2 or 3 (for a short time only) (this
corresponds to 100% capacity of the SONICflex
working with these tips.
6. Maintenance/care
Remove CEM tip from the tip holder (see paragraph 4 "appropriate use") and discard CEM tip according to the
legal hygiene regulations valid in your country. Place tip holder in a cleaning/disinfection tank (Fräsator) filled
with a suitable detergent/disinfectant (e.g. Komet DC1) immediately after use in the mouth to prevent drying of
residues on the instruments (protein fixation). Hold tip holder at an angle when placing it into the liquid to ensure
that all hollow spaces are reached. It is recommended to reprocess the instruments within one hour of use at the
very latest. The instruments should be in the cleaning/disinfection tank (Fräsator) when transported to the site
where the reprocessing is to take place.
ê
Inserts soniques pour la pose des inlays, onlays et facettes
1. Indication
En combinaison avec le support d'inserts SF1981, l'insert sonique SF12 (insert CEM) pour la pose des inlays,
onlays et facettes s'utilisent pour la pose précise (par vibration) des reconstitutions ci-dessus mentionnées.
Grâce au mouvement sonique de ces inserts en polymère, le matériau de fixation (ciment ou composite) est
transporté vers tous les régions de la préparation, garantissant ainsi et bon ajustement et une excellente
étanchéité marginale.
2. Contre-indications
Il n'y a aucune contre-indication connue.
3. Avertissements
Les inserts CEM (SF12) sont produits à usage unique. Ils ne peuvent pas être ré-stérilisés. La réutilisation de ces
produits entraîne un risque d'infection. De fait une utilisation sûre et sans risques ne peut être alors garantie.
Par contre, le support d'inserts SF1981 est apte pour la réutilisation. Il peut donc être retraité et ré-stérilisé. La
longévité des inserts soniques est limitée. Il faut donc les utiliser avec une grande prudence.
Attention :
- Risque de fracture ! Il faut s'attendre à la fracture spontanée et prématurée des inserts sans signe
avant-coureur. Pour réduire le risque de fracture, veiller à observer le niveau de puissance prescrit (voir
recommandations d'utilisation) et respecter toutes les instructions. Eviter que les instruments ne se coincent
ou ne fassent levier. Eviter les pressions trop importantes. Même un dommage minime causé par des facteurs
mécaniques peut conduire à la fracture des inserts. Il faut donc utiliser les inserts soniques avec une grande
précaution.
- Risque d'ingestion ! La fracture des inserts soniques peut entraîner un risque d'ingestion. Veiller à prendre des
mesures appropriées pour éviter toute ingestion.
- Les pressions de travail trop importantes peuvent endommager la partie travaillante.
- Echauffement trop important! Les pressions trop importantes et l'application de l'insert CEM au bord de
la reconstruction peuvent provoquer un échauffement plus élevé ce qui pourrait endommager l'insert. C'est
pourquoi il faut éviter les pressions de travail trop importantes et remplacer les inserts endommagés (inserts
tordus, surfaces corrodées, filetage défectueux, etc.). N'utiliser que des inserts CEM et supports d'inserts en
condition irréprochable.
Distributor/Importer for USA and Canada:
Komet USA LLC
3042 Southcross Blvd, Suite 101
Rock Hill, SC 29730, USA
Phone: 888-566-3887
Fax:
800-223-7485
info@kometusa.com
www.kometusa.com
CAUTION: U.S. Federal law restricts the device
to sale by or on the order of a licensed dentist.
|
LOT number
Numéro de lot
Número de lote
=
Do not re-use! (single use only)
Ne pas réutiliser (usage unique)
No reutilizar (un solo uso)
= SF12
Polyetheretherketone (PEEK)
Polyéther éther cétone (PEEK)
Poliéter éter cetona (PEEK)
ZA-55/L/LM/M or Alegra
ST ZE-55RM/BC)
®
®
2000). The use of power setting 1 is not permitted when
®
Instructions for use
Please read carefully and retain for future reference.
Conseils d'utilisation
A respecter scrupuleusement et garder cette copie
pour une utilisation ultérieure.
Instrucciones de empleo
Leer detenidamente y guardar este ejemplar para
uso más tarde.
?
Consult instructions for use
Se reporter aux instructions
Observe indicaciones
566.000
Mounting wrench, Clé de montage, Llave de montaje
Stainless Steel, Acier inoxydable, Acero inoxidable
7. Reprocessing
Manual pre-cleaning (prior to mechanical and manual reprocessing of the tip holder SF1981):
1. Remove tip holder from cleaning/disinfection tank (Fräsator) immediately before reprocessing.
2. Check patency of the cooling passage by guiding the nozzle cleaner (accessory supplied with the sonic hand
piece) through the passage. Replace instrument if the passage is obstructed.
Mechanical reprocessing (validated) and preparation of the CEM tip prior to use:
1. Rinse tip holder thoroughly under running water to prevent any residues of the detergent/disinfectant from
getting into the washer/disinfector.
2. Unscrew the nozzle on the injector bar of the washer/disinfector. Then screw the external thread of the rinse
adapter SF1978 in the silicon holders on the injector bar. Now screw the tip holder in the internal thread at the
top of the rinse adapter (fig. 2). Observe the directions in the instructions for use provided with the SF1978. To
prepare the CEM tips prior to use, place them in a little sieve of the thermo disinfector. The CEM tips must not be
re-sterilised.
3. Put chemical detergent into the washer/disinfector, following the indications on the label and the instructions
of the manufacturer of the washer/disinfector.
4. Start the Vario TD programme including thermal disinfection. Thermal disinfection takes place allowing for the
A
value and observing national provisions.
0
5. On completion of the cycle remove CEM tip or tip holder from the washer/disinfector and dry (preferably with
compressed air. When drying the inside of the instruments, please make sure to hold the compressed air gun
close to the cooling passage, in order to guarantee that sufficient air flows through the tip holder or CEM tip.
6. Visual examination to ensure that the instrument is clean and undamaged. If after mechanical reprocessing
there are still visible residues of contamination, repeat the cleaning and disinfecting process until no visible
contamination is left.
Manual reprocessing (alternative) – for CEM tips as of point 5:
1. Place tip holder onto a 10ml syringe and rinse with detergent/disinfectant. In case of visible contamination
emerging from the perforation, rinse again with detergent/disinfectant.
2. Remove stubborn contamination with a nylon brush under running water, turning the tip holder constantly.
3. Rinse tip holder thoroughly with running water.
4. Visual examination to ensure that the instrument is clean. If there are still visible residues of contamination,
repeat the cleaning process until no visible contamination is left.
5. Place tip holder or CEM tip in a suitable container into the ultra sonic device or instrument bath filled with
detergent/disinfectant.
6. During chemical disinfection in the ultrasonic device or instrument bath, observe the instructions of the
manufacturer regarding concentration and immersion time. Be sure to observe the full correct immersion
time which does not start until the last tip has been immersed. Attention: do not exceed 45°C (risk of protein
coagulation)!
7. On completion of the immersion time, rinse tip holder or CEM tip thoroughly with suitable water (preferably
with demineralised water to avoid residues of lime). Rinse the perforation of the tip holder or CEM tip with at
least 10 ml of demineralised water by means of a cannula, to ensure that no residues of the detergent are left in
the cooling passage.
8. Dry sonic tip (preferably with compressed air). When drying the inside of the instruments, please make sure to
hold the compressed air gun close to the cooling passage, in order to guarantee that sufficient air flows through
the tip holder.
9. Visual examination to ensure that the instrument is clean and undamaged. If there are still visible residues of
contamination, repeat the cleaning and chemical disinfecting process until no visible contamination is left.
Note: mechanical cleaning is preferable
Sterilisation in the autoclave:
The tip holder can be steam-sterilized at 134°C in a suitable device using the vacuum process. The tip holder
must be unscrewed from the rinse adapter before each sterilization cycle. Prior to sterilization, the tip holder
must be individually packed in sterilization pouches (to prevent contact corrosion). Alternatively, they can be
placed in a suited sterilization cassette (e.g. Komet 9952) that is packed in sterilization pouch. The pouch must
be sufficiently large to comfortably fit the cassette or tip without strain on the packaging. Sterilization is effected
in an autoclave with fractionated pre-vacuum (type B) or simplified pre-vacuum (type S) with a holding time of at
least 5 minutes (full cycle) and a drying time of at least 10 minutes at 134 °C +1. Alternatively, sterilization may
also be effected in an autoclave with gravitation process at 121°C +1 with a holding time of at least 30 minutes.
Note the range of application indicated in the manufacturer's instructions.
8. Disclaimer of Warranties
ALL WARRANTIES, WHETHER EXPRESS OR IMPLIED, INCLUDING, WITHOUT LIMITATION, THE IMPLIED
WARRANTIES OF MERCHANTABILITY AND FITNESS FOR A PARTICULAR PURPOSE, ARE EXPRESSLY
DISCLAIMED. ALL INCIDENTAL OR CONSEQUENTIAL DAMAGES, INCLUDING, BUT NOT LIMITED TO, LOST
PROFITS, INJURY TO OTHER PROPERTY, LOSS OF USE OR OTHER COMMERCIAL LOSSES, ARE EXPRESSLY
DISCLAIMED. If, not withstanding the foregoing, consequential and incidental damages cannot be excluded
due to operation of law, such damages are expressly limited in amount to the purchase price of any defective
products.
Store out of children's reach.
For dental use only.
It is the responsibility of the user to check the products prior to use to ensure that they are suited for the
intended purpose. The user is responsible for the application of the instruments. The manufacturer declines any
liability for possible damage caused in connection with the use of this instrument.
- Desserrage imprévu de l'insert : Avant l'utilisation, s'assurer du bon ajustement de l'insert (voir point 4, risque
d'ingestion).
Une utilisation incorrecte peut conduire aux conséquences néfastes mentionnées ci-dessus et peut constituer de
fait un danger pour l'utilisateur, le patient ou une tierce personne.
Contrôle de sécurité
Les inserts peuvent se fracturer s'ils subissent un endommagement (p. ex. une chute ou une déformation
mécanique de la forme d'origine). C'est pourquoi il faut contrôler le bon fonctionnement des inserts avant chaque
utilisation en appuyant légèrement avec le pouce et l'index. Comme mesure de sécurité supplémentaire, il faut
charger mécaniquement les inserts avec env. 10N (1 kg) sans fonction. Veiller à porter des gants de protection
appropriés lors du contrôle, de l'insertion et du retrait des inserts – risque de blessure et d'infection. Nous
recommandons de changer le support d'inserts SF1981 régulièrement.
4. Utilisation appropriée
Les supports d'inserts et les inserts CEM sont livrés non stérile. Pour cette raison ils doivent être nettoyés,
désinfectés et stérilisés avant la toute première utilisation. Les supports d'inserts et les inserts CEM s'utilisent :
- sur la pièce-à-main sonique Komet SF1LM
- sur la pièce-à-main SONICflex
de la marque KaVo (Série 2000N/L/X/LX ou série 2003N/L/X/LX)
®
- sur les détartreurs de la marque W&H (Série Synea
ZE-55RM/BC)
- sur le SIROAIR L de la marque Sirona
Insertion du support d'inserts et de l'insert CEM
- N'insérer le support d'inserts dans la pièce-à-main qu'au moyen d'une clé appropriée (Clé Komet SF1975,
fig. 1) en le faisant tourner vers la droite.
- Visser l'insert CEM sur le support d'inserts et le resserrer ensuite au moyen de la clé 566 en faisant un quart
de tour ou un demi-tour. Eviter tout surfilage car cela pourrait endommager le filet de l'insert CEM. Avant de
l'utilisation, s'assurer de l'ajustement parfait de l'insert CEM sur le support d'inserts.
Retrait de l'insert CEM et du support d'inserts
- Après le traitement, retirer d'abord l'insert CEM du support d'inserts au moyen de la clé 566 en le tournant vers
la gauche, et le dévisser manuellement. Le support d'inserts reste fixé dans la pièce-à-main sonique. Eliminer
l'insert CEM.
- Ensuite, placer la clé SF1975 sur le support d'inserts, et le dévisser en le faisant tourner vers la gauche.
Remarque : merci de consulter les consignes figurant dans le mode d'emploi des pièces-à-main soniques.
Packing unit
/
Unité d'emballage
Unidad de embalaje
ZA-55/L/LM/M ou série Alegra
ST
®
®
Advertisement
Table of Contents

Related Manuals for Komet SF12 CEM-Tip


Summary of Contents for Komet SF12 CEM-Tip
- Page 1 The tip holder can be steam-sterilized at 134°C in a suitable device using the vacuum process. The tip holder - Screw the tip holder into the hand piece with a suitable tip changer (i.e. Komet tip changer SF1975, fig. 1) in must be unscrewed from the rinse adapter before each sterilization cycle.
- Page 2 (Cambiador de herramientas Komet SF1975, ver imagen 1). colocadas en una bandeja de esterilización (p. ej. Komet 9952). Se debe sellar la bandeja de esterilización en - Primero enrosque manualmente la punta CEM en el soporte y apriétela con la correspondiente llave 566, hasta un embalaje apropiado.
Need help?
Do you have a question about the SF12 CEM-Tip and is the answer not in the manual?
Questions and answers