Table of Contents
Advertisement
Quick Links
BS 2/C-..., BS 2/R-...
Belt sections
Applies to the following types:
3 842 998 096 , BS 2/R-700
3 842 998 097 , BS 4/R-300
3 842 998 238 , BS 2/R-H
3 842 998 239 , BS 2/C-H
3 842 998 492 , BS 2/R-V-1200
BS 2/C-100
BS 2/R-300
BS 4/R-300
3 842 999 901 , BS 4/R-700
3 842 999 904 , BS 2/R-300
3 842 999 917 , BS 2/C-100
3 842 999 985 , BS 2/C-250
BS 2/C-250
BS 2/R-700
BS 4/R-700
Assembly instructions
3 842 358 724/2013-04
BS 2/C-H
BS 2/R-H
BS 2/R-V-1200
Replaces: –
English
Advertisement
Table of Contents

Related Manuals for Bosch Rexroth BS 2/C Series


Summary of Contents for Bosch Rexroth BS 2/C Series
- Page 1 BS 2/C-…, BS 2/R-… Belt sections Applies to the following types: 3 842 998 096 , BS 2/R-700 3 842 999 901 , BS 4/R-700 3 842 998 097 , BS 4/R-300 3 842 999 904 , BS 2/R-300 3 842 998 238 , BS 2/R-H 3 842 999 917 , BS 2/C-100 3 842 998 239 , BS 2/C-H 3 842 999 985 , BS 2/C-250...
- Page 2 © This document, as well as the data, specifi cations and other information set forth in it, are the exclusive property of Bosch Rexroth AG. It may not be reproduced or given to third parties without its consent.
-
Page 3: Table Of Contents
BS 2/C-100, -250, BS 2/R-300, -700, BS 4/R-300, -700: Assembling the belt section between two sections 7.6.4 BS 2/C-H, BS 2/R-H, BS 4/R-V-1200: Assembling the belt section between two sections 3 842 358 724/2013-04, MIT: BS 2/C-… + BS 2/R-…, Bosch Rexroth AG... - Page 4 Checking the chain elongation for BS 2/C-100, BS 2/C-250 BS 2/R-300, BS 4/R-300, BS 2/R-700, BS 4/R-700 10.4.8 Checking the chain elongation for BS 2/C-H, BS 2/R-H, BS 2/R-V-1200 Bosch Rexroth AG, MIT: BS 2/C-… + BS 2/R-…, 3 842 358 724/2013-04...
- Page 5 BS 2/C-100, BS 2/C-250, BS 2/C-H 10.5 Spare parts Decommissioning Disassembly and Exchange 12.1 Preparing the product for storage/further use Disposal Extension and Conversion Troubleshooting and Resolution Technical Data 16.1 Ambient conditions 3 842 358 724/2013-04, MIT: BS 2/C-… + BS 2/R-…, Bosch Rexroth AG...
-
Page 6: Contents
Damage” and before any actions or steps whenever there is a danger of personal injury or damage to the equipment. The measures described to avoid these hazards must be observed. Bosch Rexroth AG, MIT: BS 2/C-… + BS 2/R-…, 3 842 358 724/2013-04... -
Page 7: Symbols
Symbol Meaning If this information is disregarded, the operating procedure may be impaired. Individual, independent action Numbered steps: The numbers indicate the order for the steps. 3 842 358 724/2013-04, MIT: BS 2/C-… + BS 2/R-…, Bosch Rexroth AG... -
Page 8: Designations
• For installation in a Rexroth TS 2plus transfer system • For transporting Rexroth WT 2 workpiece pallets. • Maximum load/section load: see Technical data on page 75. • For ambient conditions, see page 75. Bosch Rexroth AG, MIT: BS 2/C-… + BS 2/R-…, 3 842 358 724/2013-04... -
Page 9: Improper Use
• Having knowledge of the function and structure of pneumatic components. Bosch Rexroth offers training for special fi elds. You can fi nd an overview of the training contents on the Internet at http://www.boschrexroth.de/didactic 3 842 358 724/2013-04, MIT: BS 2/C-… + BS 2/R-…, Bosch Rexroth AG... -
Page 10: General Safety Instructions
• Make sure that all safety equipment belonging to the product is present, has been installed properly, and is fully functional. Do not modify the position of, bypass, or disable the safety equipment. Bosch Rexroth AG, MIT: BS 2/C-… + BS 2/R-…, 3 842 358 724/2013-04... -
Page 11: Personal Protective Equipment
• Perform a risk assessment in accordance with DIN EN ISO 12100 before initial commissioning or recommissioning of a conveyor system. • Instruct operating personnel on safety before initial commissioning or recommissioning and afterwards regularly. 3 842 358 724/2013-04, MIT: BS 2/C-… + BS 2/R-…, Bosch Rexroth AG... -
Page 12: General Notes On Equipment And Product Damage
Use the disassembly tool to remove all of the affected area. • Prevent cleaning agents from entering the system. During cleaning • Never use solvents or aggressive detergents. • Do not use a high-pressure cleaner for cleaning. Bosch Rexroth AG, MIT: BS 2/C-… + BS 2/R-…, 3 842 358 724/2013-04... -
Page 13: Scope Of Delivery
• Motor mounting depending on the version, right side (MA = R), left side (MA = L) or center (MA = M) • Motor connection optionally with cable/plug or terminal box. 3 842 358 724/2013-04, MIT: BS 2/C-… + BS 2/R-…, Bosch Rexroth AG... -
Page 14: Product Description
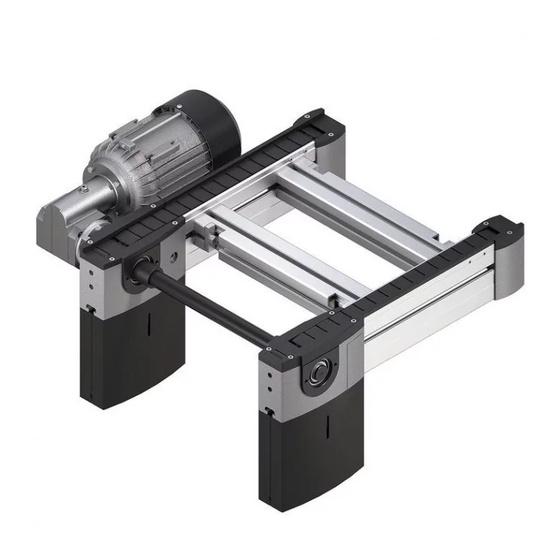
BS 2/C-H BS 2/R-300 BS 2/R-700 BS 4/R-300 BS 4/R-700 E, F BS 2/R-H BS 2/R-V-1200 547 601-01 Fig. 1: Belt sections BS 2/C-… + BS 2/R-… Bosch Rexroth AG, MIT: BS 2/C-… + BS 2/R-…, 3 842 358 724/2013-04... -
Page 15: Product Identifi Cation
• Protect the product against environmental infl uences such as contamination and humidity. • Observe the ambient conditions, see page 75. • Support the product so that suspended, there is no load on motors assembled. 3 842 358 724/2013-04, MIT: BS 2/C-… + BS 2/R-…, Bosch Rexroth AG... -
Page 16: Assembly
7.3 Required tools Hexagon wrenches (open-end): WS8, WS10, WS13, WS19, WS24. Hex socket wrench: WS4. Water level Combination pliers Flat smooth fi le Bosch Rexroth AG, MIT: BS 2/C-… + BS 2/R-…, 3 842 358 724/2013-04... -
Page 17: Required Accessories
BS 2/C-100, BS 2/C-250, BS 2/R-300, BS 4/R-300, BS 2/R-700, BS 4/R-700 BS 2/C-400, BS 2/C-700, BS 2/R-1200, BS 2/R-2200 BS 2/C-H, BS 2/R-H, BS 2/R-V, 3 842 530 871 3 842 358 724/2013-04, MIT: BS 2/C-… + BS 2/R-…, Bosch Rexroth AG... -
Page 18: Symbols Used
The numbers correspond with the order of the assembly steps according to the instructions in the accompanying text. Designation of components in graphics. The letters identify the components specifi ed in the instructions. Bosch Rexroth AG, MIT: BS 2/C-… + BS 2/R-…, 3 842 358 724/2013-04... -
Page 19: Assembling The Product
2 leg sets: 2000 mm. SZ 2 SZ 2 SW13 M = 25 Nm 547 601-02 Fig. 3: Assembling the belt section on leg sets (1/2) 3 842 358 724/2013-04, MIT: BS 2/C-… + BS 2/R-…, Bosch Rexroth AG... - Page 20 M = 25 Nm 3 842 146 815 "A" 3 842 526 560 SW13 M = 25 Nm 547 601-03 Fig. 4: Assembling the belt section on leg sets (2/2) Bosch Rexroth AG, MIT: BS 2/C-… + BS 2/R-…, 3 842 358 724/2013-04...
-
Page 21: Changing The Mounting Position Of The Motor/Gear Combination Or The Gear Motor
Assemble the screws (A/B). = 6 Nm SW10 = 8 Nm 547 601-75 Fig. 5: Swiveling the motor/gear combination or the gear motor around the drive axle. 3 842 358 724/2013-04, MIT: BS 2/C-… + BS 2/R-…, Bosch Rexroth AG... -
Page 22: Bs 2/C-100, -250, Bs 2/R-300, -700, Bs 4/R-300, -700: Assembling The Belt Section Between Two Sections
ST 2/C SW13 M = 10 Nm SW13 M = 10 Nm 547 601-04 Fig. 6: BS 2/C-100, … : Assembling the belt section between two sections Bosch Rexroth AG, MIT: BS 2/C-… + BS 2/R-…, 3 842 358 724/2013-04... -
Page 23: Bs 2/C-H, Bs 2/R-H, Bs 4/R-V-1200: Assembling The Belt Section Between Two Sections
= 25 Nm = 7 Nm SW10 = 8 Nm = 7 Nm 547 601-05 Fig. 7: BS 2/C-H, … : Assembling the belt section between two sections 3 842 358 724/2013-04, MIT: BS 2/C-… + BS 2/R-…, Bosch Rexroth AG... -
Page 24: Bs 2/R-H, Reversible: Assembling The Belt Section Between Two Sections
Mount the side cover = 25 Nm plates. Mount the gear motor. = 7 Nm 547 601-06 Fig. 8: BS 2/R-H, reversible: Assembling the belt section between two sections Bosch Rexroth AG, MIT: BS 2/C-… + BS 2/R-…, 3 842 358 724/2013-04... -
Page 25: Bs 2/C-100, -250, Bs 2/R-300, -700, Bs 4/R-300, -700: Assembling Two Belt Sections, Drive Head To Return Unit
Mount the external housing element halves. = 15 Nm 547 601-72 Fig. 9: BS 2/C-100, … : Assembling two belt sections, drive head to return unit 3 842 358 724/2013-04, MIT: BS 2/C-… + BS 2/R-…, Bosch Rexroth AG... -
Page 26: Bs 2/C-H, Bs 2/R-H, Bs 4/R-V-1200
= 8 Nm SW13 = 25 Nm = 7 Nm 547 601-73 Fig. 10: BS 2/C-H, … : Assembling two belt sections, drive head to return unit Bosch Rexroth AG, MIT: BS 2/C-… + BS 2/R-…, 3 842 358 724/2013-04... -
Page 27: Checking The Chain Elongation Bs 2/C-100, -250, Bs 2/R-300, -700, Bs 4/R-300, -700
• Lead the cable through the break in the housing +0,5 element to the control unit. 547 601-07 Fig. 11: Checking the chain elongation, “small” drive head 3 842 358 724/2013-04, MIT: BS 2/C-… + BS 2/R-…, Bosch Rexroth AG... -
Page 28: Checking The Chain Elongation Bs 2/C-H, Bs 2/R-H, Bs 4/R-V-1200
547 601-30 Fig. 12: Checking the of chain elongation, “large” drive head • SH 2/UV switch bracket, 3 842 168 600. • Proximity switch, 3 842 537 995. Bosch Rexroth AG, MIT: BS 2/C-… + BS 2/R-…, 3 842 358 724/2013-04... -
Page 29: Bs 2/R-300, -700, Bs 4/R-300, -700: Assembling The Accelerating Element (Only If L = 160/240)
Pull the chain back until the slider is exposed SW19 in the drive head. Clip the acceleration element onto the slider. 547 601-09 Fig. 13: Assemble acceleration element (1/2) 3 842 358 724/2013-04, MIT: BS 2/C-… + BS 2/R-…, Bosch Rexroth AG... - Page 30 SW10 SW10 M = 8 Nm M = 8 Nm BS 2/R-300 BS 2/R-700 547 601-10 Fig. 14: Assembling the acceleration element (2/2) Bosch Rexroth AG, MIT: BS 2/C-… + BS 2/R-…, 3 842 358 724/2013-04...
-
Page 31: Electrically Connecting The Product
Note: In motors with a factory-installed plug, correct the rotational direction in the switch cabinet or at the plug coupling (socket side). This will simplify exchanges. 3 842 358 724/2013-04, MIT: BS 2/C-… + BS 2/R-…, Bosch Rexroth AG... - Page 32 Fig. 15: Motor rating plate (example) Installation_DY Fig. 16: Connection plans: delta connection/Y-connection 3 842 409 645 3 842 409 645 Installation_C Fig. 17: Connection cable option Bosch Rexroth AG, MIT: BS 2/C-… + BS 2/R-…, 3 842 358 724/2013-04...
-
Page 33: Commissioning
• Only commission the belt section if all safety devices have been installed in the system and are functional. • Commission the product only if it is installed completely. 3 842 358 724/2013-04, MIT: BS 2/C-… + BS 2/R-…, Bosch Rexroth AG... -
Page 34: Residual Hazards
End of the belt section Crushing of body parts Crushing Design solution required, e.g. stopper due to falling parts 8.3 Recommissioning after shutdowns Follow the same procedure used for initial commissioning. Bosch Rexroth AG, MIT: BS 2/C-… + BS 2/R-…, 3 842 358 724/2013-04... -
Page 35: Operation
• Only select speeds that correspond with the particular function. • Especially important: Avoid contamination by abrasive media; reduce contamination through regular cleaning. 3 842 358 724/2013-04, MIT: BS 2/C-… + BS 2/R-…, Bosch Rexroth AG... -
Page 36: Loading The Workpiece Pallet
Such cases require special attention when planning the system and the maintenance intervals need to be shortened accordingly. Bosch Rexroth AG, MIT: BS 2/C-… + BS 2/R-…, 3 842 358 724/2013-04... -
Page 37: Maintenance And Repair
• Test runs with open housings are only permitted when they are performed by skilled workers using hold-to-run controls and when the infl uence of all other switching devices can be excluded. 3 842 358 724/2013-04, MIT: BS 2/C-… + BS 2/R-…, Bosch Rexroth AG... -
Page 38: Cleaning And Care
• Motor surface • Fan housing inlets • Interior surfaces of the cooling fi ns The cleaning intervals are based on the ambient conditions and operating conditions. Bosch Rexroth AG, MIT: BS 2/C-… + BS 2/R-…, 3 842 358 724/2013-04... -
Page 39: Conveyor Chain (Fl At Top Chain/Accumulation Roller Chain)
While doing so, also check the conveyor chain for wear and elongation. We recommend: The LU 2 automatic lubrication unit enables an optimally defi ned, uniform lubrication of the conveyor chain during operation. See page 41. 3 842 358 724/2013-04, MIT: BS 2/C-… + BS 2/R-…, Bosch Rexroth AG... -
Page 40: Options To Lubricate The Conveyor Chain Manually
Fig. 19: Lubricating the conveyor chain in the drive module = 5 Nm = 5 Nm ST 2/C-W ST 2/R-W Fig. 20: Lubricating the conveyor chain in the maintenance section Bosch Rexroth AG, MIT: BS 2/C-… + BS 2/R-…, 3 842 358 724/2013-04... -
Page 41: Lu 2 Automatic Lubrication Unit
+ 3 842 543 487, AS 2/R-V set Fig. 21: LU 2 automatic lubrication unit, overview The holes identifi ed with *) are used to connect the LU 2 automatic lubrication unit. 3 842 358 724/2013-04, MIT: BS 2/C-… + BS 2/R-…, Bosch Rexroth AG... -
Page 42: Replacing Wear Parts
3 842 539 357 3 842 530 417 3 842 538 872 8 981 010 510 Flat top chains Accumulation roller chain Vplus accumulation roller chain Fig. 22: Required accessories Bosch Rexroth AG, MIT: BS 2/C-… + BS 2/R-…, 3 842 358 724/2013-04... -
Page 43: Notes For Mounting: Finding The Master Link On A Functional Chain
– The gray fl at plate with hole on the gray fl at top chain – The galvanized link plate on the accumulation roller chain Flat top chains Accumulation roller chain Vplus accumulation roller chain Fig. 23: Master link 3 842 358 724/2013-04, MIT: BS 2/C-… + BS 2/R-…, Bosch Rexroth AG... -
Page 44: Notes For Mounting: Securing The Chain Tensioner For
Fig. 25, pos. 2). Loosen the chain tensioner by turning it 90° counter-clockwise. Fig. 25, pos. 3). 547 601-38 Fig. 25: Securing the chain tensioner: “large” drive head Bosch Rexroth AG, MIT: BS 2/C-… + BS 2/R-…, 3 842 358 724/2013-04... -
Page 45: Checking The Chain Elongation For
(= 3% of the original length) is exceeded. 547 601-70 Fig. 27: Checking the chain elongation for “large” drive head 3 842 358 724/2013-04, MIT: BS 2/C-… + BS 2/R-…, Bosch Rexroth AG... -
Page 46: Shortening The Conveyor Chain: Bs 2/C-100, Bs 2/R-300, Bs 4/R-300, Bs 2/C-250, Bs 2/R-700, Bs 4/R-700 Motor Mounting (Ma) = R/L
SW19 3 842 535 333 8 981 010 510 547 601-41 Fig. 28: Shortening the conveyor chain: BS 2/C-100, …-250, BS 2/R-300, …-700, MA = R/L (1/2) Bosch Rexroth AG, MIT: BS 2/C-… + BS 2/R-…, 3 842 358 724/2013-04... - Page 47 M = 8 Nm BS 2/C-100 BS 2/C-250 BS 2/R-300 BS 2/R-700 547 601-42 Fig. 29: Shortening the conveyor chain: BS 2/C-100, …-250, BS 2/R-300, …-700, MA = R/L (2/2) 3 842 358 724/2013-04, MIT: BS 2/C-… + BS 2/R-…, Bosch Rexroth AG...
-
Page 48: Shorten Conveyor Chain: Bs 2/C-100, Bs 2/R-300, Bs 4/R-300, Motor Mounting (Ma) = M
3 842 010 511 3 842 535 333 8 981 010 510 547 601-43 Fig. 30: Shortening the conveyor chain: BS 2/C-100, BS 2/R-300, MA = M (1/2) Bosch Rexroth AG, MIT: BS 2/C-… + BS 2/R-…, 3 842 358 724/2013-04... - Page 49 8 981 010 511 housing element halves. 3 842 530 417 547 601-44 Fig. 31: Shortening the conveyor chain: BS 2/C-100, BS 2/R-300, MA = M (2/2) 3 842 358 724/2013-04, MIT: BS 2/C-… + BS 2/R-…, Bosch Rexroth AG...
-
Page 50: Shortening The Conveyor Chain: Bs 2/C-H, Bs 2/R-H, Bs 2/R-V-1200, Motor Mounting (Ma) = R/L
BS 2/C-H 8 981 010 510 3 842 535 333 547 601-45 Fig. 32: Shortening the conveyor chain: BS 2/C-H, BS 2/R-H, BS 2/R-V-1200, MA = R/L (1/2) Bosch Rexroth AG, MIT: BS 2/C-… + BS 2/R-…, 3 842 358 724/2013-04... - Page 51 Mount the gear motor. 8 981 010 511 3 842 539 537 547 601-46 Fig. 33: Shortening the conveyor chain: BS 2/C-H, BS 2/R-H, BS 2/R-V-1200, MA = R/L (2/2) 3 842 358 724/2013-04, MIT: BS 2/C-… + BS 2/R-…, Bosch Rexroth AG...
-
Page 52: Shortening The Conveyor Chain: Bs 2/R-H, Reversible, Bs 2/R-V, Reversible, Motor Mounting (Ma) = R/L
3 842 530 417 BS 2/R-V 3 842 538 872 3 842 539 537 547 601-58 Fig. 34: Shorten conveyor chain BS 2/R-H, reversible, BS 2/R-V, reversible (1/2) Bosch Rexroth AG, MIT: BS 2/C-… + BS 2/R-…, 3 842 358 724/2013-04... - Page 53 Mount the gear motor. 3 842 538 872 3 842 539 537 547 601-59 Fig. 35: Shortening the conveyor chain BS 2/R-H, reversible, BS 2/R-V, reversible (2/2) 3 842 358 724/2013-04, MIT: BS 2/C-… + BS 2/R-…, Bosch Rexroth AG...
-
Page 54: Notes For Mounting: Exchanging The Chain And Wear Parts
Exchange the worn out parts. 547 601-63 Fig. 36: Wear parts We recommend: When exchanging the fl at top chain, always exchange the glide profi les at the same time. Bosch Rexroth AG, MIT: BS 2/C-… + BS 2/R-…, 3 842 358 724/2013-04... - Page 55 If the chain coil has tipped over during assembly and the chain is deformed: Use the disassembly tool to remove all of the affected area. 547 601-39 Fig. 37: Uncoiling the chain from the chain coil 3 842 358 724/2013-04, MIT: BS 2/C-… + BS 2/R-…, Bosch Rexroth AG...
-
Page 56: Notes For Mounting: Direction Of Movement Of The Chain
Vplus accumulation roller chain Fig. 39: Lubrication points *) Also lubricate the fl at top chain on the side (curves and sections) For system-related reasons, the lubricant can spread. Bosch Rexroth AG, MIT: BS 2/C-… + BS 2/R-…, 3 842 358 724/2013-04... -
Page 57: Exchanging The Conveyor Chain
Fig. 38, page 56. 8 981 010 510 547 601-47 Fig. 40: Exchanging conveyor chain: BS 2/C-100, …-250, BS 2/R-300, …-700, MA = R/L (1/2) 3 842 358 724/2013-04, MIT: BS 2/C-… + BS 2/R-…, Bosch Rexroth AG... - Page 58 BS 2/C-250 BS 2/R-300 BS 2/R-700 BS 4/R-300 BS 4/R-700 547 601-48 Fig. 41: Exchanging the conveyor chain: BS 2/C-100, …-250, BS 2/R-300, …-700, MA = R/L (2/2) Bosch Rexroth AG, MIT: BS 2/C-… + BS 2/R-…, 3 842 358 724/2013-04...
-
Page 59: Exchanging The Conveyor Chain: Bs 2/C-100, Bs 2/R-300, Bs 4/R-300 Motor Mounting (Ma) = M
Remove the slider from the return head. 8 981 010 510 547 601-49 Fig. 42: Exchanging the conveyor chain BS 2/C-100, BS 2/R-300, MA = M (1/3) 3 842 358 724/2013-04, MIT: BS 2/C-… + BS 2/R-…, Bosch Rexroth AG... - Page 60 For the next assembly step you will need a helper or a lift aid. 547 601-50 Fig. 43: Exchanging the conveyor aid: BS 2/C-100, BS 2/R-300, MA = M (2/3) Bosch Rexroth AG, MIT: BS 2/C-… + BS 2/R-…, 3 842 358 724/2013-04...
- Page 61 3 842 530 417 3 842 530 417 8 981 010 510 547 601-51 Fig. 44: Exchanging the conveyor chain: BS 2/C-100, BS 2/R-300, MA = M (3/3) 3 842 358 724/2013-04, MIT: BS 2/C-… + BS 2/R-…, Bosch Rexroth AG...
-
Page 62: Exchanging The Conveyor Chain: Bs 2/C-H, Bs 2/R-H, Bs 2/R-V-1200, Motor Mounting (Ma) = R/L
3 842 539 357 8 981 010 510 8 981 010 511 547 601-52 Fig. 45: Exchanging the conveyor chain: BS 2/C-H, BS 2/R-H, BS 2/R-V-1200, MA = R/L (1/3) Bosch Rexroth AG, MIT: BS 2/C-… + BS 2/R-…, 3 842 358 724/2013-04... - Page 63 = 7 Nm Mount the slider into the return head. 547 601-53 Fig. 46: Exchanging the conveyor chain: BS 2/C-H, BS 2/R-H, BS 2/R-V-1200, MA = R/L (2/3) 3 842 358 724/2013-04, MIT: BS 2/C-… + BS 2/R-…, Bosch Rexroth AG...
- Page 64 3 842 535 333 15 16 3 842 530 417 547 601-54 Fig. 47: Exchanging the conveyor chain: BS 2/C-H, BS 2/R-H, BS 2/R-V-1200, MA = R/L (3/3) Bosch Rexroth AG, MIT: BS 2/C-… + BS 2/R-…, 3 842 358 724/2013-04...
-
Page 65: Exchanging The Conveyor Chain: Bs 2/R-H, Reversible, Bs 2/R-V, Reversible, Motor Mounting (Ma) = R/L
3 842 539 537 BS 2/R-V Remove the slider from the return head. 547 601-56 Fig. 48: Exchanging the conveyor chain: BS 2/R-H, reversible, BS 2/R-V, reversible (1/2) 3 842 358 724/2013-04, MIT: BS 2/C-… + BS 2/R-…, Bosch Rexroth AG... - Page 66 3 842 530 417 3 842 539 357 8 981 010 511 547 601-57 Fig. 49: Exchanging the conveyor chain: BS 2/R-H, reversible, BS 2/R-V, reversible (2/2) Bosch Rexroth AG, MIT: BS 2/C-… + BS 2/R-…, 3 842 358 724/2013-04...
-
Page 67: Exchanging The Relief Roller/Connection Roller Toothed Belt
Mount the side cover plates. Mount the gear motor. 547 601-55 Fig. 50: Exchanging the connection roller/connection roller toothed belt 3 842 358 724/2013-04, MIT: BS 2/C-… + BS 2/R-…, Bosch Rexroth AG... -
Page 68: Exchanging The Motor And/Or Gear: Bs 2/C-100, Bs 2/R-300, Bs 4/R-300, Motor Mounting (Ma) = R/L
• Position the motor correctly (terminal box!) and mount the motor in the gear. If the motor is not properly positioned: do NOT turn it. Disconnect the motor from the gear and assemble it again. Bosch Rexroth AG, MIT: BS 2/C-… + BS 2/R-…, 3 842 358 724/2013-04... -
Page 69: Bs 2/C-100, Bs 2/R-300, Bs 4/R-300, Motor Mounting (Ma) = M
• Position the motor correctly (terminal box!) and mount the motor in the gear. If the motor is not properly positioned: do NOT turn it. Disconnect the motor from the gear and assemble it again. 3 842 358 724/2013-04, MIT: BS 2/C-… + BS 2/R-…, Bosch Rexroth AG... -
Page 70: Exchanging The Gear Motor: Bs 2/C-H, Bs 2/R-H, Bs 2/R-V-1200, Motor Mounting (Ma) = R/L
= 8 Nm Assemble the fl ange on the new gear motor. Mount the gear motor. 547 601-65 Fig. 53: Exchanging the gear motor, motor mounting (MA) = R/L Bosch Rexroth AG, MIT: BS 2/C-… + BS 2/R-…, 3 842 358 724/2013-04... -
Page 71: Bs 2/C-H, Bs 2/R-H, Bs 2/R-V-1200, Motor Mounting (Ma) = M
fi rmly. = 7 Nm 547 601-66 Fig. 54: Exchanging the gear motor, motor mounting (MA) = M 3 842 358 724/2013-04, MIT: BS 2/C-… + BS 2/R-…, Bosch Rexroth AG... -
Page 72: Exchanging The Glide Profi Les
Mount the chain, see BS 2/C-H pages 58/61/64. T 40 = 25 Nm BS 2/C-100 547 601-67 Fig. 55: Exchanging glide profi les: BS 2/C-100, BS 2/C-250, BS 2/C-H Bosch Rexroth AG, MIT: BS 2/C-… + BS 2/R-…, 3 842 358 724/2013-04... -
Page 73: Spare Parts
• For belt sections with an assembled motor and/or assembled lubrication unit: Support the belt section so that there is no load on the motor or lubrication unit. 3 842 358 724/2013-04, MIT: BS 2/C-… + BS 2/R-…, Bosch Rexroth AG... -
Page 74: Disposal
14 Extension and Conversion • Do not convert the product. • The Bosch Rexroth warranty only applies to the delivered confi guration and extensions taken into account in the confi guration. The manufacturer can accept no warranty claims if the system is converted or extended in a manner not listed in these instructions. -
Page 75: Technical Data
fl uid. • Avoid long-term contact with acidic or basic reacting materials. 3 842 358 724/2013-04, MIT: BS 2/C-… + BS 2/R-…, Bosch Rexroth AG... - Page 76 Bosch Rexroth AG Postfach 30 02 07 D-70442 Stuttgart Germany Fax +49 711 811–7777 info@boschrexroth.de www.boschrexroth.com Subject to changes. 3 842 358 724/2013-04...
Need help?
Do you have a question about the Rexroth BS 2/C Series and is the answer not in the manual?
Questions and answers