Table of Contents
Advertisement
Available languages
Available languages
Quick Links
INSTALLATION INSTRUCTIONS
HB0034
S
UITABLE FOR USE IN DAMP LOCATIONS WHEN INSTALLED IN A
I
INTENDED FOR DOMESTIC COOKING ONLY
!
READ AND SAVE THESE INSTRUCTIONS
INSTALLER: LEAVE THIS MANUAL WITH HOMEOWNER.
HOMEOWNE: USE AND CARE INFORMATION ON PAGES 11 AND 12.
BEST; Hartford, Wisconsin www.BestRangeHoods.com 800-558-1711
BEST; Drummondville, QC, Canada www.BestRangeHoods.com 866-737-7770
REGISTER YOUR PRODUCT ON LINE AT: www.BestRangeHoods.com/register
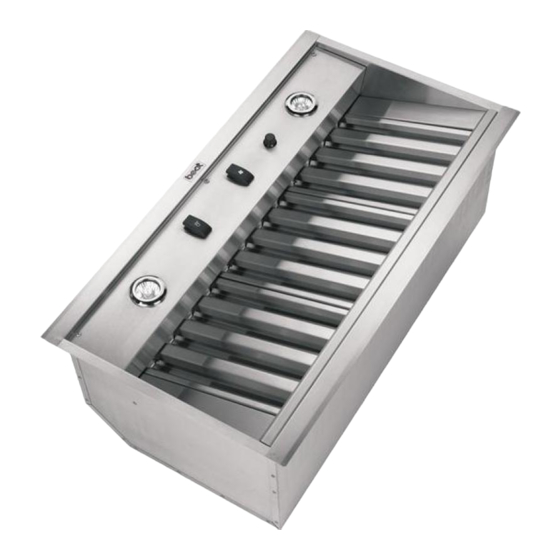
MODEL PIK33D
NTENDED FOR OUTDOOR COVERED PATIO OR LANAI AREA
For additional information - visit www.BestRangeHoods.com
GFCI PROTECTED BRANCH-CIRCUIT.
.
!
V06322 Rev. F
Advertisement
Table of Contents

Related Manuals for Best PIK33D


Summary of Contents for Best PIK33D
-
Page 1: Installation Instructions
HOMEOWNE: USE AND CARE INFORMATION ON PAGES 11 AND 12. BEST; Hartford, Wisconsin www.BestRangeHoods.com 800-558-1711 BEST; Drummondville, QC, Canada www.BestRangeHoods.com 866-737-7770 REGISTER YOUR PRODUCT ON LINE AT: www.BestRangeHoods.com/register For additional information - visit www.BestRangeHoods.com MODEL PIK33D GFCI PROTECTED BRANCH-CIRCUIT. V06322 Rev. F... -
Page 2: To Reduce The Risk Of Fire, Electric Shock Or Injury To Persons, Observe The Following
9. To reduce the risk of fire and electrical shock, the Best model PIK33D must be installed only with interior blower model P8D, exterior blower model EB12 or EB15, or in-line blower model ILB11 (sold separately). - Page 3 (1200 cfm) or EB15 (1500 cfm) Exterior blower Model 421 10” round vert. in-line damper. (Recommended for use with exterior blowers) L3336D or L3348D Custom Hood Liner (optional) PIK33D INSERT Rough-in plate (supplied with interior blower P8D) Dual-blower P8D (sold separately)
-
Page 4: Select Blower Option And Install Ductwork
This unit is not designed for use with a charcoal grill. The insert model PIK33D must be installed with the interior blower P8D, or with the exterior blower model EB12 or EB15 or with the in-line blower ILB11 only (sold separately). Other blowers cannot be substituted. -
Page 5: Custom Hood Preparation
NSERT ODEL PIK33D Start with the custom hood base, because its position will determine the height of the insert. We recommend the base of the custom hood should be 3/4 inch thick plywood. - Page 6 6. CUT THE HOLE IN CUSTOM HOOD BASE If it is not done yet, cut a hole in the bottom of the cabinet, using the dimensions shown beside. NOTES: 1. The recommended distance from the back to the rearmost cutout edge is 2¼” minimum. 2.
-
Page 7: Connect Wiring
10. CONNECT WIRING Risk of electrical shock. Electrical wiring must be done by qualified personnel in accordance with all applicable codes and standards. Before connecting wires, switch power off at service panel and lock service disconnecting means to prevent power from being switched on accidentally. ALL INSTALLATIONS: Punch out the knock-out hole(s) located on back side of the insert. -
Page 8: Ducting Connection
11. INSTALL THE TRANSITION Attach the transition to insert top. Use duct tape to make all joints secure and airtight. 12. DUCTING CONNECTION When there is access to the top of the hood, connect ductwork and seal connections with duct tape after Step 13 Install the insert. When there is no access to the top of the hood, carefully pull down the metal duct through the custom hood base hole. - Page 9 14. INSTALL THE INTERIOR BLOWER (P8D BLOWER MODEL ONLY) The blower must be installed to the insert using (8) no. 8 x 3/8” screws. Remove the cover from the blower assembly. Remove the impellers by pulling them out gently (see pictures below). HD0021 Install (4) no.
-
Page 10: Light Bulbs
14. INSTALL THE INTERIOR BLOWER (P8D BLOWER MODEL ONLY) (CONT’D) Make sure the impellers are correctly installed, the insert will not work properly if reversed. Both impellers are different in the dual blower, one rotates clockwise and the other counterclockwise. Each wheel and motor have an arrow and a number on them, you have to match them correctly (see drawing beside). -
Page 11: Install Baffle Filters
16. INSTALL BAFFLE FILTERS Remove protective plastic film covering the baffle filters before installing them. It is recommended to install side filters first and finish with center one. A vertical arrow with the word AIR can be found on the filters border. Make sure to install the baffle filters with the arrow pointing towards the inside of the hood insert. -
Page 12: Operation
18. OPERATION The insert is operated using the (3) controls located beneath the front edge of the insert. HC0014 1) Light switch COOKTOP LIGHTING (HALOGEN) The light switch turns the halogen lights ON and OFF. Use shielded halogen bulbs (120 V, 50 W, type GU10), included. BLOWER The blower is operated using two (2) controls. -
Page 13: Wiring Diagram
19. WIRING DIAGRAM Risk of electrical shock. Electrical wiring must be done by qualified personnel in accordance with all applicable codes and standards. Before connecting wires, switch power off at service panel and lock service disconnecting means to prevent power from being switched on accidentally. Ground Line Neutral... -
Page 14: Warranty
Broan warrants to the original consumer purchaser of its products that such products will be free from defects in materials or workmanship for a period of one year from the date of original purchase. THERE ARE NO OTHER WARRANTIES, EXPRESS OR IMPLIED, INCLUDING, BUT NOT LIMITED TO, IMPLIED WARRANTIES OR MERCHANTABILITY OR FITNESS FOR A PARTICULAR PURPOSE. -
Page 15: Service Parts
SERVICE PARTS PIK33D MODEL REF. NO. PART NUMBER SV03428 TRANSITION 9” x 18” TO 10” ROUND V05869 BEST LOGO V06508 NYLON CONNECTOR KIT V15432 FILTER CLIP KIT V06364 POTENTIOMETER V06497 THERMOSTAT V06498 SOCKET LAMP GU-10 ASSEMBLY V02775 CHROME RING V03504... - Page 16 SERVICE PARTS DUAL BLOWER P8D HL0051 REF. NO. PART NUMBER V15440 DUAL BLOWER ASSEMBLY V02160 CAPACITOR 15MFD V01582 LOCK NUT NO. 6-32 V01857 WIRE COVER V06338 MOTOR 165W CW V03400 BLOWER IMPELLER, HOOD 7.094” V01810 IMPELLER RING V03399 BLOWER IMPELLER, HOOD 7.094” V06339 MOTOR 165 W CCW V00871...
- Page 17 GUIDE D’INSTALLATION HB0034 MODÈLE PIK33D ONVIENT À UNE UTILISATION DANS DES LIEUX HUMIDES LORSQUE RACCORDÉ À UN DISJONCTEUR DE FUITE À LA TERRE (DDFT). ONÇU POUR FONCTIONNER SUR UN PATIO COUVERT OU UNE VÉRANDA CONÇU POUR LA CUISSON DOMESTIQUE SEULEMENT LIRE ET CONSERVER CES INSTRUCTIONS INSTALLATEUR : LAISSER CE GUIDE AU PROPRIÉTAIRE.
- Page 18 AVERTISSEMENT AFIN DE RÉDUIRE LES RISQUES D’INCENDIE, D’ÉLECTROCUTION OU DE BLESSURES CORPORELLES, SUIVEZ LES INSTRUCTIONS SUIVANTES : 1. N’utilisez cet appareil que de la façon prévue par le manufacturier. Si vous avez des questions, contactez le manufacturier à l’adresse et au numéro de téléphone indiqués sur la garantie.
- Page 19 MODÈLE PIK33D SYSTÈME DE MODULE DE HOTTE ENCASTRABLE Ventilateur en ligne ILB11 (1100 PCM) (incluant deux transitions rondes de 8 po x 12 po à 10 po) Modèle 441 Capuchon de mur de 10 po rond Standard, sections de 2 pi (inclus avec ventilateur intérieur P8D)
-
Page 20: Préparer L'installation
Cet appareil n’est pas conçu pour être utilisé avec un barbecue. Le module de hotte encastrable PIK33D doit être installé uniquement avec le ventilateur intérieur P8D, le ventilateur extérieur EB12 ou EB15 ou le ventilateur en ligne ILB11 (vendus séparément). Aucun autre ventilateur ne peut être utilisé. - Page 21 Le tableau ci-dessous indique les poids des modules selon le type de ventilateur choisi. NSERT ODEL PIK33D Commencer avec la base de l’armoire, car sa position déterminera la hauteur du module de hotte encastrable. Nous recommandons qu’elle soit faite de contreplaqué de 3/4 po d’épaisseur.
-
Page 22: Installer La Plaque Ventilateur
6. DÉCOUPER LE TROU DANS LA BASE DE L’ARMOIRE Si ce n’est pas déjà fait, découper le trou dans la base de l’armoire selon les dimensions indiquées ci-contre. NOTES : 1. La distance minimale recommandée entre l’arrière de l’armoire et le rebord arrière de la découpe est de 2¼ po. 2. -
Page 23: Branchements Électriques
10. BRANCHEMENTS ÉLECTRIQUES Risque de chocs électriques. Le raccordement électrique doit être effectué par du personnel qualifié conformément aux codes et aux standards. Avant d’effectuer le branchement, coupez l’alimentation électrique au panneau de service et verrouillez-le pour éviter une mise en marche accidentelle. TOUTES LES INSTALLATIONS : Perforer l’ouverture préamorcée située à... -
Page 24: Installer Le Module
11. INSTALLER LA TRANSITION Glisser la transition par-dessus l’adaptateur. Sceller la transition à l’adaptateur en utilisant du ruban adhésif en toile. 12. RACCORDER LES CONDUITS Si l’accès au-dessus de l’armoire demeure ouvert, aller au point 13 Installer le module, puis raccorder les conduits et sceller les joints à... - Page 25 14. INSTALLER LE VENTILATEUR INTERIEUR (MODÈLE P8D SEULEMENT) Le ventilateur doit être installé à la plaque ventilateur en utilisant huit vis n du ventilateur en tirant délicatement (voir photos ci-dessous). HD0021 Installer quatre (4) vis n° 8 x 3/8 po aux endroits indiqués sur la photo ci-contre en laissant un espace d’environ 1/8 po.
- Page 26 14. INSTALLER LE VENTILATEUR INTÉRIEUR (MODÈLE P8D SEULEMENT) ( S’assurer que les roues soient bien replacées; le module ne fonctionnera pas normalement si inversées. Dans le cas d’un ventilateur double, les deux roues de ventilateur sont différentes; une doit tourner dans le sens horaire et l’autre dans le sens anti-horaire.
-
Page 27: Entretien
16. INSTALLER LES FILTRES À CHICANE Avant d’installer les filtres à chicane, retirer le plastique protecteur de ceux-ci. Il est recommandé d’installer d’abord les filtres situés aux extrémités et de terminer par le filtre du centre. Une flèche verticale accompagnée du mot « AIR » apparaît sur le rebord des filtres. S’assurer d’installer les filtres de façon à... - Page 28 18. FONCTIONNEMENT Le module fonctionne à l’aide des (3) commandes situées sous son rebord inférieur avant. HC0014 1) Commande d’éclairage 2) Commande MARCHE/ARRÊT du ventilateur 3) Commande de réglage de vitesse du ventilateur ÉCLAIRAGE Cette commande contrôle les lampes halogènes. Utiliser des ampoules halogènes 120 V, 50 W, de type GU10, (incluses).
- Page 29 19. SHÉMA ÉLECTRIQUE Risque de chocs électriques. Le raccordement électrique doit être effectué par du personnel qualifié conformément aux codes et aux standards. Avant d’effectuer le branchement, coupez l’alimentation électrique au panneau de service et verrouillez-le pour éviter une mise en marche accidentelle. Mise à...
-
Page 30: Garantie
GARANTIE LIMITÉE DE UN AN DE BROAN Broan garantit à l’acheteur consommateur initial de ses produits qu’ils sont exempts de tout défaut dans les matières premières ou la main-d’œuvre, pour une période de un an à compter de la date d’achat par le consommateur initial. -
Page 31: Pièces De Rechange
PIÈCES DE RECHANGE MODÈLE PIK33D Nº Nº RÉF. DE PIÈCE SV03428 TRANSITION RONDE 9 po x 18 po à 10 po V05869 LOGO BEST V06508 ENSEMBLE DE CONNECTEURS DE NYLON V15432 ENSEMBLE ATTACHE FILTRE V06364 POTENTIOMÈTRE V06497 THERMOSTAT V06498 ASSEMBLAGE DOUILLE POUR LAMPE GU-10... - Page 32 PIÈCES DE RECHANGE VENTILATEUR DOUBLE P8D HL0051 Nº Nº RÉF. DE PIÈCE V15440 VENTILATEUR DOUBLE ASSEMBLÉ V02160 CONDENSATEUR 15MFD V01582 ÉCROU DENTELÉ N° 6-32 V01857 CACHE-FILS V06338 MOTEUR DE 165 W CW V03400 ROUE HOTTE 7,094 V01810 ANNEAU DE ROUE V03399 ROUE HOTTE 7,094 V06339...
-
Page 33: Manual De Instalación
MANUAL DE INSTALACIÓN HB0034 MODELO PIK33D ADECUADA PARA LUGARES HÚMEDOS CUANDO SE INSTALA EN UN CIRCUITO DE DERIVACIÓN PROTEGIDO CON UN DISYUNTOR. PREVISTA PARA PATIOS O TERRAZAS CUBIERTAS. CONCEBIDO SÓLO PARA USO DOMÉSTICO LEER Y CONSERVAR ESTAS INSTRUCCIONES INSTALADOR: DEJAR ESTE MANUAL AL PROPRIETARIO. - Page 34 PIK33D debe ser instalado solamente con el ventilador interior P8D ó con ventilador exterior modelo EB12 ó EB15 ó con ventilador en línea ILB11 (vendidos separadamente).
- Page 35 MODELO PIK33D SISTEMA DE DISPOSITIVO Ventilador en línea Modelo ILB11 (1100 pcm) (con dos transiciónes redondas de 8” x 12” a 10”) Modelo 441 10” redondo Remate de pared (incluido con ventilador P8D) HL0080 Modelo 437 Remate de techo de alta capacidad Modelo 418 Codo ajustado de 10”...
-
Page 36: Seleccione La Opción Ventilador Y Instale Los Conductos
Este dispositivo no es diseñado por una utilizacíon con un asado. El modelo de dispositivo PIK33D debe ser instalado unicamente con ventilador interior P8D ó con ventilador modelo EB12 ó EB15 ó con ventilador en línea ILB11 (vendidos separadamentes). Otros ventiladores no pueden reemplazar a este ventiladores. - Page 37 ISPOSITIVO PIK33D Empiece por la base de la campana extractora, ya que su posición determinará la altura del dispositivo. Aconsejamos que la base de la campana extractora sea un contrachapado de 3/4”...
- Page 38 6. CORTE EL ORIFICIO EN LA BASE DE LA CAMPANA EXTRACTORA Si no está hecho, corte un orificio en la base de la campana, utilizando las dimensiones que aparecen a continuación. NOTAS: 1. La distancia mínima recomendada entre la parte trasera de la campana y la parte trasera del borde del orificio es de 2¼’’.
-
Page 39: Conexión Eléctrica
CONEXIÓN ELÉCTRICA Peligro de choque eléctrico. La instalación eléctrica debe ser hecha por personal calificado de acuerdo con todos los códigos aplicables y normas. Antes de efectuar el empalme, cortar la alimentación eléctrica del interruptor y cerrar con securidad para prevenir una alimentación accidental. TODAS LAS INSTALACIONES: Abra el agujero ciego situarse en la parte posterior del dispositivo. -
Page 40: Conexión Del Conducto
11. INSTALE LA TRANSICIÓN Coloque la transición sobre el dispositivo. Selle la transición al disposotivo con cinta adhesiva a conducto. 12. CONEXIÓN DEL CONDUCTO Si existe un acceso por la parte superior de la campana, conecte el conducto y selle las juntas con cinta aislante tras la etapa 13 Instalación del dispositivo. - Page 41 14. INSTALACIÓN DEL VENTILADOR (MODELO P8D SOLAMENTE) El ventilador debe ser instalado a el dispositivo utilizando 8 tornillos n.° 8 x 3/8’’ para el ventilador doble. Saque la tapa del ventilador. Saque las ruedas del ventilador tirándola delicadamente (ver fotos de abajo). HD0022 HD0021 Instale 4 tornillos n.°...
- Page 42 14. INSTALACIÓN DEL VENTILADOR (MODELO P8D SOLAMENTE) (CONTINUACIÓN) Asegurarse que las ruedas sean bien reemplazadas, el dispositivo no funcionará normalmente si está al réves. Las dos ruedas del ventilador son diferentes en el caso de un ventilador doble, una debe girar en el sentido de las agujas del reloj y la otra en el sentido contrario de las agujas del reloj.
-
Page 43: Mantenimiento
16. INSTALACIÓN DE LOS FILTROS DEFLECTORES Retire la película protectora de plástico que cubre los filtros deflectores antes de instalarlos. Se aconseja instalar los filtros laterales primero y hacer después lo propio con el central. En el extremo del filtro hay una flecha vertical con la palabra AIR. Asegúrese de instalar los filtros deflectores con la flecha señalando hacia la parte interior del dispositivo de la campana. - Page 44 18. FUNCIONAMIENTO El dispositivo funciona utilizando los 3 controles que se encuentran debajo del borde frontal del dispositivo. HC0014 1) Luces halógenas LÁMPARAS HALÓGENAS El interruptor de encender/apagar controlan las luces halógenas. Utilice bombillas halógenas 120 V, 50 W, de typo GU10 (incluidas). VENTILADOR El ventilador funciona con la ayuda de dos controles.
-
Page 45: Esquema Eléctrico
19. ESQUEMA ELÉCTRICO Peligro de choque eléctrico. La instalación eléctrica debe ser hecha por personal calificado de acuerdo con todos los códigos aplicables y normas. Antes de efectuar el empalme, cortar la alimentación eléctrica del interruptor y cerrar con securidad para preveir una alimentación accidental. Tierra Línea Neutral... - Page 46 BROAN GARANTÍA LIMITADA POR UN AÑO Broan garantiza al consumidor comprador original de sus productos que dichos productos carecerán de defectos en materiales o en mano de obra por un período de un año a partir de la fecha original de compra. NO EXISTEN OTRAS GARANTÍAS, EXPRESAS O IMPLÍCITAS, INCLUYENDO, PERO NO LIMITADAS A, GARANTÍAS IMPLÍCITAS DE COMERCIALIZACIÓN O ACTITUD PARA UN PROPOSITO PARTICULAR.
- Page 47 RUPUESTOS MODELO PIK33D REF. N.° N.° PIEZA SV03428 TRANSICIÓN 9” x 18” A 10” REDONDO V05869 LOGOTIPO BEST V06508 KIT DE CONECTOR DE NAILON V15432 KIT GRAPA FILTROS V06364 POTENCIÓMETRO V06497 TERMOSTATO V06498 CASQUETE DE LUZ GU-10 V02775 ANILLO METALICO V03504 BOTÓN VENTILADOR...
- Page 48 REPUESTOS VENTILADOR DOBLE P8D HL0051 REF. N.° N.° PIEZA V15440 MONTAJE DE VENTILADOR DOBLE V02160 CONDENSADOR 15MFD V01582 TUERCA DENTELLADA n.° 6-32 V01857 CUBRE-CABLE V06338 MOTOR 165W CW V03400 RUEDA CAMPANA 7.094” x 3.375” CW V01810 ANILLO RUEDA V03399 RUEDA CAMPANA 7.094” x 3.375” CCW V06339 MOTOR 165W CCW V00871...
Need help?
Do you have a question about the PIK33D and is the answer not in the manual?
Questions and answers