Table of Contents
Advertisement
Advertisement
Table of Contents

Related Manuals for Boston Acoustics DSi495


Summary of Contents for Boston Acoustics DSi495
- Page 1 VRi595 DSi495 Designer VRi/DSi Série VRi/DSi ™ In-Ceiling Designer Sistemas de Speaker System altavoces empotrados en el techo Série VRi/DSi VRi/DSi-Designer Designer Decken- Système d’enceintes Lautsprechersysteme encastrées dans le plafond A Boston Acoustics Hidden Theater ™ product...
-
Page 2: Table Of Contents
VRi595 or DSi495 a ceder de la propia pantalla, lo que perfect solution for front stage convierte al VRi595 o al DSi495 en audio in a home theater system. una solución perfecta para obtener VRi595 features include a die-cast... -
Page 3: Thank You
VRi595 or DSi495 will be normas locales de construcción y eléc- installed. Install the speakers to meet tricos, y familiaridad con el entorno... -
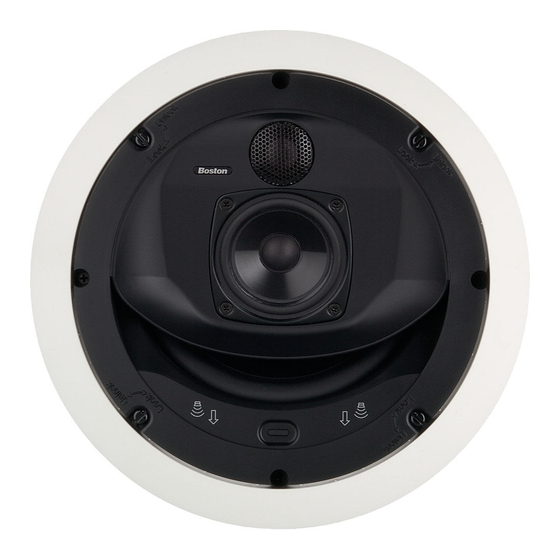
Page 4: Parts List
The tweeter and midrange baffle brado a la zona de audición principal. of the speaker has been angled to deliver accurate on-axis response to tica de frecuencias medias del altavoz the listening position. The baffle... -
Page 5: Surround Speakers
LCR (Left/Center/Right) (Izquierda/Centro/Derecha) When using the VRi595 or DSi495 as a front or main speaker: • Keep the speakers as close to the como altavoz principal o frontal: front wall as possible. • Ideally,... -
Page 6: Installation Tips
25 mm autour du trou de montage. " 326mm " 276mm VRi595 and DSi495 Cutout Diagram Bi-câblage/Bi-amplification (VRi595 seulement) Si vous bi-câblez ou bi-amplifiez vos enceintes VRi595, vous devez replacer le cavalier de la borne «... -
Page 7: New Construction
Nueva construcción Performance of your VRi595 and DSi495 can be enhanced if the ceil- del altavoz VRi595 y DSi495 si se rel- ing cavity is filled with standard lena la cavidad del techo con aislante fiberglass i n s u l a t i o n . If there de fibra de vidrio estándar. -
Page 8: Grille Removal
VRi595 and DSi495 for mounting a 25/70-volt red de cruce de los VRi595 y distribution transformer. DSi495 para la instalación de un transformador de distribución de Grille Removal 25/70 V. If you need to remove the grille, Extracción de la rejilla... -
Page 9: Installation Instructions
Install the speaker to meet all local familiaridad con el entorno en que va a building, energy, and electrical codes. instalarse el altavoz de graves. Instale el altavoz de modo que se cumplan todas Tools You’ll Need... - Page 10 The speaker jack will accept either bare wire up to 12-gauge or single banana plugs. 2. Connect the wire to the speaker. 3. Slide the speaker into the cutout 2. Conecte el cable al altavoz con (see diagram #3).
- Page 11 5. To rotate the speaker baffle, first 5. Para girar la caja acústica del turn the four flathead screws 90º counterclockwise into the “Unlock” position (see diagram #5 and #6). 6. Rotate the baffle so that the 6. Gire la caja acústica de forma...
- Page 12 7. Once the baffle is in the desired 7. Cuando la caja acústica esté en position, turn the flathead screws to the “Lock” position. 8. Insert the grille into the slots in the baffle by gently applying 8. Inserte la rejilla en las ranuras de pressure along the edge (see dia- gram #9).
-
Page 13: Painting
1. Insert the supplied paint shield 1. Inserte el protector de pintura into the frame of the speaker. 2. Paint the frame. If you are using 2. Pinte el marco. Si va a utilizar spray paint, apply two light coats. -
Page 14: Listening Levels/Power Handling
If that is not possible, write to: En primer lugar, diríjase al provee- dor al que compró los altavoces. Si Boston Acoustics, Inc. no es posible, escriba a: Attn: Parts and Service 300 Jubilee Drive Boston Acoustics, Inc. - Page 15 – 15 –...
-
Page 16: Boston Acoustics
300 Jubilee Drive DCD, Designer, and Hidden Theater are trademarks and VR, Boston, Boston Acoustics, the Boston Acoustics logo, DSi, Kortec, and VR are registered trademarks Peabody, MA 01960 USA of Boston Acoustics, Inc. Specifications are subject to change without notice.
Need help?
Do you have a question about the DSi495 and is the answer not in the manual?
Questions and answers