Table of Contents
Advertisement
Advertisement
Table of Contents

Related Manuals for Boston Acoustics DSi465T2


Summary of Contents for Boston Acoustics DSi465T2
- Page 1 VRi585T2 DSi465T2 Altavoz estéreo Single Stereo único directo/ Direct/Diffuse difuso para techo Designer ™ In-Ceiling Speaker System Enceinte de plafond Stereo Einzellaut- simple stéréo sprecher für directe/diffusion Deckeninstallation mit direkter/diffuser Abstrahlung...
-
Page 2: Configuration Guide
Quick Reference Guía de configuración Configuration Guide de referencia rápida Single Stereo Speaker Altavoz estéreo único operating mode direct diffuse Surround Speaker: Altavoz ambiental: Direct Mode modo directo operating mode direct diffuse Surround Speaker: Altavoz ambiental: Diffuse Mode modo difuso... -
Page 3: Table Of Contents
T2 puede realizarse después de Both the VRi585T2 and the instalarse el altavoz. DSi465T2 can be set for one- or Tanto el VRi585T2 como el two-channel inputs, allowing the DSi465T2 se pueden configurar speaker to function as a single sur-... -
Page 4: Specifications
Tips as they contain VRi585T2 and Sugerencias sobre la instalación, DSi465T2 specific information. ya que contiene información especí- Enjoy your new Boston Acoustics fica para los VRi585T2 y DSi465T2. T2 speaker. Disfrute de su nuevo altavoz T2 de Boston Acoustics. Specifications Frequency Response (±3dB) -
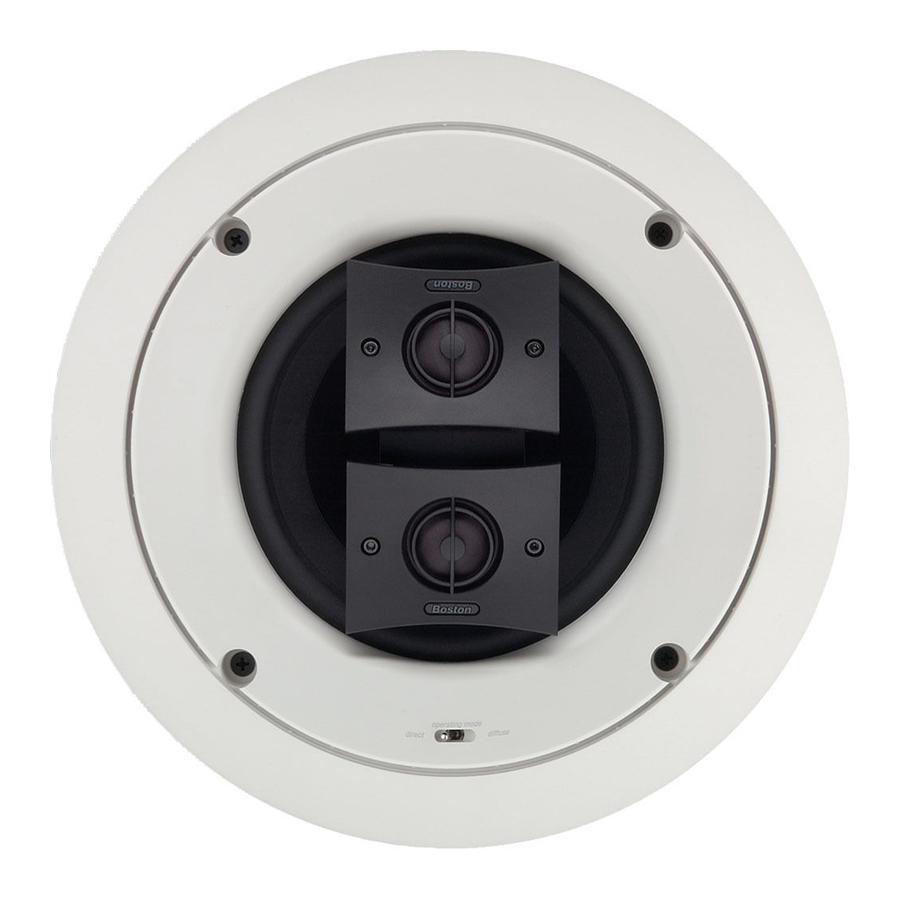
Page 5: Parts List
Single Stereo Speaker Altavoz estéreo único If the T2 is going to be used as the only speaker in a small or mid- Si se va a usar el T2 como altavoz size room, hallway, or bathroom, único en una habitación de tamaño position the speaker as close to the pequeño o medio, como el vestíbu-... - Page 6 Once the speaker is installed, the Una vez instalado el altavoz T2, T2 speaker can be fine-tuned by puede realizarse un ajuste preciso...
- Page 7 Surround Placement Option #1 Opción de colocación ambiental nº 1 • Direct mode • Tweeters face front and back • Modo directo • Altavoces de agudos hacia el frente y atrás Surround Placement Option #2 Opción de colocación ambiental nº 2 •...
- Page 8 Surround Placement Option #3 Opción de colocación ambiental nº 3 • Direct mode • Tweeters face front and back • Modo directo • Altavoces de agudos hacia el frente y atrás Surround Placement Option #4 Opción de colocación ambiental nº 4 •...
- Page 9 Surround Placement Option #5 Opción de colocación ambiental nº 5 • Side speakers–diffuse mode • Rear speaker–direct mode • Altavoces laterales–modo difuso • Tweeters face front and back • Altavoz trasero–modo directo • Altavoces de agudos hacia el frente y atrás Surround Placement Option #6 Opción de colocación...
-
Page 10: Installation Tips
Nueva construcción Performance of your Boston Pueden mejorarse las prestaciones Acoustics loudspeaker can be del altavoz Boston Acoustics si se rel- enhanced if the ceiling cavity is lena la cavidad del techo con aislante filled with standard fiberglass insu- de fibra de vidrio estándar. Si ya hay lation. - Page 11 To Remove Grille paneles de unión de los equipos If you need to remove the grille, VRi585T2 y DSi465T2 para la insta- gently lift it out at the edges. Use a lación de dos transformadores de sharp, pointed instrument such as distribución de 25/70 V.
-
Page 12: Wiring
T2 speaker. el altavoz T2. Single Stereo Speaker Altavoz estéreo único If your T2 speaker is going to be Si va a usar el T2 como altavoz used as the sole stereo speaker, refer estéreo único, consulte el croquis to the diagram below. - Page 13 Surround Speaker Altavoz ambiental If your T2 speaker is going to be Si va a usar el T2 como altavoz used as a surround speaker, refer to ambiental, consulte el croquis the diagram below. siguiente. 1. Set the input jumper (located on 1.
-
Page 14: Anleitungen Zur Installation
T2 speaker will be installed. Install the locales de construcción y eléctricos, y T2 speaker to meet all local building, familiaridad con el entorno en que va energy, and electrical codes. - Page 15 (up to 12-gauge) or cable pelado (hasta un calibre single banana plugs. 12) como un enchufe sencillo 2. Connect the wire to the speaker, con punta cónica. being careful to retain proper 2. Conecte el cable al altavoz con polarity.
- Page 16 Surround plano del altavoz de agudos, lea Speaker section found on pages la sección Altavoz ambiental en 6 through 9. las páginas 6 a 9. 6. Insert the grille into the slots in 6.
-
Page 17: Painting
1. Insert the supplied paint shield 1. Inserte el protector de pintura into the frame of the speaker (see diagram #10). 2. Paint the frame. If you are using 2. Pinte el marco. Si va a utilizar spray paint, apply two light coats. -
Page 18: Listening Levels/Power Handling
En primer lugar, diríjase al provee- If that is not possible, write to: dor al que compró los altavoces. Si no es posible, escriba a: Boston Acoustics, Inc. Attn: Parts and Service Boston Acoustics, Inc. 300 Jubilee Drive Attn: Customer Service... - Page 19 Notes: Notas: Remarques : Anmerkungen: – 19 –...
- Page 20 DCD, DSi, Designer, Kortec, and VRi are trademarks of Boston Acoustics, Inc. 300 Jubilee Drive Boston, Boston Acoustics, and VR are registered trademarks of Boston Acoustics, Inc. Peabody, MA 01960 USA Specifications are subject to change without notice. © 2003 Boston Acoustics, Inc.
Need help?
Do you have a question about the DSi465T2 and is the answer not in the manual?
Questions and answers