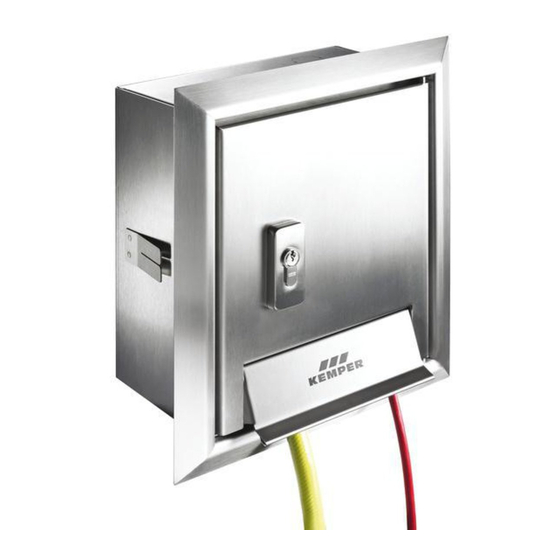
Kemper MINI-TRESOR Installation And Operating Instructions Manual
Stainless steel built-in wall cabinet
Hide thumbs
Also See for MINI-TRESOR:
- Installation and operating instructions manual (36 pages) ,
- Installation and operating instructions manual (12 pages) ,
- Installation and operating instructions manual (32 pages)
Summary of Contents for Kemper MINI-TRESOR
- Page 1 DE Einbau- und Bedienungsanleitung ‘MINI-TRESOR‘ Wandeinbauschrank aus Edelstahl Fig. 211 EN Installation and operating instructions ‘MINI-TRESOR‘ stainless steel built-in wall cabinet Fig. 211...
- Page 2 Schäden an der Anlage oder ätzenden Reinigungsmittel verwen- - sonstiger fehlerhafter Bedienung. Funktionsstörungen führen können. den. Die Reinigung wird mittels Info! Kennzeichnet zusätzliche feuchtem Mikrofasertuch empfoh- Informationen und Tipps. len. 2 / 16 – K410021100001-00 / 09.2021 – © www.kemper-olpe.de...
- Page 3 0,03A) abgesichert werden. Dies gilt für alle Steckdosen im Außen- bereich. Entsorgung Örtliche Vorschriften zur Abfallver- wertung bzw. -beseitigung sind zu beachten. Produkt darf nicht mit normalem Haushaltsmüll, sondern muss sachgemäß entsorgt werden. 3 / 16 – K410021100001-00 / 09.2021 – © www.kemper-olpe.de...
- Page 4 150 mm Restwandstärke (1) erforderlich. Hinweis! Bei Verlegung der Anschlussleitung Unterputz ist eine Mindestwandstärke von 285 mm (2) erforderlich. Hinweis! Die Armatur muss mindestens 250 mm über dem höchst- möglichen Betriebswasserspiegel eingebaut werden! 4 / 16 – K410021100001-00 / 09.2021 – © www.kemper-olpe.de...
- Page 5 Empfehlenswert ist eine rückseitige Dämmung (z.B. Styropor). Rückseitige Dämmung einsetzen. Schrank einsetzen und fixieren. Ggf. vier Löcher bohren und Schrank (1) mittels beiliegenden vier Befestigungsschrauben (2) an der Rückwand befestigen (vier Bohrungen, Ø 8 mm). 5 / 16 – K410021100001-00 / 09.2021 – © www.kemper-olpe.de...
- Page 6 Außenarmatur an den vorgesehenen Befestigungspunkten an der Rückwand anschrauben. (Das Spritzschutzblech kann auch nach Angaben unter Punkt 1 Mindestwandstärken sind zu • beachten! Montage der frostsicheren Außenarmatur angebracht werden.) 6 / 16 – K410021100001-00 / 09.2021 – © www.kemper-olpe.de...
- Page 7 Es ist aus diesem Grunde nur leichtes Zu- drehen (Schließen) der Armatur erforderlich. Hinweis! Zur Sicherstellung der Funktion „Frostsicherheit“ müssen Schläuche und sonstige Anbauteile vor Beginn der Frost- periode entfernt werden! 7 / 16 – K410021100001-00 / 09.2021 – © www.kemper-olpe.de...
-
Page 8: Precautions For Installation
Cleaning with a lead to damages to the system or - Unauthorised product modifications. damp micro-fibre cloth is recom- malfunctions. - Other incorrect operation. mended. Info! Indicates additional infor- mation and tips. 8 / 16 – K410021100001-00 / 09.2021 – © www.kemper-olpe.de... - Page 9 Disposal Local regulations on waste recycling and disposal must be followed. The product must not be disposed of with household waste but must rather be disposed of appropriately. 9 / 16 – K410021100001-00 / 09.2021 – © www.kemper-olpe.de...
- Page 10 When laying the connecting pipe within the wall, a mini- mum wall thickness of 285 mm is required! Note! The valve must be attached minimum 250 mm over the maximum of operating water surface! 10 / 16 – K410021100001-00 / 09.2021 – © www.kemper-olpe.de...
- Page 11 Insert the cabinet into the opening and fix it. If necessary, drill four holes and attach the cabinet (1) to the rear wall using the four attachment screws provided (2) (four holes, Ø 8 mm). 11 / 16 – K410021100001-00 / 09.2021 – © www.kemper-olpe.de...
- Page 12 (7). (The spray protection plate can also be fitted after The specifications given under Point 1 Minimum wall • the installation of the frost-proof outdoor valve.) thicknesses must be observed! 12 / 16 – K410021100001-00 / 09.2021 – © www.kemper-olpe.de...
-
Page 13: Functional Testing
(frost safety). For this reason, the fitting only needs to be closed gently. Note! To ensure the correct ‘frost safety‘ function, hoses and other attachements must be removed before the start of the frost period! 13 / 16 – K410021100001-00 / 09.2021 – © www.kemper-olpe.de... - Page 14 14 / 16 – K410021100001-00 / 09.2021 – © www.kemper-olpe.de...
- Page 15 15 / 16 – K410021100001-00 / 09.2021 – © www.kemper-olpe.de...
- Page 16 Gebr. Kemper GmbH + Co. KG Service-Hotline +49 2761 891-800 Harkortstraße 5 www.kemper-olpe.de D-57462 Olpe info@kemper-olpe.de 16 / 16 – K410021100001-00 / 09.2021 – © www.kemper-olpe.de...


Need help?
Do you have a question about the MINI-TRESOR and is the answer not in the manual?
Questions and answers