Kemper MINI-TRESOR Installation And Operating Instructions Manual
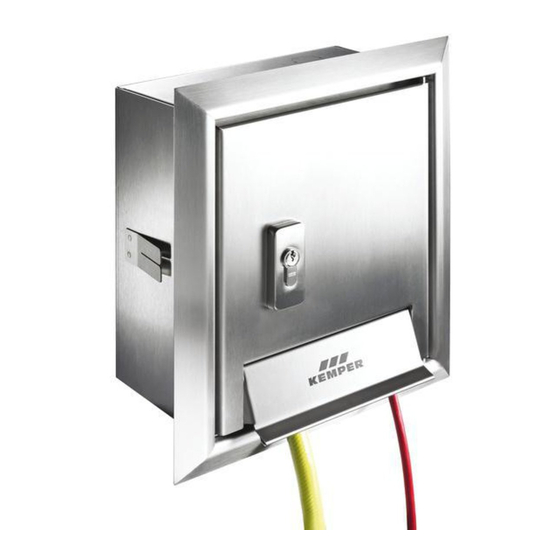
Stainless steel surface-mounted wall cabinet
Hide thumbs
Also See for MINI-TRESOR:
- Installation and operating instructions manual (36 pages) ,
- Installation and operating instructions manual (24 pages) ,
- Installation and operating instructions manual (16 pages)

Subscribe to Our Youtube Channel
Related Manuals for Kemper MINI-TRESOR


Summary of Contents for Kemper MINI-TRESOR
- Page 1 DE Einbau- und Bedienungsanleitung ‘MINI-TRESOR‘ Wandaufputzschrank aus Edelstahl Fig. 212 EN Installation and operating instructions ‘MINI-TRESOR‘ stainless steel surface-mounted wall cabinet Fig. 212...
- Page 2 Schäden an der Anlage oder ätzenden Reinigungsmittel verwen- - sonstiger fehlerhafter Bedienung. Funktionsstörungen führen können. den. Die Reinigung wird mittels Info! Kennzeichnet zusätzliche feuchtem Mikrofasertuch empfoh- Informationen und Tipps. len. 2 / 12 – K410021200001-00 / 09.2021 – © www.kemper-olpe.de...
- Page 3 4 Schrauben für die Montageplatte und das Spritzschutzblech (M6 x 10) muss der KEMPER MINI-TRESOR Spritzschutzblech für Strom- und Wasseranschluss Türschloss mit 3 Schlüsseln durch einen FI-Schalter (Fehlerstrom 0,03A) abgesichert werden. Dies gilt für alle Steckdosen im Außen- bereich. 3 / 12 – K410021200001-00 / 09.2021 – © www.kemper-olpe.de...
- Page 4 Schraube im oberen Wandeinbauschrankbereich herstellen tur an den vorgesehenen Befestigungspunkten an der Rückwand (sämtliche metallischen Teile sind somit geerdet). anschrauben. (Das Spritzschutzblech kann auch nach Montage der frostsicheren Außenarmatur angebracht werden.) 4 / 12 – K410021200001-00 / 09.2021 – © www.kemper-olpe.de...
- Page 5 Zur Sicherstellung der Funktion „Frostsicherheit“ müssen Schläuche und sonstige Anbauteile vor Beginn der Frost- Hinweis! Die Mindestwandstärke von 180 mm Mauerwerk darf periode entfernt werden! nicht unterschritten werden (s. frostfreier Bereich). 5 / 12 – K410021200001-00 / 09.2021 – © www.kemper-olpe.de...
-
Page 6: Precautions For Installation
- Unauthorised product modifications. malfunctions. - Other incorrect operation. Note! The valve must be attached Info! Indicates additional infor- minimum 250 mm over the maxi- mation and tips. mum of operating water surface. 6 / 12 – K410021200001-00 / 09.2021 – © www.kemper-olpe.de... - Page 7 Disposal Local regulations on waste recycling and disposal must be followed. The product must not be disposed of with household waste but must rather be disposed of appropriately. 7 / 12 – K410021200001-00 / 09.2021 – © www.kemper-olpe.de...
- Page 8 (thus (7). (The spray protection plate can also be fitted after the instal- all metallic parts are earthed). lation of the frost-proof outer fitting.) 8 / 12 – K410021200001-00 / 09.2021 – © www.kemper-olpe.de...
-
Page 9: Functional Testing
To ensure the correct ‘frost safety‘ function, hoses and other attachements must be removed before the start of Note! the frost period! The masonry must be at least 180 mm thick (see frost- free area). 9 / 12 – K410021200001-00 / 09.2021 – © www.kemper-olpe.de... - Page 10 10 / 12 – K410021200001-00 / 09.2021 – © www.kemper-olpe.de...
- Page 11 11 / 12 – K410021200001-00 / 09.2021 – © www.kemper-olpe.de...
- Page 12 Gebr. Kemper GmbH + Co. KG Service-Hotline +49 2761 891-800 Harkortstraße 5 www.kemper-olpe.de D-57462 Olpe info@kemper-olpe.de 12 / 12 – K410021200001-00 / 09.2021 – © www.kemper-olpe.de...
Need help?
Do you have a question about the MINI-TRESOR and is the answer not in the manual?
Questions and answers