Table of Contents
Advertisement
Quick Links
*47327850*
47327850
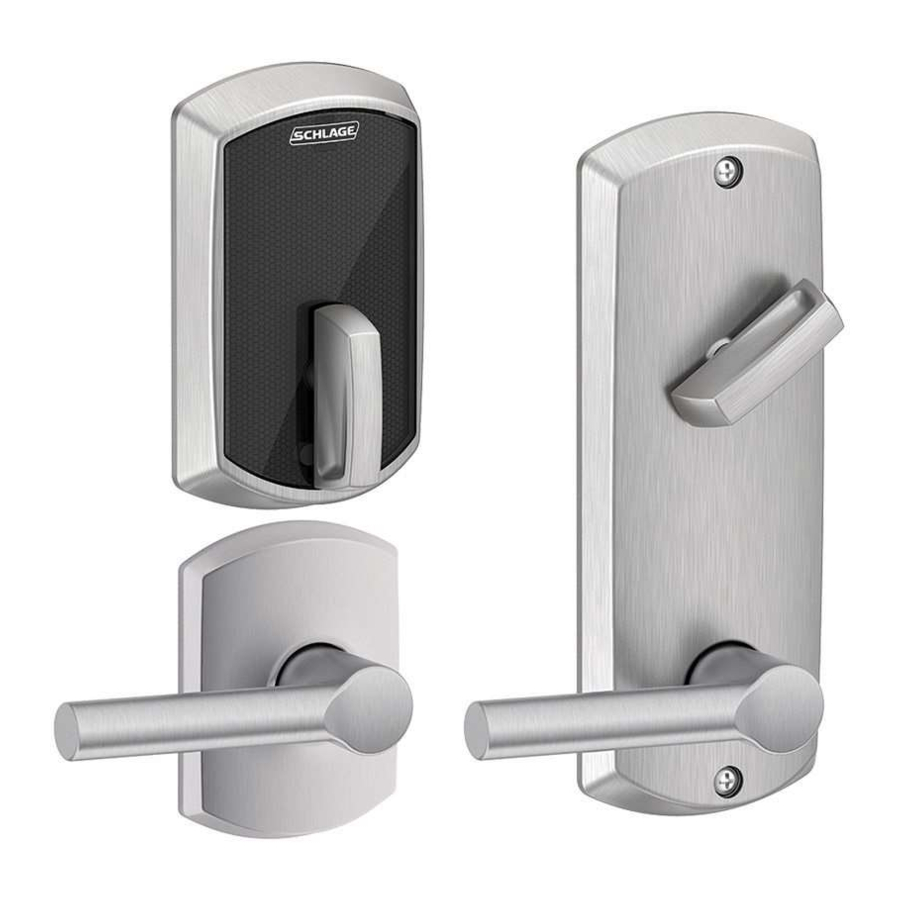
FE410F
Outside deadbolt
assembly
Outside lever assembly
Lever
Tools Needed
• Phillips screwdriver
• Tape measure
Optional
• Flathead screwdriver
• Torx™ screwdriver
ENGAGE™ WEB & MOBILE APPLICATIONS
Search for "Allegion ENGAGE" in the Apple App Store or
Google Play store to download the app.
Navigate to portal.allegionengage.com to access your
account online.
Access online interactive
instructions, user guide,
warranty, and reference
information.
alle.co/control
Schlage Control™
Smart Interconnected Lock
Inside assembly for 5Z\x" door prep
Only one inside assembly is included. Lock
is ordered for either 5Z\x" or 4" door prep.
Bolt
Firecup
Handing Plate
Door preparation:
See template in
package.
Contact Product Support
1-877-671-7011.
Deadbolt mounting screws
Latch
Latch/Bolt/Strike Screws (8)
• Install and test lock with door open to avoid being locked in or out.
Do NOT use a power drill for installation!
Determine the Handing
If the handing is incorrect, locking and
unlocking could be reversed, resulting in an
Determine the handing of your door. Directions for changing
lock handing are provided throughout the instructions.
Left hand
Installation Instructions
Lever mounting screws
Latch Strike
Credentials not included.
IMPORTANT NOTES
CAUTION
Use provided bolt!
CAUTION
unsecured residence.
Outside of door
Right hand
Lever
Cover screws
Inside cover
Advertisement
Table of Contents

Related Manuals for Schlage Control FE410F


Summary of Contents for Schlage Control FE410F
- Page 1 *47327850* Schlage Control™ 47327850 Smart Interconnected Lock FE410F Installation Instructions Deadbolt mounting screws Inside assembly for 5Z\x” door prep Only one inside assembly is included. Lock is ordered for either 5Z\x” or 4” door prep. Lever Bolt Cover screws Inside cover...
- Page 2 Install the firecup into the lower hole. Check door dimensions. L DO NOT install the firecup on a 1C\,” thick door. See consumer.schlage.com/Service-Support for door preparation instructions if dimensions are different. Backset Fire cup not ” OR 2 ” required for...
- Page 3 Install the inside assembly on the inside of the door. Install the top part of the lock. L Bolt must remain retracted! CAUTION If the bolt does not remain retracted throughout installation, locking Route the cable and unlocking could be reversed, resulting in an unsecured residence. through the hole in the inside assembly.
- Page 4 Install the lever assembly on the outside of the door. Apply power to the lock. L The lever will be installed later. Connect the cable to the inside assembly. CAUTION The connector fits only one way. DO NOT FORCE! Red wire Make sure the notch faces the latch.
- Page 5 Secure the inside cover with two screws. Test the lock. Extend and then retract the bolt using the inside bolt throw. Bolt should extend and retract smoothly. Actual Size (2) L Outside bolt throw should spin freely until a valid credential is presented.
-
Page 6: Customer Service
Set up the lock. Customer Service 1-877-671-7011 www.allegion.com/us Access online interactive instructions, user guide, warranty, and reference information. alle.co/control Troubleshooting Most installation problems are related to handing. Determine the Handing Outside of door CAUTION If the handing is incorrect, locking and unlocking could be reversed, resulting in an unsecured residence. - Page 7 *47327850* 47327850 Schlage Control™ Cerradura inteligente interconectada con tecnología Engage Schlage Control™ Modelo FE410F Modèle FE410F Serrure intelligente interconnectée Instrucciones para la instalación dotée de la technologie Engage Instructions d’installation Tornillos de montaje de Unidad interna para prep de Assemblage intérieur pour cerradura puerta de 5Z\x”...
-
Page 8: Notas Importantes
Verifique las dimensiones de la puerta. NOTAS IMPORTANTES Vérifiez les dimensions de la porte. • Instalar la cerradura y probarla con la puerta abierta ¡para Consulte consumer.schlage.com/Service-Support para evitar quedarse adentro o afuera! conocer las instrucciones de preparación de puerta si las dimensiones son diferentes. - Page 9 Instalar la cerradura No se requiere un cerrojo cilindro y volteador para un Installation de la serrure orificio de cerradura. Une coupelle coupe-feu n’est pas requise pour le trou Instalar el perno y el pestillo. du pêne dormant Installez le pêne et le verrou. La apertura debería apuntar PRECAUCIÓN MISE EN GARDE...
- Page 10 Asegúrese de que la leva en la unidad interior se Instalar la parte superior de la cerradura. encuentre en la posición correcta. Installez la partie supérieure de la serrure. Assurez-vous que la came est dans la bonne position. Instalar la unidad de cerrojo externa del lado exterior de PRECAUCIÓN MISE EN GARDE la puerta.
- Page 11 Asegurar la unidad interna con dos tornillos inferiores. Instalar la parte inferior de la cerradura. Fixez l’assemblage interne à l’aide des deux vis du bas. Installez la partie inférieure de la serrure. Instalar la placa del lado de la manija en la unidad de la manija.
- Page 12 Alimentar la cerradura con energía. IInstalar la tapa interna. Mettez la serrure sous tension. Installez le couvercle interne. Conectar el cable fuera de la unidad interna. Colocar la tapa interna en la puerta. Branchez le câble dans l’assemblage interne. Posez le couvercle interne sur la porte. Alinear la ranura con la pieza final.
- Page 13 Instalar las manijas. Instalar las contra chapas. Installez les leviers. Installez les gâches. Instalar la manija del lado interior de la puerta. Instalar las contra chapas en el marco. Installez le levier à l’intérieur de la porte. Installez les gâches dans le cadre. L El pasador externo debería girar libremente hasta que se presente una credencial válida.
- Page 14 Configure la cerradura. Configurez la serrure. Acceda en línea a instrucciones interactivas, guía del usuario, garantía e información de referencia. alle.co/control Accédez aux instructions interactives en ligne, au guide d’utilisation, à la garantie et aux informations de référence. alle.co/control Servicio al cliente / Service à la clientèle 1-877-671-7011 www.allegion.com/us...
-
Page 15: Resolución De Problemas
Resolución de problemas La mayoría de los problemas de instalación se relacionan con el lado de la manija. Consulte Fijar el lado de la manija. Problema Solución Paso La manija interna no gira hacia arriba. La cerradura está instalada correctamente. —... -
Page 16: Dépannage
Dépannage La plupart des problèmes d’installation sont liés à la main d’ouverture. Consultez Déterminez la main d’ouverture pour déterminer la main d’ouverture de votre porte. Problème Solution Étape Le levier interne ne tourne pas vers le haut. La serrure est bien installée. Le levier —...
Need help?
Do you have a question about the Control FE410F and is the answer not in the manual?
Questions and answers