Table of Contents
Advertisement
Quick Links
Download this manual
See also:
Installation Manual
Advertisement
Table of Contents

Related Manuals for Bose Wave PC system


Summary of Contents for Bose Wave PC system
- Page 1 The Wave/PC™ Interactive System Owner’s Guide April 12, 2001 PDF259774_00...
-
Page 2: Safety Information
Note: DO NOT place the Wave/PC unit on any heat-sensitive surface, such as the finished surface of fine furniture. Like all electrical equipment, it generates some heat. © 2001 Bose Corporation. No part of this work may be reproduced, modified, distributed or other- wise used without prior written permission. - Page 3 Opening or removing covers may expose you to dangerous voltages or other hazards. Please call Bose to be referred to an authorized service center near you. 15. To prevent risk of fire or electric shock, avoid over- loading wall outlets, extension cords, or integral convenience receptacles.
-
Page 4: Antenna Grounding
Safety Information Information about products that generate electrical noise If applicable, this equipment has been tested and found to comply with the limits for a Class B digital device, pursuant to Part 15 of the FCC rules. These limits are designed to provide reasonable protection against harmful interference in a residential installation. -
Page 5: Table Of Contents
Wave/PC system audio and your computer system ....... . . -
Page 6: System Setup
System Setup Before you begin Thank you for purchasing the Bose power of your computer with the benefits of award-winning patented acoustic waveguide speaker technology to provide an entirely new way to listen to music. The Wave/PC system gives you one-touch access to your favorite AM/FM or Internet radio stations, music files, and your entire music collection in one easy-to-use package. -
Page 7: Installing The Wave/Pc System Hardware
Carefully unpack your system (Figure 1) and save all packing materials. The original packing materials provide the safest way to transport your Wave/PC system. If any part of the product appears damaged, do not attempt to use it. Notify Bose phone number listings on the inside back cover.) Note: Find the serial number on the bottom of the Wave/PC unit. - Page 8 Note: Use only a Duracell, Eveready, Maxell, or Toshiba CR2032 or DL2032 lithium battery (available at electronics stores). If you have difficulty finding a replacement battery, contact Bose ® Customer Service. (See phone numbers on the inside back cover.) 3.
- Page 9 5. Use the supplied mounting strip if you want to attach the remote to a surface in your lis- tening room. Peel off the protective backing to stick one piece to the back of the remote and the other to the selected surface (Figure 4). Figure 4 Installing the mounting strip for the remote control...
- Page 10 3. Connect the serial data port (DB-9) connector of the Wave/PC system cable to the serial (RS232) data port of your computer (Figure 6 or Figure 7). 4. Connect the audio plug (3.5 mm) of the Wave/PC system cable to the audio output jack of your computer (Figure 6 or Figure 7).
- Page 11 Example 2: Wave/PC ™ system connections Audio plug Connecting the power cord to the Wave/PC unit 1. Plug the small end of the power cord into the power jack on the back of your Wave/PC unit (Figure 8). The connector is shaped to fit in only one direction. Line up the flat edge of the plug with the flat edge on the side of the jack.
-
Page 12: Connecting The External Fm Antenna
6. In the “Directory Selection” dialog box, click Next to accept the default directory, or click Browse to select another directory, and then click Next. 7. In the “Bose files or not). Click Next to accept the default destination directory, or click Browse to select another directory, and then click Next. - Page 13 If you do not register, the CDDB lookup feature will not work. The information gathered during registration is for the sole use of Bose Corporation and CDDB, Inc. CDDB is a free on-line service that provides artist, title, track, and other informa- tion about the CDs you play.
- Page 14 System Setup 16. In this step, the setup program searches your hard drive for any music files you may already have: A. Select the types of music files to include in your search. You can select MP3 or WAV. B. Specify the minimum file length. When importing files, you may want to exclude short C.
-
Page 15: System Overview
To turn the system on, double-click the Wave/PC monitor icon in the Windows Task bar, or right-click the monitor icon ® ® and select Start Bose Wave /PC. To turn the system off, click the close ( ) button in the Wave/PC application... -
Page 16: Wave/Pc Application Window
Volume control buttons – Raises, lowers or mutes the volume of the Wave/PC unit. Music source control buttons – Controls the selected music source. This set of buttons changes for each source. Wave/PC Home – Links you to the Bose Window control buttons – Provides standard window control buttons: What’s this? Help, Minimize, Resize and Close. -
Page 17: Wave/Pc Remote Control
When playing an AM/FM radio station what you hear is generated by the Wave/PC unit. How- ever, when listening to a CD, Web Radio station, or a music file, the audio you hear is gener- ated by your computer, not the Wave/PC unit. Because the audio is computer generated, certain factors affect the sound quality. - Page 18 This calibration matched the relative volume level of computer-generated audio with the audio generated by the AM/FM tuner in the Wave/PC unit. If you change the volume level on your computer (such as in the Task bar) outside of the Wave/PC application, these volume levels will no longer match.
-
Page 19: The Wave/Pc System Monitor
This program runs in the background whenever your computer is on and enables the computer-generated audio to play through your Wave/PC unit. A status icon (Figure 13) for this program appears in the portion of the Windows Task bar where the clock is located. -
Page 20: Operating The Cd Player/Recorder
CDDB, see “Using CDDB” on page 23. Note: The check marks appearing in the check column of the music finder window are used to select tracks you want to record. To record your CD, see “Recording an audio CD” on page 22. - Page 21 Playing tracks from the music finder window The music finder gives you great flexibility in playing single or multiple music selections. • To start playback: Double-click the first title you want to play, or select the first title and click the Play/pause ( •...
-
Page 22: Recording An Audio Cd
Operating the CD Player/Recorder Recording an audio CD In addition to playing CDs from your computer’s CD-ROM drive, you can record and save them as music files on your computer’s hard drive. When you insert a CD into your com- puter’s CD-ROM drive, the Wave/PC... - Page 23 CD Using CDDB The Wave/PC interactive audio system uses the CDDB from CDDB, Inc. to get the artist, title, track, credit, and other information about the CDs you play. This service is FREE and automatic. The first time you use the service, the Wave/PC software application automatically registers you with CDDB.
-
Page 24: Setting Cd Player/Recorder Setup Options
The default CD player in your computer system is the application that launches automatically, in the CD mode, when you insert an audio CD in your CD-ROM drive. If your Wave/PC system is not your default CD player, the CD setup window provides a checkbox (Figure 19) for changing this option. - Page 25 CD recording process. However, when selected, simultaneous playback and recording of CDs is not allowed. The recording format drop list offers you a choice of audio file formats: Fixed MP3, Variable MP3, or WAV (uncompressed). Fixed MP3 is recommended. It is more compatible with other devices, such as portable MP3 players.
- Page 26 Operating the CD Player/Recorder Select “Record using error correction” to decrease the probability of audio errors during recording. The Wave/PC tion speed and tell you whether or not it can support simultaneous record and playback. To test your CD-ROM drive: 1.
-
Page 27: Listening To Music Files
Selecting the Music Files player The Music Files player gives you one-touch selection of any MP3 or WAV file stored on your computer’s hard drive. To select the Music Files player (Figure 20), click the Music Files but- ton on the Wave/PC start playing music recorded on your hard drive. -
Page 28: Navigating The Music Finder
Listening to Music Files Navigating the music finder The music finder makes it easy for you to view your music database and find the music you want to hear. The music database is organized into a hierarchy of views (Figure 21) to group your music into logical collections. - Page 29 Sorting lists in the music finder window You can sort the list in the music finder window by column heading in ascending or descend- ing order. Click on a column heading and you’ll see a small triangle appear on the right-hand side of the heading.
- Page 30 Listening to Music Files To find and play all the music of a certain type (jazz, rock, etc.): 1. Click the Types button. A list of music types is displayed in the music finder. 2. Enter the music type name (or part of the name) in the Search box. As you type, the music finder will reduce the number of displayed music types to only those that contain the string of characters entered in the Search box.
-
Page 31: Maintaining Your Music Library
Maintaining your music library To help you create and maintain your music library, the Wave/PC capability to add and delete files, and edit the music finder database. Adding new music to your music finder database There are three ways to add new music to the music finder database: •... -
Page 32: Creating Your Own Music Playlists
Listening to Music Files Creating your own music playlists Open the Playlist Editor by clicking the Edit Playlists button in the Music Files player mode. The playlist editor window is divided into two views (Figure 23). The lower view displays the music files finder and the upper view displays your playlists in a tree view. -
Page 33: Setting The Music Files Player Setup Options
Setting the Music Files player setup options To access the Music Files player setup options (Figure 24) and change the configuration, click the Setup button and click the Music Files tab. After selecting the options you want, • Click the OK button to save your settings and close the setup window, or •... - Page 34 Listening to Music Files Normally, the Wave/PC them to the Wave/PC database. If you do not want this to happen automatically, remove the check mark beside “Automatically check for new music files.” If this box is not checked, you will need to click the Scan hard drive for music button to search for new music files. When new music files are found they are automatically added to the database (default set- ting).
- Page 35 To scan your hard drive for supported music files and add them to the music finder database: 1. Click the Scan hard drive for music… button. The dialog box shown in Figure 27 opens. 2. Select the types of music files to include in your search. You can select MP3 or WAV. By default, only MP3 is selected.
-
Page 36: Listening To Web Radio Stations
Selecting the Web Radio mode The Web radio mode (Figure 28) allows you to listen to a variety of Internet audio broadcast stations. To listen to a Web radio station, click the Web Radio button. A list of Internet sta- tions is displayed in the station finder window. - Page 37 (Figure 28). • Connecting – looking for the station • Buffering – transferring digital audio to the memory in your computer • Playing – you are listening to the selected station • Stopped – audio has ended or playback was interrupted...
-
Page 38: Setting Presets To Play Web Radio Stations
Listening to Web Radio Stations Deleting a Web Radio station 1. In the Wave/PC 2. Click the Delete Station button. 3. When the delete confirmation box (Figure 30) appears, click Delete. Figure 30 Web Radio delete confirmation box Editing the information of a Web Radio station This function is enabled only for user-entered stations. -
Page 39: Setting Web Radio Setup Options
Setting Web radio setup options To access the Web radio setup options (Figure 32) and change the configuration, click the Setup button and click the Web radio tab. After selecting the options you want, • Click the OK button to save your settings and close the setup window, or •... -
Page 40: Listening To Am/Fm Radio Stations
Listening to AM/FM Radio Stations Selecting the AM/FM radio Selecting AM/FM radio (Figure 33) allows you to listen to your local AM/FM broadcast sta- tions using the tuner in the Wave/PC and a list of your local radio stations is displayed in the station finder. These stations were downloaded during installation according to the ZIP code you entered. -
Page 41: Deleting A Station
Adding a new AM/FM radio station Tune to the station you want to add and click the Add Station button. The Add Radio Station dialog box (Figure 34) opens, prompting you to enter information about the radio station. Enter the information and click OK to create a new station in the station finder, or click Can- cel to close the box without creating a new entry. -
Page 42: Setting Presets To Play Am/Fm Radio Stations
Listening to AM/FM Radio Stations Setting presets to play AM/FM radio stations You can assign up to six presets for the AM and FM radio modes. There are three ways to set presets: • Drag and drop – Find and select a radio station in the station finder. Drag the station out of the finder window and drop it onto any preset button. - Page 43 The station database that was built on your hard drive during software installation was deter- mined by the ZIP code you entered. The selections you make in the Local Zip code and Country drop lists are used by the Bose Wave/PC web site to determine which stations to download when you request an update.
-
Page 44: General And Internet Setup Options
General and Internet Setup Options Setting general setup options To open the General setup window (Figure 38) and change the configuration, click the Setup button and click the General tab. After selecting the options you want, • Click the OK button to save your settings and close the setup window, or •... -
Page 45: Setting Internet Setup Options
The Language drop list allows you to view the Wave/PC The Calibrate Volume Control button is available if your Wave/PC unit is connected to the serial port of your computer. Clicking this button calibrates system volume levels so that the output level from the AM/FM tuner is approximately the same as from the CD, Web Radio, and Music Files sources. - Page 46 General and Internet Setup Options • If your computer is not part of a network, select the default setting “No HTTP proxy.” • If your computer is part of a network and you already use a browser to access the Internet, select “Use my browser proxy settings.”...
-
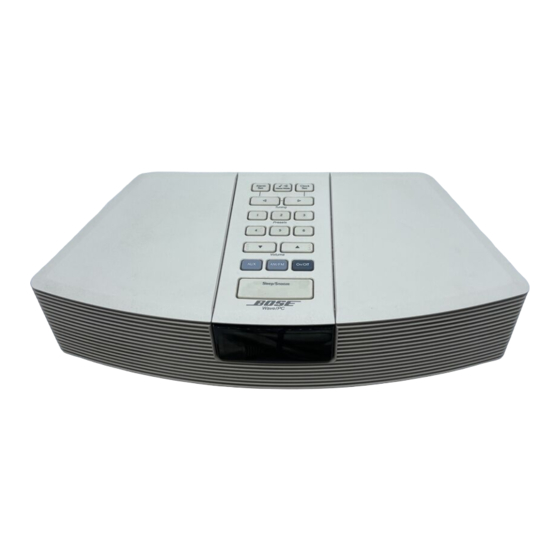
Page 47: Using The Wave/Pc Unit Controls
The Wave/PC ™ unit control panel The button panel functions are defined in Figure 40. You must use the control panel to change the clock and alarm settings, to select the Sleep feature time, or to select any component connected to the AUX input. The control panel On/Off and Volume buttons have raised ridges to help you locate these frequently used buttons. - Page 48 ™ Using the Wave/PC Unit Controls Clock display mode Figure 41 shows you the display indicators of the clock display. To view the AM/FM station frequency while in the clock mode, press both Tuning buttons at the same time. Figure 41 Shows current time, wakeup time, sleep time, station frequency, or volume setting The clock display...
-
Page 49: Setting The Clock Time
Setting the clock time Normally, the Wave/PC computer. If you choose to disable this option in the General setup menu, you can set the clock using the Wave/PC unit’s control panel. Press and hold the Clock Set button and use the Tuning up and down buttons to change the clock time. - Page 50 ™ Using the Wave/PC Unit Controls Waking to a preselected AM/FM station Select ALARM or ALARM 2. Press and hold Alarm Set, and then press one of the six station Presets buttons (you can change between AM and FM if needed). To clear the preset, press and hold Alarm Set and press the button for that preset again.
-
Page 51: Making External Input/Output Connections
AUX IN AUX IN Most audio cables are color coded. Match the red plug to the R (red) jack and the black or white plug to the L (white) jack. For cable information, see “Input connection details” on page 52. -
Page 52: Input Connection Details
Making External Input/Output Connections Input connection details Audio cables for connecting external components to the Wave/PC electronics stores, or by calling Bose Source Cable Portable CD or One miniplug-to-stereo tape player audio cable CD player, tape One stereo audio cable Audio output jacks... -
Page 53: Reference
• Weight: 6.8 lb (3.1 kg) Warranty period The Bose Wave/PC system is covered by a limited 1-year transferable warranty. Details of the warranty are provided on the warranty card that came with your radio. Please fill out the infor- mation section on the card and mail it to Bose. -
Page 54: Troubleshooting
• Save all your work and restart your computer. If problem still persists, con- tact Bose Customer Service. • Check the audio connection to the sound card of your computer. • Check the volume calibration. Click the Setup button and click on the Gen- eral tab. - Page 55 • Update the station list from the Bose server. • Manually edit the information. • Send an e-mail to Bose with the correct information so that the Bose server can be updated. Click the Setup button and click on the Internet tab. Click the Tech Support button.
- Page 56 • Open RealPlayer and go to View, Preferences. Click the “Transport” tab and click “Auto Configure.” When finished, close RealPlayer sists, contact Bose Customer Service. • Try connecting at another time. • Some Internet stations do not broadcast 24 hours a day.
- Page 57 Your CD-ROM drive does not support simultaneous play and record. Stop play- back of CD and button should become available. If the Record CD button is still grayed, your CD-ROM drive may not support digital audio extraction. Click the Setup button and click on the CD tab. Select the “Automatically play CDs when inserted”...
- Page 58 • Make sure you have an Internet connection. • Try again later, server may be busy. • If problem still persists, contact Bose CD recording speed is a function of many factors in your computer. For exam- ple, your CD-ROM may be able to read at 32X, but your computer may not be able to record and encode into MP3 at that speed.
-
Page 59: Glossary
MP3 – An audio file format also known as MPEG 1 Layer 3. Audio files of this type are identi- fied by their “ .mp3” filename extension. Because audio files can be very large, an MP3 file is compressed so that it occupies less storage space on your hard drive. - Page 60 Streaming – A name given to the media that allows you to play audio or video directly from the Internet, without first saving it to your hard drive. Its main advantage is that you can start listening to your selections right away, without having to wait for a file to finish downloading.
-
Page 61: Index
SEEK serial number Setup button SLEEP Sleep Sleep/Snooze Snooze sound quality source selection buttons Start Bose® Wave®/PC station frequency station presets STEREO Stop system audio system controls application window location sources Volume system monitor system on/off controls... - Page 62 Index unit control panel unmute unpacking Volume wakeup time warranty warranty card ™ Wave/PC unit 12/24 hr. time alarms cleaning clock display controls display display brightness setting the time of tuner display Wave/PC unit, connecting to Web Radio adding stations to controls deleting a station from presets...
- Page 63 Bose Corporation USA & Canada Service Bose Corporation, The Mountain Framingham, MA 01701-9168 1-800-851-2673 World Wide Web www.bose.com PDF259774_00 April 12, 2001...
- Page 64 ©2001 Bose Corporation The Mountain, Framingham, MA 01701-9168 USA PDF259774_00 JN10648 April 12, 2001...
Need help?
Do you have a question about the Wave PC system and is the answer not in the manual?
Questions and answers