Table of Contents
Advertisement
Available languages
Available languages
Quick Links
EVODECK EC / EM
Couverture automatique de piscine
NOTICE D'INSTALLATION ET DE MAINTENANCE
(à lire attentivement et à conserver pour consultation ultérieure)
Vous venez d'acquérir une couverture automatique pour piscine "EVODECK" et nous vous remercions
de votre confiance. Il s'agit d'un produit efficace, performant et fiable. Avant d'entreprendre son
installation et son utilisation, lisez attentivement les informations ci-après. Elles contiennent d'importantes
recommandations sur les différentes manipulations et conseils d'utilisation. Gardez soigneusement ces
informations et montrez-les aux utilisateurs éventuels.
FR
Page 1
GB
Page 17
1/32
2015/11 - Indice de révision : C - Code : 35101
Advertisement
Chapters
Table of Contents

Related Manuals for Delta EVODECK EC

Summary of Contents for Delta EVODECK EC
- Page 1 EVODECK EC / EM Couverture automatique de piscine NOTICE D’INSTALLATION ET DE MAINTENANCE (à lire attentivement et à conserver pour consultation ultérieure) Vous venez d’acquérir une couverture automatique pour piscine "EVODECK" et nous vous remercions de votre confiance. Il s’agit d’un produit efficace, performant et fiable. Avant d’entreprendre son installation et son utilisation, lisez attentivement les informations ci-après.
-
Page 2: Table Of Contents
SOMMAIRE I. SYNTHÈSE DES INSTRUCTIONS DE SÉCURITÉ: ................3 II. PRÉSENTATION DU PRODUIT ......................3 ƒ VERSION ÉLECTRIQUE (EC) : ............................4 ƒ VERSION MANUELLE (EM) : ............................... 4 ƒ EVOLUTIVITÉ : ..................................4 III. MATÉRIEL FOURNI / MOYENS NÉCESSAIRES A LA POSTE ............5 IV. -
Page 3: Synthèse Des Instructions De Sécurité
La manœuvre de la couverture peut être réalisée EVODECK EC : par des enfants d’au moins 8 ans ou des personnes Le câblage électrique de la motorisation EVODECK ayant des capacités physiques, sensorielles, ou... -
Page 4: Présentation Du Produit
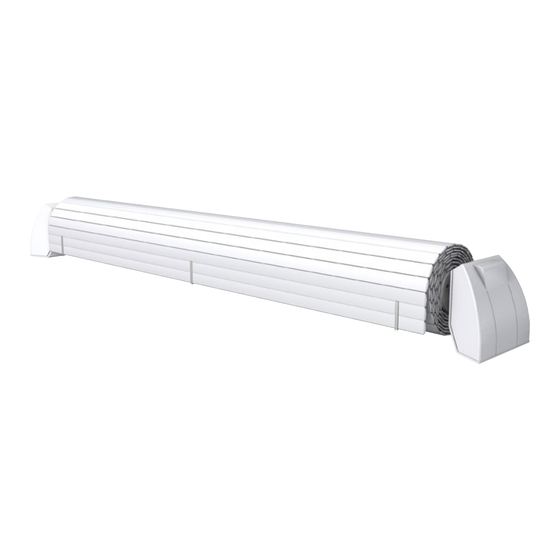
II. PRÉSENTATION DU PRODUIT La couverture EVODECK est destinée à la protection des piscines dont les dimensions maximales du bassin sont les suivantes : TAILLE MAXIMUM DE LA PISCINE Version MANUELLE (EM) 10 m x 5 m + escalier périphérique de 2 m (soit une longueur de tablier maximum de 12 m) Version ELECTRIQUE (EC) 12 m x 6 m + escalier de 2 m (Soit une longeur de taille... -
Page 5: Matériel Fourni / Moyens Nécessaires A La Poste
EVODECK EC EVODECK EM 1 Axe 1 Axe 1 Ensemble flasques pour Evodeck EC 1 Ensemble flasques pour Evodeck EM 1 Ensemble capots pour Evodeck EC 1 Ensemble capot pour Evodeck EM 4 Vis auto 4,2x13 A2 DIN7504 K (fixation des capots) 4 Vis auto 4,2x13 A2 DIN7504 K (capots) 9 Vis FHC 6x20 A4 DIN7991 (fixation de l’axe côté... -
Page 6: Préparation De La Pose
IV. PRÉPARATION DE LA POSE 1) Assise du banc „ Nez de margelle Une fois déterminée le côté où le banc sera positionné, il convient de procéder, si besoin, aux Taille préparatifs suivants : Rayon de bassin ƒ Découper les nez de margelles de chaque côté... -
Page 7: Alimentation Électrique Des Modèles À Moteur (Ec)
Sinon, les pieds sont équipés de 3 appuis réglables en hauteur (par vissage-dévissage avec une clef 6 pans), afin de reprendre la forme du dessus des margelles. 2) Alimentation électrique des „ modèles à moteur (EC) Un câble électrique comportant 3 conducteurs (neutre –... -
Page 8: Montage
V. MONTAGE Déballer les pieds, et positionner chacun des pieds 1) Assemblage de l'axe au pied „ sur son futur emplacement. Le pied d’entraînement est celui qui comporte l’arbre creux avec la rainure Déballer l’axe, l’amener niveau de clavette. l’emplacement du banc. Pied opposé... -
Page 9: Positionnement Du Banc
2) Positionnement du banc „ 3) Fixation du banc „ Les pieds se fixent dans la margelle au moyen de 2 goujons par pied. Présenter l’ensemble sur le bassin en respectant le positionnement ci-dessous : Les pieds étant ajustés en position idéale, repérer dans la margelle les futurs emplacements des goujons à... -
Page 10: Version Motorisée (Ec) : Câblage Électrique
4) Version motorisée (EC) : câblage „ électrique Le câblage électrique de la motorisation EVODECK EC doit être réalisé suivant le schéma ci-dessous par un professionnel expérimenté. Prévoir en amont une protection par disjoncteur différentiel de 30 mA. Passer le câble d’alimentation (câble 3G2.5 3 brins de section 2,5 mm2) par le presse-étoupe, dénuder... -
Page 11: Mise En Place Des Capots
5) Mise en place des capots „ CLAC CLAC Prendre à deux mains le capot pour le positionner Visser les vis auto 4.2x13 pour maintenir le capot sur la partie haute du pied. S’assurer que les câbles au flasque. électriques ne sont pas coincés entre le flasque et le capot. - Page 12 Validation du sens de rotation de l’axe : Programmation des fins de course : Après avoir assemblé le tablier à la surface du bassin et l’avoir relié à l’axe (sangles), introduire la clef dans le commutateur et la basculer sur la position d’enroulement (vers la plage).
-
Page 13: Utilisation
VII. UTILISATION IMPORTANT : avant de procéder à IMPORTANT : La vitesse de rotation du l’enroulement du tablier sur l’axe, toujours mandrin de la perceuse devra être telle vérifier que le tablier a bien été décroché de que la vitesse de rotation de l’axe du toutes les accroches de sécurité. -
Page 14: Entretien Et Hivernage
Fermoir sur paroi couleur Noir avec sangle 32800900 Fermoir sur paroi couleur Gris Anthracite avec sangle 32800600 DELTA LOCK avec sangle Fermoir sous margelle en 2 parties couleur Blanc avec sangle 32802300 Fermoir sous margelle en 2 parties couleur Bleu clair avec sangle... - Page 15 15/32 2015/11 - Indice de révision : C - Code : 35101...
- Page 16 16/32 2016/01 - Indice de révision : D - Code : 35101...
- Page 17 EVODECK EC / EM Automatic pool cover INSTALLATION AND MAINTENANCE INSTRUCTIONS (to be read carefully and kept for future reference) You have just purchased an "EVODECK" automatic cover, thank you for placing your trust in us. By selecting this cover you have chosen a cutting edge product perfectly adapted to its function as a pool safety cover.
- Page 18 CONTENTS I. SAFETY INSTRUCTIONS: ........................19 II. PRODUCT PRESENTATION ....................... 19 ƒ ELECTRICAL VERSION (EC) :............................20 ƒ MANUAL VERSION (EM) : ..............................20 ƒ UPGRADING: ..................................20 III. MATERIAL PROVIDED/ TOOLS REQUIRED ..................21 IV. PREPARATION PRIOR TO ASSEMBLY .................... 22 ƒ...
-
Page 19: Safety Instructions
The cover may only be operated by children under EVODECK EC : 8, or people with diminished motor, sensory and The EVODECK EC motorisation system must be cognitive abilities, or people with no experience or wired in by an experienced professional. -
Page 20: Product Presentation
II. PRODUCT PRESENTATION EVODECK covers are designed to protect pools with the following maximum dimensions: Maximum pool size MANUAL version (EM) 10 m x 5 m + peripheral step, 2 m (that is, maximum cover length of 12 m) ELECTRIC version (EC) 12 m x 6 m + peripheral step, 2 m (that is, maximum cover length of 14 m) Evodeck is a floating cover with hinged slats (the slat apron) that rolls up around an axle standing on the... -
Page 21: Material Provided/ Tools Required
EVODECK EC EVODECK EM 1 Axle 1 Axle 1 Set of flanges for Evodeck EC 1 Set of flages for Evodeck EM 1 Set of casings for Evodeck EC 1 Set of casings for Evodeck EM 4 Self-tapping screws 4.2x13 A2 DIN7504 K (casings) -
Page 22: Preparation Prior To Assembly
IV. PREPARATION FOR ASSEMBLY 1) Seating the mechanical assembly „ Once you have decided which end of the pool the cover will be installed on, carry out the following Coping nose Nez de margelle preparations (if necessary) : Taille ƒ... -
Page 23: X83; 2) Power Supply Of Motorised Models (Ec)
The stands are fitted with 3 height adjustable feet (loosen and tighten with an Allen key), in order to follow the contour of the top of the coping. 2) Wiring in the cover motor (EC) „ Run an electrical cable with three 2.5 mm2 wires (neutral - live - earth) up to the cable port in the stand housing the motor. -
Page 24: Assembly
V. ASSEMBLY 1) Assembling the axle Unwrap the stands and place them where they are „ to be installed. The stand that will house the motor Unwrap the axle and bring it to the installation site. features a hollow shaft with a key groove. Opposite stand Axle, motor side Position the axle such that the end that will receive... -
Page 25: Positioning The Mechanical Assembly
2) Positioning the mechanical Loosen and tighten the 3 height adjustable feet „ to fine tune the position of the stands. Use a spirit assembly level to check that the assembly is level (axle side and coping side). 3) Fixing the stand in position „... -
Page 26: Motorised Version (Ec): Wiring
4) Motorised version (EC): electrical „ wiring The EVODECK EC motor should be wired in by an experienced professional according to the diagram below. A 30 mA differential circuit breaker should be installed at the head of the line. Feed the power cable (3G2.5 cable, three 2.5 mm2... -
Page 27: Installing The Casings
5) Installing the casing „ Holding the casing in both hands, position it over the top of the stand. Make sure that electrical cables will Use the self tapping screws 4.2x13 to fix the casing not be caught between the flange and the casing. to the flange. - Page 28 Validation of the direction of rotation of the Programming the ends of travel axle: After having assembled the slat cover on the surface of the pool and having attached it to the axle (straps), insert the key into the switch and turn it to roll-up (towards the deck).
-
Page 29: Use
VII. USE IMPORTANT: before rolling the slat apron IMPORTANT: The drill mandrel RPM around the axle, always check that the all the should not cause the cover axle to safety fasteners have been released first. rotate at more than 5 RPM. The cover can be rolled up and out by a single person. -
Page 30: Maintenance And Winterizing
Wall-mounted fastener, grey, with strap 32800800 Wall-mounted fastener, black, with strap 32800900 Wall-mounted fastener, anthracite grey, with strap 32800600 DELTA LOCK with straps 2 part sub-coping fastener, white, with strap 32802300 2 part sub-coping fastener, light blue, with strap 32802100... - Page 31 31/32 2015/11 - Indice de révision : C - Code : 35101...
- Page 32 32/32 2016/01 - Indice de révision : D - Code : 35101...
Need help?
Do you have a question about the EVODECK EC and is the answer not in the manual?
Questions and answers