Table of Contents
Advertisement
Quick Links
MANUAL
LABEL
INSTRUCTION MANUAL
CONTENTS
Instructions for safe use.........................
1. Getting to know your cleaner................
2. Preparing your cleaner........................
3.1 Upright mode..............................
3.2 Accessories mode.........................
4.1 Dust bin & filters..........................
4.2 Brushbar....................................
4.3 Clearing a blockage......................
4.4 Belt change................................
5. Wiper blade.....................................
6. Troubleshooting................................
7. Important information........................
P2
P3
P4
P5
P6
P7
P8
P8
P9
P9
P10
P10
Advertisement
Table of Contents

Related Manuals for Hoover 48033778


Summary of Contents for Hoover 48033778
-
Page 1: Table Of Contents
INSTRUCTION MANUAL MANUAL CONTENTS Instructions for safe use......LABEL 1. Getting to know your cleaner....2. Preparing your cleaner......3. Using your cleaner 3.1 Upright mode......3.2 Accessories mode......4. Cleaner maintenance 4.1 Dust bin & filters......4.2 Brushbar........4.3 Clearing a blockage...... 4.4 Belt change........ -
Page 2: Instructions For Safe Use
Please ensure that this guide is operation of this appliance we recommend that any servicing fully understood before operating the appliance. or repairs are only carried out by an authorised Hoover service Do not leave the appliance plugged in. Always switch off and engineer. -
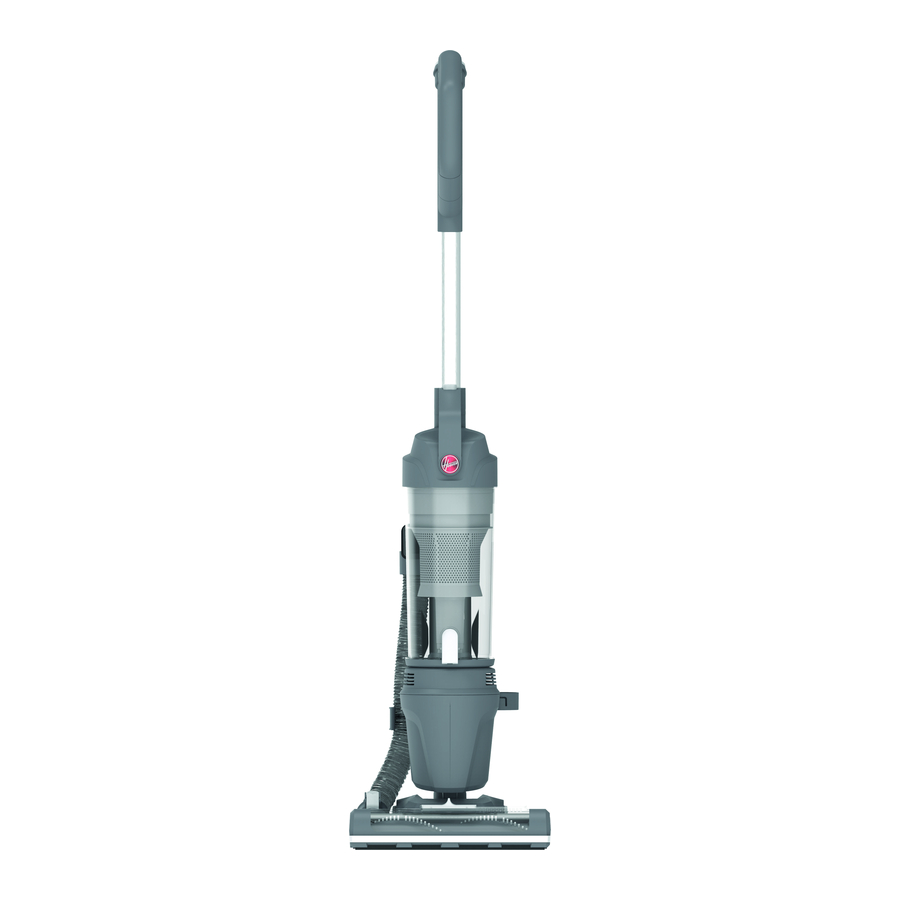
Page 3: Getting To Know Your Cleaner
1.GETTING TO KNOW YOUR CLEANER Thank you for purchasing your H-UPRIGHT300 Hoover upright vacuum cleaner. MAIN COMPONENTS: A. Handle & tube B. Dust bin release button C. Dust bin top D. Dust bin E. Dust bin empty button F. Active hose G. -
Page 4: Preparing Your Cleaner
IMPORTANT: Accessories included are dependant on your model. Full specification 2. PREPARING YOUR CLEANER details are included on your product packaging. STEP 1: STEP 2: STEP 3: STEP 4: Fit the handle & tube assembly into the Release the power cord from the cord Fit the mini turbo nozzle or dusting Fit the 3-in-1 tool or short crevice tool main product. -
Page 5: Using Your Cleaner
3. USING YOUR CLEANER 3.1 UPRIGHT MODE STEP 1: STEP 5: Plug the power cord into the socket. Turn your cleaner off by pressing the ON/OFF Place your foot onto the nozzle and pull the handle button. Remove the plug from the power backwards to your desired operating level. -
Page 6: Accessories Mode
IMPORTANT: Accessories included are dependant on your model. Full specification 3. USING YOUR CLEANER details for your product are included on your product packaging. 3.2 ACCESSORIES MODE To use your accessories, firstly release the active hose from the nozzle. Accessories: STEP 1: STEP 2: STEP 3:... -
Page 7: Cleaner Maintenance
IMPORTANT: Before performing any maintenance task, always ensure your product is 4. CLEANER MAINTENANCE switched off and unplugged from the electricity supply. 4.1 DUST BIN & FILTERS EMPTYING THE DUST BIN CLEANING THE EXHAUST FILTER STEP 1: STEP 2: STEP 3: Rotate the exhaust Remove the Remove any excess... -
Page 8: Brushbar
IMPORTANT: Before performing any maintenance task, always ensure your product is 4. CLEANER MAINTENANCE switched off and unplugged from the electricity supply. 4.2 BRUSHBAR If your cleaner is not picking up efficiently, the brushbar may need cleaned. STEP 1: STEP 2: STEP 3: STEP 4: STEP 5:... -
Page 9: Belt Change
IMPORTANT: Before performing any maintenance task, always ensure your product is 4. CLEANER MAINTENANCE switched off and unplugged from the electricity supply. 4.4 BELT CHANGE If your cleaner is still not picking up efficiently after cleaning the filters, brush bar & clearing blockages, the belt may be worn and need replacing. Please ensure to carry out filter cleaning and check for blockages first. -
Page 10: Troubleshooting................................ P10
7,8,9) If there is any doubt call the Hoover Service Office for advice. They may be able to assist you over the telephone. A service charge will be made if the cleaner is examined and found to be in working order, has not been assembled... - Page 11 Printed in P.R.C. Part No. : 48033778/02...
Need help?
Do you have a question about the 48033778 and is the answer not in the manual?
Questions and answers